graphql적용
nestjs는 express기반!!
graphql을 사용하기 위해 apollo-server를 사용
code first vs schema first
code first는 typescript로 클래스를 짜면 해당 클래스에 해당하는 graphql schema를 만들어 준다.
schema first는 graphql schema를 먼저 짠후 typescript 클래스나 인터페이스를 생성한다.
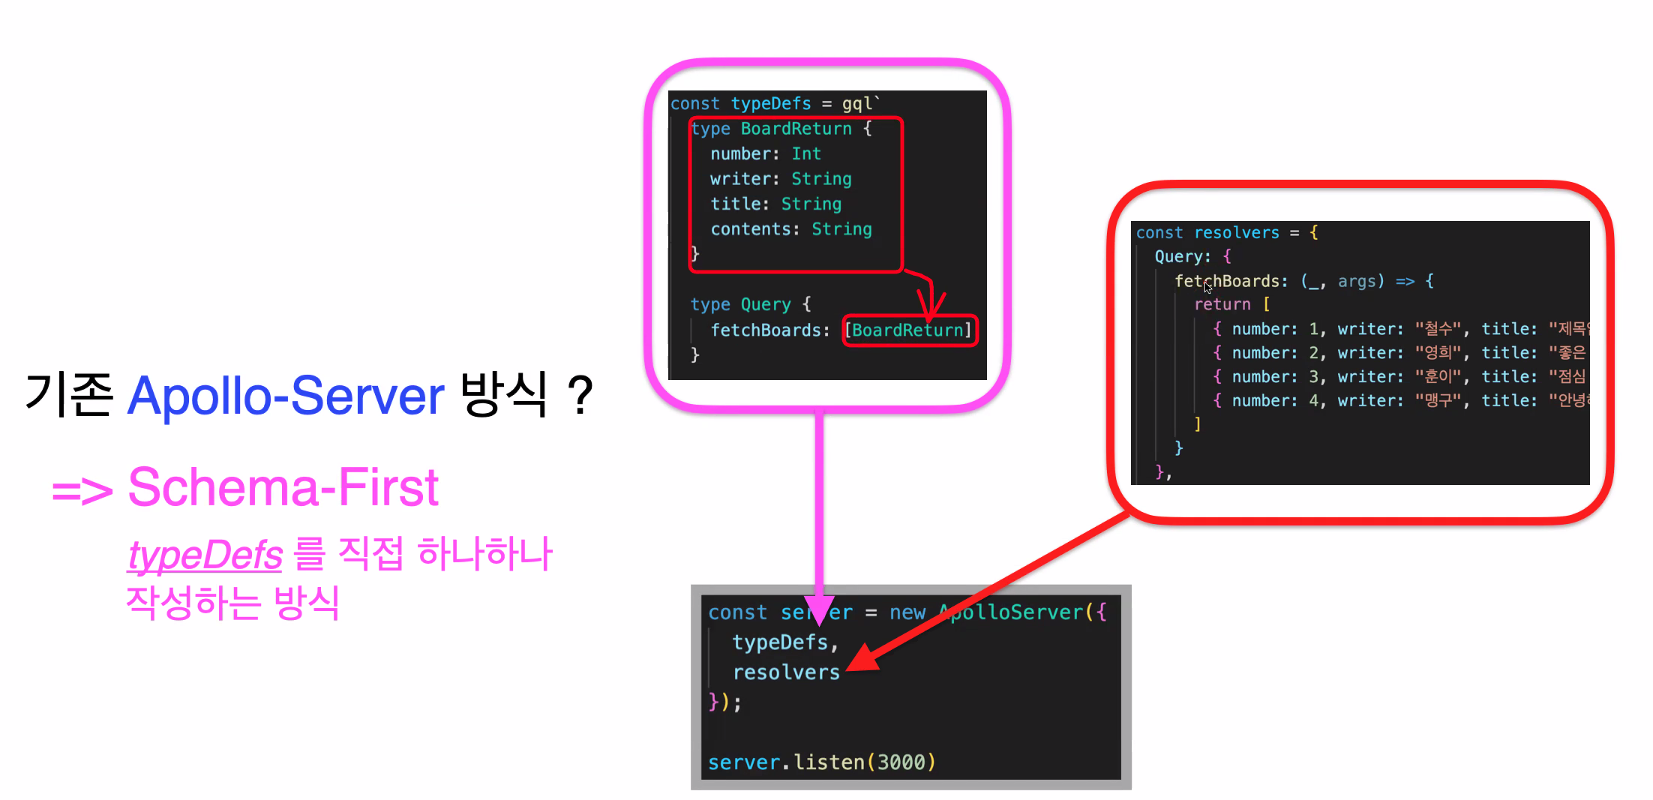
기존 apollo-server방식?
=> schema-Frist를 그동안 사용
- 이런 식으로 만들면 swagger를 따로 만들 필요 x
- 대신 하나하나 다 입력을 해야함
최근 nestjs 방식?
=> code-first(typeDefs를 자동으로 만들어주는 방식)
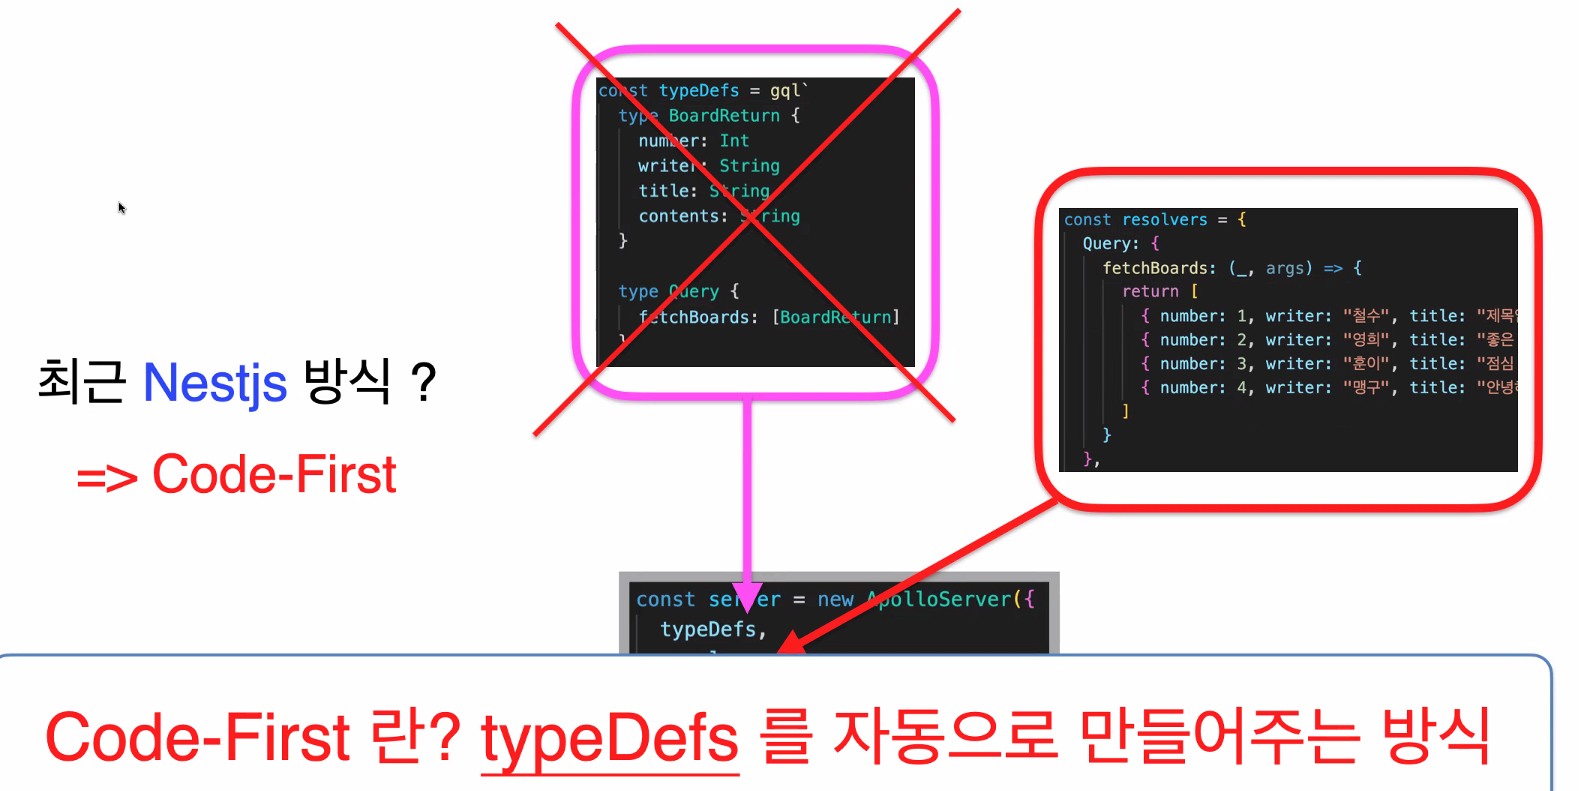
autoSchema파일을 통해 자동으로 생성 가능!!
code first방식 사용법
아래와 같이 옵션 객체에 autoSchemaFile 속성을 추가하자.
//app.module.ts
@Module({//dependency
  imports: [
    BoardModule,
        GraphQLModule.forRoot<ApolloDriverConfig>({
            driver: ApolloDriver,
         autoSchemaFile: 'src/common/graphql/schema.gql', //추가 뒤의 주소는 schema가 생성되는 장소
        }),
      TypeOrmModule.forRoot({
        type: 'mysql',
        host: 'localhost',
        port: port,
        username: 'root',
        password: 'root!',
        database: 'db',
        entities: [Board],
        synchronize: true,
        logging: true,

      }),

    ],
})
Schema First방식 사용법
GraphQL 스키마를 기반으로 typescript 정의를 자동으로 생성한다. 이렇게 되면 중복된 상용구 코드를 줄여준다.
code first방식과 같이 옵션 개체에 typepaths 속성을 추가해준다.
GraphQLModule.forRoot({
  typePaths: ['./**/*.graphql'],//GraphQLModule이 작성할 GraphQL SDL 스키마 정의 파일을 찾아야하는 위치
}),
그 후 .graphql로 스키마를 직접 작성하면 된다.
// cat.graphql

type Query {
  cats: [Cat]
  cat(id: ID!): Cat
}

type Mutation {
  createCat(createCatInput: CreateCatInput): Cat
}

type Subscription {
  catCreated: Cat
}

type Owner {
  id: Int!
  name: String!
  age: Int
  cats: [Cat!]
}

type Cat {
  id: Int
  name: String
  age: Int
  owner: Owner
}

input CreateCatInput {
  name: String
  age: Int
}
nestjs 기본 세팅
https://github.com/nestjs/nest/tree/master/sample
mysql
루트 계정으로 로그인해서 mysql을 실행하자
mysql -u root -p
//비밀번호 입력
typeORM이 mysql을 연결하도록 하는 것

ORM(TypeORM), ODM(Mongoose)
dbeaver


백엔드 주니어 개발자