swagger 란?
api 를 제작한 후에 프론트에게 api 를 전달하고.
추후 나의 api 를 관리할 개발자들을 위해 api명세서를 정의해야한다.
그때 스웨거를 이용하면 비교적 간편한 방법(?)
솔직히 좀 귀찮다...
으로 정의할수 있다.
swagger Settings
1.npm 모듈설치
npm i swagger-jsdoc swagger-ui-express --save두개의 모듈을 설치하자
2.Options
lib/swagger.js 파일에
const swaggerUi = require('swagger-ui-express');
const swaggereJsdoc = require('swagger-jsdoc');
const options = {
swaggerDefinition: {
// openapi: '3.0.1',
info: {
// API informations (required)
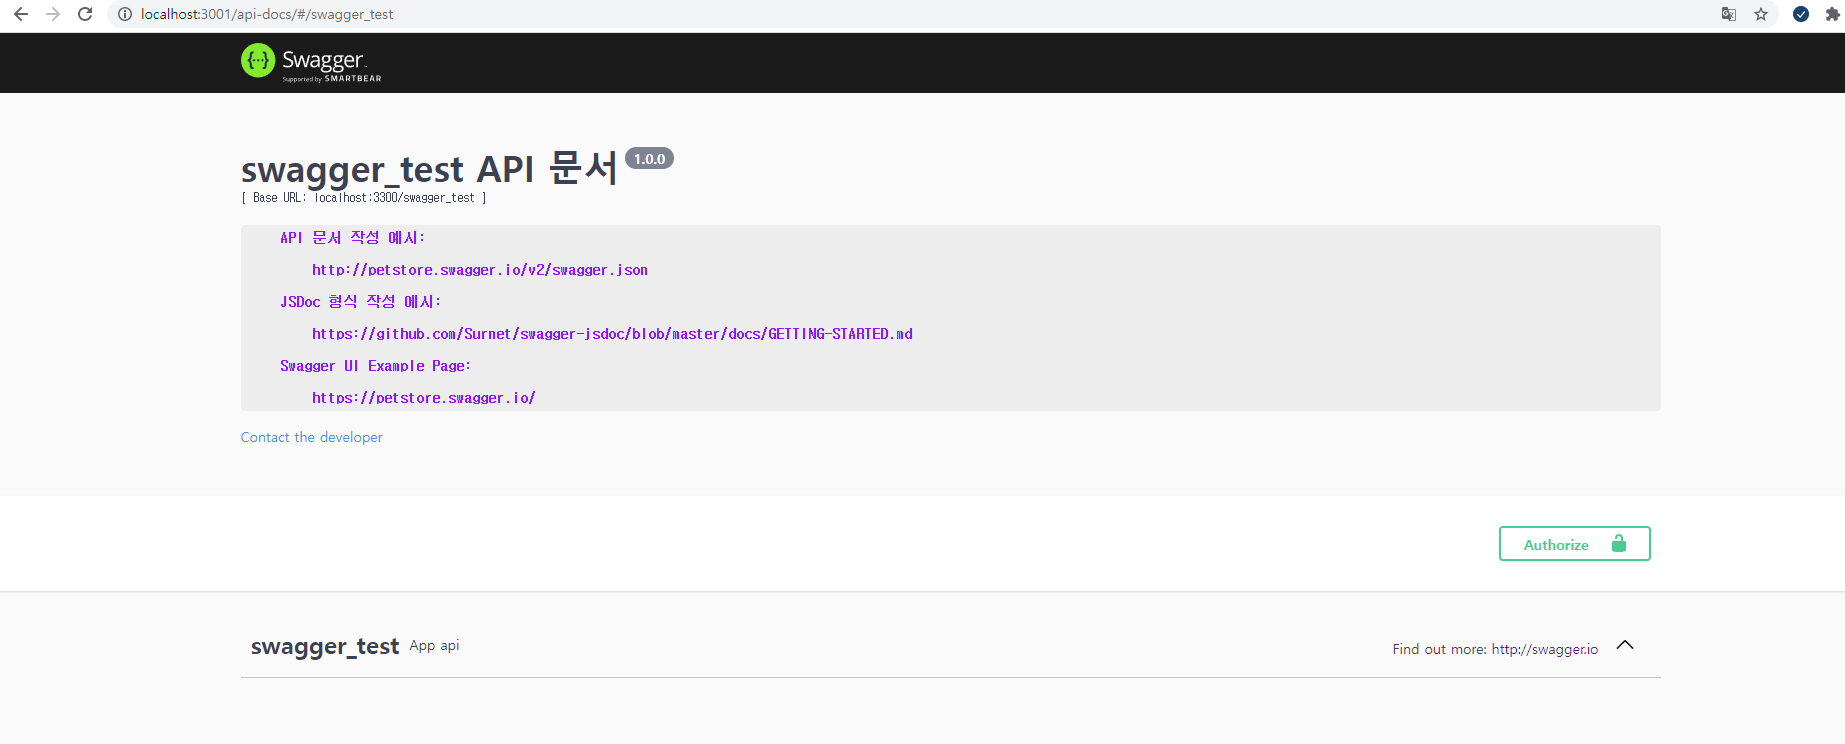
title: "swagger_test API 문서", // Title (required)
version: "1.0.0", // Version (required)
description: `
API 문서 작성 예시: \n
http://petstore.swagger.io/v2/swagger.json \n
JSDoc 형식 작성 에시: \n
https://github.com/Surnet/swagger-jsdoc/blob/master/docs/GETTING-STARTED.md \n
Swagger UI Example Page: \n
https://petstore.swagger.io/
`,
contact: {
email: "https://github.com/any1ok",
},
},
host: 'localhost:3300', // Host (optional)
basePath: "/swagger_test", // Base path (optional)
securityDefinitions: {
api_key: {
type: "apiKey",
in: "header",
name: "authorization",
},
},
tags: [
{
name: "swagger_test",
description: "App api",
externalDocs: {
description: "Find out more",
url: "http://swagger.io",
},
},
],
},
apis: ['./routes/swagger_test.js']
};
const specs = swaggereJsdoc(options);
module.exports = {
swaggerUi,
specs
};형식을 정의 한후
3.server.js 에설정
server.js 파일에
swagger.js 파일을 불러와 등록 시켜주자
const express = require("express");
const app = express();
const path = require("path");
const port = process.env.PORT || 3001;

// doc

const { swaggerUi, specs } = require('./lib/swagger');

app.use("/swagger_test", require(`${__dirname}/routes/swagger_test`));

app.use("/api-docs", swaggerUi.serve, swaggerUi.setup(specs));


app.listen(port, () => {
    console.log(`server is listening at localhost`);
});
실행시켜보면 잘 나온다
4.swagger 명세서 등록/정의 하기
swagger.js option에서 정의한 위치의 파일에다가
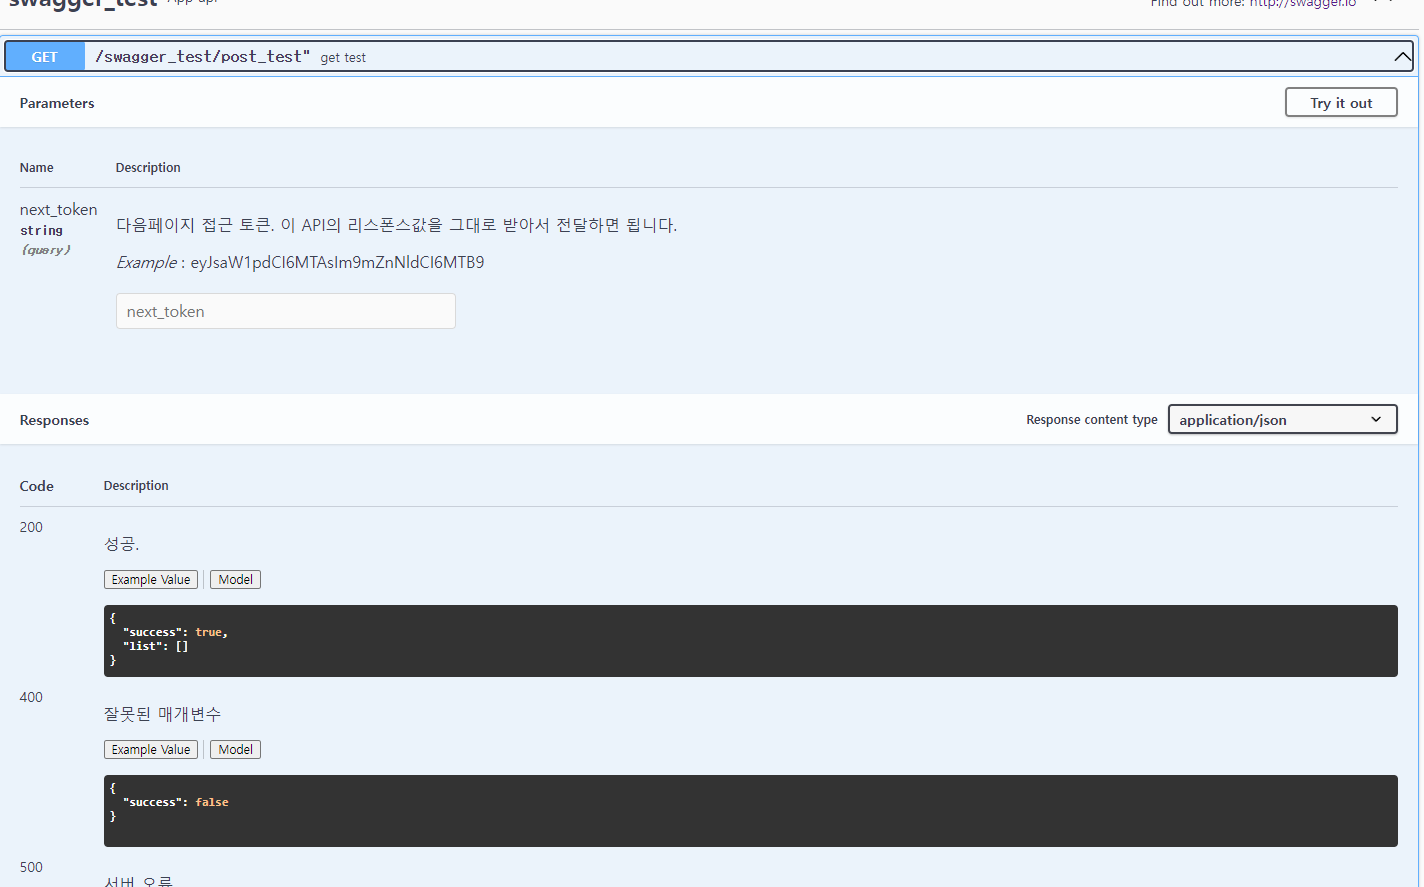
apis: ['./routes/swagger_test.js']get
/**
 * @swagger
 * /swagger_test/post_test":
 *   get:
 *     tags: [swagger_test]
 *     summary: "get test"
 *     consumes: [application/json]
 *     produces: [application/json]
 *     parameters:
 *       - name: "next_token"
 *         description: "다음페이지 접근 토큰. 이 API의 리스폰스값을 그대로 받아서 전달하면 됩니다."
 *         in: query
 *         required: false
 *         type: string
 *         example: "eyJsaW1pdCI6MTAsIm9mZnNldCI6MTB9"
 *     responses:
 *       200:
 *         description: "성공."
 *         schema:
 *           type: object
 *           properties:
 *             success:
 *               description: "성공 여부"
 *               type: boolean
 *               example: true
 *             list:
 *               description: "목록"
 *               type: array
 *               example: []
 *       400:
 *         description: "잘못된 매개변수"
 *         schema:
 *           type: object
 *           properties:
 *             success:
 *               description: "성공 여부"
 *               type: boolean
 *               example: false
 *       500:
 *         description: "서버 오류"
 *         schema:
 *           type: object
 *           properties:
 *             success:
 *               description: "성공 여부"
 *               type: boolean
 *               example: false
 */
post
/**
 * @swagger
 * "/swagger_test/post_test":
 *   post:
 *     tags: [swagger_test]
 *     summary: "관리자, 혹은 감독으로 가입된 상태에서 배우로 가입할 경우 사용"
 *     consumes: [application/json]
 *     produces: [application/json]
 *     parameters:
 *       - name: "next_token"
 *         description: "다음페이지 접근 토큰. 이 API의 리스폰스값을 그대로 받아서 전달하면 됩니다."
 *         in: body
 *         required: false
 *         type: string
 *         example: "eyJsaW1pdCI6MTAsIm9mZnNldCI6MTB9"
 *     responses:
 *       200:
 *         description: "성공"
 *         schema:
 *           type: object
 *           properties:
 *             success:
 *               description: "성공 여부"
 *               type: boolean
 *               example: true
 *             already_register:
 *               description: "이미 등록됨"
 *               type: boolean
 *               example: false
 *       400:
 *         description: "잘못된 매개변수"
 *         schema:
 *           type: object
 *           properties:
 *             success:
 *               description: "성공 여부"
 *               type: boolean
 *               example: false
 *       500:
 *         description: "서버 오류"
 *         schema:
 *           type: object
 *           properties:
 *             success:
 *               description: "성공 여부"
 *               type: boolean
 *               example: false
 */
정의를 해주면
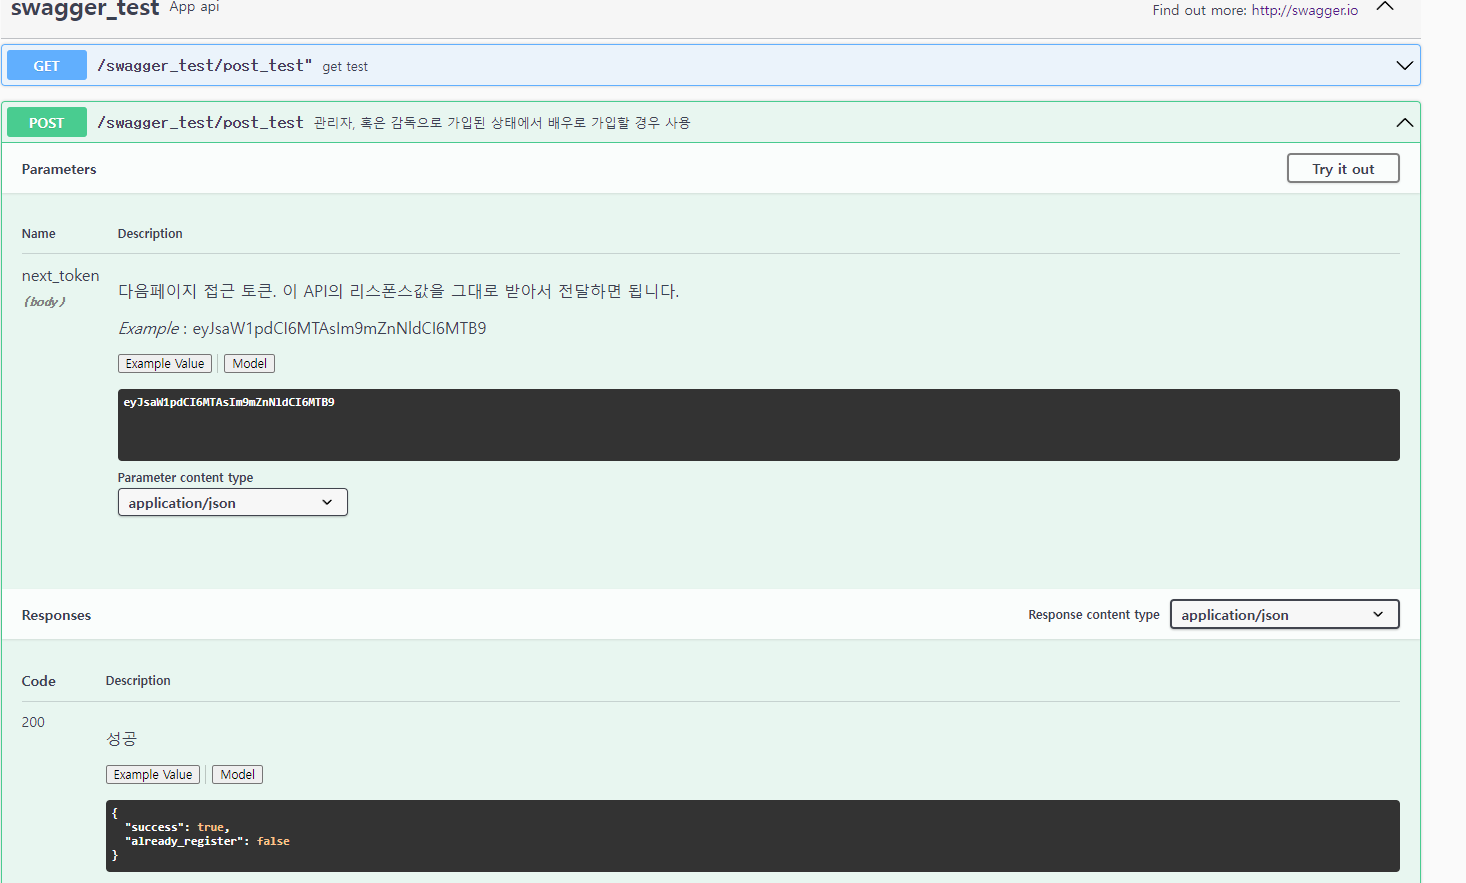
성공적으로 나온다.
코드는 https://github.com/any1ok/swagger-boilerplates 에 올려놓았다

백엔드 개발자