라디오 버튼 생성
사용자가 옵션 중 한 가지만 선택하도록 해야할 때는 name을 전부 같게 지정해준다. 또한 각각의 옵션에 하나씩 input을 할당해주어야 한다.
<input type="radio" id="verify-message">
<label for="verify-message">Via text message</label>
<input type="radio" id="verify-phone">
<label for="verify-phone">Via a phone call</label>
<input type="radio" id="verify-email">
<label for="verify-email">Via an email</label>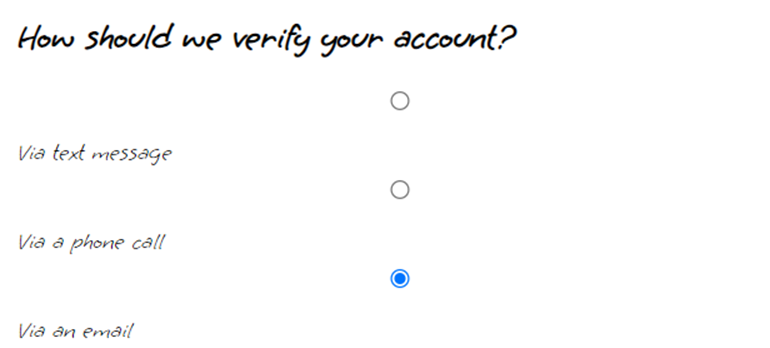
하지만 input은 블록요소이기 때문에 배치가 잘 맞지 않고, 각 input에 대한 서버로 전송되는 데이터도 지정해주지 않았다.
데이터 지정
각 input마다 value속성을 지정해주어야 한다.
<input type="radio" name="verify" id="verify-message" value="text-message"/>
<label for="verify-message">Via text message</label>
<input type="radio" name="verify" id="verify-phone" value="phone"/>
<label for="verify-phone">Via a phone call</label>
<input type="radio" name="verify" id="verify-email" value="email"/>
<label for="verify-email">Via an email</label>
이제 폼이 제출될 때 value의 값이 서버로 전송된다. 이것은 사용자에게는 보이지 않는다.
스타일링
플렉스 박스를 사용하기 위해 각 인풋-레이블 쌍을 div요소에 넣어서 html구조를 만들었다.
      <div class="radio">
        <input
          type="radio"
          name="verify"
          id="verify-message"
          value="text-message"
        />
        <label for="verify-message">Via text message</label>
      </div>
      <div class="radio">
        <input type="radio" name="verify" id="verify-phone" value="phone" />
        <label for="verify-phone">Via a phone call</label>
      </div>
      <div class="radio">
        <input type="radio" name="verify" id="verify-email" value="email" />
        <label for="verify-email">Via an email</label>
      </div>
css
.radio{
    display: flex;
}

.radio input{
    width: auto;
    margin-right: 1rem;
이제 선택지들이 알맞게 배치되었다.
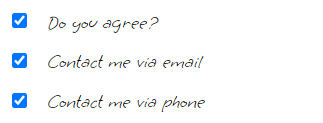
체크박스 추가
      <div class="radio">
        <input type="checkbox" name="terms" id="agree-term">
        <label for="agree-term">Do you agree?</label>
      </div>
만약 체크박스가 체크 해제되어 제출되면 URL에는 아무것도 추가되지 않고, 누락된 채로 인풋이 제출된다.
yes/no식의 체크박스는 value를 딱히 지정해주지 않아도 되나, 두 가지 이상의 여러 옵션들을 한 번에 골라야 할 때는
      <div class="radio">
        <input type="checkbox" name="contact" id="contact-email" value="email">
        <label for="contact-email">Contact me via email</label>
      </div>

      <div class="radio">
        <input type="checkbox" name="contact" id="contact-phone" value="phone">
        <label for="contact-phone">Contact me via phone</label>
      </div>
와 같이 value로 식별자를 서버에 제공해주는 것이 좋다.
URL의 마지막 부분에서 볼 수 있다.

공부 정리용 블로그