환경
버전은 스프링 부트 3.0.8이며, Spring MVC를 사용했습니다.

@SpringBootApplication이 명시된 클래스는 위와 같습니다.
서론
이전 글에서 createApplicationContext(), context.setApplicationStartup(), prepareContext(), refresh()까지 모두 살펴봤으므로 마지막 afterRefresh()를 살펴보고, 정리를 해보고자 합니다.
afterRefresh()
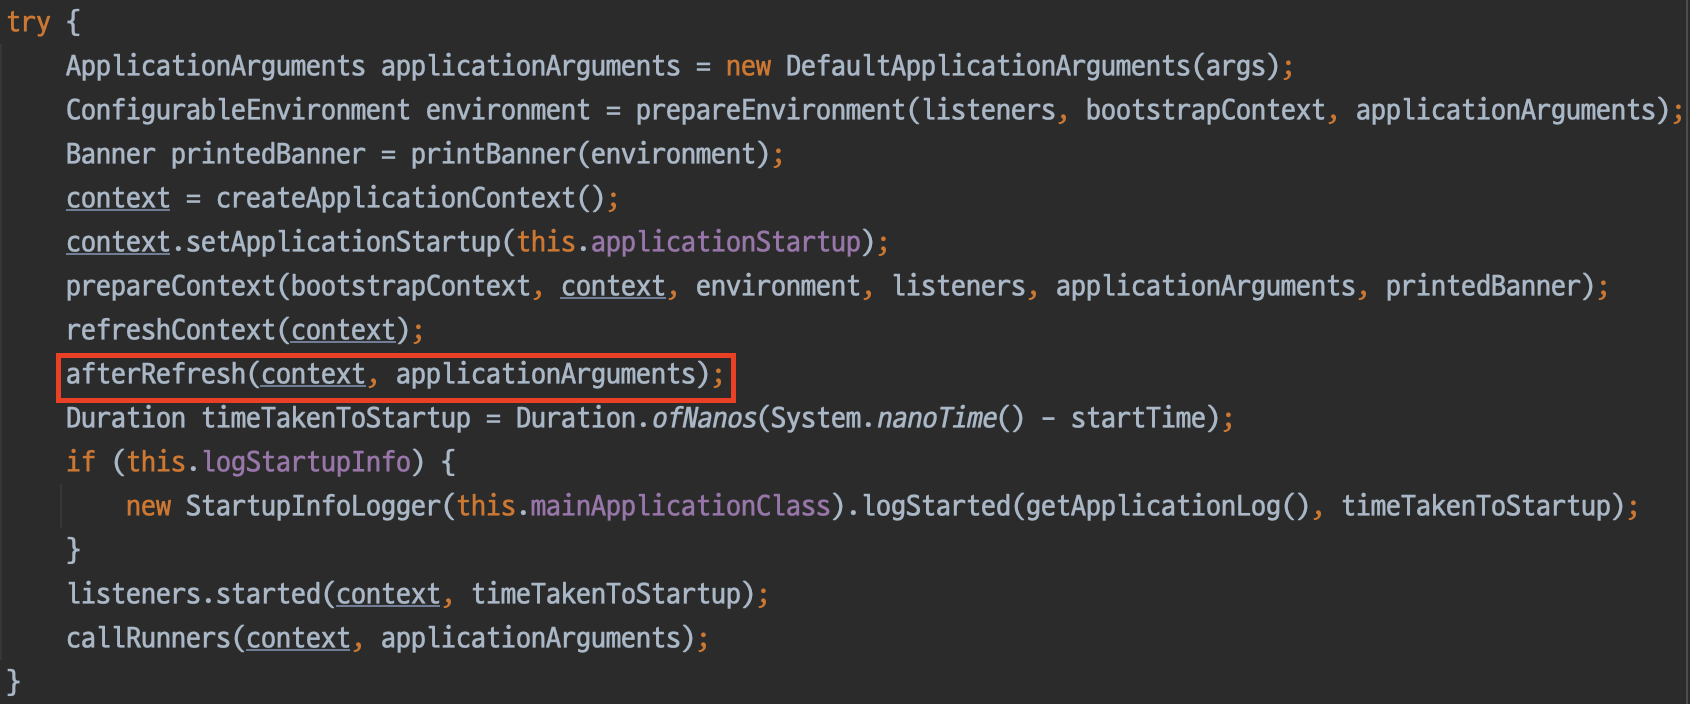
ApplicationContext의 refresh 수행 이후 후처리를 수행합니다.

별도의 동작은 수행하지 않습니다.
정리
- createApplicationContext()
- 현재 스프링 부트의 환경에 맞는 ApplicationContext를 생성합니다.
- context.setApplicationStartup()
- ApplicationContext 과정을 모니터링할 수 있는 ApplicationStartup을 세팅합니다.
- 별도의 설정을 하지 않은 경우 DefaultApplicationStartup이 사용됩니다.
- prepareContext()
- ApplicationContext refresh를 위한 사전 작업을 수행합니다.
- 최소한의 빈이 등록됩니다.
- refreshContext()
- ApplicationContext refresh를 수행합니다.
- 이 단계에서 웹 서버 생성(Embedded WAS) 및 필요한 빈이 등록됩니다.
- afterRefresh()
- ApplicationContext refresh 작업 이후 후처리를 수행합니다.
- 별도의 작업을 수행하지는 않습니다.

안녕하세요