
배포 자동화
한 번의 클릭 혹은 명령어 입력을 통해 전체 배포 과정을 자동으로 진행하는 것
이유:
- 수동적이고 반복적인 배포 과정을 자동화함으로써 시간이 절약
- 휴먼 에러(Human Error)를 방지
배포 자동화 파이프라인
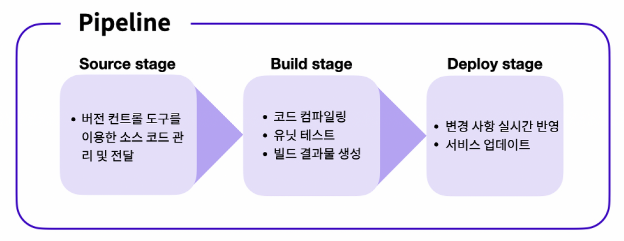
배포에서 파이프라인(Pipeline) : 용어는 소스 코드의 관리부터 실제 서비스로의 배포 과정을 연결하는 구조를 뜻함
- Source 단계: Source 단계에서는 원격 저장소에 관리되고 있는 소스 코드에 변경 사항이 일어날 경우, 이를 감지하고 다음 단계로 전달하는 작업을 수행
- Build 단계: Build 단계에서는 Source 단계에서 전달받은 코드를 컴파일, 빌드, 테스트하여 가공, Build 단계를 거쳐 생성된 결과물을 다음 단계로 전달하는 작업을 수행
- Deploy 단계: Deploy 단계에서는 Build 단계로부터 전달받은 결과물을 실제 서비스에 반영하는 작업을 수행
주의할 사항
- 파이프라인의 단계는 상황과 필요에 따라 더 세분화되거나 간소화될 수 있음
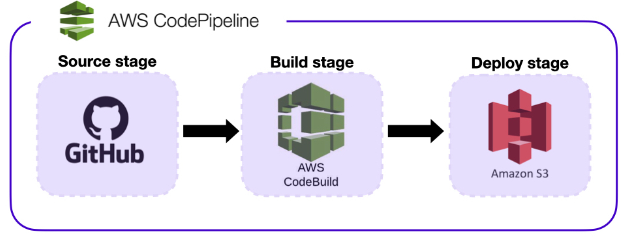
AWS 개발자 도구
CodeCommit
-
Source 단계를 구성할 때 CodeCommit 서비스를 이용
-
GitHub과 유사한 서비스를 제공하는 버전 관리 도구
-
CodeCommit 서비스는 보안과 관련된 기능에 강점
-
가볍게 작성한 소스 코드를 저장해야 할 경우에는 GitHub을 이용하는 것이 효과적
CodeBuild
-
Build 단계에서는 CodeBuild 서비스를 이용
-
유닛 테스트, 컴파일, 빌드와 같은 빌드 단계에서 필수적으로 실행되어야 할 작업을 명령어를 통해 실행
CodeDeploy
-
Deploy 단계를 구성할 때는 기본적으로 다양한 서비스를 이용
-
CodeDeploy 서비스를 이용하면 실행되고 있는 서버 애플리케이션에 실시간으로 변경 사항을 전달할 수 있음
CodePipeline
- 각 단계를 연결하는 파이프라인을 구축할 때 CodePipeline 서비스를 이용
클라이언트 배포 파이프라인
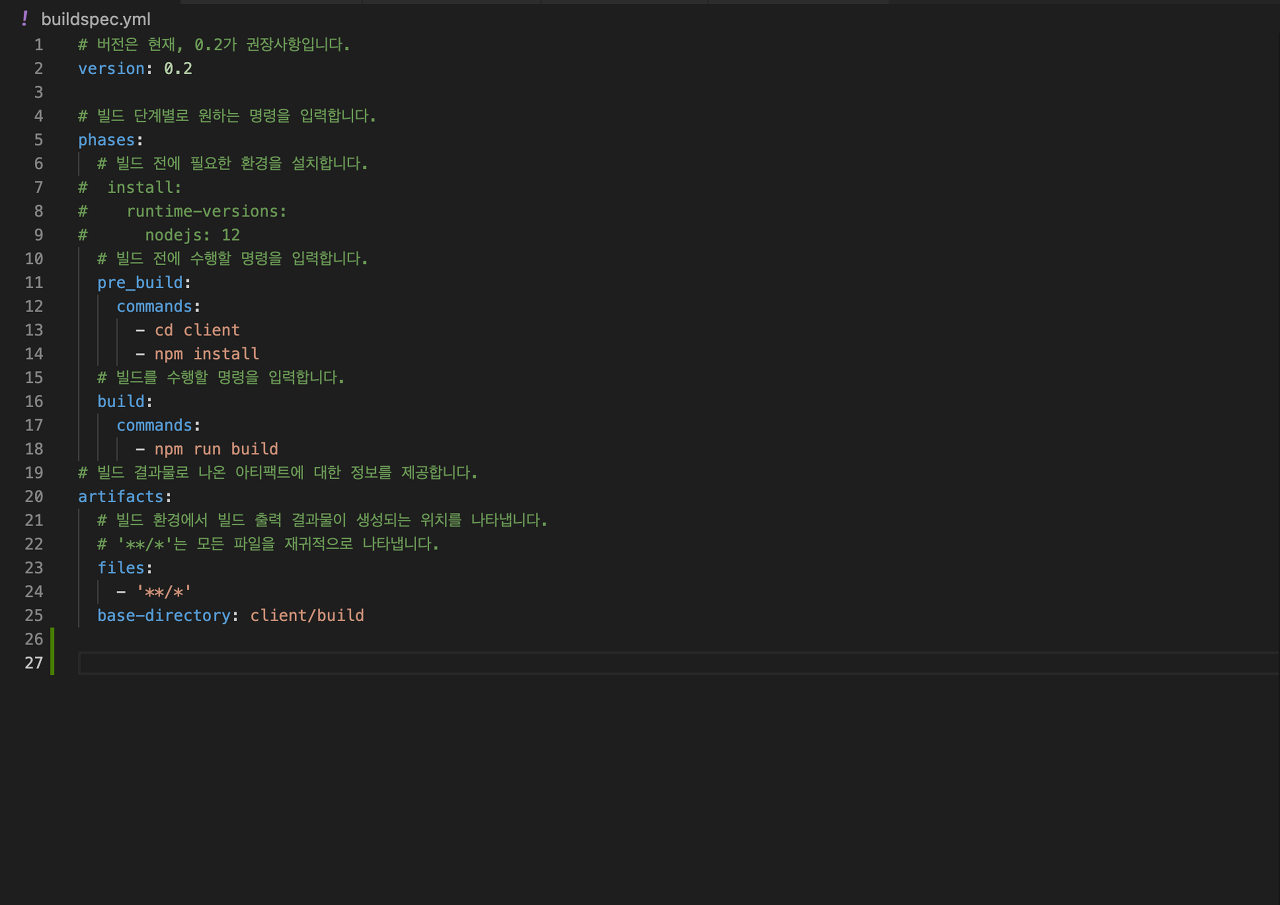
1. buildspec.yml 작성
2. 파이프라인 구성
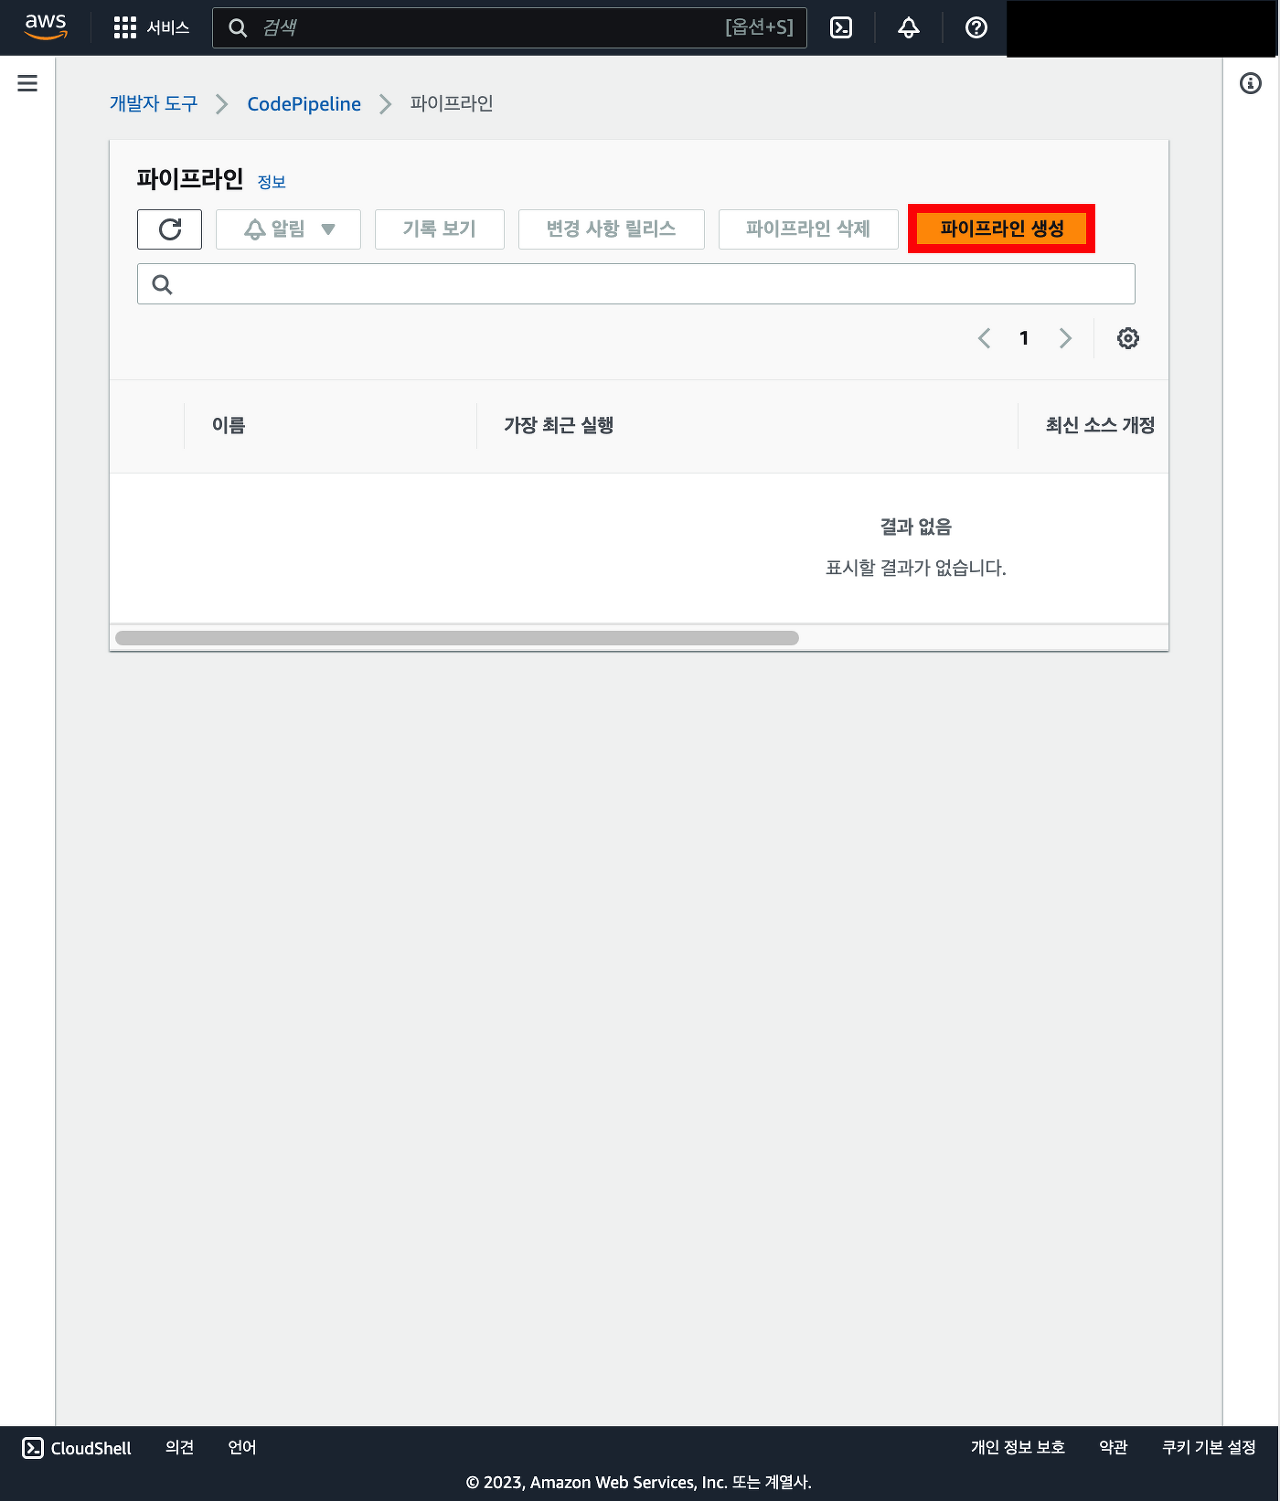
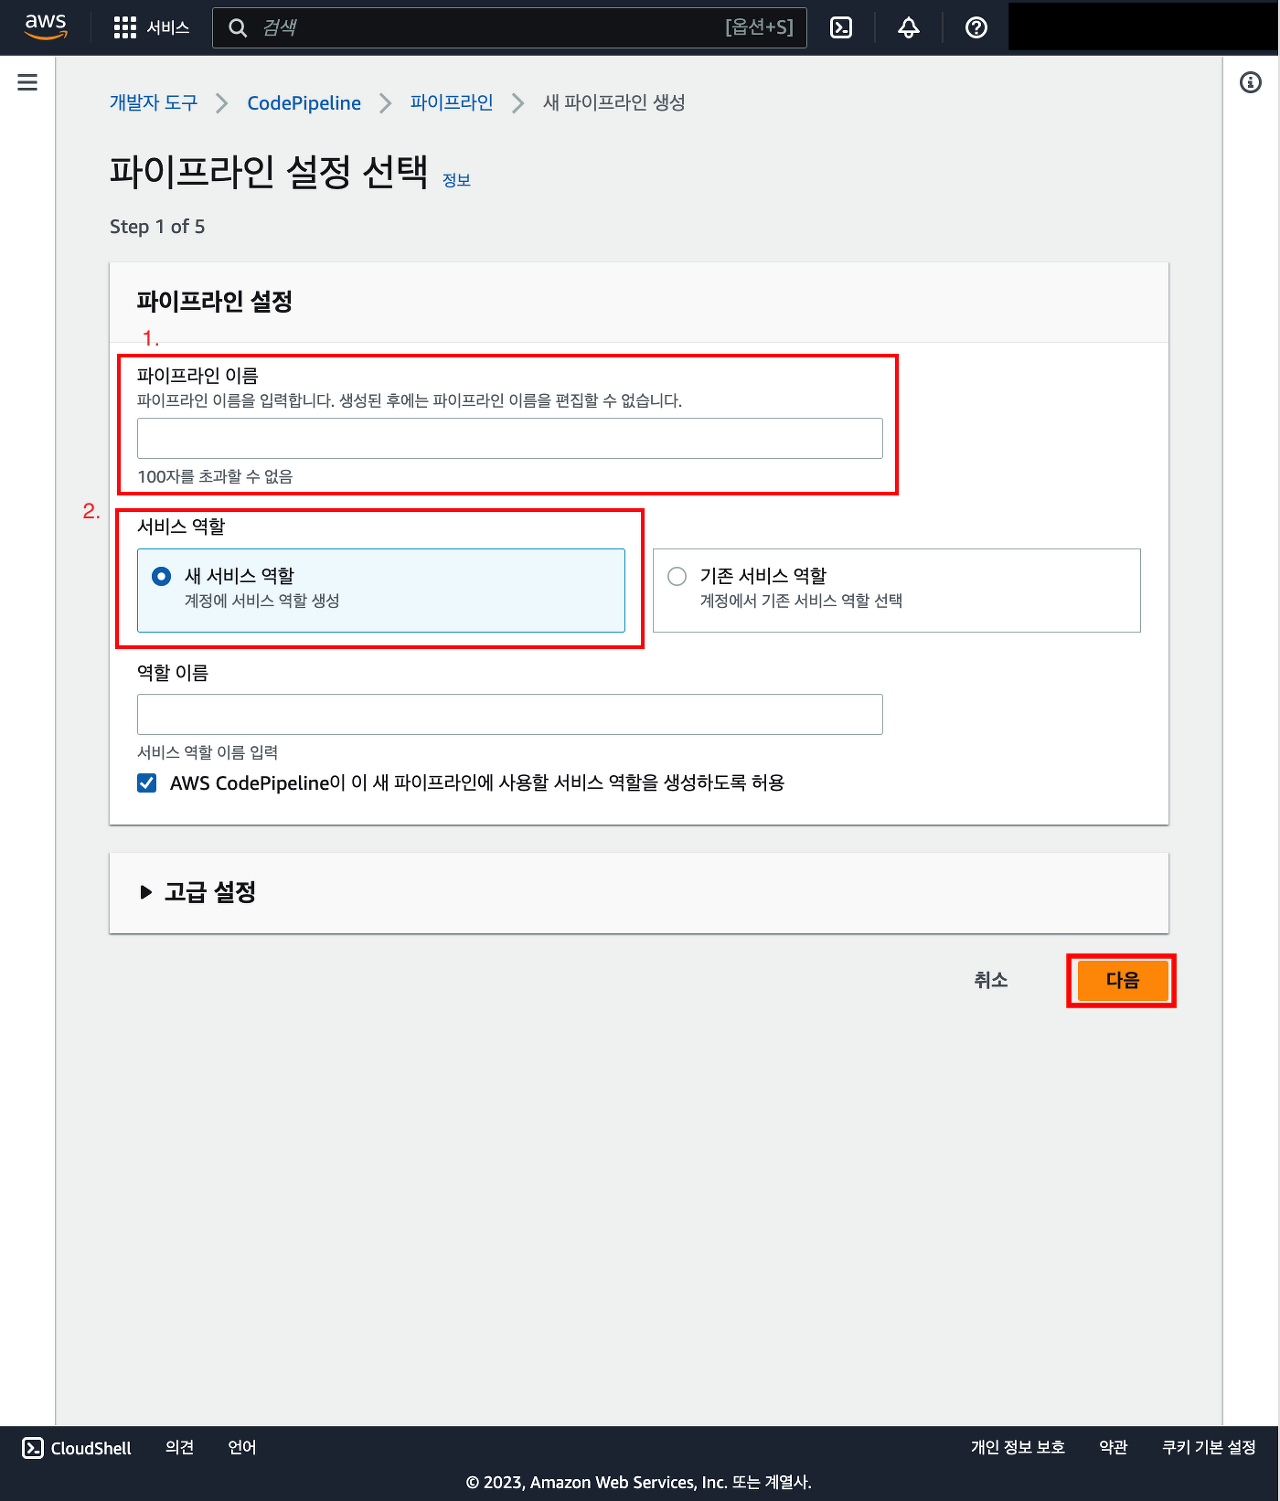
2-1. 검색 창에 CodePipeline 클릭 후 파이프라인 생성 클릭
2-2. 이름과 서비스 역할에서 새 서비스 역할 클릭 후 다음 클릭
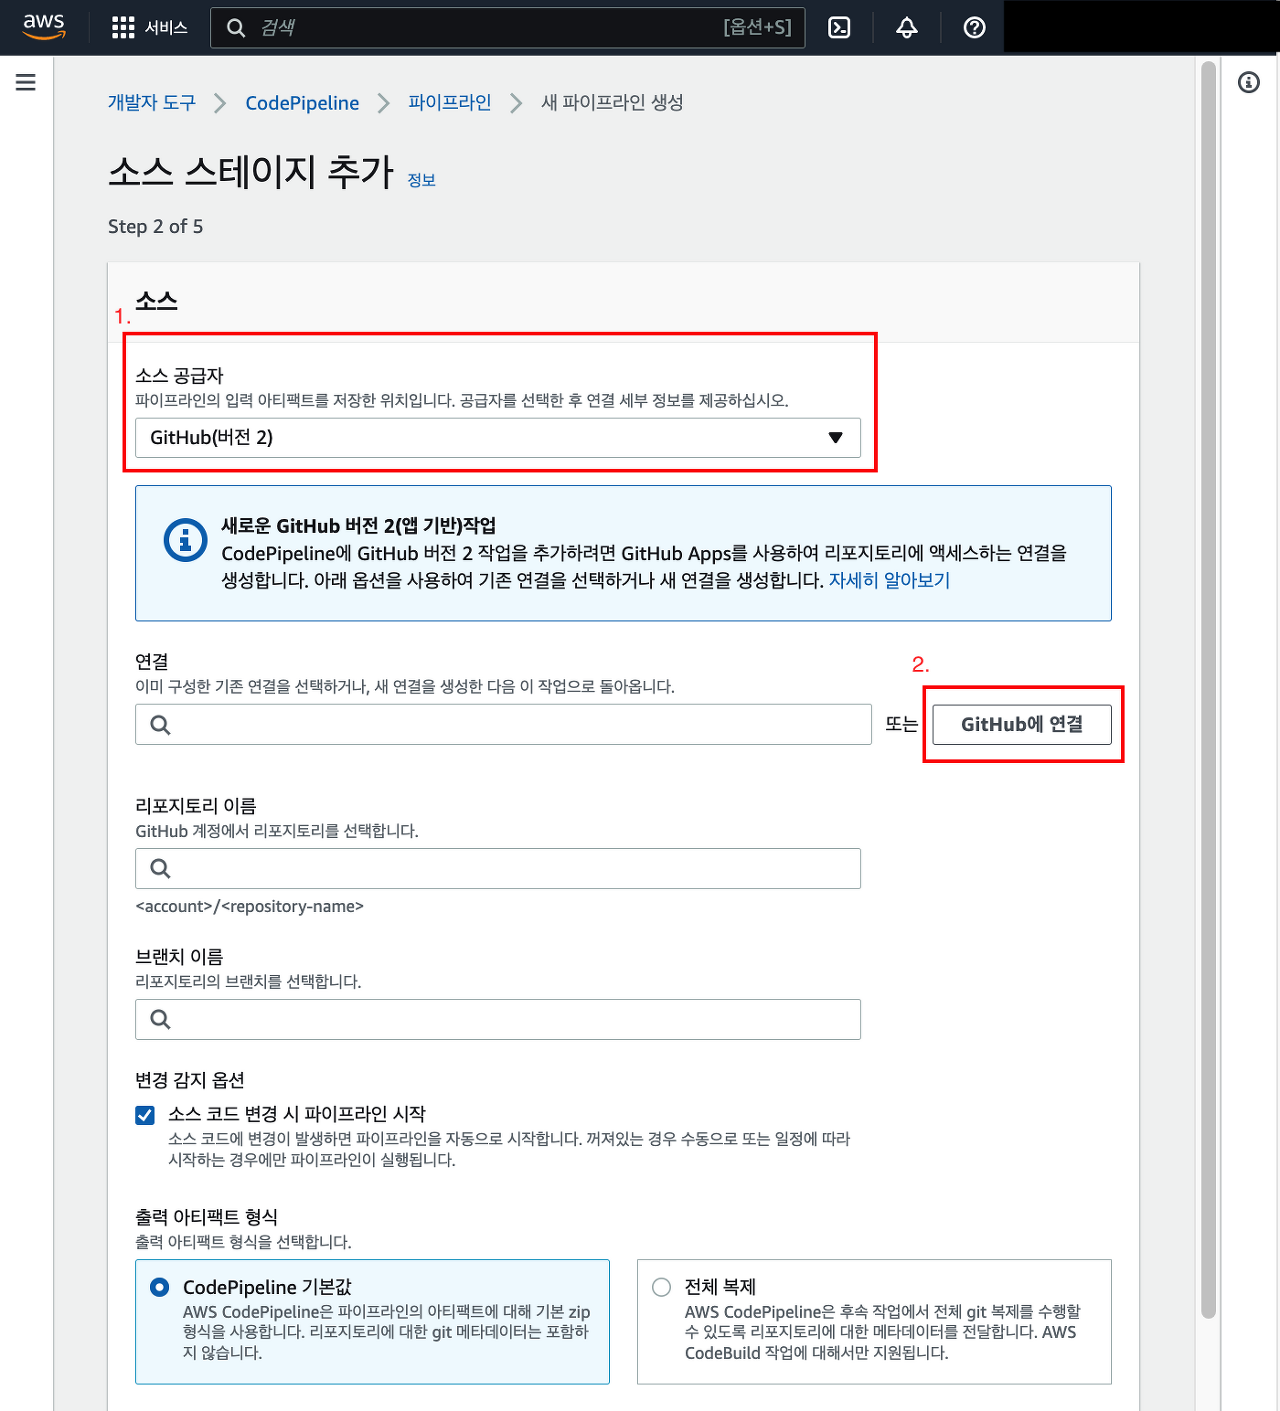
3. 소스 공급자를 클릭해서 GitHub를 선택(build 할 데이터가 있는 곳을 선택하면 됨)
만약 GitHub를 선택했으면, GitHub 연결을 클릭 > 내 GitHub의 리파지토리와 연결을 위해서
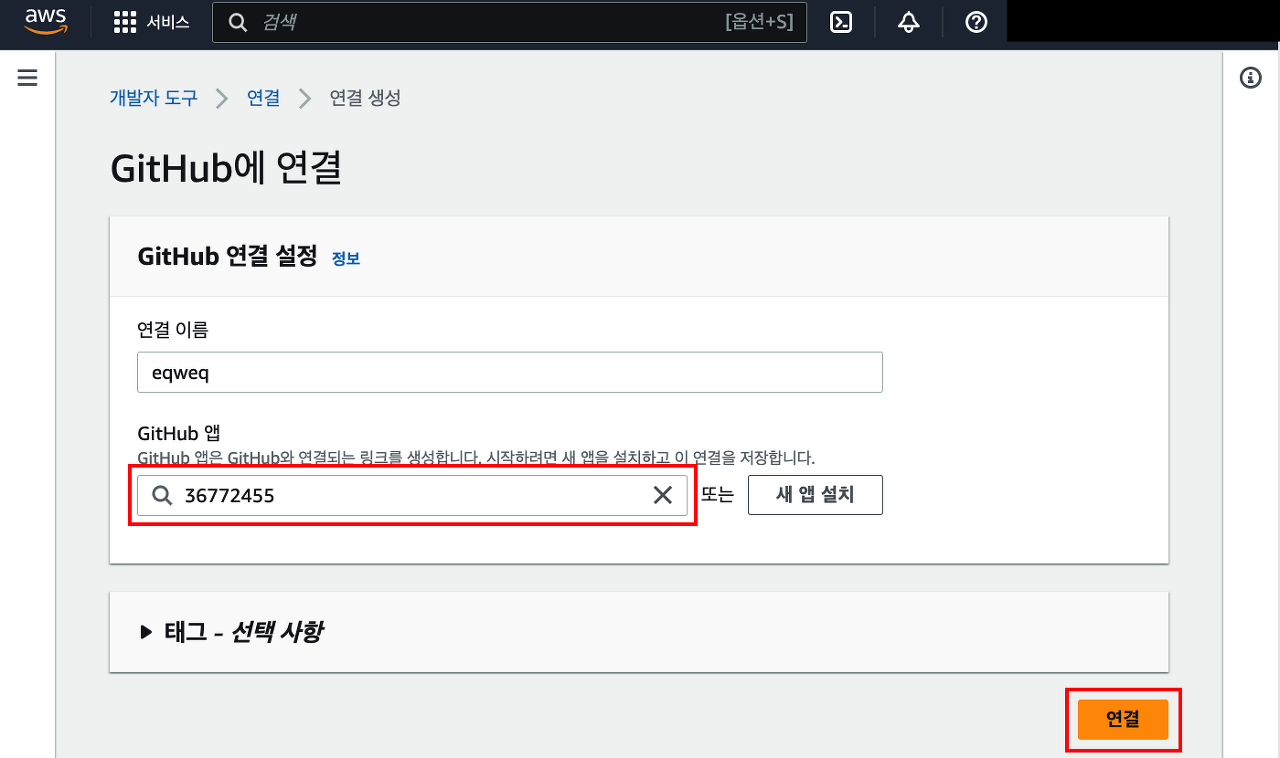
4. 이름은 아무거나 입력
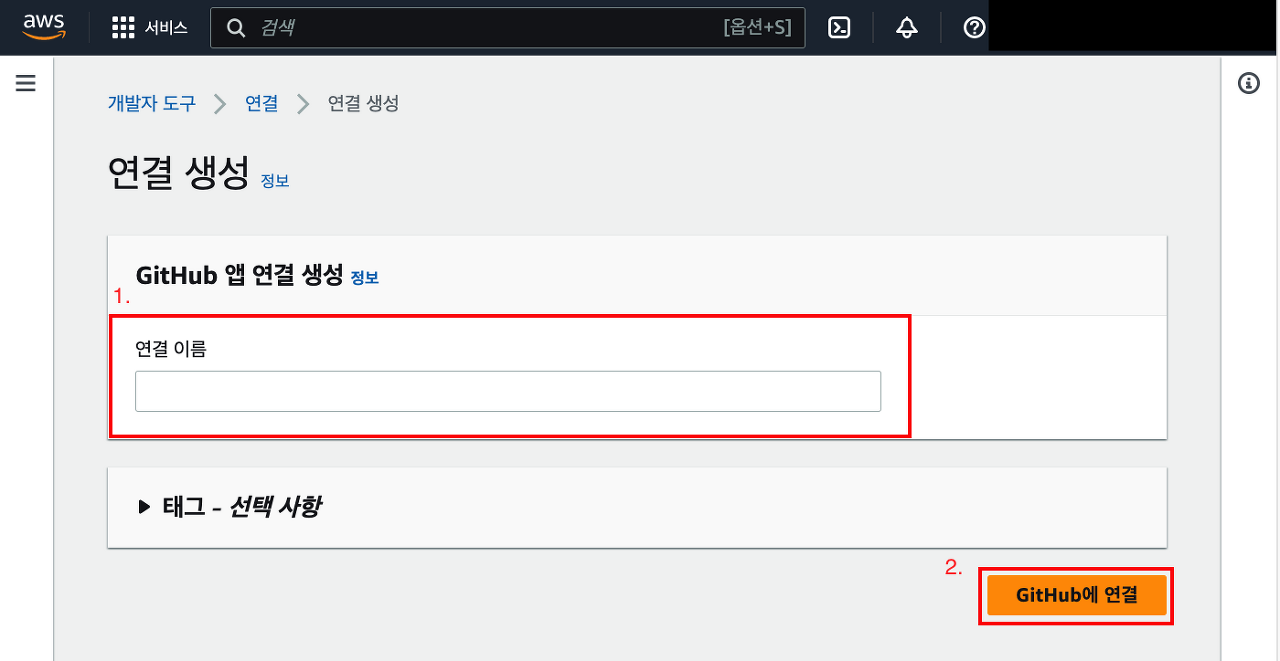
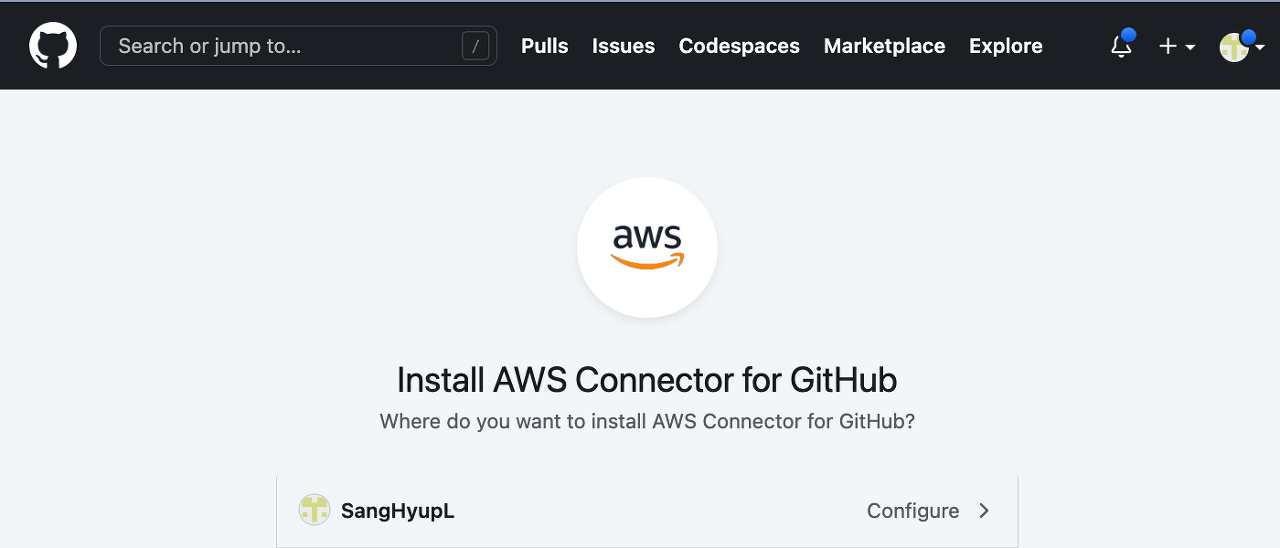
5. github에 연결 클릭 하면 GitHub 앱의 새 앱 설치 클릭
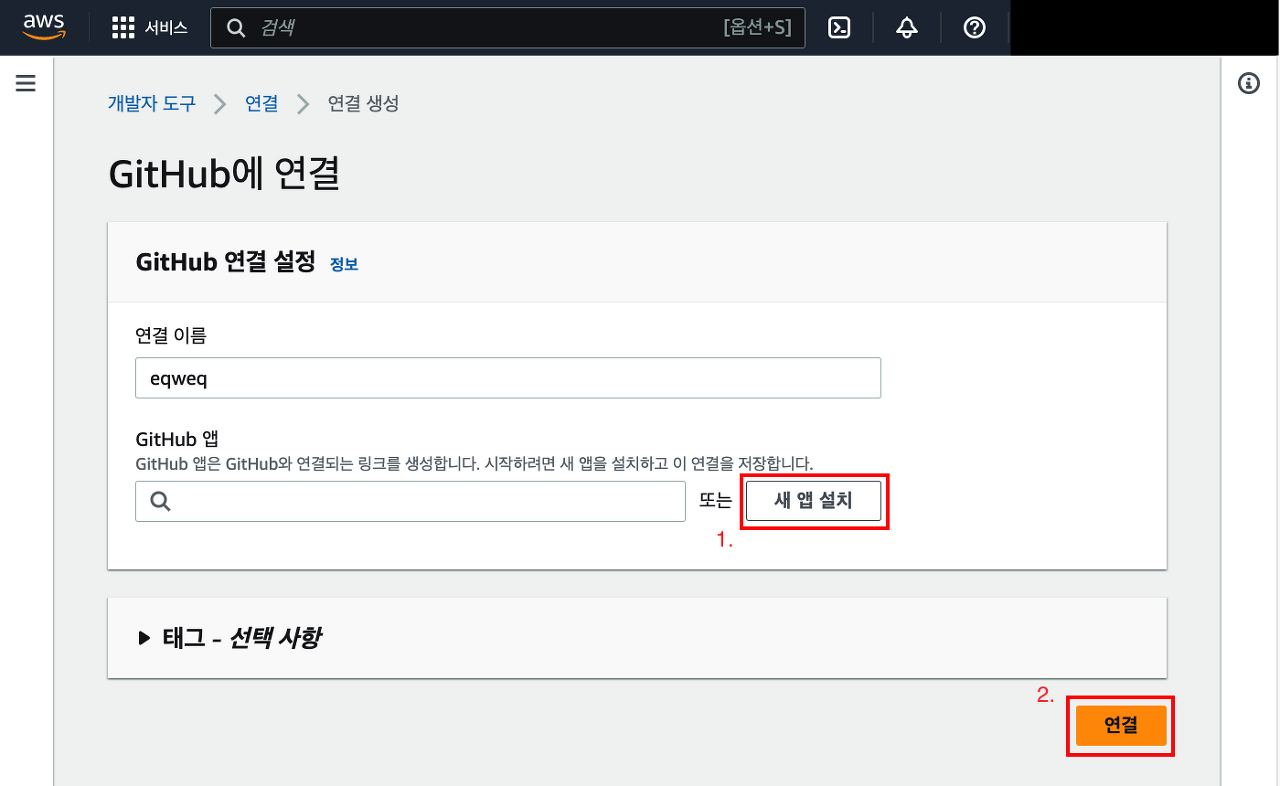
6. aws와 연결할 github 아이디 선택
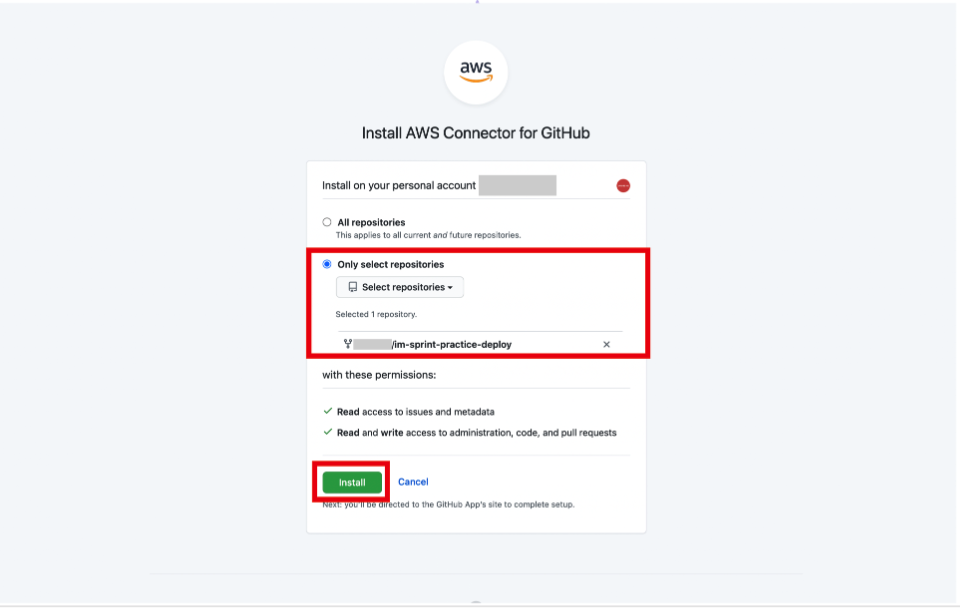
7. 실행할 소스 코드가 있는 자신의 리파지토리 선택
install 버튼 클릭
8. 생성한 GitHub 앱 선택 후 연결 클릭
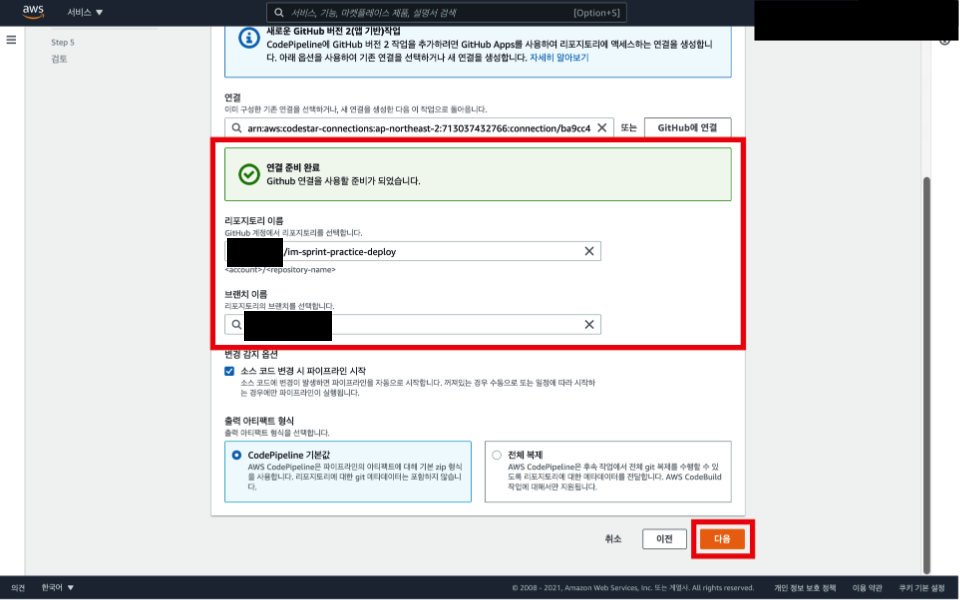
9. 리파지토리 이름과 , 해당 리파지토리의 main 브랜치를 선택한 뒤 다음 버튼 클릭
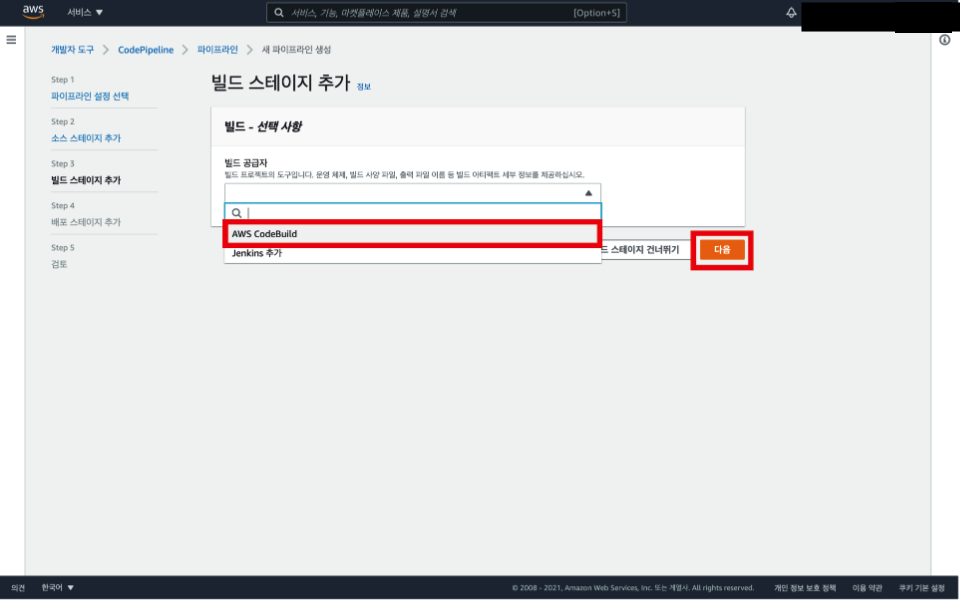
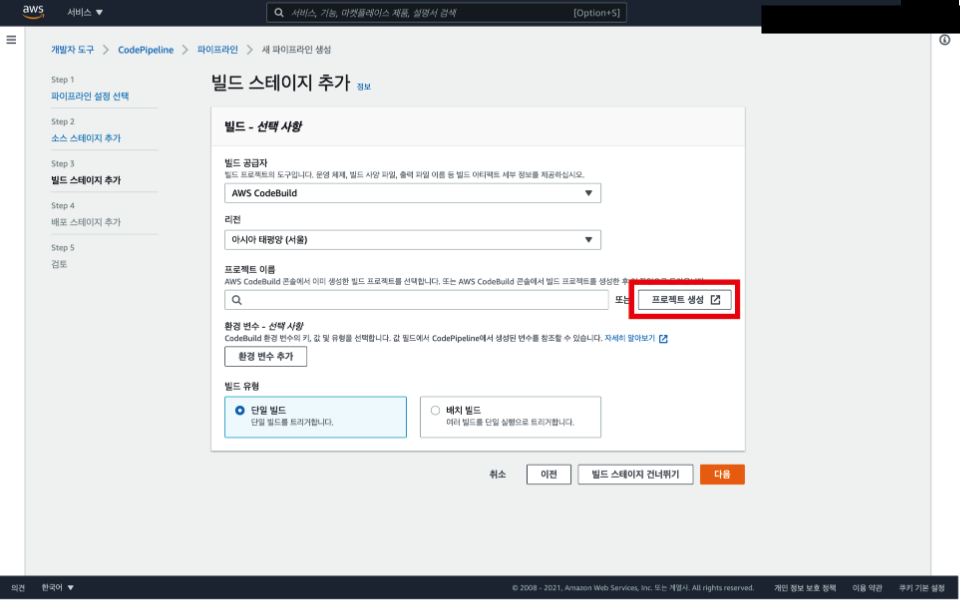
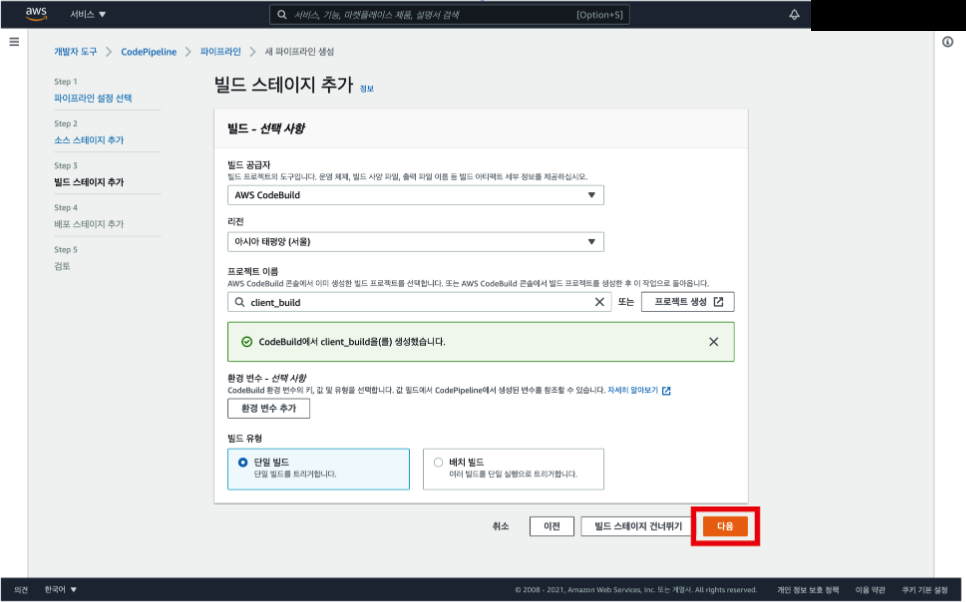
10. 빌드 단계에서 codeBuild 프로젝트 생성
소스 단계를 통해 전달받은 코드를 테스트하거나 빌드하여 배포 단계로 전달하는 역할
11. 빌드 프로젝트 이름은 마음대로 지음
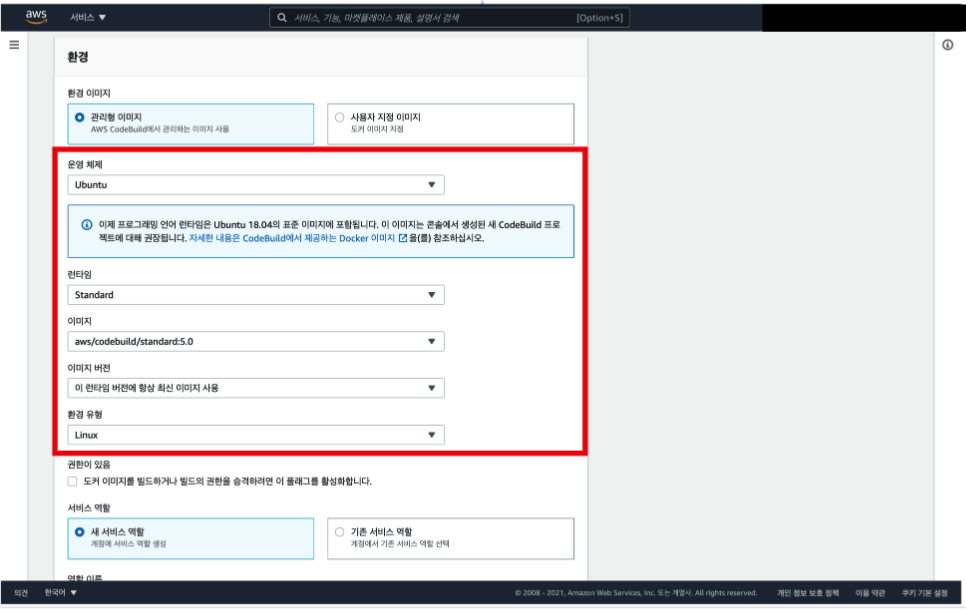
12. Ubuntu 운영체제를 선택
다른 운영체제를 선택할 시 yml 파일이 오류를 일으킬 수 있음
13. 로그 파일을 저장하는 서비스로 CloudWatch 혹은 S3를 이용
S3에는 정적 웹 호스팅을 위한 버킷이 이미 생성
버킷의 수가 많아지면 과금이 될 가능성이 다소 커질 수 있기에, CloudWatch 서비스를 빌드 출력 로그 저장을 위한 서비스로 선택하여 리소스를 분산
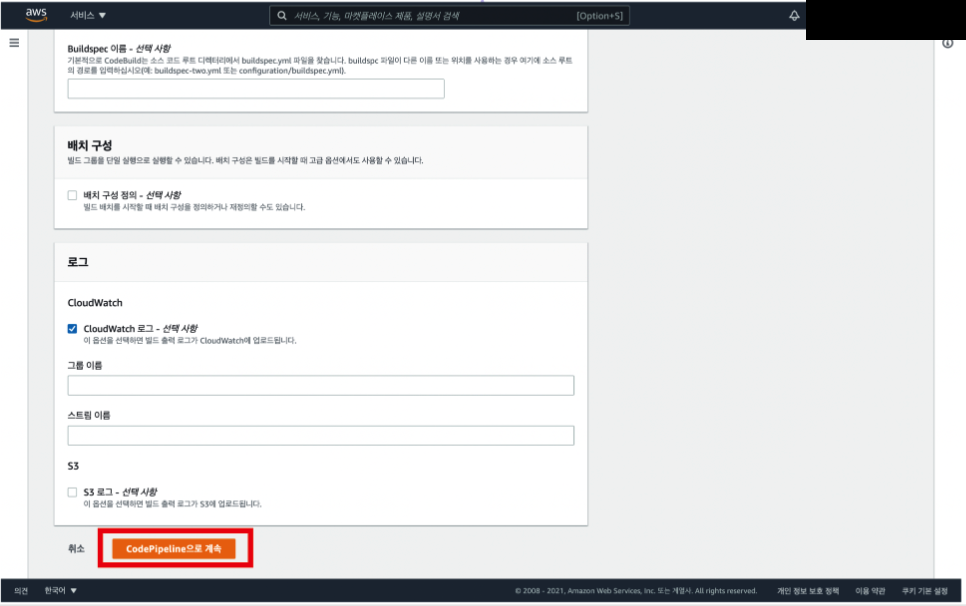
14. 다음 클릭
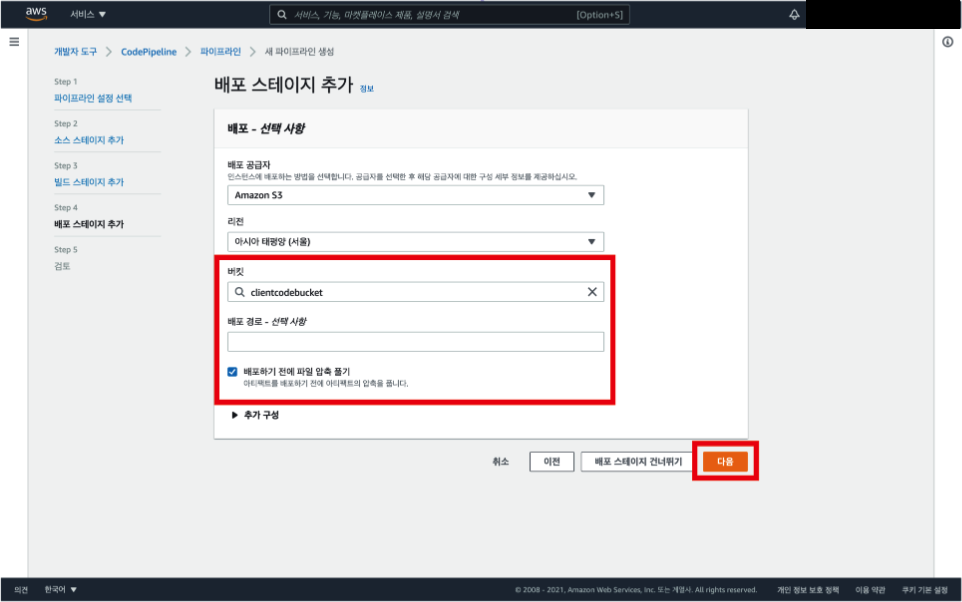
15. 최종적으로 만들어진 결과물을 전달 및 반영할 위치를 선택, client이므로 s3를 선택

16. s3를 만들었을 때 사용한 버킷 이름을 선택
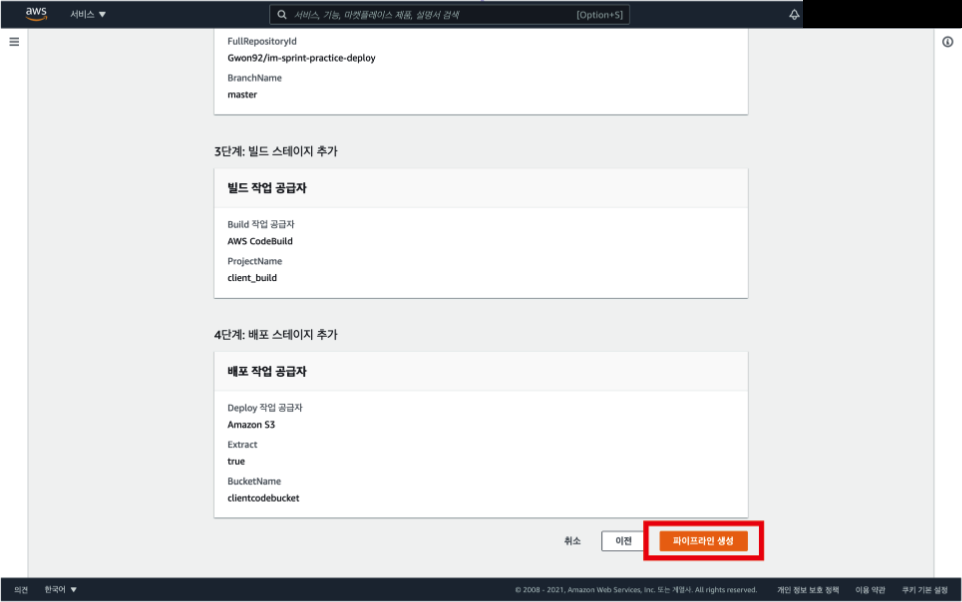
17. 검토한 후 다 맞다면 파이프라인 생성 클릭
결과
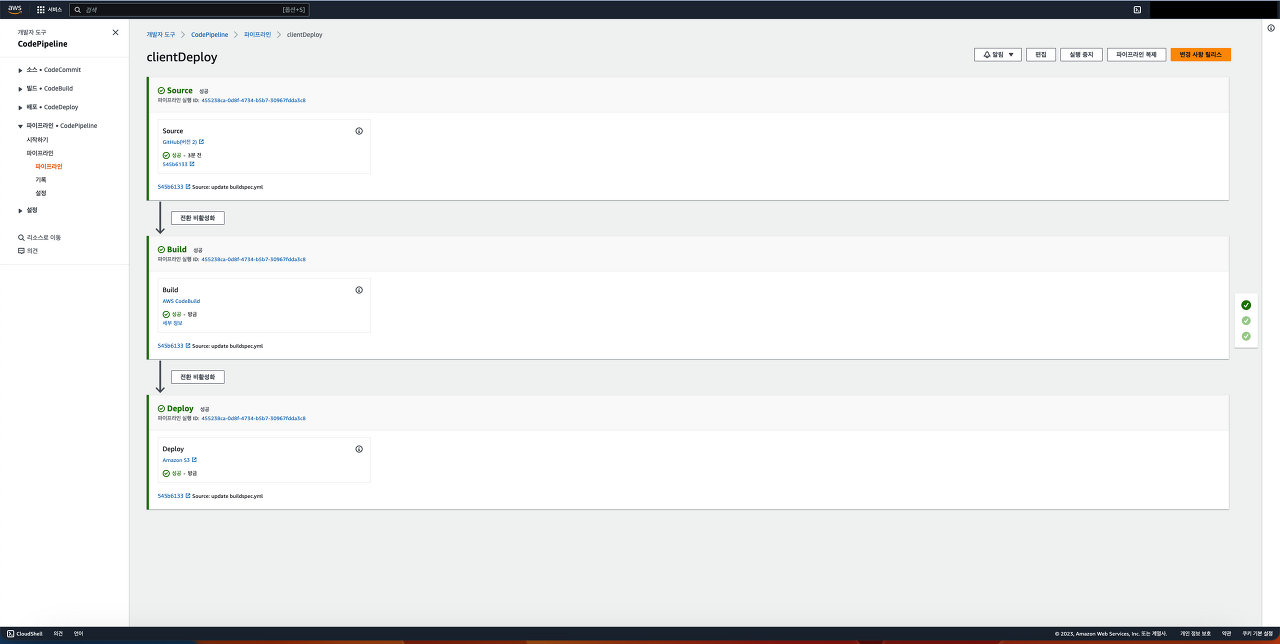
배포가 성공하는 것을 확인할 수 있다

기록하고 공유하려고 노력하는 DevOps 엔지니어