JavaScript, postgreSQL, DBeaver, apollogrphql 이용해서 간단한 백엔드 만들기
- 프론트엔드를 공부 중 이지만 나중에 백엔드 개발자, 프로젝트 매니저분들과 원활한 커뮤니케이션을 백엔드의 기본을 알아야 한다고 하셨다!
- 그래서
JavaScript, postgreSQL, DBeaver, apollogrphql를 이용해서 간단한 백엔드를 만들어보았다.
📔 먼저 index.ts를 만들어서 postgreSQL과 연결하기 위한 코드를 작성해준다.
createConnection({
type: "postgres",
database: "****",
username: "****",
password: "****",
port: ****,
host: "3*.**.***.***",
entities: [__dirname + "/*.postgres.ts"],
logging: true,
synchronize: true,
}).then(() => {
console.log("접속완료!!!");
server.listen({ port: **** });
});
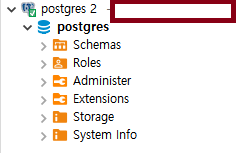
DBeaver 를 실행시켜서 postgreSQL를 선택해서 연결해준다. DBeaver 란 SQL 데이터베이스 관리도구로써 SQL에 담긴 데이터들을 관리 할 수 있다!
📔 TypeORM을 만들어서 type을 지정해준다
import { BaseEntity, Column, Entity, PrimaryGeneratedColumn } from "typeorm";
@Entity()
export default class Product extends BaseEntity {
  @PrimaryGeneratedColumn("increment")
  number!: number;
  @Column({ type: "text" })
  name!: string;
  @Column({ type: "text" })
  detail!: string;
  @Column({ type: "text" })
  seller!: string;
  @Column({ type: "integer" })
  price!: number;
  @Column({ type: "timestamp", default: null, nullable: true })
  deletedAt?: Date;
  @PrimaryGeneratedColumn("uuid")
  _id!: string;
}
@PrimaryGeneratedColumn
자동생성되는 ID값을 표현하는 방식을 아래와 같이 2가지 옵션을 사용할 수 있도록 도와줍니다.
increment: AUTO_INCREMENT를 사용해서 1씩 증가하는 ID를 부여한다. 기본 옵션이다.
uuid: 유니크한 uuid를 사용할 수 있다.
@Column
entity의 속성을 테이블 칼럼으로 표시합니다.
📔 index.ts 작성
- 위에서 만든
TypeORM인 Product 를 import해온다.
import { createConnection } from "typeorm";
import { ApolloServer, gql } from "apollo-server";
import Product from "./Product.postgres";
gql 을 선언해준다. (선언해준것들이 apollogrphql에 뜨게 된다)
const typeDefs = gql`
  input CreateProductInput {
    name: String
    detail: String
    price: Int
  }
  input UpdateProductInput {
    name: String
    detail: String
    price: Int
  }
  type Return {
    _id: String
    message: String
    number: Int
  }
  type Product {
    number: Int
    seller: String
    name: String
    detail: String
    price: Int
    _id: String
  type Query {
    fetchProduct(productId: ID): Product
    fetchProducts: [Product]
  }
    createProduct(
      seller: String
      createProductInput: CreateProductInput
    ): Return
    updateProduct(
      productId: ID
      updateProductInput: UpdateProductInput!
    ): Return
    deleteProduct(productId: ID): Return
`;
📔 resolvers 안에 Query와 Mutation을 선언해준다
fetch는 Query 안에, create, update, delete는 Mutation 안에 적어준다.
const resolvers = {
  Query: {
  fetchProduct: async (_: any, args: any) => {
      const result = await Product.findOne({
        where: { _id: args.productId, deletedAt: null },
      });
      return result;
    },
    fetchProducts: async (_: any, args: any) => {
      const result = await Product.find({
        where: { deletedAt: null },
      });
      return result;
    },
  }
  Mutation: {
createProduct: async (_: any, args: any) => {
      const result = await Product.insert({
        seller: args.seller,
        ...args.createProductInput,
      });
      return {
        message: "상품이 등록되었습니다.",
        number: result.identifiers[0].number,
        _id: result.identifiers[0]._id,
      };
    },
    updateProduct: async (_: any, args: any) => {
      const result = await Product.update(
        {
          _id: args.productId,
        },
        {
          ...args.updateProductInput,
        }
      );
      return {
        message: " 상품이 수정되었습니다.",
        _id: args.productId,
      };
    },
    deleteProduct: async (_: any, args: any) => {
      await Product.update({ _id: args.productId }, { deletedAt: new Date() });
      return { message: "상품을 삭제했습니다.", _id: args.productId };
    },
}
}
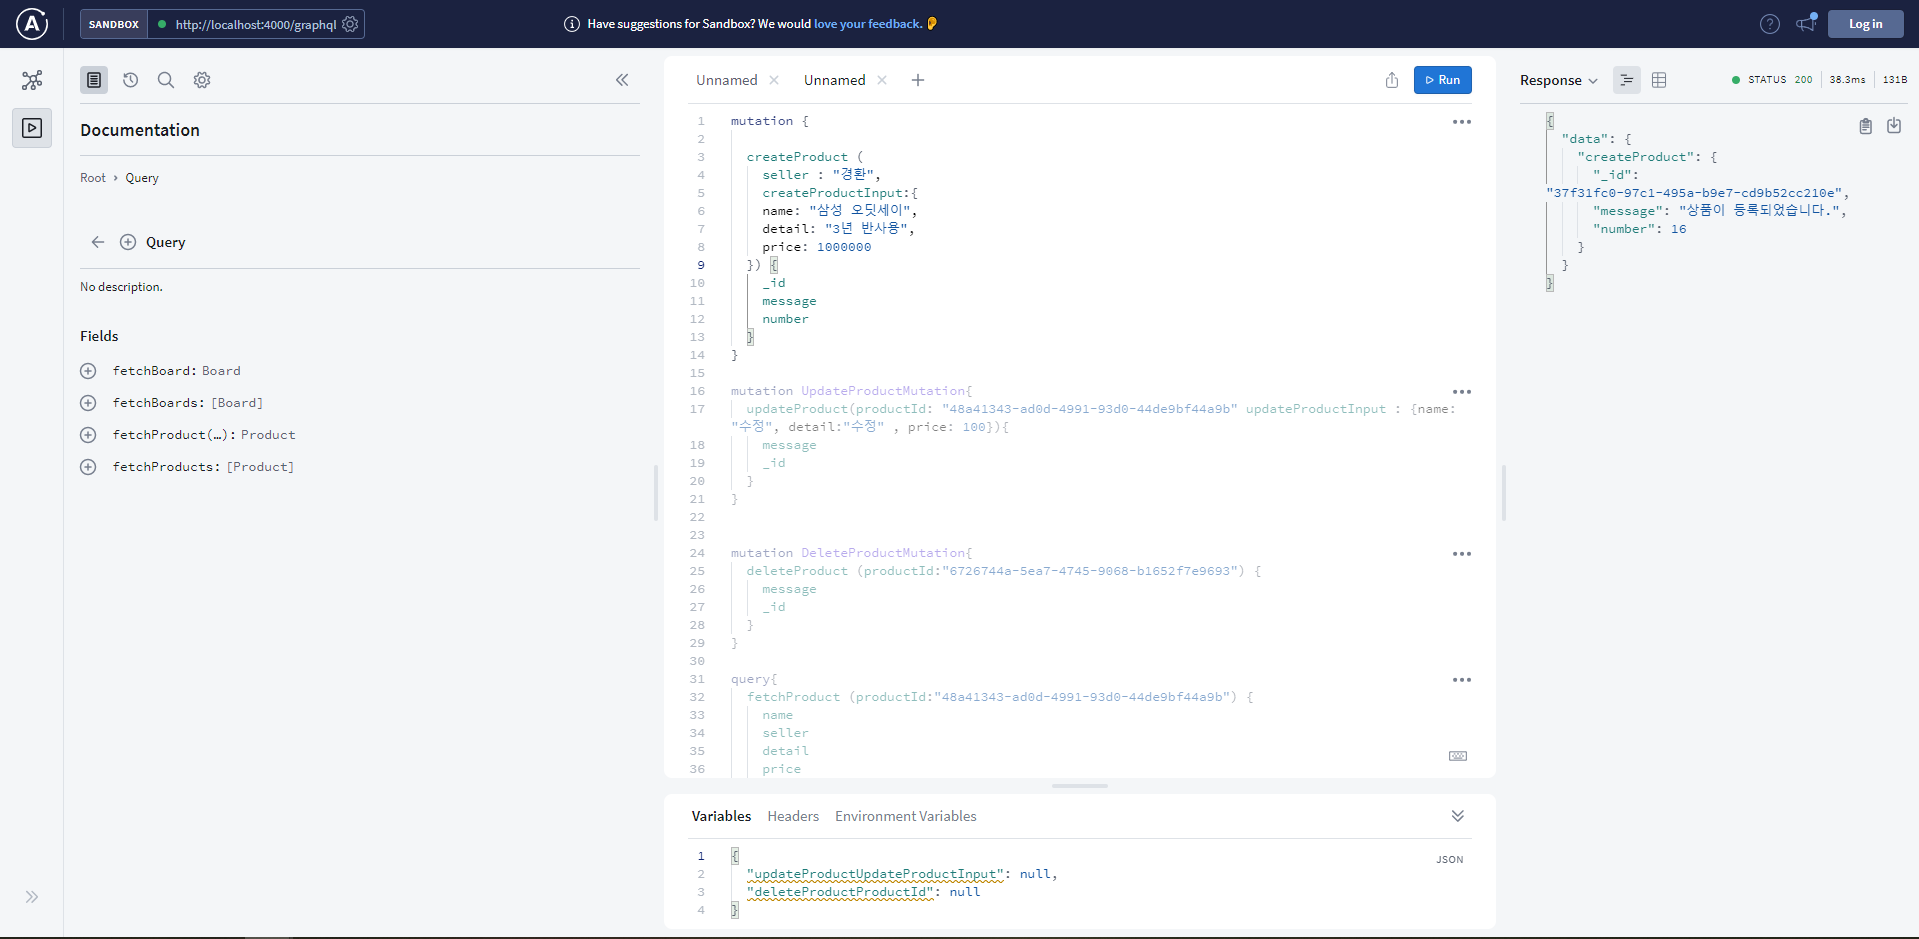
📔 apollographql 을 이용해서 mutation 과 query를 해본다.
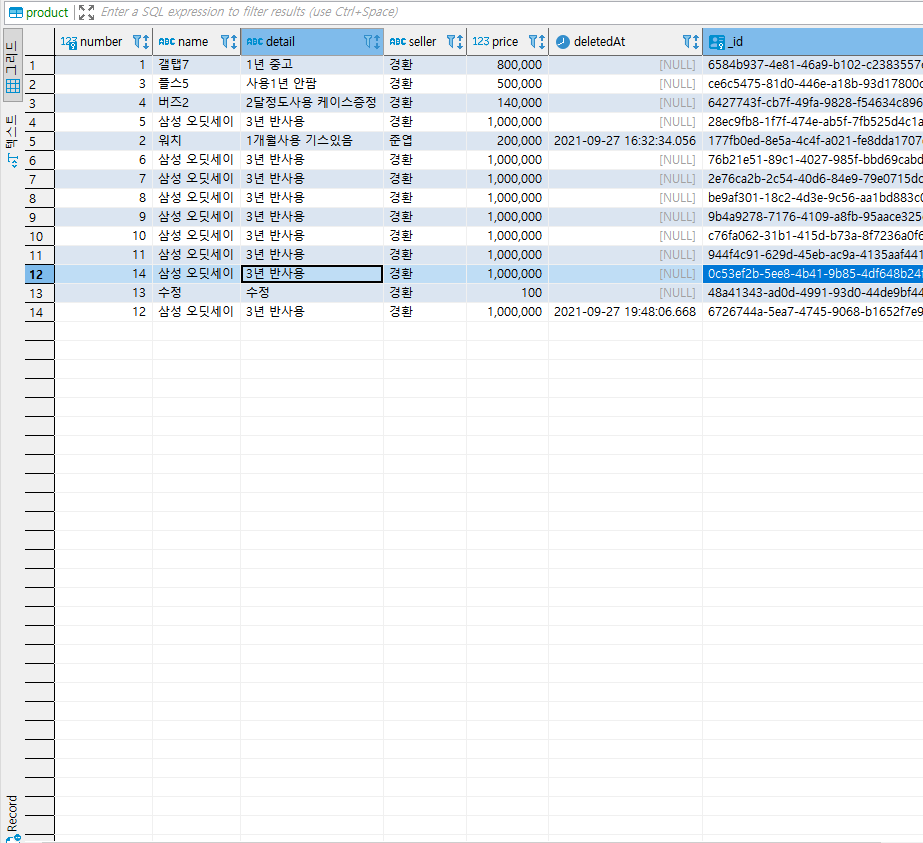
📔 DBeaver로 데이터를 조회, 확인해본다.
📔 데이터가 잘 등록,수정, 삭제, 조회되었다면 완성!!