티쳐블머신 with 플라스크
플라스크 이용한 파일전송

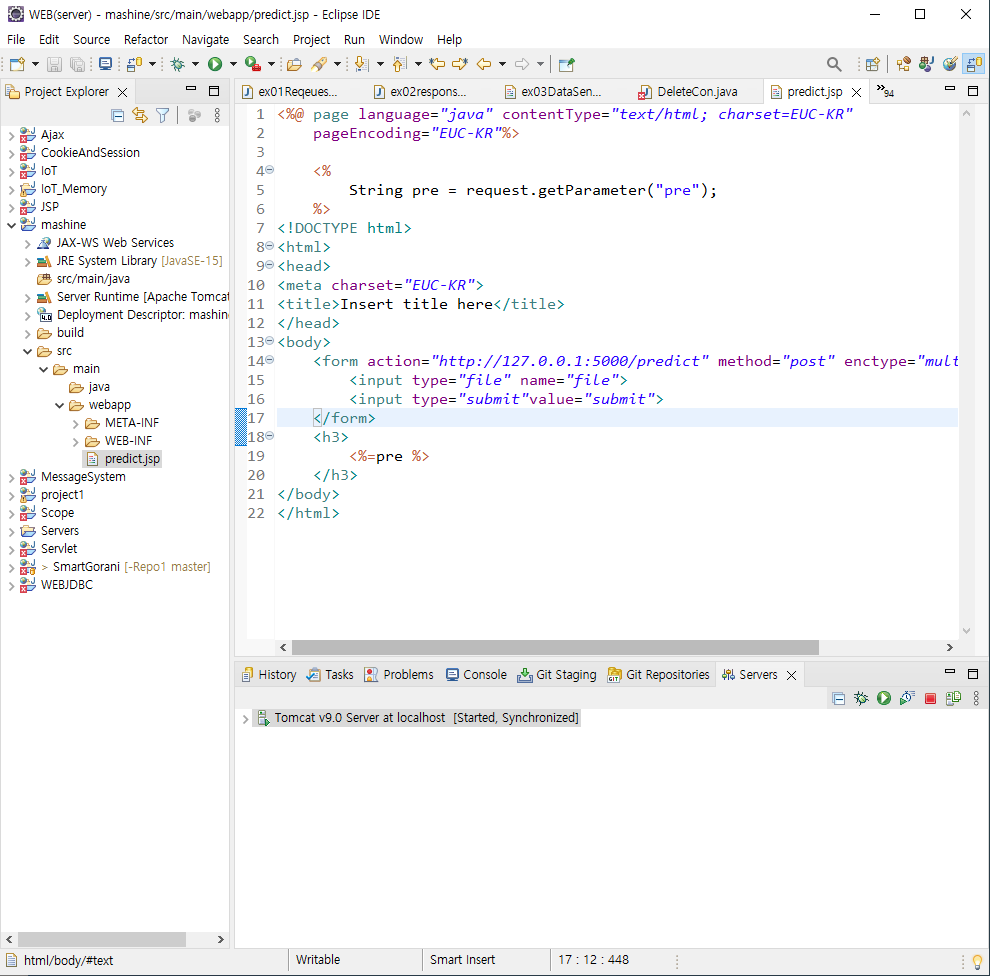
- 이클립스 페이지 생성
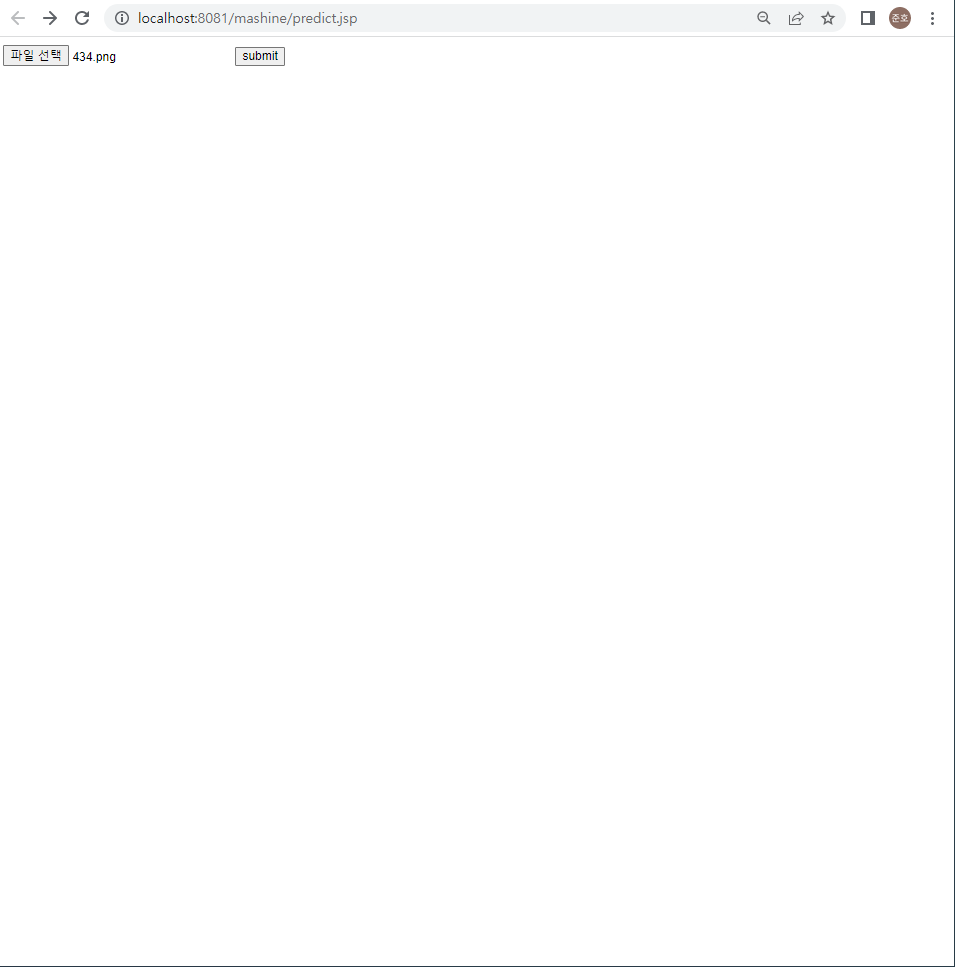
- 파일선택후 서브밋으로 주피터 생성된 주소에 값보내기
- 주피터에 받아졌으면 1로 표현

- request추가
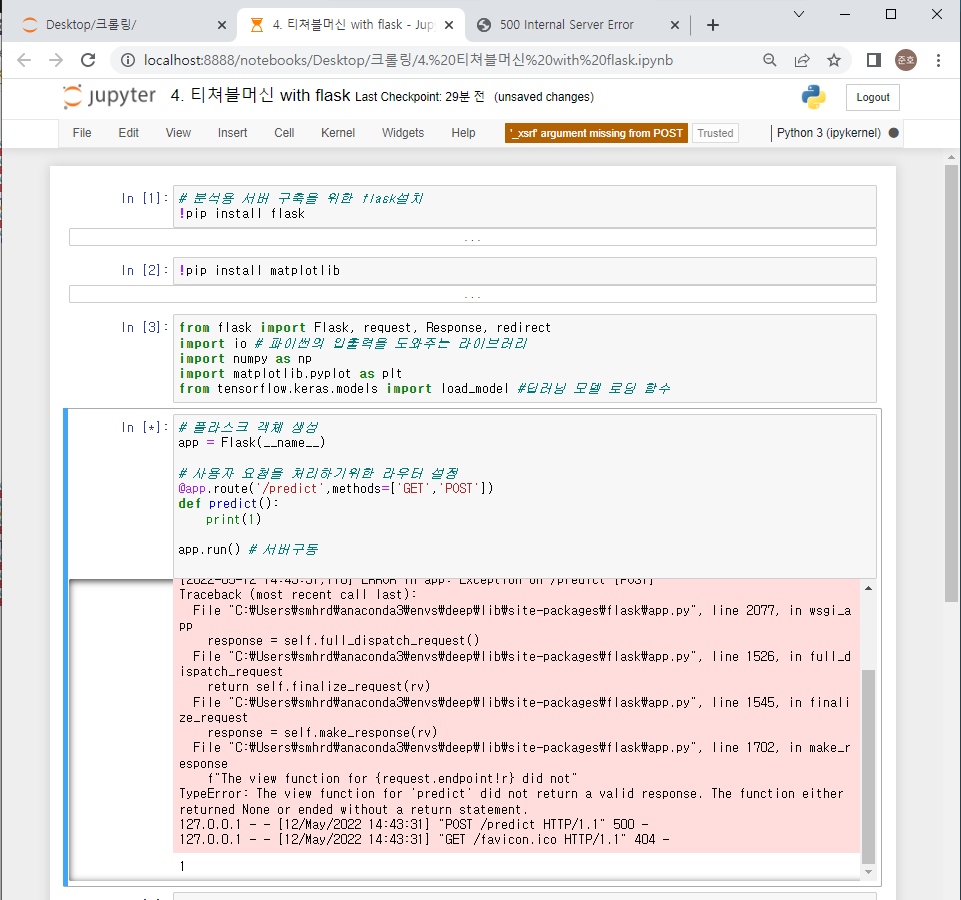
# 플라스크 객체 생성
app = Flask(__name__)
model = load_model('./converted_keras/keras_model.h5')

# 사용자 요청을 처리하기위한 라우터 설정
@app.route('/predict', methods = ['GET', 'POST'])
def predict():
    if request.method == 'POST':
        print(1)
        img = request.files['file']
        print(request.files)
        input_stream = io.BytesIO() #byte단위로 읽어들이는 통로
        img.save(input_stream) # file로 부터 데이터를 읽기시작
        data = np.fromstring(input_stream.getvalue(), dtype=np.uint8)
        print(data)

        real_img = cv2.imdecode(data,1) # 1 => 컬러정보
        real_img = cv2.cvtColor(real_img,cv2.COLOR_BGR2RGB) #BGR에서 RGB
        resize_img = cv2.resize(real_img, dsize=(224,224), interpolation=cv2.INTER_AREA)

        #display(plt.imshow(resize_img))
        #plt.show()

        normalized_img = (np.array(resize_img, dtype=np.float32) / 127.0)-1

        # 예측시킬 이미지 데이터를 넣을 변수
        data = np.ndarray(shape=(1, 224, 224, 3), dtype=np.float32)
        # 불러온 numpy 타입의 이미지를 변수에 대입
        data[0] = normalized_img
        # 예측
        prediction = model.predict(data)
        index = np.argmax(prediction[0]) # 최대값의 인덱스

        print(index,'정답')
    return redirect("http://localhost:8081/mashine/predict.jsp?pre={}".format(index))

app.run() # 서버구동
input_stream부터 새로
값을 받아오는 코드
주피터에서 쿼리스트링(?=) 값을 보내준것을 이클립스에서 <% request.getParameter("pre")%>로 값을 받아와 웹페이지에 결과값을 출력할 수 있다. <%= pre %>
결과

주소창에 pre값이 들어가있고 웹페이지에 h3로 pre값이 출력

파이팅