들어가며
이번 작업은 Spring Boot를 이용하여 파일 업로드 / 다운로드 기능을 REST API로 만들어보려고 한다.
단순한 파일 업로드 / 다운로드 기능이지만 인터페이스의 다형성을 이용하여 어떤 Beans 선택 하냐에 따라 S3 버킷에 파일을 올릴 수도 있고, 로컬 디렉토리에 파일을 올릴 수 있도록 작업을 하는것이 이번 작업에 핵심 포인트이다.
- 클래스 다이어그램

Interface 작업
Interface 구성은 간단하다.
앞서 말했듯 이번 작업에는 파일 업로드 기능 / 다운로드 기능 두가지의 기능만 존재한다. 두개의 기능이 가능한 인터페이스를 작성한다.
public interface FileService {
	  /* 파일 업로드 */
     UploadFileResponse upload(MultipartFile file) throws IOException;
     /* 파일 다운로드 */
     byte[] download(String fileKey) throws IOException;
}
LocalUpload 작업
인터페이스 구성을 마친 후 로컬 디렉토리에 업로드될 수 있도록 설정과 구현체를 작성한다.
1. application.properties 작성
application.properties 파일에 multipart file 관련 설정들(크기 설정, upload 경로 등)을 해준다.
# application.properties

spring.servlet.multipart.enabled=true
spring.servlet.multipart.file-size-threshold=2KB
spring.servlet.multipart.max-file-size=200MB
spring.servlet.multipart.max-request-size=215MB
file.upload-dir=upload-path/User/upload
💡 spring과 달리 spring boot에서는 file upload를 위한 multipartResolver가 기본 빈으로 등록되기 때문에 추가적으로 등록할 필요는 없다.
2. FileLocalServiceImpl 작성
multipart 관련 설정을 완료 한 후 FileLocalServiceImpl 구현 클래스를 생성한다.
@Service
public class FileLocalServiceImpl implements FileService {

    private final Path fileStorageLocation;

    /*
    	생성자 주입을 통해 파일 업로드 경로를 설정
    */
    @Autowired
    public FileLocalServiceImpl(FileStorageProperties fileStorageProperties) {

        this.fileStorageLocation = Paths.get(fileStorageProperties.getUploadDir())
                .toAbsolutePath()
                .normalize();
        try {
            Files.createDirectories(this.fileStorageLocation);
        } catch (Exception ex) {
            throw new FileStorageException("Failed to create directory.", ex);
        }

    }
/*
saveFile메서드에서 Files.copy 메서드를 이용해 설정한 경로로 파일을 업로드한다.
*/
@Override
public UploadFileResponse upload(MultipartFile file) {
UploadFileResponse uploadFileResponse = null;
String fileName = storeFile(file);
try {
if(fileName.equals("")){
new Exception("The file name does not exist.");
}else {
String fileDownloadUri = ServletUriComponentsBuilder.fromCurrentContextPath()
.path("/downloadFile/")
.path(fileName)
.toUriString();
uploadFileResponse = new UploadFileResponse(fileName,fileDownloadUri,file.getContentType(),file.getSize());
}
} catch (Exception ex) {
throw new FileStorageException("Could not store file " + fileName + ". Please try again!", ex);
}
return uploadFileResponse;
}
public String storeFile(MultipartFile file) {
String fileName = StringUtils.cleanPath(file.getOriginalFilename());
try {
if(fileName.contains("..")) {
throw new FileStorageException("Sorry! Filename contains invalid path sequence " + fileName);
}
Path targetLocation = this.fileStorageLocation.resolve(fileName);
Files.copy(file.getInputStream(), targetLocation, StandardCopyOption.REPLACE_EXISTING);
return fileName;
} catch (IOException ex) {
throw new FileStorageException("Could not store file " + fileName + ". Please try again!", ex);
}
}
	/*
  		Paths.get를 통해 파일 정보를 가져온후 파일의 내용을 바이트 배열로 읽어 들인 다음 파일을 닫는다.
	*/

    @Override
    public byte[] download(String fileKey) throws IOException {
        byte[] data = null;
        try {
            Path path = Paths.get(this.fileStorageLocation.resolve(fileKey).normalize().toString());
            data = Files.readAllBytes(path);
        }catch (IOException ex){
            throw new IOException("IOE Error Message= " + ex.getMessage());
        }
        return data;
    }
}
S3 Upload 작업
로컬 디렉토리에 업로드 설정과 구현체 작성 후 S3 버킷에 업로드 될 수 있도록
S3 업로드 설정과 구현체를 작성한다.
1. application.properties 작성
cloud.aws.credentials.accessKey=엑세스 키 ID (AWS S3에서 발급 받은 키)
cloud.aws.credentials.secretKey=비밀 엑세스 키 (AWS S3에서 발급 받은 키)
cloud.aws.stack.auto=false

# AWS S3 Service bucket
cloud.aws.s3.bucket=버킷이름 (자신이 설정한 버킷이름)
cloud.aws.region.static=ap-northeast-2 (버킷 지역(서울은 ap-northeast-2))
💡 S3 업로드 시 버킷 생성 및 권한 설정, AWS IAM 권한 부여 및 accessKey, secretKey 발급 등이 필요하다.
이번 작업에선 기존에 설정한 버킷과 발급 받은 accessKey, secretKey로 진행을 해보겠다.
참고로 accessKey, secretKey는 외부에 노출되면 안되기 때문에 꼭 .gitignore를 해놓길 바란다.
2. FileS3ServiceImpl 작성
S3 업로드 관련 설정을 완료 한 후 FileS3ServiceImpl 구현 클래스를 생성한다.
@Service
public class FileS3ServiceImpl implements FileService {

    @Value("${cloud.aws.s3.bucket}")
    private String bucket;
    private final AmazonS3Client amazonS3Client;
     /*
    	생성자 주입을 통해 AmazonS3Client 생성
        Spring Boot Cloud AWS를 사용하게 되면 S3 관련 Bean을 자동 생성해준다.
    */
    public FileS3ServiceImpl(AmazonS3Client amazonS3Client) {
        this.amazonS3Client = amazonS3Client;
    }
    @Override
    public UploadFileResponse upload(MultipartFile file) throws IOException{
        return uploadOnS3(file);
    }

    /*
    	 S3 파일을 업로드하려면 PutObjectRequest 객체를 생성해야한다.
 		 PutObjectRequest 객체를 생성은 InputStream과 key값 그리고 파일 정보
   		 (ContentType, file Length 등)를 이용해 생성한다.
    */
    private UploadFileResponse uploadOnS3(MultipartFile uploadFile) throws IOException {
        UploadFileResponse uploadFileResponse = null;

        final TransferManager transferManager = new TransferManager(this.amazonS3Client);
        final PutObjectRequest request = new PutObjectRequest(bucket, uploadFile.getOriginalFilename(), uploadFile.getInputStream(), getMetadataValue(uploadFile));
        final Upload upload =  transferManager.upload(request);

        try {
            UploadResult result = upload.waitForUploadResult();
            if (upload.getState().name().equals("Completed")){
                uploadFileResponse = new UploadFileResponse( result.getKey(),result.getETag(), getMetadataValue(uploadFile).getContentType(),uploadFile.getSize());
            }else {
                new Exception("Upload fail");
            }
        } catch (AmazonClientException amazonClientException) {
            System.out.println("amazonClientException " + amazonClientException);
        } catch (InterruptedException ex) {
            System.out.println("InterruptedException " + ex);
        }
        return  uploadFileResponse;
    }

	/*
		다운받을 파일을 getObject 메소드를 통해 검색한 후
    	getObjectContent를 호출하여 객체의 내용을 가져온다.
	*/
    @Override
    public byte[] download(String fileKey) throws IOException {
        byte[] content = null;
        final S3Object s3Object = amazonS3Client.getObject(bucket, fileKey);
        final S3ObjectInputStream stream = s3Object.getObjectContent();
        try {
            content = IOUtils.toByteArray(stream);
            s3Object.close();
        } catch(final IOException ex) {
            throw new IOException("IO Error Message= " + ex.getMessage());
        }
        return content;
    }

}
Controller 작업
마지막으로 이제 이 fileService를 호출할 Controller를 생성해보자.
@RestController
public class allRoundFileController {

    private final FileService fileService;

    public allRoundFileController(FileService fileService) {
        this.fileService = fileService;
    }
    				.....
위에 처럼 코드를 작성 후 실행하면 아래의 오류가 발생한다.

오류를 확인 해보면 fileService 어떤 빈을 주입해야 할지 판단할 수 없기 때문에 에러가 발생한다.
같은 타입의 빈이 여러개일 때 3가지 방법으로 해결할 수 있다.
-
@Autowired 필드 명 매칭
@Autowired는 기본적으로 타입(Type)으로 조회를 시도하고, 동일한 타입의 빈이 2개 이상 존재하면 필드 이름, 파라미터 이름으로 빈을 조회한다. -
@Qualifier 사용
@Qualifier 에너테이션을 추가적인 구분자를 넣어준다. -
@Primary 사용
이 에너테이션은 정말 편리하다. 이름에서도 유추할 수 있듯이, 여러개의 등록된 빈 중에 우선순위를 주는 것이다.
사용할 빈에다가 이 에너테이션을 붙이기만 하면, 인터페이스로 주입해도 그 빈이 주입된다.
자 그럼 다시 이 fileService를 호출할 Controller를 생성해보자.
@RestController
public class allRoundFileController {

    private final FileService fileService;

    /*
    @Autowired 필드 명 매칭
    * fileLocalServiceImpl : Local Upload Component
    * fileS3ServiceImpl : S3 Upload Component
    */
    public allRoundFileController(FileService fileLocalServiceImpl) {
        this.fileService = fileLocalServiceImpl;
    }

    @PostMapping("/uploadFile")
    public UploadFileResponse uploadFile(@RequestParam("file") MultipartFile file) {
        UploadFileResponse uploadFileResponse = fileService.upload(file);
        return uploadFileResponse;
    }

    @GetMapping(path = "/downloadFile")
    public ResponseEntity<ByteArrayResource> downloadFile(@RequestParam String fileName) {

        try{
            byte[] data = fileService.download(fileName);
            ByteArrayResource resource = new ByteArrayResource(data);
            return ResponseEntity
                    .ok()
                    .contentLength(data.length)
                    .header("Content-type", "application/octet-stream")
                    .header("Content-disposition", "attachment; filename=\"" + URLEncoder.encode(fileName, "utf-8") + "\"")
                    .body(resource);
        }catch (IOException ex){
            return ResponseEntity.badRequest().contentLength(0).body(null);
        }

    }
}
전체 코드는 내 Github 주소에 정리를 해두었다.
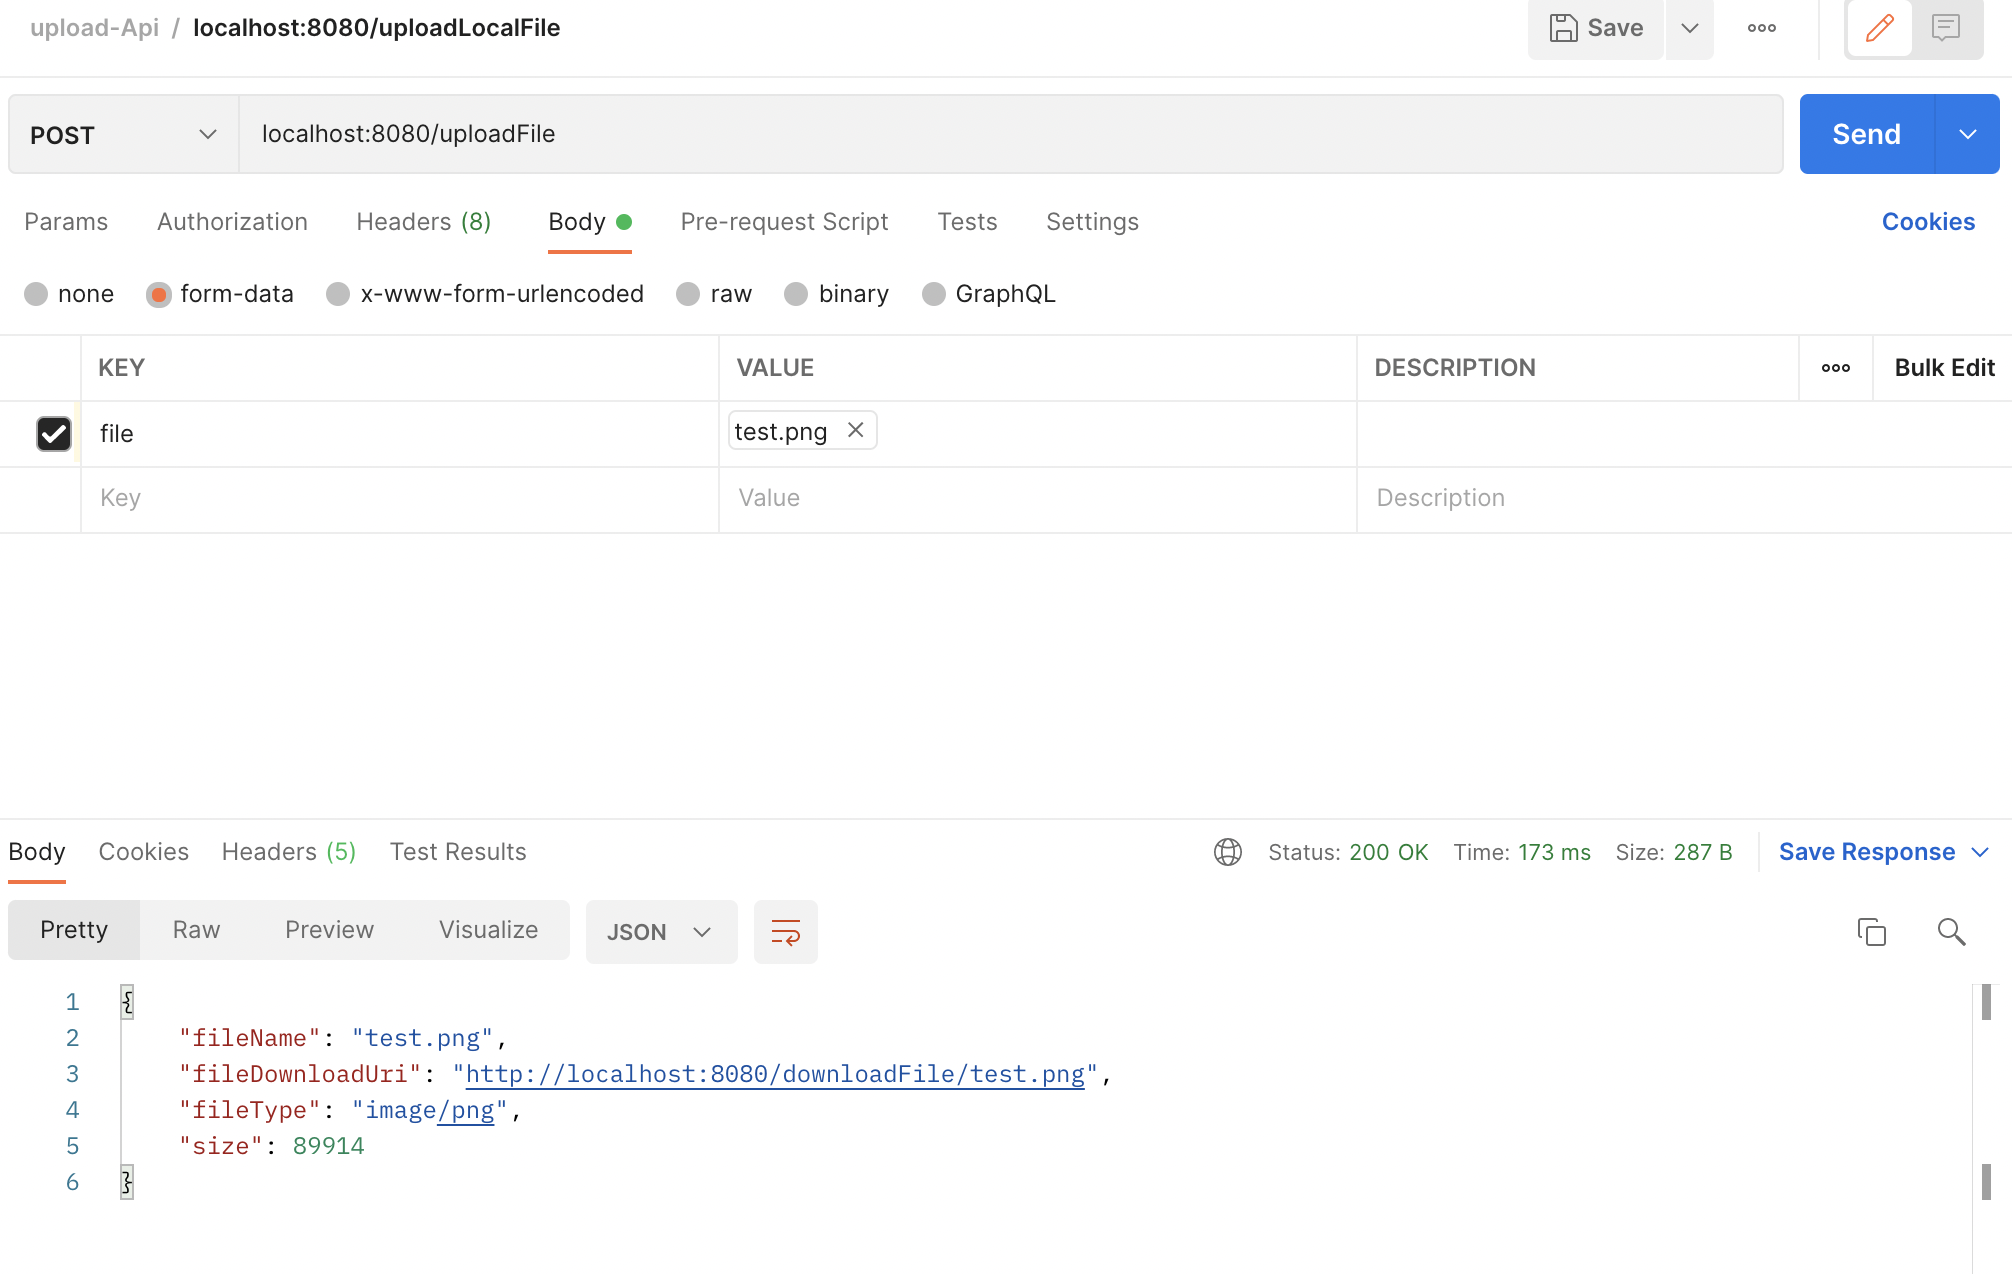
실행 결과
postman에서 form-data의 key 입력부분에서 file을 선택하고 이미지를 첨부 후 Send 버튼을 클릭 하면 아래의 화면 처럼 결과 값을 얻을 수 있다.
마~무리 🙌
실무에서 가장 많이 사용되는 파일 업로드 / 다운로드 기능을 REST API 형태로 제공할 수 있도록 작업을 해보았다.
앞서 말했듯 이번 작업에 핵심 목표는 추상화에 의존하여 어떤 Beans 주입 받냐에 따라 클라이언트의 소스를 수정하지 않고 업로드 구현 로직과 대상이 바뀌는 것이 핵심 목표였다.
다시 한번 추상화 중요성 , 설계 중요성 되새기자 ✍️