📹 참고 : 인프런 [스프링 입문 - 김영한 ]
View 환경 설정
Welcome 페이지 만들기
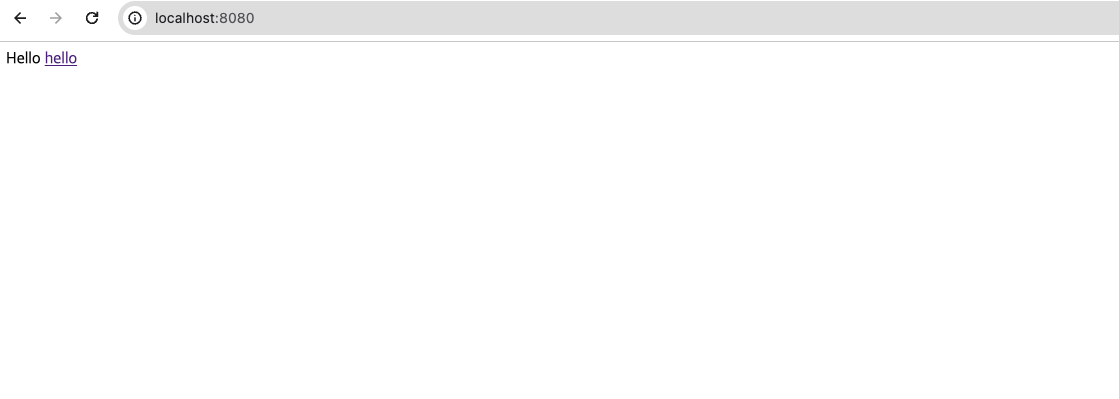
스프링부트는 resources/static/index.html 를 welcome page로 지정한다. (도메인만 누르고 들어왔을 때 첫 화면)
📄 공식문서
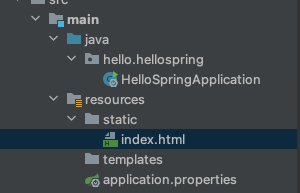
<!DOCTYPE html>
<html lang="en">
<head>
    <title>Hello</title>
    <meta http-equiv="content-type" content="text/html"; charset="UTF-8"/>
</head>
<body>
Hello
<a href="/hello">hello</a>
</body>
</html>
스프링부트를 껐다가 다시 실행하면 아래와 같은 화면이 나온다.
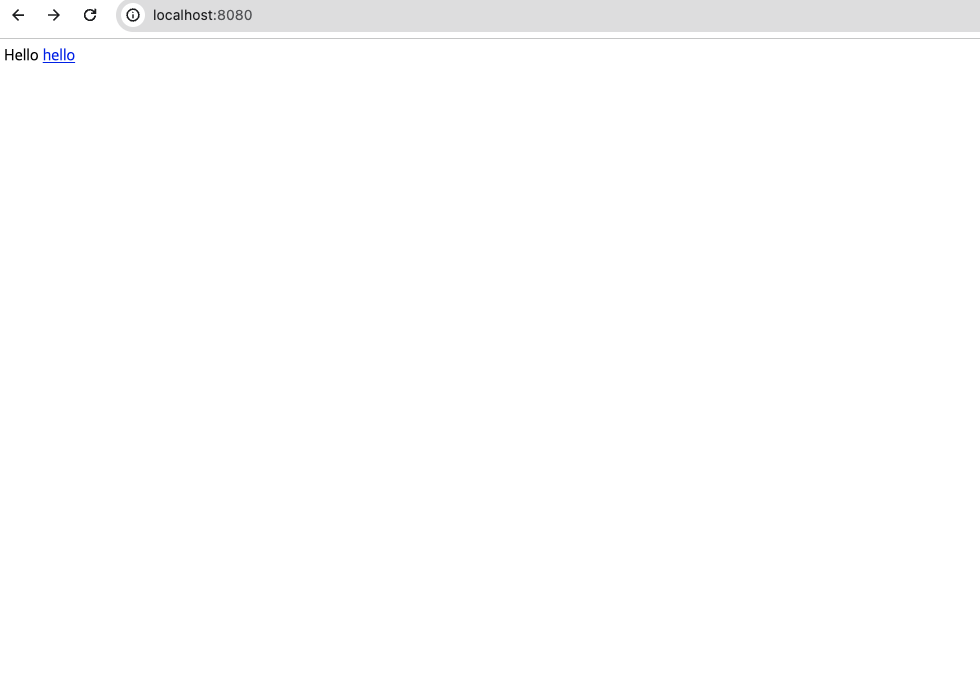
여기까지는 정적 페이지.
이 파일을 웹서버가 그대로 웹 브라우저에 넘겨주는 형식이다.
thymeleaf 템플릿 엔진
- 공식 사이트 : https://www.thymeleaf.org/
- 스프링 공식 튜터리얼 : https://spring.io/guides/gs/serving-web-content
- 스프링부트 메뉴얼: https://docs.spring.io/spring-boot/docs/2.3.1.RELEASE/reference/html/ spring-boot-features.html#boot-features-spring-mvc-template-engines
Controller
: 웹 어플리케이션에서 첫 번쨰 진입점.
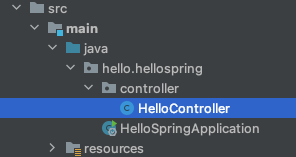
controller 패키지를 생성 후 Controller 클래스를 생성한다.
@Controller //컨트롤러 어노테이션 필수
public class HelloController {

    @GetMapping("hello") //웹 어플리케이션에서 "hello"를 치고 들어오면 아래 메소드 실행
    public String hello(Model model){
        model.addAttribute("data","hello!!"); //attribute key,value
        return "hello"; //resoures/templetes 에서 찾아 랜더링.
    }
}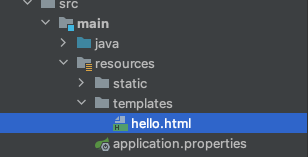
templates 폴더에 hello.html을 생성 후 아래 코드를 넣어준다.
<!DOCTYPE HTML>
<html xmlns:th="http://www.thymeleaf.org"> <!--tymeleaf 문법을 사용할 수 있게 해줌-->
<head>
    <title>Hello</title>
    <meta http-equiv="Content-Type" content="text/html; charset=UTF-8" />
</head>
<body>
<p th:text="'안녕하세요. ' + ${data}" >안녕하세요. 손님</p> <!-- ${data} 부분이 모델에서 data의 value값으로 치환됨-->
</body>
</html>
http://localhost:8080/hello 실행
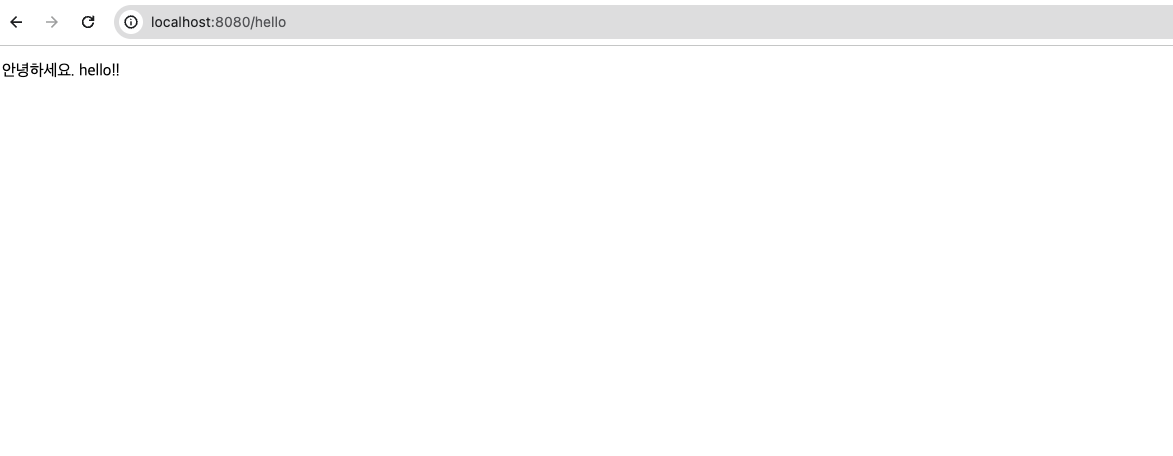
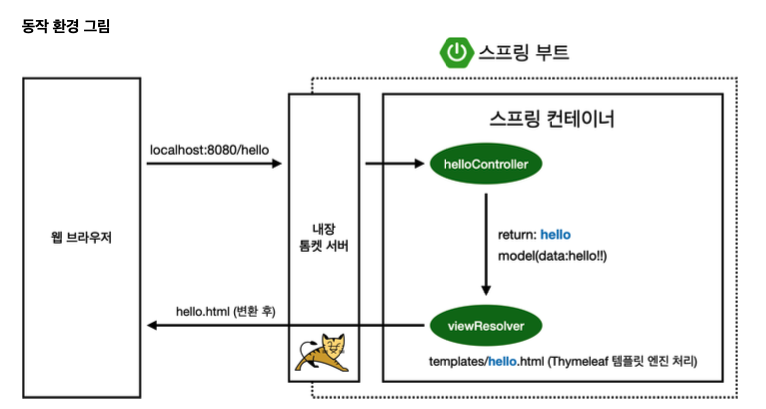
- 컨트롤러에서 리턴 값으로 문자를 반환하면 뷰 리졸버(
viewResolver)가 화면을 찾아서 처리한다.
- 스프링 부트 템플릿엔진 기본 viewName 매핑
- resources:templates/ +{ViewName}+ .html
빌드하고 실행하기
** intelliJ 의 스프링부트는 끄고 작업한다.
- 터미널 실행
- 해당 프로젝트가 있는 폴더로 이동
$ cd Documents/spring_study/hello-spring $ ./gradlew build빌드 (실행이 되지 않을 때는 clean build)- libs 폴더 이동
$ cd build/libs $ java -jar hello-spring-0.0.1-SNAPSHOT.jar실행
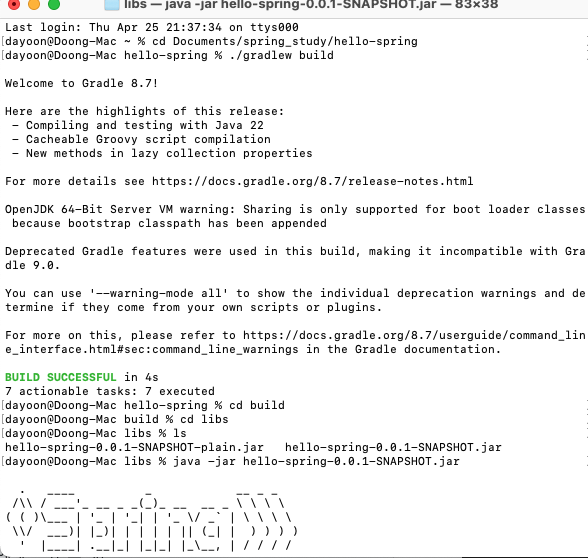
터미널에서 빌드 실행도 성공~!
서버 배포할 때는 jar 파일만 복사해서 서버에 넣어주고 java -jar 을 실행하면 서버에서도 스프링이 동작하게 된다.

복습 복습 복습