NestJS 폴더 구조
이번에는 TypeScript 파일들에 대해서 알아보자
src 폴더의 main.ts 파일을 열어주면
처음에 실행되는 부분이 main.ts 파일이다.
main.ts는controller,module,service들이 최종적으로 처리되는 부분이다.
// main.ts

import { NestFactory } from '@nestjs/core';
import { AppModule } from './app.module';

async function bootstrap() {
  // AppModule 은 app.module.ts 파일
  const app = await NestFactory.create(AppModule);
  await app.listen(3000);
}
bootstrap();- bootstrap : 함수 이름이기에 bootstrap 외에 원하는 이름으로 작성 가능하다.
- app.listen(3000) : 3000번 포트가 실행되서 24시간 동안 listening 하고 있을것으로
기존에 실행 중이던 3000번 포트가 존재한다면 종료시켜줘야 한다. - .create(AppModule) : AppModule 안에 앞으로 만들게 되는 모든 내용들(API 등)이 포함되어 있다.
-
app.controller.spec.ts: test 관련 코드앞으로 만드는 API들은 아래의 3개 파일이 하나의 세트로 움직이게 된다.
-
app.controller.ts -
app.module.ts -
app.service.ts
-
app.module.ts
src 폴더의 app.module.ts 파일을 열어주세요.
// app.module.ts

import { Module } from '@nestjs/common';
import { AppController } from './app.controller';
import { AppService } from './app.service';

@Module({
  imports: [],
  controllers: [AppController], // new AppController() 부분이다.
  providers: [AppService], // new AppController(AppService) 로 의존성 주입
})
export class AppModule {}
app.module.ts 파일에서 app.controller.ts 와 app.service.ts 가 합쳐지게 된다.
app.controller.ts 파일은 controllers 에 해당되며 app.service.ts 파일은 providers 에 해당한다.
따라서 이 module 을 main.ts 파일에 import 해준다.
또한, NestJS에서는 자동으로 의존성주입을 해주게되는데 module 부분이 의존성주입을 해주는 부분이다.
정확히는 Module 에서 provider 에서 진행된다. 위에서는 AppService를 의존성 주입이 되어있다.
app.controller.ts
src 폴더의 app.controller.ts 파일을 열어준다.
// app.controller.ts

import { Controller, Get } from '@nestjs/common';
import { AppService } from './app.service';

@Controller()
export class AppController {
  constructor(private readonly appService: AppService) {} // 생성자

  @Get() // Get안에 엔드포인트를 적어줌
  getHello(): string {
    return this.appService.getHello();
  }
}
의존성주입을 사용하여 appService 를 불러오고 있으며, 제어가 역전된것을 확인 할 수 있다.
@Controller():데코레이터로 함수의 정의 전에 호출되며 기존 객체에 새로운 기능을 추가할 수 있도록 하는 디자인 패턴이다.@Get(): Get 요청이 실행되는 부분으로, ( ) 안은 엔드포인트로 dafault 값은‘/’이다.
아래와 같이 @Get(’/products/buy’) 로 endpoint를 추가해서 파일을 실행시킨다.
현재 폴더 위치가 08-01-nestjs 폴더가 아니라면 08-01-nestjs 폴더로 이동 시켜 준 뒤,
yarn start:dev 로 실행한다.
// app.controller.ts

import { Controller, Get } from '@nestjs/common';
import { AppService } from './app.service';

@Controller()
export class AppController {
  constructor(private readonly appService: AppService) {}

  @Get('/products/buy') // 수정된 부분
  getHello(): string {
    return this.appService.getHello();
  }
🚨 import 에서 eslintrc 에러가 나타난다면 eslintrc가
tsconfig.json파일 위치를 찾지 못해서 나타나는 에러이므로.eslintrc.js파일을 아래와 같이 수정해야 한다.
🚨 그럼에도 에러가 계속 발생된다면 파일을 껐다가 다시 켜준다
// .eslintrc.js

module.exports = {
  parser: '@typescript-eslint/parser',
  parserOptions: {
    project: './tsconfig.json',
		tsconfigRootDir: __dirname,
    sourceType: 'module',
  },
  plugins: ['@typescript-eslint/eslint-plugin'],
  extends: [
    'plugin:@typescript-eslint/recommended',
    'plugin:prettier/recommended',
  ],
  root: true,
  env: {
    node: true,
    jest: true,
  },
  ignorePatterns: ['.eslintrc.js'],
  include: ['.eslintrc.js'],
  rules: {
    '@typescript-eslint/interface-name-prefix': 'off',
    '@typescript-eslint/explicit-function-return-type': 'off',
    '@typescript-eslint/explicit-module-boundary-types': 'off',
    '@typescript-eslint/no-explicit-any': 'off',
  },
};
tsconfigRootDir: __dirname👉🏻 tsconfig root 폴더 주소를 현재 실행중인 폴더 위치임을 알려주는 것
🚨 already in use :::3000 Error 가 발생하게된다면 3000번 포트가 이미 열려져있는 상태라서 발생되는 오류이기에 기존에 열려있던 3000번 포트를 닫아주신 후 다시 실행하면 된다.
// 실행중인 포트 확인
$ lsof -i :포트번호

// 실행중인 포트 죽이기
$ kill -9 PID번호
아래와 같이 나타나게 된다면 성공적으로 실행된 것이다.

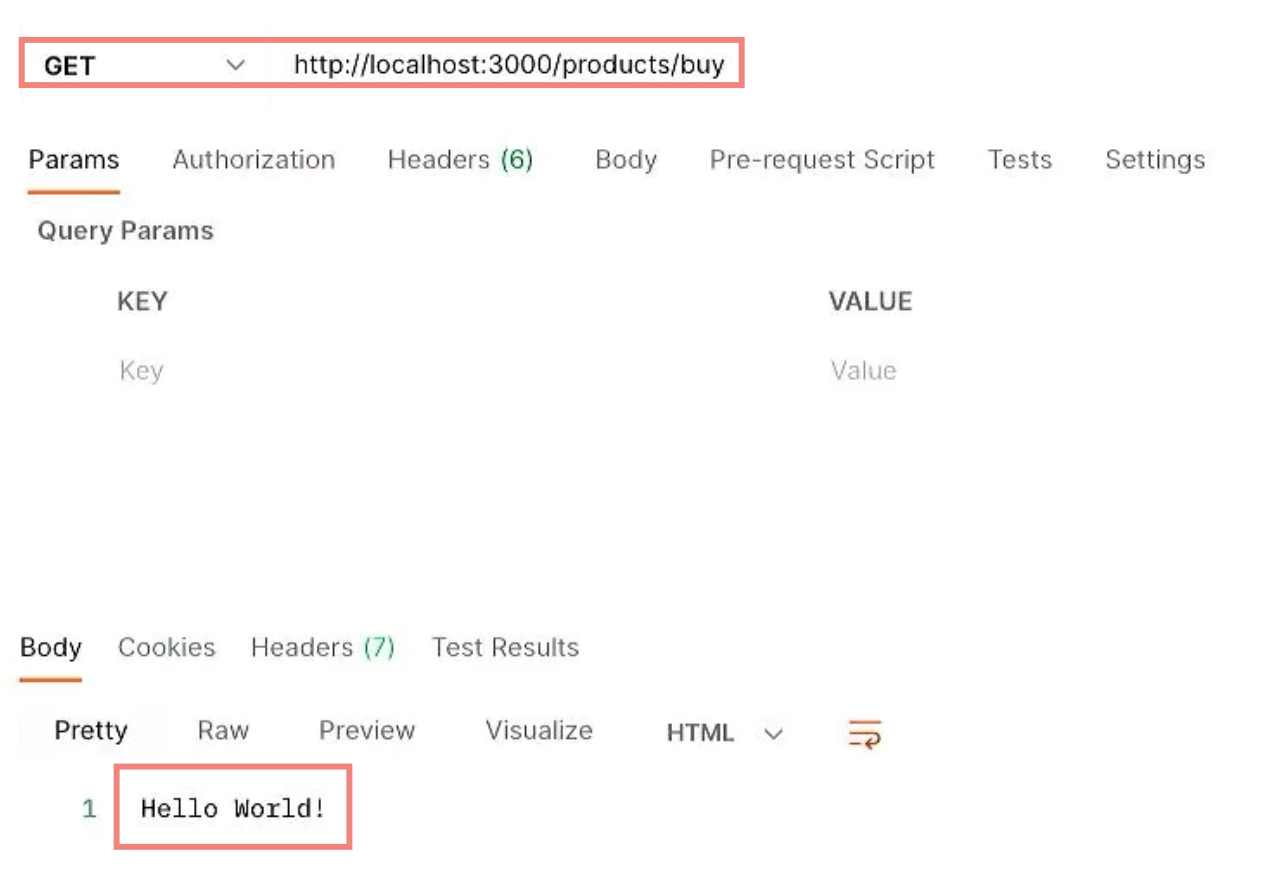
포스트맨을 실행시켜서 요청 해보자
GET을 선택하고 localhost:3000/products/buy 을 작성한 후, Send 로 요청하면 Hello World! 가 나온다.