- 프로덕션 준비 기능이란?
- 액츄에이터 시작
- 엔드포인트 설정
- 다양한 엔드포인트
- 헬스 정보
- 애플리케이션 정보
- 로거
- HTTP 요청 응답 기록
- 액츄에이터와 보안
1. 프로덕션 준비 기능이란?
- 운영 환경에서 서비스할 때 필요한 이런 기능들을 프로덕션 준비 기능이라 한다.
- 프로덕션을 운영에 배포할 때 준비해야 하는 비 기능적 요소들을 뜻한다.
- 지표(metric), 추적(trace), 감사(auditing)
- 모니터링
좀 더 구체적으로 보면 애플리케이션이 현재 살아있는지, 로그 정보는 정상 설정 되었는지, 커넥션 풀은 얼마나 사용되고 있는지 등을 확인할 수 있어야 한다.
- 스프링 부트가 제공하는 액추에이터는 이런 프로덕션 준비 기능을 매우 편리하게 사용할 수 있는 다양한 편의 기능들을 제공한다.
- 마이크로미터, 프로메테우스, 그라파나 같은 최근 유행하는 모니터링 시스템과 매우 쉽게 연동할 수 있는 기능도 제공한다.
2. 액츄에이터 시작
- springboot-actuator 프로젝트를 새로 생성하였습니다.
- build.gradle에 spring-boot-starter-actuator를 추가했습니다.
localhost:8080/actuator 실행
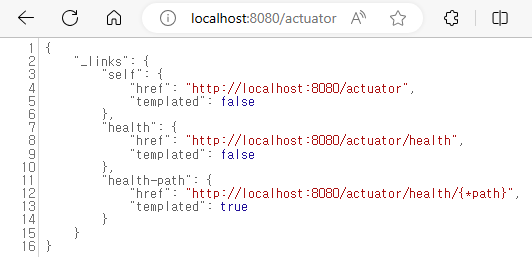
- 액츄에이터는
/actuator경로를 통해서 기능을 제공
localhost:8080/actuator/health 실행
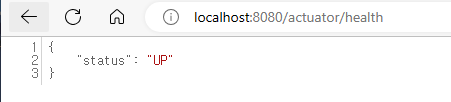
- 이 기능은 현재 서버가 잘 동작하고 있는지 애플리케이션의 헬스 상태를 나타낸다.
액츄에이터는 헬스 상태 뿐 아니라 수 많은 기능을 제공하는데, 이런 기능이 웹 환경에 보이도록 노출해야 한다.
application.yml - 추가
management:
  endpoints:
    web:
      exposure:
        include: "*"
localhost:8080/actuator 실행
{
"_links": {
"self": {
"href": "http://localhost:8080/actuator",
"templated": false
},
"beans": {
"href": "http://localhost:8080/actuator/beans",
"templated": false
},
"caches-cache": {
"href": "http://localhost:8080/actuator/caches/{cache}",
"templated": true
},
"caches": {
"href": "http://localhost:8080/actuator/caches",
"templated": false
},
"health": {
"href": "http://localhost:8080/actuator/health",
"templated": false
},
"health-path": {
"href": "http://localhost:8080/actuator/health/{*path}",
"templated": true
},
"info": {
"href": "http://localhost:8080/actuator/info",
"templated": false
},
"conditions": {
"href": "http://localhost:8080/actuator/conditions",
"templated": false
},
"configprops": {
"href": "http://localhost:8080/actuator/configprops",
"templated": false
},
"configprops-prefix": {
"href": "http://localhost:8080/actuator/configprops/{prefix}",
"templated": true
},
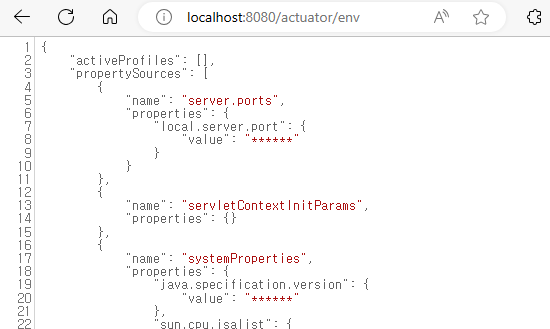
"env": {
"href": "http://localhost:8080/actuator/env",
"templated": false
},
"env-toMatch": {
"href": "http://localhost:8080/actuator/env/{toMatch}",
"templated": true
},
"loggers": {
"href": "http://localhost:8080/actuator/loggers",
"templated": false
},
"loggers-name": {
"href": "http://localhost:8080/actuator/loggers/{name}",
"templated": true
},
"heapdump": {
"href": "http://localhost:8080/actuator/heapdump",
"templated": false
},
"threaddump": {
"href": "http://localhost:8080/actuator/threaddump",
"templated": false
},
"metrics-requiredMetricName": {
"href": "http://localhost:8080/actuator/metrics/{requiredMetricName}",
"templated": true
},
"metrics": {
"href": "http://localhost:8080/actuator/metrics",
"templated": false
},
"scheduledtasks": {
"href": "http://localhost:8080/actuator/scheduledtasks",
"templated": false
},
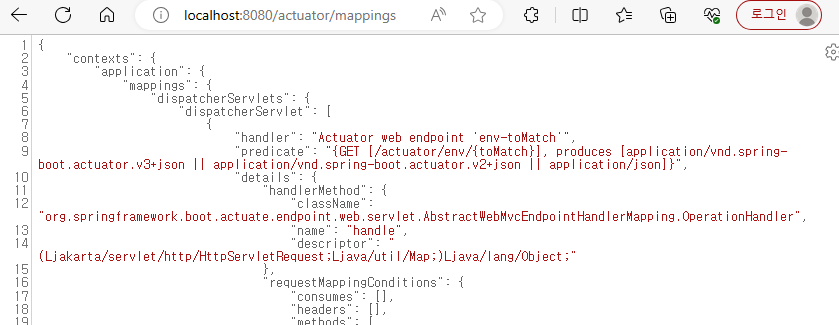
"mappings": {
"href": "http://localhost:8080/actuator/mappings",
"templated": false
}
}
}- 각각의 엔드포인트는
/actuator/{엔드포인트명}과 같은 형식으로 접근할 수 있다.
3. 엔드포인트 설정
엔드포인트를 사용하려면 다음 2가지 과정이 모두 필요하다.
1. 엔드포인트 활성화
2. 엔드포인트 노출
데 엔드포인트는 대부분 기본으로 활성화 되어 있다.( shutdown 제외) 노출이 되어 있지 않을 뿐이다. 따라서 어떤 엔드포인트를 노출할지 선택하면 된다. 참고로 HTTP와 JMX를 선택할 수 있는데, 보통 JMX는 잘 사용하지 않으므로 HTTP에 어떤 엔드포인트를 노출할지 선택하면 된다.
-
위에서 application.yml를 통해 웹에 모든 엔드포인트를 노출 했다.
-
엔드포인트 활성화
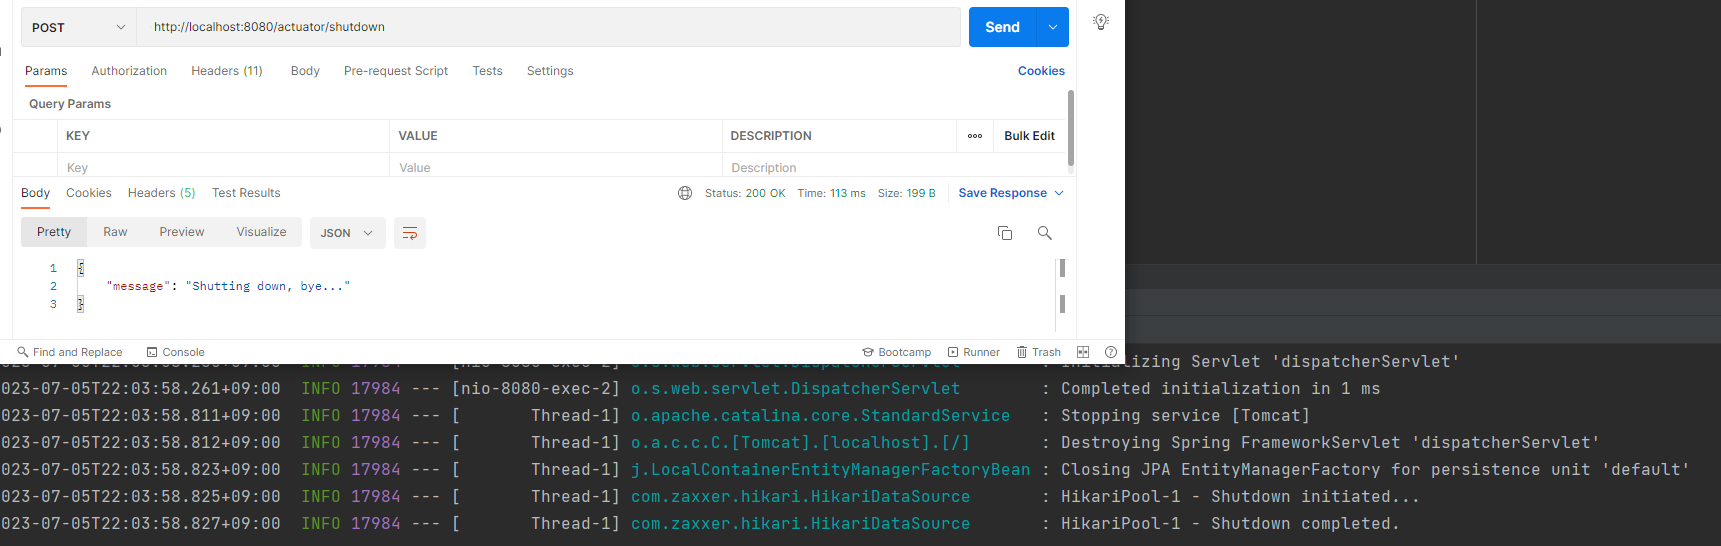
application.yml - shutdown 엔드포인트 활성화
management:
  endpoint:
    shutdown:
      enabled: true
  endpoints:
    web:
      exposure:
        include: "*"
Postman Post로 localhost:8080/actuator/shutdown 실행
4. 다양한 엔드포인트
엔드포인트 목록
beans: 스프링 컨테이너에 등록된 스프링 빈을 보여준다.conditions:condition을 통해서 빈을 등록할 때 평가 조건과 일치하거나 일치하지 않는 이유를 표시한다.configprops:@ConfigurationProperties를 보여준다.env:Environment정보를 보여준다.health: 애플리케이션 헬스 정보를 보여준다.httpexchanges: HTTP 호출 응답 정보를 보여준다.HttpExchangeRepository를 구현한 빈을 별도로 등록해야 한다.info: 애플리케이션 정보를 보여준다.loggers: 애플리케이션 로거 설정을 보여주고 변경도 할 수 있다.metrics: 애플리케이션의 메트릭 정보를 보여준다.mappings:@RequestMapping정보를 보여준다.threaddump: 쓰레드 덤프를 실행해서 보여준다.shutdown: 애플리케이션을 종료한다. 이 기능은 기본으로 비활성화 되어 있다.
공식 메뉴얼
https://docs.spring.io/spring-boot/docs/current/reference/html/actuator.html#actuator.endpoints
저번 시간에 배웠던Environment
mappings 현재는 actuator설정 밖에 없어서 해당 정보만 나오고있다.
등등등 한번 씩 확인해보면 좋을 것 같다.
5. 헬스 정보
- 헬스 정보를 사용하면 애플리케이션에 문제가 발생했을 때 문제를 빠르게 인지할 수 있다.
- 헬스 정보는 단순히 애플리케이션이 요청에 응답을 할 수 있는지 판단하는 것을 넘어서 애플리케이션이 사용하는 데이터베이스가 응답하는지, 디스크 사용량에는 문제가 없는지 같은 다양한 정보들을 포함해서 만들어진다.
더 자세히 보려면 옵션을 지정하면 된다.
management:
  endpoint:
    shutdown:
      enabled: true
    health:
      show-details: always
  endpoints:
    web:
      exposure:
        include: "*"
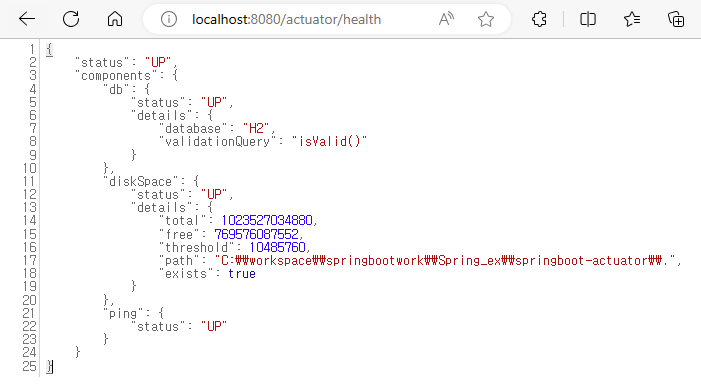
- 각각의 항목이 아주 자세하게 노출되는 것을 확인할 수 있다.
- 헬스 컴포넌트 중에 하나라도 문제가 있으면 전체 상태는
DOWN이 된다.
자세한 헬스 기본 지원 기능은 다음 공식 메뉴얼
https://docs.spring.io/spring-boot/docs/current/reference/html/actuator.html#actuator.endpoints.health.auto-configured-health-indicators
6. 애플리케이션 정보
info엔드포인트는 애플리케이션의 기본 정보를 노출한다.
java: 자바 런타임 정보os: OS 정보env:Environment에서info.로 시작하는 정보build: 빌드 정보,META-INF/build--info.properties파일이 필요하다.git:git정보,git.properties파일이 필요하다.
application.yml - 내용 추가
management:
  info:
    java:
      enabled: true
    os:
      enabled: true
  endpoint:
    shutdown:
      enabled: true
    health:
      show-details: always
  endpoints:
    web:
      exposure:
        include: "*"
localhost:8080/actuator/info 실행

env 사용해보기
application.yml - 내용 추가
management:
  info:
    env:
      enabled: true
    java:
      enabled: true
    os:
      enabled: true
  endpoint:
    shutdown:
      enabled: true
    health:
      show-details: always
  endpoints:
    web:
      exposure:
        include: "*"

info:
  app:
    name: hello-actuator
    company: kyh
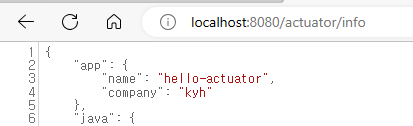
application.yml에서 info 로 시작하는 부분의 정보가 노출되는 것을 확인할 수 있다.
7. 로거
loggers엔드포인트를 사용하면 로깅과 관련된 정보를 확인하고, 또 실시간으로 변경할 수도 있다. 코드를 통해서 알아보자.
LogController
package hello.controller;

import lombok.extern.slf4j.Slf4j;
import org.springframework.web.bind.annotation.GetMapping;
import org.springframework.web.bind.annotation.RestController;

@Slf4j
@RestController
public class LogController {

    @GetMapping("/log")
    public String log() {
        log.trace("trace log");
        log.debug("debug log");
        log.info("info log");
        log.warn("warn log");
        log.error("error log");
        return "ok";
    }

}
application.yml 설정
logging:
  level:
hello.controller: debughello.controller패키지와 그 하위는debug레벨을 출력하도록 했다.
localhost:8080/log

DEBUG레벨까지 출력되는 것을 확인할 수 있다.
localhost:8080/actuator/loggers
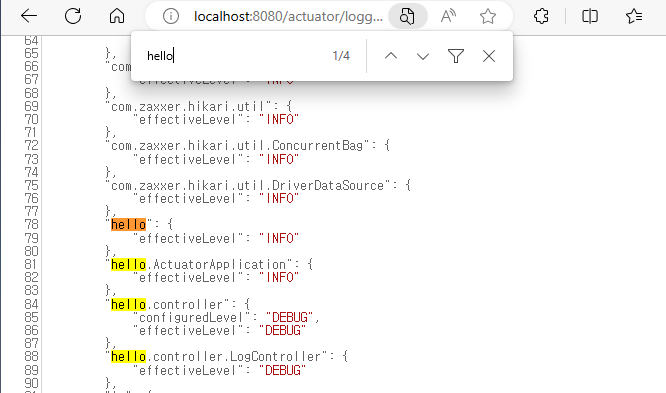
- 로그를 별도로 설정하지 않으면 스프링 부트는 기본으로
INFO를 사용한다. 실행 결과를 보면ROOT의configuredLevel가INFO인 것을 확인할 수 있다. 따라서 그 하위도 모두INFO레벨이 적용된다. - 앞서 우리는
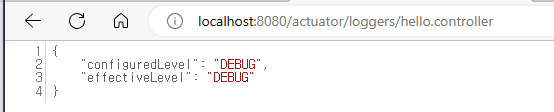
hello.controller는DEBUG로 설정했다. 그래서 해당 부분에서configuredLevel이DEBUG로 설정된 것을 확인할 수 있다. 그리고 그 하위도DEBUG레벨이 적용된다.
자세히 확인하기
실시간 로그 레벨 변경
- 서비스 운영중에 문제가 있어서 급하게
DEBUG나TRACE로그를 남겨서 확인해야 확인하고 싶다면 어떻게 해야할까? 일반적으로는 로깅 설정을 변경하고, 서버를 다시 시작해야 한다. loggers엔드포인트를 사용하면 애플리케이션을 다시 시작하지 않고, 실시간으로 로그 레벨을 변경할 수 있다.
POST로 전달하는 내용 JSON
{
	 "configuredLevel": "TRACE"
}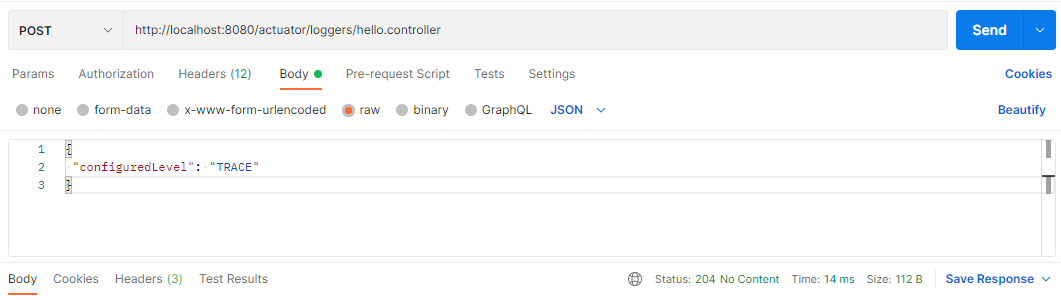
- 요청에 성공하면 204 응답이 온다.(별도의 응답 메시지는 없다.)
localhost:8080/actuator/loggers/hello.controller 실행
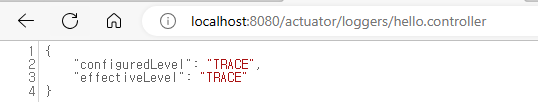
Debug에서TRACE로 변환 되었다.

- 실행 결과
TRACE레벨까지 출력된다.
8. HTTP 요청 응답 기록
- HTTP 요청과 응답의 과거 기록을 확인하고 싶다면
httpexchanges엔드포인트를 사용하면 된다. HttpExchangeRepository인터페이스의 구현체를 빈으로 등록하면httpexchanges엔드포인트를 사용할 수 있다.
InMemoryHttpExchangeRepository 추가
package hello;

import org.springframework.boot.SpringApplication;
import org.springframework.boot.actuate.web.exchanges.InMemoryHttpExchangeRepository;
import org.springframework.boot.autoconfigure.SpringBootApplication;
import org.springframework.context.annotation.Bean;

@SpringBootApplication
public class ActuatorApplication {

    public static void main(String[] args) {

        SpringApplication.run(ActuatorApplication.class, args);
    }

    @Bean
    public InMemoryHttpExchangeRepository httpExchangeRepository() {
        return new InMemoryHttpExchangeRepository();
    }
}
localhost:8080/actuator/httpexchanges
(localohst:8080/log를 한번 요청하고 했다.)
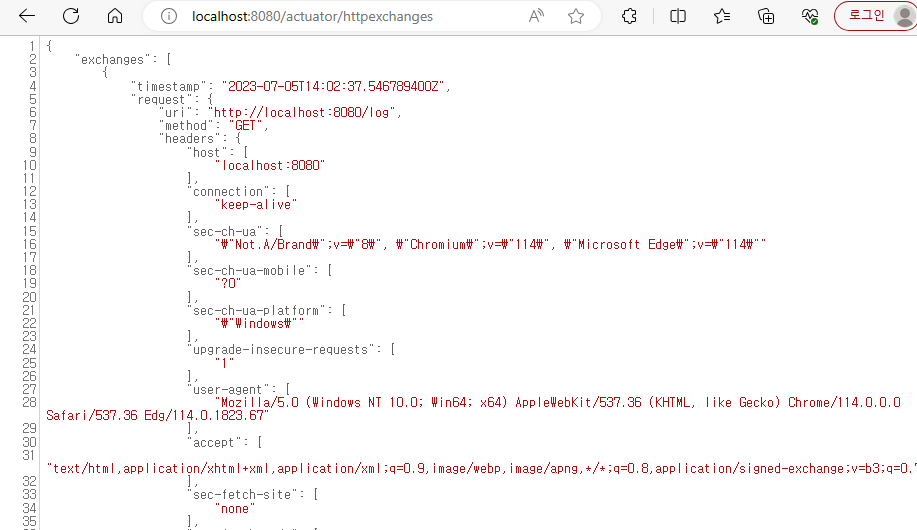
- 이 구현체는 최대 100개의 HTTP 요청을 제공한다. 최대 요청이 넘어가면 과거 요청을 삭제한다.
setCapacity()로 최대 요청수를 변경할 수 있다.
서비스에서는 모니터링 툴이나 핀포인트, Zipkin 같은 다른 기술을 사용하는 것이 좋다.
9. 액츄에이터와 보안
- 액츄에이터가 제공하는 기능들은 우리 애플리케이션의 내부 정보를 너무 많이 노출한다. 그래서 외부 인터넷 망이 공개된 곳에 액츄에이터의 엔드포인트를 공개하는 것은 보안상 좋은 방안이 아니
- 액츄에이터의 엔드포인트들은 외부 인터넷에서 접근이 불가능하게 막고, 내부에서만 접근 가능한 내부망을 사용하는 것이 안전하다.
액츄에이터 URL 경로에 인증 설정
포트를 분리하는 것이 어렵고 어쩔 수 없이 외부 인터넷 망을 통해서 접근해야 한다면 /actuator경로에 서블릿 필터, 스프링 인터셉터 또는 스프링 시큐티리를 통해서 인증된 사용자만 접근 가능하도록 추가 개발이 필요하다.
엔드포인트 경로 변경
application.yml
  endpoint:
    web:
      base-path: "/manage"