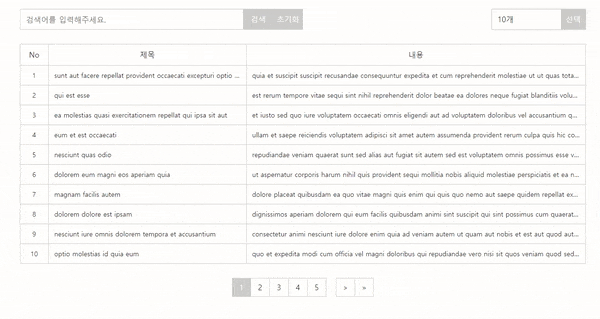
⚙️ ListPage 구조 및 결과
const BASE_URL = 'https://jsonplaceholder.typicode.com'
const OPTION_LIST = [
  {
    key: 10,
    value: '10개'
  },
  {
    key: 20,
    value: '20개'
  },
  {
    key: 50,
    value: '50개'
  },
]

function ListPage() {
  const data = useAxios(BASE_URL,'posts')
  const [renderList, setViewData, setCurrentPage, currentPage, totalPage, firstPage, lastPage, searchValue, setSearchValue,  searchEvent, searchInit, slicedList] = useListPage(data)

  return (
    <div className='App'>
      <div className='flex-row'>
        <SearchBar
          searchValue={searchValue}
          setSearchValue={setSearchValue}
          searchEvent={searchEvent}
          searchInit={searchInit}
        />
        <Select
          optionList={OPTION_LIST}
          setViewData={setViewData}
        />
      </div>
      <Table data={slicedList(renderList)}/>
      <Pagination
        setCurrentPage={setCurrentPage}
        currentPage={currentPage}
        totalPage={totalPage}
        firstPage={firstPage}
        lastPage={lastPage}
      />
    </div>
  );
}
✅ useAxios 커스텀 훅
useAxios custom hooks 부터 살펴보자면 매개변수로 api의 baseUrl, api의 Path Parameter를 type이라 정의하여 받아온다. data는 response data 값을 set 해주고 return한 data 값을 ListPage 에서 useAxios 커스텀 훅을 통하여 받아온다.
function useAxios(baseUrl, initialType) {
  const [data, setData] = useState(null)

  const getData = useCallback(async (type) => {
    const response = await axios.get(`${baseUrl}/${type}`)
    setData(response.data);
  },[baseUrl])

  useEffect(() => {
    getData(initialType).catch((err) => console.log(err));
  },[getData, initialType])

  return data;
}
✅ useListPaige 커스텀 훅
function useListPage(data) {

  const [renderList, setRenderList] = useState([]);
  const [searchValue, setSearchValue] = useState('');
  const [currentPage, setCurrentPage] = useState(1);
  const [viewData, setViewData] = useState(10);
  const [viewPage] = useState(5);
  const totalPage = Math.ceil(renderList?.length / viewData);
  const pageGroup = Math.ceil(currentPage / viewPage);
  const lastPage = pageGroup * viewPage > totalPage ? totalPage : pageGroup * viewPage;
  const firstPage = lastPage - (viewPage - 1) <= 0 ? 1 : lastPage - (viewPage - 1);

  useEffect(() => {
    setRenderList(data)
  },[data])

  const slicedList = (data) => {
    const startIndex = (currentPage - 1) * viewData
    const endIndex = startIndex + viewData
    return data?.slice(startIndex, endIndex)
  }


  const searchEvent = () => {
    const search = [...data]?.filter(item => item.title.toUpperCase().includes(searchValue.toUpperCase()) || item.body.toUpperCase().includes(searchValue.toUpperCase()))
    if(searchValue === '') {
      setRenderList(data)
    } else {
      setRenderList(search)
    }
  }

  const searchInit = () => {
    setSearchValue('')
    setRenderList(data);
  }


  return [renderList, setViewData, setCurrentPage, currentPage,  totalPage, firstPage, lastPage, searchValue, setSearchValue,  searchEvent, searchInit, slicedList];
}-
useListPage 훅은 data 를 매개변수로 받고 기존 data 를 수정하면 안되기 때문에
renderList에 useEffect 을 통하여 화면에 첫 렌더링 될때 data 를 set 하여준다. -
나중에 input 에 적용할 value 를 저장할 값
const [searchValue, setSearchValue] = useState(''); -
현재 페이지는
const [currentPage, setCurrentPage] = useState(1);을 통하여 1페이지로 설정한다. -
화면에 표시할 데이터 수는
const [viewData, setViewData] = useState(10);을 통하여 10개가 보이게 초기 셋팅한다. -
화면에 표시할 페이지 개수는
const [viewPage] = useState(5);을 통하여 5개로 제한한다. -
전체 페이지 개수는
const totalPage = Math.ceil(renderList?.length / viewData);data 의 총 개수 / 화면에 표시할 데이터수로 나누고Math.ceil올림 함수를 적용해준다.
ex) 76 / 10 = 7.6 <-- 7페이지를 넘어가고 8보다 작지만 8페이지에도 표시되어야 하므로Math.ceil이용 -
현재 페이지가 몇번째 페이지 그룹에 속해있는지
const pageGroup = Math.ceil(currentPage / viewPage);설정 -
현재 보이는 화면에 표시하는 페이지의 마지막 번호
const lastPage = pageGroup * viewPage > totalPage ? totalPage : pageGroup * viewPage; -
현재 보이는 화면에 표시하는 페이지의 첫번째 번호
const firstPage = lastPage - (viewPage - 1) <= 0 ? 1 : lastPage - (viewPage - 1);
  const slicedList = (data) => {
    const startIndex = (currentPage - 1) * viewData // 현재 페이지 - 1 * 화면에 표시할 데이터 수  ex) (2페이지 - 1) * 10 = 10
    const endIndex = startIndex + viewData // startIndex 에 + 화면에 표시할 데이터 수 ex) 10 + 10 = 20
    return data?.slice(startIndex, endIndex) //data 를 slice 함수로  시작 인덱스 , 종료 인덱스를 받아 return 한다.
  }
  const searchEvent = () => {
      //받아온 data 를 스프레드 연산자를 통하여 배열을 복사하고 data 의 title , body 가 searchValue 의 값이 포함되있으면 필터해주어 search 변수에 담아줌, (toUpperCase 를 사용하여 대문자도 구분)
    const search = [...data]?.filter(item => item.title.toUpperCase().includes(searchValue.toUpperCase()) || item.body.toUpperCase().includes(searchValue.toUpperCase()))
      // 만약 searchValue 의 값이 빈 스트링이면 data 를 다시 set 해줌으로 전체검색이 일어나고 아닐땐 search 에 담긴 data 를 set 해준다.
    if(searchValue === '') {
      setRenderList(data)
    } else {
      setRenderList(search)
    }
  }

  //초기화 함수
    const searchInit = () => {
    setSearchValue('') // value 값을 초기화
    setRenderList(data); // 다시 data를 set 해줌
  }
✅ Table Components
function Table({data}) {
  return (
    <table className={styles.table}>
      <thead>
      <tr>
        <th>No</th>
        <th>제목</th>
        <th>내용</th>
      </tr>
      </thead>
      <tbody>
      {data?.length === 0 ? <tr><td colSpan="3">데이터가 없습니다.</td></tr> : data?.map((post) => <TableItem key={post.id} id={post.id} title={post.title} body={post.body} />)}
      </tbody>
    </table>
  );
}
props 로 data 를 전달받아 data 가 0개일땐 데이터 없음을 출력하고, data 가 있다면, map 을 통하여 TableItem 에 props 로 전달
function TableItem({id, title, body}) {
  return (
    <>
      <tr>
        <td>{id}</td>
        <td>{title}</td>
        <td>{body}</td>
      </tr>
    </>
  );
}
TableItem은 props로 전달받은 값을 출력만 해줌.
✅ usePagination 커스텀 훅
// usePagination 에 매개변수로 setCurrentPage, totalPage, firstPage, lastPage 나열해준다.
function usePagination(setCurrentPage, totalPage, firstPage, lastPage) {

  const pageNumbers = []; //  ``const pageNumbers = [];`` 로 페이지에 출력될 페이지 넘버를 담을 빈 배열을 만들어주기

  for (let i = firstPage; i <= lastPage; i++) {  // 초기값은 첫번째 페이지이고, 마지막페이지까지 반복시켜서 빈 배열에 담아준다.
    pageNumbers.push(i)
  }

  // 현재 페이지를 set 해주는 setCurrentPage 로 페이지 그룹을 이동하기 위해 firstPage 에서 - 1 을 해줌
  // ex) 5개씩 이루어지는 페이지그룹에 7번 페이지에 위치해있다면 첫 페이지는 6페이지, 6페이지 - 1 은 5, 버튼 클릭시 1~5 페이지가 노출됨
  const prev = () => setCurrentPage(firstPage - 1);

  // 현재 페이지를 set 해주는 setCurrentPage 로 페이지 그룹을 이동하기 위해 lastPage 에서 + 1 을 해줌
  // ex) 5개씩 이루어지는 페이지그룹에 4번 페이지에 위치해있다면 마지막 페이지는 5 페이지, 5페이지 + 1 은 6, 버튼 클릭시 6 ~ 10 페이지가 노출됨
  const next = () => setCurrentPage(lastPage + 1);

  // 현재 페이지를 1페이지로 보내주는 버튼
  const first = () => setCurrentPage(1)

  // 현재 페이지를 마지막 페이지로 보내주는 버튼, ex) 전체 페이지 개수가 10개면 마지막인 10으로 이동
  const last = () => setCurrentPage(totalPage);

  // pageNum 을 받아 현재 페이지에  pageNum 를 넘겨줌
  const paginate = (pageNum) => setCurrentPage(pageNum)

  // 검색 혹은 초기화, 리스트 개수 변경 시 1번 페이지로 set 해주는 함수
  const initPageNum = useCallback(() => {
    setCurrentPage(1)
  },[setCurrentPage])

  // totalPage 감지

  useEffect(() => {
    initPageNum()
  },[initPageNum, totalPage])

  return { pageNumbers, prev, next, first, last, paginate }
}
✅ Pagination Components
function Pagination({setCurrentPage,currentPage, totalPage, firstPage, lastPage}) {
const {pageNumbers, prev, next, first, last, paginate} = usePagination(setCurrentPage, totalPage, firstPage, lastPage)
return (
<div>
<div className={styles.pagination}>
{firstPage === 1 ? null : <button className={styles.first} onClick={first}>«</button>}
{firstPage === 1 ? null : <button className={styles.prev} onClick={prev}><</button>}
{pageNumbers.map((num) =>
<div className={styles.list} key={num} aria-current={currentPage === num ? 'active' : null}>
<button className={styles.btn} onClick={() => paginate(num)}>{num}</button>
</div>
)}
{lastPage === totalPage ? null : <button className={styles.next} onClick={next}>></button>}
{lastPage === totalPage ? null : <button className={styles.last} onClick={last}>»</button>}
</div>
</div>
);
}-
props 에 받아오는 값들을 usePagination 훅에 인자로 전달한다.
-
기능 및 페이지 번호 매김은 usePagination 에서 return 시킨 함수들을 이용
-
1번 페이지로 이동하는 버튼 및, 이전 버튼은 firstPage 가 1 이면 보이지 않게 설정.
-
aria-current={currentPage === num ? 'active' : null}현재 페이지가 pageNumbers 에 num 과 같다면 class 추가 -
마지막 페이지가 전체페이지의 값과 같다면 다음, 마지막 페이지로 이동하는 버튼은 보이지 않게 설정
✅ useSelect 커스텀 훅
function useSelect(initialValue) {
  // initialValue 를 매개변수로 받아 defaultText 설정
  const defaultText = initialValue
  // 클릭시 토글 역할을 할 isShowOptions 설정
  const [isShowOptions, setIsShowOptions] = useState(false);
  // 선택된 아이템을 넣어줄 배열을 초기값으로 설정
  const [selectedItem, setSelectedItem] = useState([]);

  // 클릭시 토글 역할 함수
  const isShowSelect = () => {
    setIsShowOptions(prev => !prev)
  }

  // 클릭시 토글 역할 및 선택된 아이템을 set 해줄 함수
  const value = (option) => {
    setSelectedItem([option])
    setIsShowOptions(prev => !prev);
  }
  return {selectedItem, isShowOptions, defaultText, isShowSelect, value}
}
✅ Select Components
function Select({optionList,setViewData}) {
  const {selectedItem, isShowOptions, defaultText, isShowSelect, value} = useSelect(optionList[0].value)
  return (
    <div className={styles['select-menu']}>
      <button className={styles['select-btn']} aria-controls='custom-select' aria-haspopup="true"
              aria-expanded="true" onClick={isShowSelect}>
        <span>{selectedItem.length > 0 ? selectedItem[0].value : defaultText}</span>
        <div className={styles['icon-btn']}>선택</div>
      </button>
      {isShowOptions && <ul className={styles.options} id='custom-select' role='listbox'>
        {optionList.map((option) =>
          <SelectItem
            key={option.key}
            option={option}
            selected={value}
            setViewData={setViewData}
          />
        )}
      </ul>}
    </div>
  );
}-
props 로 select 에 들어갈
optionList설정 및 화면에 표시할 데이터 수 를 변경할setViewData를 전달 받음. -
useSelect 에
initialValue를 optionList 0번째 value 셋팅 -
selectedItem 이 선택됬다면
selectedItem 의 value를 select 에 출력, 아니면defaultText출력 -
isShowOptions이 true 가 되면 optionList 를 보여준다. -
SelectItem 에는 option 과 클릭시 토글 역할 및 선택된 아이템을 set 해줄 함수, 시할 데이터 수 를 변경할 setViewData 를 전달
✅ SelectItem Components
function SelectItem({option, selected, setViewData}) {
    // 클릭 시 클릭한 option 을 selected 에 set 해주고 viewData 는 옵션의 key 값을 넣어줌
  const changeData = () => {
    selected(option)
    setViewData(option.key)
  }

  return (
      <li className={styles.option} onClick={changeData}>
        <button className={styles['option-text']}>{option.value}</button>
      </li>
  );
}
✅ useSearch 커스텀 훅
function useSearch() {

  return (e, searchEvent) => {
    if (e.key === 'Enter') {
      searchEvent();
    }
  }
}
사실 이건 커스텀 훅으로 뺄 필요도 없지만,, 훅을 수정하기 전에는 훅에서 작성했던 이벤트들이 있었어서 커스텀 훅으로 작성하였는데 불필요해짐으로 인해 1개의 event만 남게됨 😅
✅ SearchBar Components
function SearchBar({setSearchValue, searchValue, searchEvent, searchInit}) {
  const onEnter = useSearch()
  return (
    <div className={styles['search-wrap']}>
      <label className={styles.label}>
        <input type="text" className={styles.search} placeholder='검색어를 입력해주세요.' value={searchValue} onChange={(e) => setSearchValue(e.target.value)} onKeyDown={(e) => onEnter(e, searchEvent)}/>
      </label>
      <button className={styles.btn} onClick={searchEvent}>검색</button>
      <button className={styles.btn} onClick={searchInit}>초기화</button>
    </div>
  );
}-
value 는 props 로 전달받은
searchValue로 설정, -
onChange Event 가 일어나면 props 로 전달받은
setSearchValue에 현재 타겟의 value 를 설정 해줌 -
onKeyDown Event 에 keyCode 가 Enter 라면
searchEvent실행 -
searchEvent - useListPage 커스툼 훅에서 작성한 검색 함수
-
searchInit - useListPage 커스툼 훅에서 작성한 초기화 함수
📝 마치며
useHooks 로 사용하여 만들어보고싶어서 만들었는데 생각보다 props drilling 도 많이 일어난다. 현재는 자바스크립트 버전이지만 추후에 타입스크립트로 아토믹 디자인 패턴을 활용하여 Compound Components 로 리팩토링 예정.