매번 리액트를 실행시키기 위해
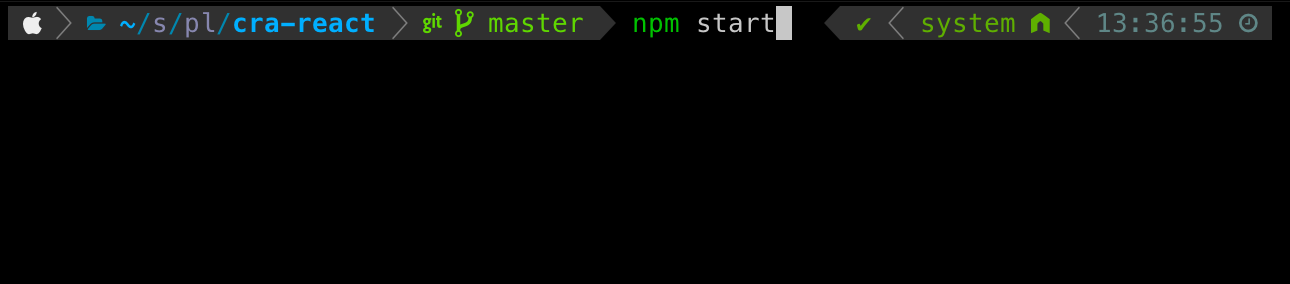
npm start혹은npm run dev와 같은 명령어를 작성하면 리액트 서버가 켜지면서 우리가 작성한 웹페이지를 브라우저에서 확인할 수 있습니다. 수도없이 이 명령어를 실행했지만 막상 어떠한 과정을 통해서 이 웹서버가 켜지는지에 대해 생각해본적이 없어서 NPM 내부 코드를 학습해보며 정리하려 합니다.
NPM(Node Packaged Manager) 이란?
들어가기에 앞서 NPM에 대해서 간단하게 알아봅시다. 위키백과에서는 NPM을 다음과 같이 정의합니다
npm은 자바스크립트 프로그래밍 언어를 위한 패키지 관리자이다. 자바스크립트 런타임 환경 Node.js의 기본 패키지 관리자이다. 명령 줄 클라이언트, 그리고 공개 패키지와 지불 방식의 개인 패키지의 온라인 데이터베이스로 이루어져 있다. 위키백과
즉, Node.js로 만들어진 패키지들을 설치하고 관리해주는 프로그램입니다. 리액트 또한 하나의 패키지로 구성되어 있으며 NPM 사이트에서 확인할 수 있습니다.
패키지 내부에는 package.json 이라는 파일을 볼 수 있습니다. 이 파일은 패키지에 대한 명세서가 들어있다고 생각하시면 됩니다. 예를들면, 패키지 이름, 버전, 의존성, 스크립트 등등 말이죠... 여기서 스크립트는 해당 패키지의 명령어 들이 적혀있는데요. start,build,test 등등 다양한 명령어를 통해서 스크립트를 실행시킬 수 있습니다.
NPM Start
리액트 환경은 CRA로 설치하여 진행하였습니다. CRA를 설치하고 npm start를 입력하면 첫 CRA 페이지를 확인할 수 있습니다. 그전에 Package.json 파일을 봅시다.
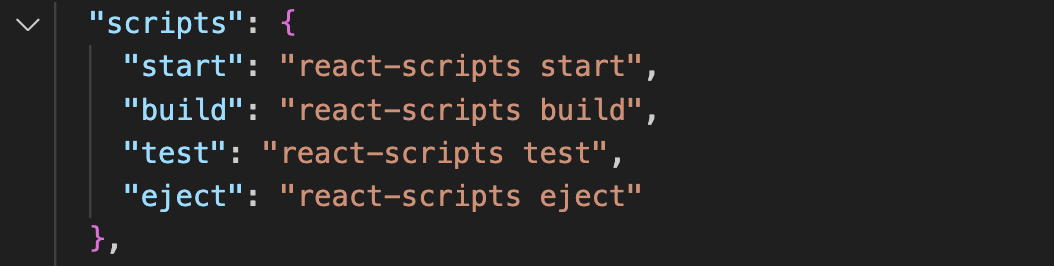
CRA에서 기본적으로 제공하는 스크립트는 start, build, test, eject 정도가 있네요. 사실 우리가 위에서 실행한 start의 경우 npm이 pakage.json의 start에 해당하는 react-scripts의 start 명령어를 실행했다고 추측할 수 있습니다.
실행 코드
//lib/cli/entry.js
 try {
    const { exec, command, args } = await npm.load()

	...
    const execPromise = npm.exec(command, args)

   	...
    updateNotifier(npm).then((msg) => (npm.updateNotification = msg))

    await execPromise
    return exitHandler()
  } catch (err) {
    ...
}
해당 코드는 npm 실행 시 진입점인 entry 파일의 일부 입니다. npm 을 실행하면 load 함수를 통해 command를 받아올 수 있고 해당 command를 기반으로 npm을 exec(실행) 한다고 추측할 수 있습니다.
그럼 npm의 load 함수를 확인해 봅시다.
//lib/npm.js

async load () {
  return time.start('npm:load', () => this.#load())
}

async #load () {

    ...

    // Remove first argv since that is our command as typed
    // Note that this might not be the actual name of the command
    // due to aliases, etc. But we use the raw form of it later
    // in user output so it must be preserved as is.
    const commandArg = this.argv.shift()

    // This is the actual name of the command that will be run or
    // undefined if deref could not find a match
    const command = deref(commandArg)

    ...

    return { exec: true, command: commandArg, args: this.argv }
}
이 코드는 npm.js 의 일부입니다. load 함수는 npm 객체의 #load를 호출하고 #load 함수는 npm start 명령어 중 npm을 제외한 start값이 commandArg에 들어갑니다. 이후 별칭임을 deref로 확인하고 반환합니다.
그럼 어떻게 start 커맨드가 exec함수에서 실행되는 지 따라가 봅시다.
static cmd (c) {
   const command = deref(c)
   if (!command) {
     throw Object.assign(new Error(`Unknown command ${c}`), {
       code: 'EUNKNOWNCOMMAND',
       command: c,
     })
   }
   return require(`./commands/${command}.js`)
 }


// Call an npm command
 async exec (cmd, args = this.argv) {
   const Command = Npm.cmd(cmd)
   const command = new Command(this)

   // since 'test', 'start', 'stop', etc. commands re-enter this function
   // to call the run-script command, we need to only set it one time.
   if (!this.#command) {
     this.#command = command
     process.env.npm_command = this.command
   }

   return time.start(`command:${cmd}`, () => command.cmdExec(args))
 }
이 함수에서는 cmd으로 'start' 값을 받을것이고 cmd를 통해 start.js의 객체를 받아옵니다. 그 객체 cmdExec 함수를 실행하는 군요.
class Start extends LifecycleCmd {
  static description = 'Start a package'
  static name = 'start'
  static params = [
    'ignore-scripts',
    'script-shell',
  ]
}

class LifecycleCmd extends BaseCommand {
  static usage = ['[-- <args>]']
  static isShellout = true
  static workspaces = true
  static ignoreImplicitWorkspace = false

  async exec (args) {
    return this.npm.exec('run-script', [this.constructor.name, ...args])
  }

  async execWorkspaces (args) {
    return this.npm.exec('run-script', [this.constructor.name, ...args])
  }
}

class BaseCommand {
	...
  async cmdExec (args) {
    return this.exec(args)
  }
}
해당 부분이 조금 특이합니다. 집중해서 보셔야 하는데요. Start클래스는 LifecycleCmd를 상속받고 있고 LifecycleCmd는 BaseCommand를 상속 받고 있습니다. 이 cmdExec 함수는 BaseCommand의 cmdExec를 실행하고 있습니다. 또한 이 cmdExec 함수는 LifecycleCmd의 exec 함수를 실행하고 있고요.
이 LifecycleCmd의 exec 함수는 다시 NPM 객체의 run-script 커맨드를 실행합니다.
class RunScript extends BaseCommand {


  async exec (args) {
    if (args.length) {
      return this.run(args)
    } else {
      return this.list(args)
    }
  }


  async run ([event, ...args], { path = this.npm.localPrefix, pkg } = {}) {
    const runScript = require('@npmcli/run-script')

    const { scripts = {} } = pkg

    pkg.scripts = scripts

    // positional args only added to the main event, not pre/post
    const events = [[event, args]]

    for (const [ev, evArgs] of events) {
      await runScript({
        path,
        // this || undefined is because runScript will be unhappy with the
        // default null value
        scriptShell: this.npm.config.get('script-shell') || undefined,
        stdio: 'inherit',
        pkg,
        event: ev,
        args: evArgs,
      })
    }
  }
}
실행하면 아까와 같은 과정으로 run-script.js 파일의 Runscript 객체의 exec 이 실행됩니다. 이 exec은 run을 실행하고 pkg(package.json 객체)의 sciprt(react-scripts start)를 실행함을 할 수 있습니다.
react-scripts start
react-scrips start는 무슨의미 일까요? 이는 react-scripts 모듈을 start 하겠다는 의미로 해석 할 수 있습니다. node_modules에 있는 react-scripts는 다음과 같습니다.
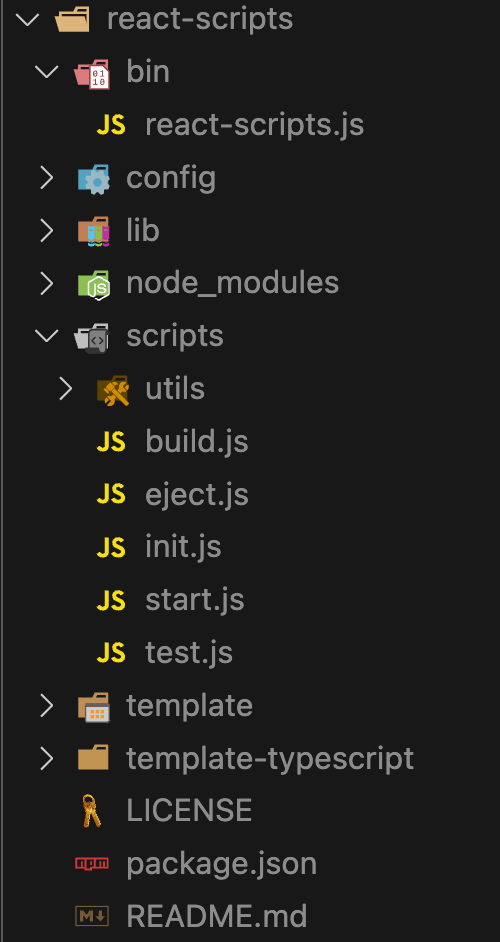
여기서 bin 파일의 react-scripts.js가 실행이 되는데요. 왜 bin폴더의 파일이 실행되는지 코드로는 찾지 못하여서 관련 게시글을 통해 알 수 있었습니다. 참고
그럼 bin 폴더가 무엇일까요??
bin
Binary File 바이너리 파일이라고 부르며, 컴퓨터가 사용하는 이진 텍스트 파일입니다. 참고
npm에서는 package.json파일의 bin 프로퍼티에 bash script를 설정하여 권한 부여 없이 자동으로 실행할 수 있도록 도와줍니다.참고 또한, npm에서는 이부분부터 시작이 되어 스크립트의 엔트리 포인트로 추측이 되긴합니다.
react-scripts 내부
다시 돌아와서 이 스크립트 내부를 살펴보면 이전에 존재했던 4가지의 커맨드가 존재합니다.
const args = process.argv.slice(2);

const scriptIndex = args.findIndex(
  x => x === 'build' || x === 'eject' || x === 'start' || x === 'test'
);
const script = scriptIndex === -1 ? args[0] : args[scriptIndex];
const nodeArgs = scriptIndex > 0 ? args.slice(0, scriptIndex) : [];

if (['build', 'eject', 'start', 'test'].includes(script)) {
  const result = spawn.sync(
    process.execPath,
    nodeArgs
      .concat(require.resolve('../scripts/' + script))
      .concat(args.slice(scriptIndex + 1)),
    { stdio: 'inherit' }
  );
}
커맨드에 따라 스크립트 폴더 내부에 있는 커맨드 파일에 접근합니다. 저희 같은 경우에는 start.js 파일이 실행되겠죠?? 최종적으로 start.js 파일이 실행되고 내부에는 프로젝트를 번들링후 웹서버를 키는 동작과정으로 React 파일이 실행되게 됩니다.
결론
이렇게 npm start를 react 프로젝트에서 입력했을 경우에 어떤과정으로 통해 react 서버가 켜지는지 알아보았습니다. 마지막으로 전체적인 과정을 요약하며 마무리 하겠습니다. 읽어주셔서 감사합니다!
과정
- CRA 프로젝트 환경에서 npm start 입력
- npm은
package.jsonscript의 start 값을 확인- scirpt에 적혀있는
react-scripts start를 확인- node_modules에 react-scripts를 확인하고, package.json의 bin에 명시되어있는
react-scripts.js파일 접근- 여러 커맨드 중 입력 받은 start.js의 파일에 접근
- 프로젝트 번들링과 웹서버 실행