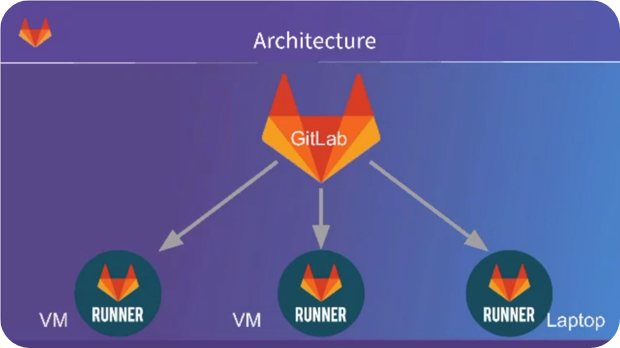
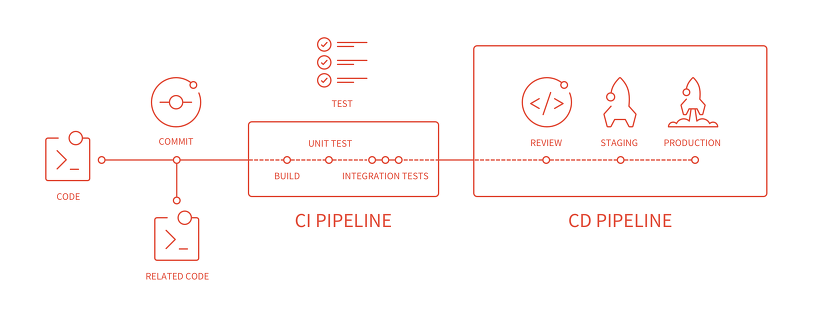
8.x 버전당시 Gitlab CI 아키텍쳐
Runner는 CI시스템에서 우리가 명세한 작업을 수행하고 결과를 Gitlab으로 피드백하는 녀석이다
GitLab CI는 8.x 버전부터 GITLAB과 통합되어 나오기 시작했으며
프로젝트 디렉토리의 루트 경로에 .gitlab-ci.yml 파일을 추가하는 것으로 활성화된다
Since version 8.0, GitLab CE/EE and GitLab CI are a single product.
Starting from version 8.0, GitLab Continuous Integration (CI) is fully integrated into GitLab itself and is enabled by default on all projects.
git add .gitlab-ci.yml
git commit -m "Add .gitlab-ci.yml"
git push origin master
Runner는 아래의 환경에 설치가능하다
Install using GitLab's repository for Debian/Ubuntu/CentOS/RedHat (preferred)
Install on GNU/Linux manually
Install on macOS
Install on Windows
Install as a Docker service
Install in Auto-scaling mode using Docker machine
Install on FreeBSD
Install on Kubernetes
Install the nightly binary manually
CentOS Gitlab Runner 설치편
설치파일은 Yum저장소를 추가하고 받는 것으로 해결된다
curl -L https://packages.gitlab.com/install/repositories/runner/gitlab-runner/script.rpm.sh | sudo bash
sudo yum -y install gitlab-runner


* Gitlab Server가 버전 10이하라면
curl -L https://packages.gitlab.com/install/repositories/runner/gitlab-ci-multi-runner/script.rpm.sh | sudo bash
sudo yum -y install gitlab-ci-multi-runner
설치완료
이제 등록을 해야한다
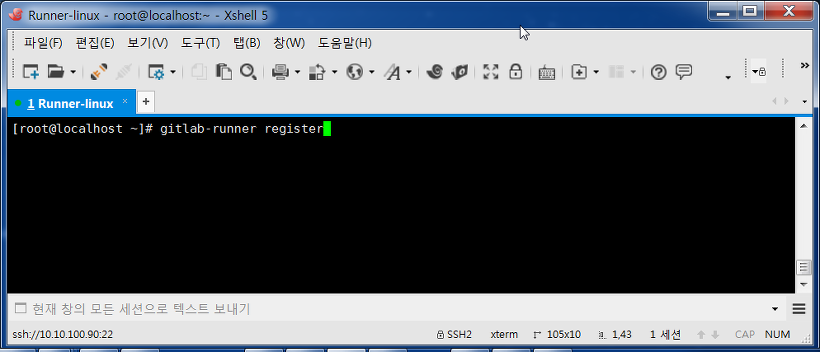
gitlab-runner register
엔터
Gitlab에서 해당프로젝트의 Runner Setting 메뉴에 들어가
1) URL과
2) Token을
확인하고 차례대로 입력한다
( 버전이 올라감에 따라 UI구성이 달라질 수 있으나 대동소이하다 )
제일 중요한 건 Tag이다 Runner를 지명할 때 쓰이니 이름을 잘 짓자
3) Description
4) Tags
5) Whether to run untagged builds [true/false]:
6) Whether to lock the Runner to current project [true/false]:
7) Please enter the executor: ssh, virtualbox, docker+machine, docker, docker-ssh, parallels, shell, docker-ssh+machine, kubernetes:

설치와 설정이 완료되었다
해당내용은 " /etc/gitlab-runner/config.toml " 여기에 저장된다
한 번 실행 해보자
gitlab-runner start
백그라운드로 돌아간다 ( 확인하려면 gitlab-runner status )
( 현재세션으로 출력하려면 gitlab-runner run )
간단하게 동작하는지 테스트를 해봅시다
.gitlab-ci.yml 파일을 추가하고
동시에 commit을 한 번 해줍니다
stages:
- test

lets_test:
  stage: test
 script:
  - echo hi
  - cd /home/gitlab-runner
  - touch devqa
 tags:
  - devqa90
pipeline 내역을 확인해봅니다
Pass란 글씨가 보입니다
cd /home/gitlab-runner
touch devqa
구문이 수행되었는지 확인합니다
Build & Verification Check & Test & Deploy를 이런식으로 작성하면 됩니다
윈도우 Gitlab Runner 설치편
파일부터 구해봅시다
받고나면 CMD창을 하나 열어줍니다
Gitlab에서 해당프로젝트의 Runner Setting 메뉴에 들어가
Gitlab 서버의 URL과
Token 값을 입력해줍니다
역시 중요한 건 Tag이다 (Runner를 지명할 때 쓰이니 이름을 잘 짓자)
3) Description
4) Tags
5) Whether to run untagged builds [true/false]:
6) Whether to lock the Runner to current project [true/false]:
7) Please enter the executor: ssh, virtualbox, docker+machine, docker, docker-ssh, parallels, shell, docker-ssh+machine, kubernetes:
config.toml 파일이 하나 생깁니다
( 방금 설정한 내역들이 기록되어 있다 )
cmd에서 " gitlab-runner-windows-amd64.exe run "
실행하고
Gitlab에서 잘 등록 되어있는지 확인해봅니다
