masonry 레이아웃으로 갤러리 구현하기

Masonry 레이아웃이 뭔가요
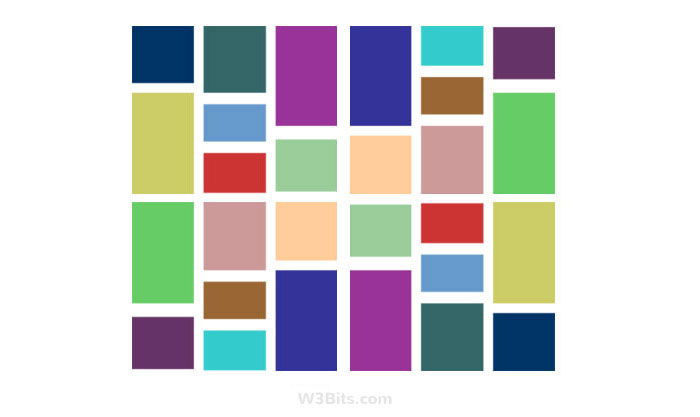
대표적으로 핀터레스트에서 사용하는 레이아웃이다. 말이 필요없다. 그림을 보자.

자유분방하면서도 정갈한 느낌을 주는 레이아웃이다. 크기가 일정하지 않은 이미지들을 효과적으로 배치하면서도 세련된 느낌을 주는 것 같다. 가로 사이즈가 고정된 채 유동적으로 세로 사이즈가 채워지는게 대표적인 특징이다.
구현
masonry 레이아웃을 구현하는 방법은 여러 가지가 있고 아주 쉽게 구현해주는 라이브러리도 있다. 나는 grid layout을 활용해서 직접 만들어 보았다.
grid layout에 대한 간단한 이해가 필요하다. heropy 선생님의 글은 아주 좋은 참고자료였다.
html 구조
 <section class="gallery">
        <div class="grid-container">
            <div class="grid-item">
                <img class="content" src='../images/gallery/gallery-1.jpg' alt="blakcpink">
            </div>
            <div class="grid-item">
                <img class="content" src='../images/gallery/gallery-2.jpg' alt="blakcpink">
            </div>
            <div class="grid-item">
                <img class="content" src='../images/gallery/gallery-3.jpg' alt="blakcpink">
            </div>
            <div class="grid-item">
                <img class="content" src='../images/gallery/gallery-4.jpg' alt="blakcpink">
            </div>
            <div class="grid-item">
                <img class="content" src='../images/gallery/gallery-5.jpg' alt="blakcpink">
            </div>
            </div>
        </div>
일반적인 grid layout과 구조는 동일하다. 단 grid item은 이미지 요소를 div로 한번 감싸야 한다.
SCSS
.gallery {

    .grid-container {
        padding: {
            top:5rem;
            bottom: 5rem;
        };
        display: grid;
        max-width: 100rem;
        margin: 0 auto;
        gap: 2rem;
        grid-template-columns: repeat(auto-fit,minmax(20rem,1fr));
        grid-auto-rows: 0.5rem;

        .grid-item {
            border-radius: 2rem;
            overflow: hidden;
            visibility: hidden;
        }
        img{
            width:100%;
        }

    }
css는 scss converter 에서 변환할 수 있다.
grid-auto-rows: 0.5rem;는 새로운 공간에 배치될 item이 추가될 때마다 자동으로 0.5rem의 크기를 갖는 row를 생성한다는 의미인데, 뒤에 나오는 js에서 이미지의 height에 따라 grid item에게 여러개의 row를 할당할 것이다. 아래 그림에서 노랑색으로 채워진 칸은 row gap, 하얀 칸은 grid-auto-rows로 설정한 height가 된다.

javascript
import imagesLoaded from 'imagesloaded'

function resizeGridItems(){
    const items = document.querySelectorAll('.grid-item')
    items.forEach(item=>{
        imagesLoaded(item,(instance)=>{
            const item = instance.elements[0];
            const grid = document.querySelector('.grid-container')
            const rowHeight = parseInt(window.getComputedStyle(grid).getPropertyValue('grid-auto-rows'))
            const rowGap = parseInt(window.getComputedStyle(grid).getPropertyValue('grid-row-gap'))
            const rowSpan =  Math.floor((item.querySelector('.content').offsetHeight+rowGap)/(rowHeight+rowGap))
            item.style.gridRowEnd = "span "+ rowSpan;
        })
    })
    const gallery = document.querySelector('.grid-container')
    imagesLoaded(gallery,()=>{
        document.querySelectorAll('.grid-item').forEach(item=> item.style.visibility = 'visible')
    })
}

window.addEventListener('load',resizeGridItems)
window.addEventListener('resize',resizeGridItems)
먼저 DOM에 부착된 이미지의 로드 시점을 알기 위해서 imagesLoaded 라이브러리를 사용했다.
이미지가 row 하나를 차지할 때마다 row height + row gap 의 크기를 갖게 된다.
item에 grid-row-end : span 2 이렇게 작성하면 row의 시작점에서 2개의 row를 할당한다는 의미다.
각 item을 순회하면서 이미지가 로드된 후에 실행되는 콜백에서는 image height/(row height+row gap)을 계산해 item.style.gridRowEnd에 넣어준다.
브라우저의 크기를 조절할 때 컬럼의 갯수가 바뀔수 있기 때문에 resize 이벤트에도 위 함수가 호출되도록 해준다.
결과

Reference
https://medium.com/@andybarefoot/a-masonry-style-layout-using-css-grid-8c663d355ebb
