0. 들어가며
2편 에서는 강의 목차 중 빌드 및 실행, 정적 컨텐츠, MVC 와 템플릿 엔진 그리고 API 까지 의 내용을 복기 하고 고찰 할 내용이 있다면 고찰 해보려고 합니다.
1. 빌드 및 실행
Build
Spring 프로젝트 경로로 이동합니다.
./gradlew build
. cd build/libs
java -jar hello-spring-0.0.1-SNAPSHOT.jar
빌드 후 서버 PC에 jar 파일만 넣어서 실행시키면 서버가 띄워집니다.
2. 정적 컨텐츠
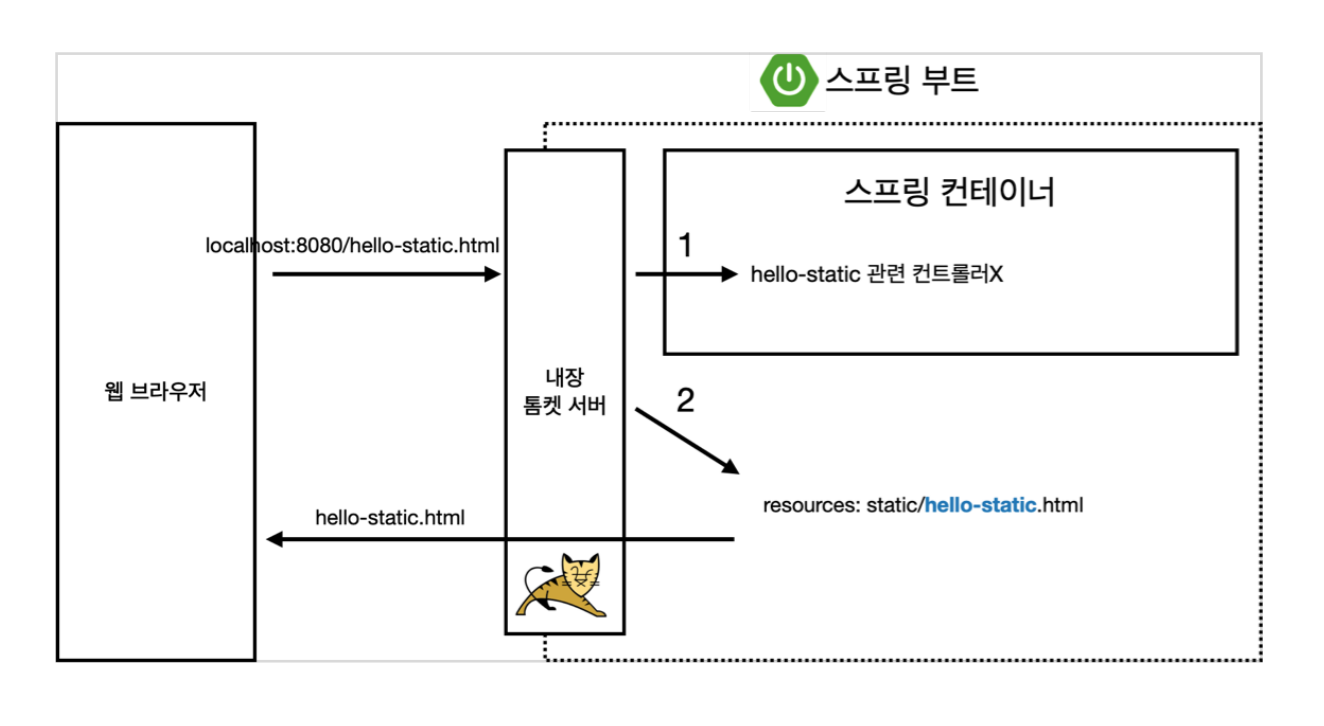
- / hello-static.html 요청
- hello-static 관련 컨트롤러가 있는지 확인
- 없다면 resources/static 경로에서 hello-static.html 응답
3. MVC 와 템플릿 엔진
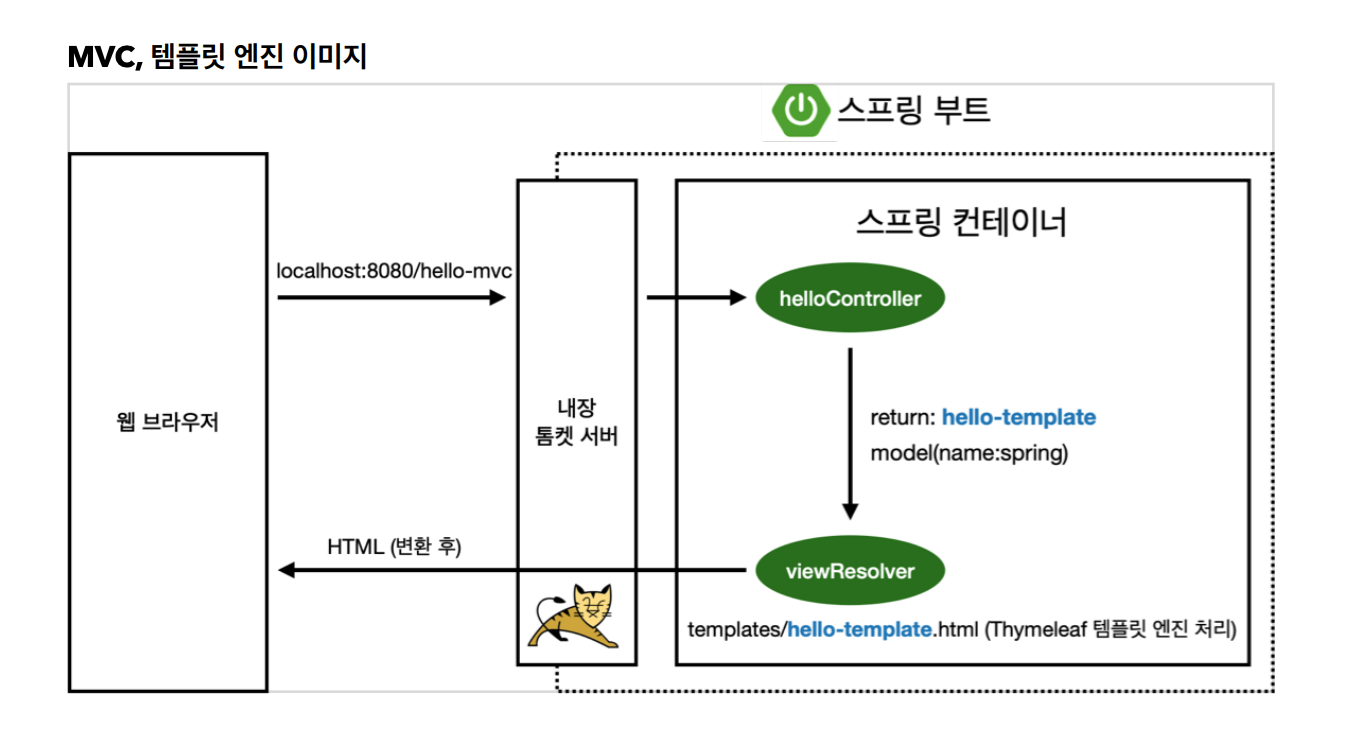
- 웹 브라우저가 /hello-mvc?name=spring 페이지를 요청 합니다.
- helloController 에서 @GetMapping("hello-mvc") 어노테이션을 통해 컨트롤러에 접근 합니다.
@Controller
public class HelloController {
 @GetMapping("hello-mvc")
 public String helloMvc(@RequestParam("name") String name, Model model) {
 					  //@RequestParam(value = "name",required = false)
 model.addAttribute("name", name);
 return "hello-template";
 }
}
- Spring에서는 Get Method 를 통해 전달받은 파라미터를 컨트롤러에서 @RequestParam 어노테이션을 통해 처리하네요.
- 아직 인자로 받은 model 에 관해서는 잘 모르겠네요. 일단 입문 편에서는 빠르게 진행합니다.
<html xmlns:th="http://www.thymeleaf.org">
<body>
<p th:text="'hello ' + ${name}">hello! empty</p>
</body>
</html>
4. API
@ResponseBody 어노테이션을 통하여 페이지를 응답해주는 것이 아닌 Data 를 응답해 줄 수 있습니다.
특정 데이터를 응답 해주는 것을 지금은 API 라고 보면 될 것 같네요.
지금은 입문 편이라 조금 가볍게 즐겨보도록 하겠습니다.
뷰 리졸버는 사용되지 않습니다.
@Controller
public class HelloController {
 @GetMapping("hello-string")
 @ResponseBody
 public String helloString(@RequestParam("name") String name) {
 return "hello " + name;
 }
}
@RequestParam("name") required 속성의 default 는 true 입니다. 안넘겨주면 400 error 가 발생합니다.
name = abc 로 넘겨 주면
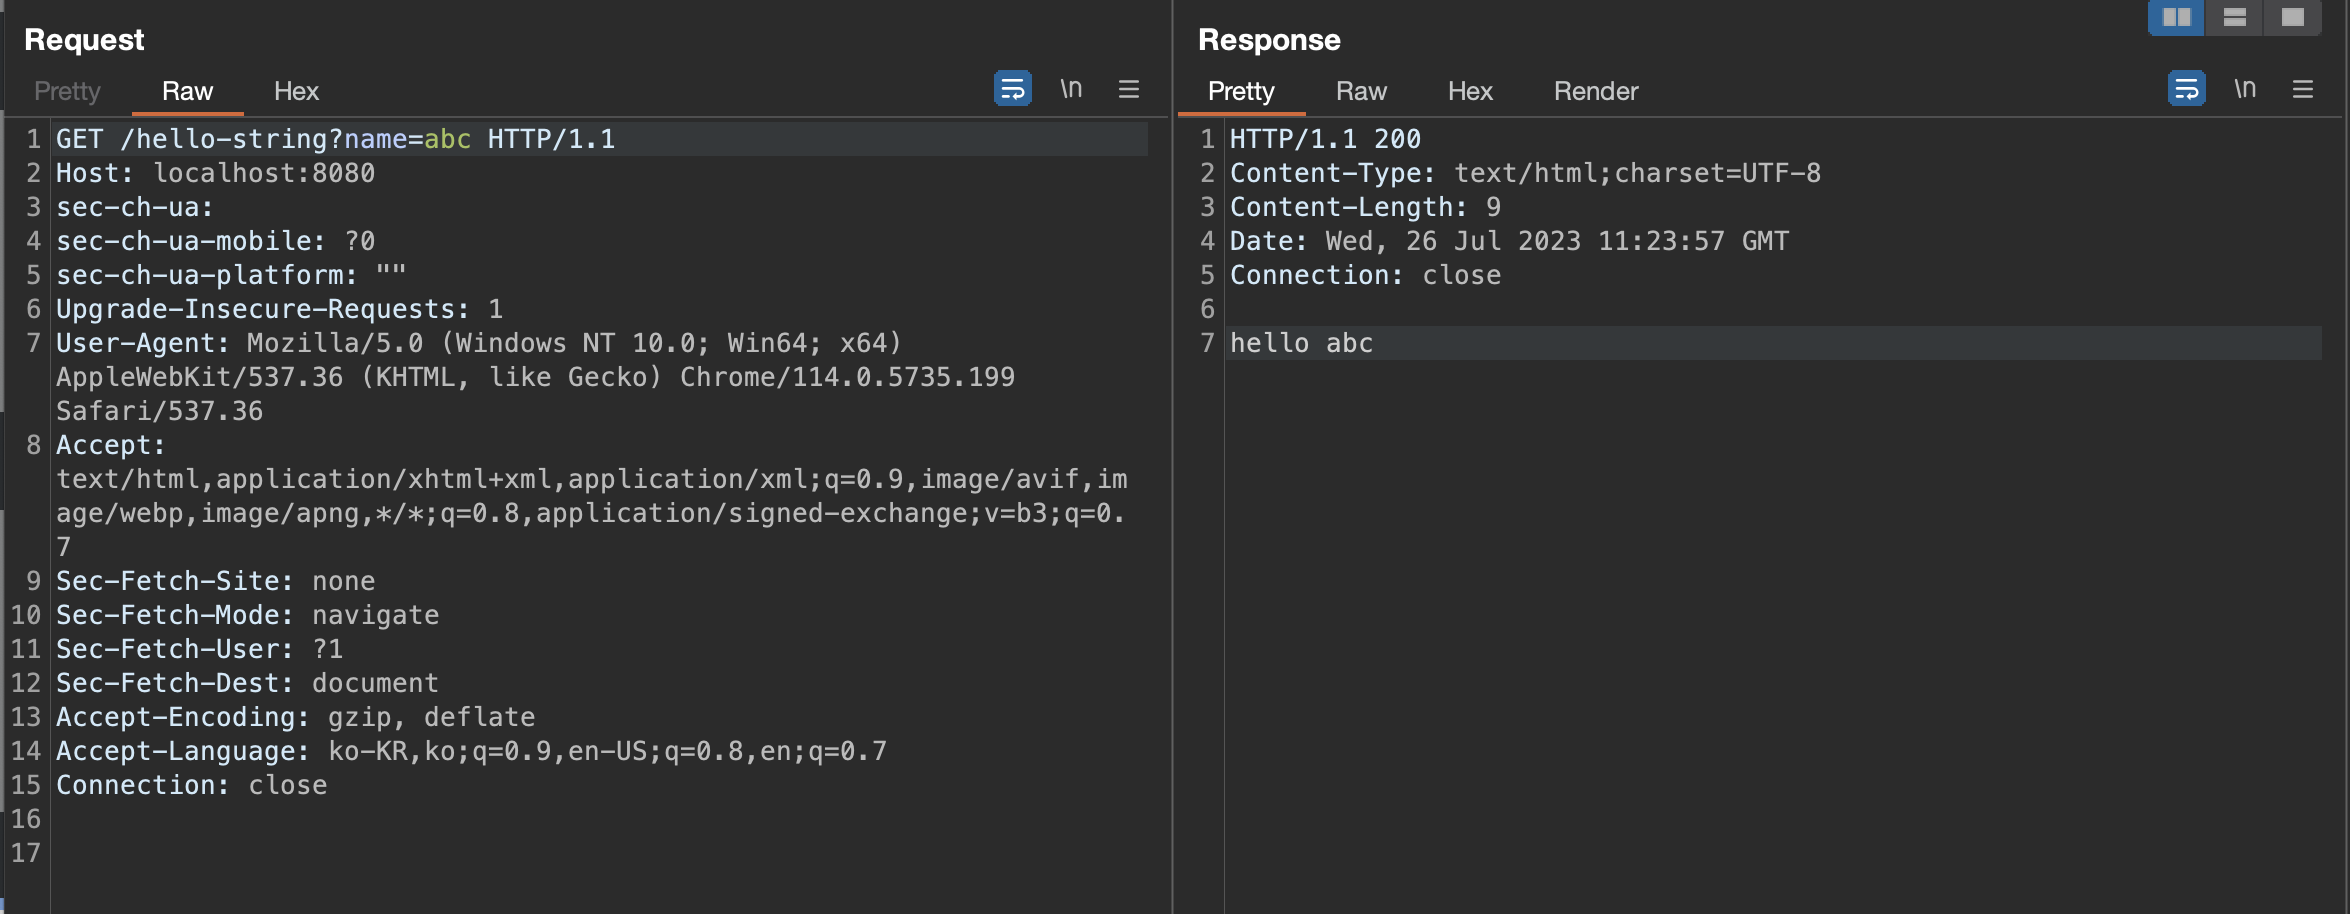
Content-Type 헤더를 살펴보니 text/html 이네요.
public class HelloController {
 @GetMapping("hello-api")
 @ResponseBody
 public Hello helloApi(@RequestParam("name") String name) {
 Hello hello = new Hello();
 hello.setName(name);
 return hello;
 }
 static class Hello {
 private String name;
 public String getName() {
 return name;
 }
 public void setName(String name) {
 this.name = name;
 }
 }
}
위의 코드는 스프링이 요청에 대한 응답으로 객체를 반환 합니다.
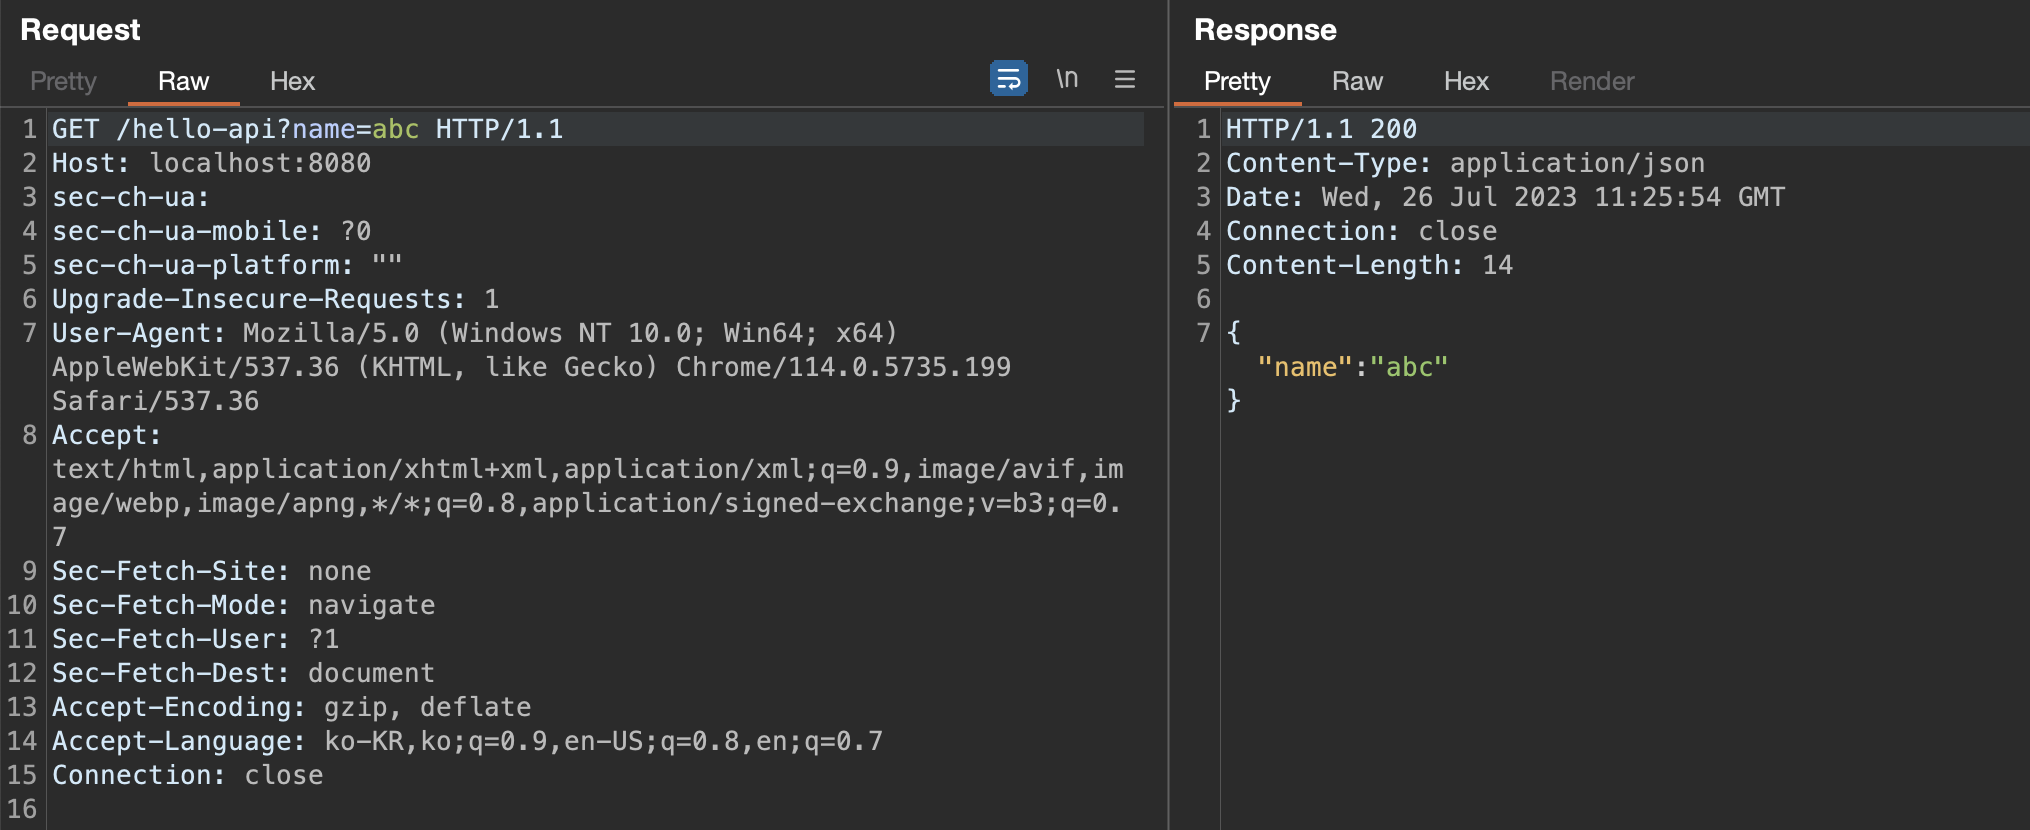
Content-Type 헤더를 살펴보니 application/json 이네요.

코더 그 이상