프로젝트를 진행하면서 디자이너님이 디자인 시스템을 구축해주셨다. 이를 custom plugin으로 만들어 tailwind CSS에 등록하려고 한다.
플러그인 설정
먼저 tailwind.config.ts 파일에서 tailwindcss/plugin을 import 한다. 그리고 plugins 배열 안에 함수를 호출하면 된다.
import type { Config } from "tailwindcss";
import plugin from "tailwindcss/plugin"

const config: Config = {
    ...
    plugins: [
        plugin(function({ addUtilities, addComponents, e, config, ... }) {
            // 커스텀 스타일 작성
        }),
    ],
};

export defualt config
plugin 함수는 단일 객체를 인수로 받는데, 다음과 같은 함수들로 구조 분해가 가능하다.
addUtilities(), for registering new static utility stylesmatchUtilities(), for registering new dynamic utility stylesaddComponents(), for registering new static component stylesmatchComponents(), for registering new dynamic component stylesaddBase(), for registering new base stylesaddVariant(), for registering custom static variantsmatchVariant(), for registering custom dynamic variantstheme(), for looking up values in the user’s theme configurationconfig(), for looking up values in the user’s Tailwind configurationcorePlugins(), for checking if a core plugin is enablede(), for manually escaping strings meant to be used in class names
여기서 내가 사용한 함수는 matchUtilties와 theme 이다.
- addUtilities 함수는 static utility styles를 등록하기 위해 사용한다면 matchUtilites 함수는 dynamic utility styles를 등록할 수 있다.
- theme 함수는 tailwind config에 등록된 theme를 사용할 수 있게 해준다.
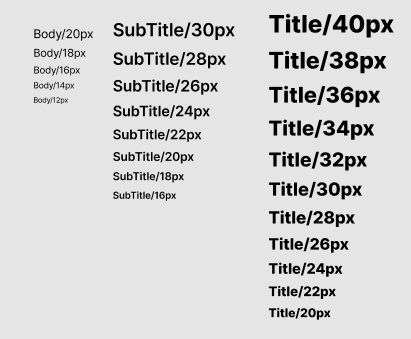
matchUtilities 함수의 첫번째 인수로 유틸리티 스타일 객체를 전달한다. 디자인 시스템에 있는 대로 body, subTitle, title 스타일을 정의하는데 타이포그래피 스타일을 정의한 것이기 때문에 접두어 "typo" 를 붙여서 사용했다.
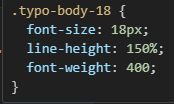
typo-body 스타일은 받아온 value로 font-size를 정의하고, 디자인 시스템에 정의된 lien-height는 150%, font-weight은 400 인데 theme 함수를 사용해 tailwind에 정의된 값을 가져왔다. 마찬가지로 typo-subTitle, typo-title 스타일을 정의했다.
두번째 인수로는 동적으로 value를 가지기 위해 values를 담고 있는 객체를 전달해준다. values에는 내가 원하는 값들을 키와 밸류로 작성해주었다.
plugins: [
    plugin(({ matchUtilities, theme }) => {
      matchUtilities(
        {
          "typo-body": (value) => ({
            fontSize: value,
            lineHeight: "150%",
            fontWeight: theme("fontWeight.normal"),
          }),
          "typo-subTitle": (value) => ({
            fontSize: value,
            lineHeight: "135%",
            fontWeight: theme("fontWeight.semibold"),
          }),
          "typo-title": (value) => ({
            fontSize: value,
            lineHeight: "135%",
            fontWeight: theme("fontWeight.extrabold"),
          }),
        },
        {
          values: {
            12: "12px",
            14: "14px",
            16: "16px",
            18: "18px",
            20: "20px",
            22: "22px",
            24: "24px",
            26: "26px",
            28: "28px",
            30: "30px",
            32: "32px",
            34: "34px",
            36: "36px",
            38: "38px",
            40: "40px",
          },
        }
      );
    }),
],
결과물
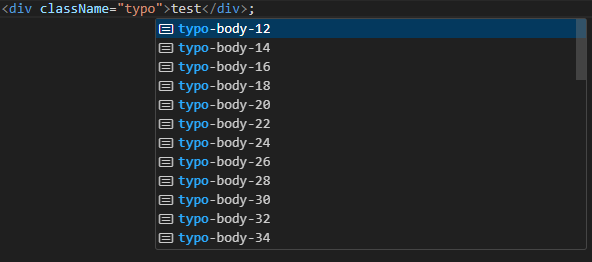
등록된 플러그인을 사용해보자. vsc 확장 프로그램인 Tailwind CSS IntelliSense에 의해 자동 제안으로 내가 작성한 유틸리티 스타일이 떠있는 것을 확인 할 수 있었다. 실제 스타일도 잘 적용된 것이 보인다.
이렇게 Tailwind CSS의 플러그인 기능을 이용해서 커스텀 스타일을 등록할 수 있었다. 이를 이용하면 일관된 스타일이 가능했고 또한 코드의 재사용성과 유지보수성을 높일 수 있었다.