(참고 : CRA 이용 안하는 것 부터 시작함.
리액트ver : 17.0.2 )
React & React DOM
- 기존의 렌더링 방식
-
브라우저는 서버가 보내준 HTML 파일 을 해석(Parsing)하여 DOM 트리 를 만든다.
-
브라우저는 서버가 보내준 CSS 파일 을 해석(Parsing)하여 CSSOM 트리 도 만든다.
-
DOM 트리 + CSSOM 트리 를 결합해 렌더트리 를 만든다.
-
렌더트리로 각 노드의 위치와 크기를 계산한 레이아웃 을 만든다. 뷰포트(Viewport) 내에서 각 노드들의 위치와 크기를 계산한다
-
Layout 계산이 완료되면 이제 요소들을 실제 화면을 그리는 페인트(Paint) 를 한다.
출처: https://devbirdfeet.tistory.com/219 [새발개발자:티스토리]문제점 : DOM은 새로운 요청, 변경사항이 있으면 매번 리렌더링 한다. (속도저하)
- 가상 DOM
돔의 구조를 흉내낸 JS 객체이며 in-memory에 존재하여 실제로 렌더링 되지 않는다.
- 변경사항 있으면 UI를 가상돔에 리렌더링 한다.
- 가상돔끼리 비교한다(diffing 알고리즘)
- 바뀐 부분만 실제 DOM에 적용한다.(레이아웃 계산은 한번만)
- 요약
기존 : HTML -> JS
리액트 : JS -> HTML
<!DOCTYPE html>

<body>
  <div id="root"></div>
</body>
<script src="https://unpkg.com/react@17.0.2/umd/react.development.js"></script>
<script src="https://unpkg.com/react-dom@17.0.2/umd/react-dom.development.js"></script>
<script>
  const root = document.getElementById("root")
  const span = React.createElement("span", {id:"sexy-span", style:{color:"red"}}, "Hello I'm a span");
  ReactDOM.render(span, root)
</script>
</html>
리액트에서 span태그를 만들고 리액트돔이 span을 root위치에 렌더링 함.
Events in React
바닐라 JS
html도 건들고 html 요소도 가져와서 수정하고 ...
<body>
  <span>Total clicks: 0</span>
  <button id="btn">Click me</button>
</body>
<script>
  const button = document.getElementById("btn");
  let counter = 0;
  const span = document.querySelector("span")
  function handleClick(){
    counter++;
    span.innerText = `Total clicks: ${counter}`;
  }
  button.addEventListener("click", handleClick)
</script>
리액트
js에서 지지고 볶고 가능. (event handler 적용이 직관적이기도 함.)
<script>
  const root = document.getElementById("root")
  const h3 = React.createElement("h3", { id:"title",onMouseEnter:()=>console.log('mouse enter')}, "Hello I'm a span");
  const btn = React.createElement("button", {id:"btn", onClick:()=>console.log('im clicked'),style:{
    backgroundColor: "tomato"
  }}, "Click me")
  const container = React.createElement("div", null, [h3, btn])

  ReactDOM.render(container, root)

</script>
위 코드는 대충 리액트가 어떻게 작동하는지 이해하기 위한 것.
JSX
JSX문법은 브라우저가 이해를 온전히 못하기에 이를 브라우저가 알아먹을 수 있도록 babel(최신 ES6, ES7 버전의 javascript코드를, ES5버전의 코드로 바꾸어주는 Node.js 패키지)을 이용한다.
기존 -> jsx 문법
//기존
const h3 = React.createElement("h3", { id:"title",onMouseEnter:()=>console.log('mouse enter')}, "Hello I'm a span");
//JSX
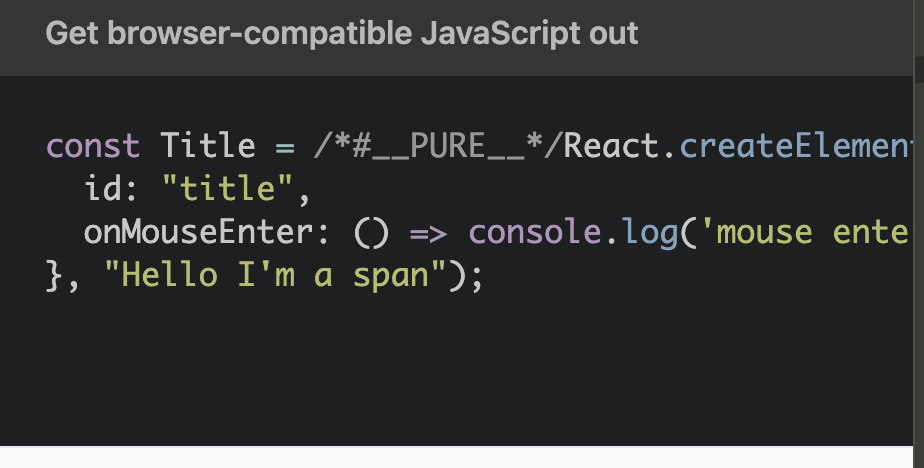
const Title = (<h3 id="title" onMouseEnter={()=>console.log('mouse enter')}>Hello I'm a span</h3>)
//JSX를 babel이 변환
const Title = /*#__PURE__*/React.createElement("h3", {
id: "title",
onMouseEnter: () => console.log('mouse enter')
}, "Hello I'm a span");babel 웹사이트의 DOCS -> babel standalone에 있는 script 복붙하면 사용 가능.(나중에 RCA하면 알아서 해줌)
createElement 대신 JSX 사용하기
const Title = ()=> (<h3 id="title" onMouseEnter={()=>console.log('mouse enter')}>Hello I'm a span</h3>)
//기존 요소를 컴포넌트화 시켜주고

const Container =
  <div>
    <Title />
    <Button/>
  </div>
//이런식으로 담아주면 됨.

 ReactDOM.render(Container, root)
//이것도 당연히 Container를 컴포넌트화 시키면
  const Container = ()=> (
  <div>
    <Title />
    <Button/>
  </div>)
ReactDOM.render(<Container/>, root)
  // 요로케 가능!
참고: arrow function
const Title = ()=> (<h3 id="title" onMouseEnter={()=>console.log('mouse enter')}>Hello I'm a span</h3>)
// 같다
function Title(){
  return (<h3 id="title" onMouseEnter={()=>console.log('mouse enter')}>Hello I'm a span</h3>)
}
state
아래처럼 state를 이용하지 않고 변수를 할당하여 그 값을 증가시키는 함수를 작동시키면 render() 함수 없이는 값의 변화만 발생할 뿐 브라우저에서 리렌더링이 일어나지 않고 그대로 0만 표시함.
<script type="text/babel">
  const root = document.getElementById("root")

  let counter = 0;
  function countUp() {
    counter++;
    console.log(counter)
    render()
  }
  function render() {
    ReactDOM.render(<Container />, root)
  }

  function Container() {
    return (
      <div>
        <h3>Total clicks: {counter}</h3>
        <button onClick={countUp} >Click me</button>
      </div>)
  }

  render()

</script>
useState 사용하기
🧨 state변경함수는 자동으로 리렌더링을 해준다.
    // const data = React.useState(0);
    // console.log(data); // [0, ƒ] = [현재상태, 변경함수]
    const [data, setData] = React.useState(0);
// 구조분해할당!
🧨 스테이트 변경함수에 함수형 사용하기
    const onClick = () => {
      // setCount(count + 1) // 1. 직접 값 설정해주는 방법
      setCount(current => current + 1) // 2. 함수형, 현재 값 이용(더 확실함))

    }
🧨 스테이트 변경함수는 비동기처리 된다. 따라서 마지막에 setCount할 때... 현재 count가 0이라고 가정하면
// 얘는.. state가 1을 가짐
setCount(count + 1); // 나 0에서 1 더할게!
setCount(count + 1); // 나 0에서 1 더할게!
setCount(count + 1); // 나 0에서 1 더할게!

//얘는 state가 3이 됨
setCount(current => current + 1); //나 0에서 1 더할게!
setCount(current => current + 1); //나 1에서 1 더할게!
setCount(current => current + 1); //나 2에서 1 더할게!
super converter 만들기
시간 <-> 분 변환 기능 구현
  function App() {
    const [amount, setAmount] = React.useState("");
    const [flipped, setFlipped] = React.useState(false);

    const onChange = (event) => {
      setAmount(event.target.value)
    }
    const reset = () => {
      setAmount('')
    }
    function onFlip() {
      setFlipped(current => !current);
      reset();
    }

    return (
      <div>
        <h1>Super Converter </h1>
        <h4>You want to convert {amount}</h4>
        <div>
          <label htmlFor="minutes">Minutes</label>
          <input value={!flipped ? amount : amount * 60} id="minutes" placeholder="Minutes" type="number" onChange={onChange} disabled={flipped} />
        </div>
        <div>
          <label htmlFor="hours">Hours</label>
          <input value={!flipped ? amount / 60 : amount} id="hours" placeholder="Hours" type="number" disabled={!flipped} onChange={onChange} />
        </div>
        <button onClick={reset}>Reset</button>
        <button onClick={onFlip}>{flipped ? "M -> H" : "H -> M"}</button>
      </div >)
  }
amount에 값을 저장하고 hour -> minute는 *60
minute -> hour 는 /60 해주는 식으로 하면 됨.
selector로 선택 기능 만들기.
** 셀렉터의 경우 옵션 선택시 해당하는 옵션의 value값이 나옴.
  function App() {
    const [index, setIndex] = React.useState("xx");
    const onSelect = (event) => {
      setIndex(event.target.value)
      console.log(event.target.value)
      //선택한 옵션의 value값이 찍힌다.
    }
    return (
      <div>
        <h1>Super Converter </h1>
        <select value={index} onChange={onSelect}>
          {/*value에 index를 준 이유 ? : 초기값 설정한 것*/}
          <option value="xx">Select yout units</option>
          <option value="0">MinutesToHours</option>
          <option value="1">KmToMiles</option>
        </select>
        {index === "xx" ? <div>"Please select your unit"</div> : null}
        {index === "0" ? <MinutesToHours /> : null}
        {index === "1" ? <KmToMiles /> : null}
      </div >)
  }
props
자식 컴포에 props 전송한 것을 콘솔로 찍어보면 저렇게 차례대로 나옴.
  function Btn({ btnText, big }) {
    console.log(btnText) // Save Changes // Continue
    return <button style={{
      backgroundColor: "tomato",
      color: "white",
      border: "0",
      padding: "10px 20px",
      borderRadius: 10,
      fontSize: big ? 18 : 16,
    }}>{btnText}</button>
  }
React Memo!!
기존에는 스테이트에 변경이 발생하면 리액트는 컴포넌트의 자식들을 모두 리렌더링하게 되어있다. 아래의 코드처럼
function Btn({ text, changeValue }) {
    console.log(text, "was rendered")
    return <button style={{
      backgroundColor: "tomato",
      color: "white",
      border: "0",
      padding: "10px 20px",
      borderRadius: 10,
      fontSize: 16,
    }}
      onClick={changeValue}>{text}</button>
  }
 // App 컴포넌트
   <Btn text={value} changeValue={changeValue} />
   <Btn text="Continue" />
첫번째 버튼만 클릭했음에도
Save Changes was rendered
Continue was rendered
이런식으로 아래 버튼까지 렌더링 되는 것이다.
이것을 방지하는 hook이 있다. React.memo()
//컴포넌트 외부
const MemorizedBtn = React.memo(Btn);
//App 컴포넌트
<MemorizedBtn text={value} changeValue={changeValue} />
<MemorizedBtn text="Continue" />
이런식으로 수정하면 첫번째 버튼의 콘솔만 출력된다.
즉 memo()는 해당 컴포넌트의 스테이트가 변경될 때만 리렌더링 해주세요~ 하는 기능이다. 따라서 Continue 버튼은 변경사항이 없기 때문에 리렌더링 되지 않은 것이다.
propType
프롭타입은 컴포넌트에 전달되는 prop의 타입을 확인하고 콘솔창에 잘못됐음을 알려준다.
https://www.npmjs.com/package/prop-types
<script src="https://unpkg.com/prop-types@15.6/prop-types.js"></script>
//외부
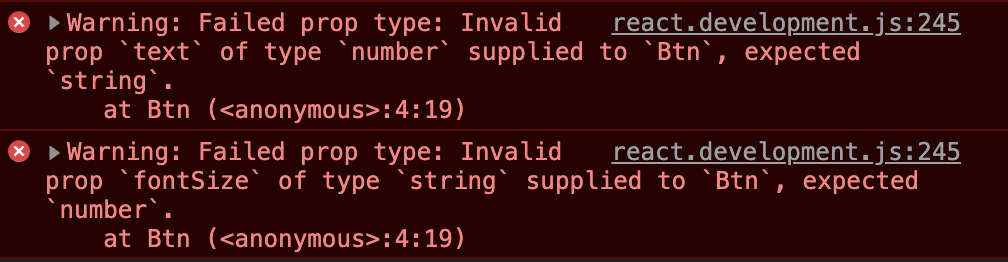
Btn.propTypes = {
text: PropTypes.string,
fontSize: PropTypes.number,
}// text에는 스트링, 폰트사이즈는 number가 들어가야해욤
//App 컴포 내
<Btn text={14} fontSize={"Continue"} />아래와 같이 콘솔창에 error가 뜸.
만약 해당하는 prop이 필수적으로 존재해야 한다면 아래처럼
isRequired를 추가하면 된다.
fontSize: PropTypes.number.isRequired,

<Btn text={14} />
만약 isRequired인 prop이 없다면 이런식으로 워닝 뜸.

만약 프롭을 전달하지 않고 값을 할당하면?
정의되지 않은 변수에 기본값을 할당할 수 있다.
function Btn({ text, fontSize = 230 }) {

<Btn text="Save Changes" fontSize={18} />
<Btn text="Continue" />
위 버튼은 fontSize가 18로 먹지만
아래 버튼은 230이 먹음.