JPA 설정하기
- JPA 설정파일
- resources/META-INF/persistence.xml 위치
- persistence-unit name으로 이름 지정, emf 호출 시 사용
<?xml version="1.0" encoding="UTF-8"?>
<persistence version="2.2"
 xmlns="http://xmlns.jcp.org/xml/ns/persistence" xmlns:xsi="http://www.w3.org/2001/XMLSchema-instance"
 xsi:schemaLocation="http://xmlns.jcp.org/xml/ns/persistence http://xmlns.jcp.org/xml/ns/persistence/persistence_2_2.xsd">
 <persistence-unit name="hello">
 <properties>
 <!-- 필수 속성 -->
 <property name="javax.persistence.jdbc.driver" value="org.h2.Driver"/>
 <property name="javax.persistence.jdbc.user" value="sa"/>
 <property name="javax.persistence.jdbc.password" value=""/>
 <property name="javax.persistence.jdbc.url" value="jdbc:h2:tcp://localhost/~/test"/>
 <property name="hibernate.dialect" value="org.hibernate.dialect.H2Dialect"/>

 <!-- 옵션 -->
 <property name="hibernate.show_sql" value="true"/>
 <property name="hibernate.format_sql" value="true"/>
 <property name="hibernate.use_sql_comments" value="true"/>
 <!--<property name="hibernate.hbm2ddl.auto" value="create" />-->
 </properties>
 </persistence-unit>
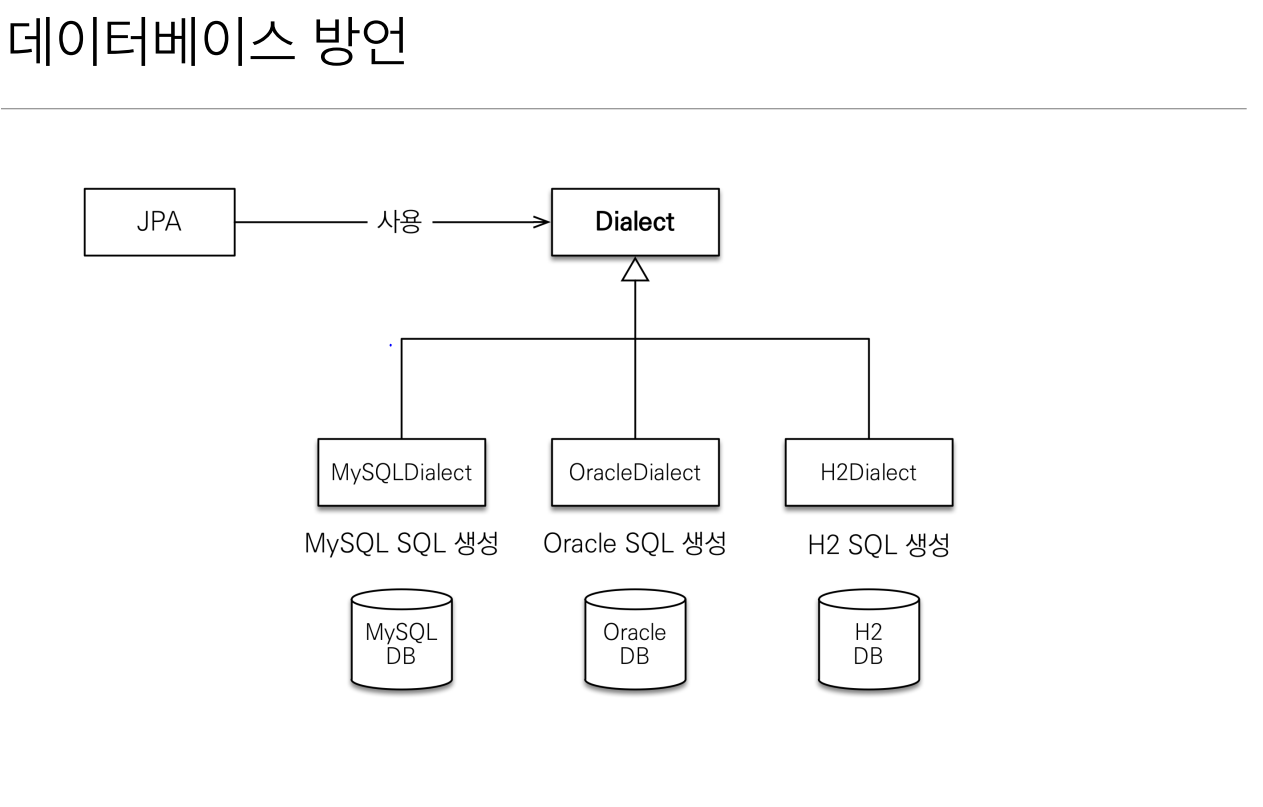
</persistence>- 데이터베이스 방언 - Dialect
각각의 데이터베이스가 제공하는 SQL문법과 함수는 조금씩 다르다.

hibernate는 40가지 이상의 데이터베이스 방언을 지원한다.
hibernate.dialect 속성에 지정하여 사용
JPA 구동 방식
public class JpaMain {

    public static void main(String[] args) {
        EntityManagerFactory emf = Persistence.createEntityManagerFactory("hello");

        EntityManager em = emf.createEntityManager();
        EntityTransaction tx = em.getTransaction();
    }
}-
META-INF/persistence.xml에서 설정 정보를 조회한다.
-
설정 정보에 따라 EntityManagerFactory를 생성한다.
-
factory를 이용해 EntityManager을 생성하여 DB를 관리한다.
주의사항
• 엔티티 매니저 팩토리는 하나만 생성해서 애플리케이션 전체에서 공유한다.
• 엔티티 매니저는 쓰레드간에 공유X (사용하고 버려야 한다).
• JPA의 모든 데이터 변경은 트랜잭션 안에서 실행