Local Repository
전체 순서
- 최초로 Repository 를 생성하고 파일 등을 등록을 한 다음에 Remote로 올리는 등의 작업
- Local Repository 생성
(C:\Users\hjh\Documents\git_ws\test_project)- 거기에 파일 생성
- 그 파일을 Working Directory에서 Stage 영역으로 파일 add
- 그 파일을 Stage 영역에서 HEAD 영역으로 파일 commit
- Local Repository와 같은 이름의 비어있는 Remote Repository 생성
- Remote Repository에 접근하는 용도로 Token 생성
- Local Repository에 연동할 Remote Repository 를 등록(연결)
- Local Repository에 있는 걸 Remote Repository에 Push
- Remote Repository에 있는 걸 Local Repository으로 Pull
- 위의 절차들은 Local Repository 생성하면서 폴더를 git에서 관리하고 있고
(git bash로 관리 폴더로 들어가면 마지막에 master가 보임)
Local과 Remote를 연결했기 때문에 가능한 것
Local Repository 구성
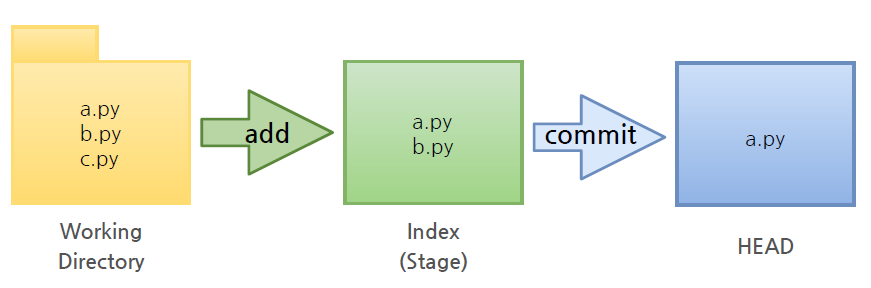
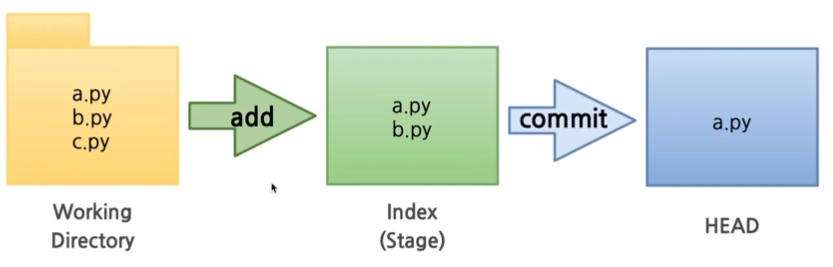
- Local Repository 는 Git 이 관리하는 3가지 단계로 구성되어 있음
• Working Directory (작업공간) - 실제 소스 파일, 생성한 파일들이 존재(우리가 보는 파일, git이 관리하진 않음)
• Index (Stage) - Staging area (준비영역) 의 역할, git add 한 파일들이 존재(add 하는 순간 git에 등록되고, 관리시작)
• HEAD - 최종 확정본, git commit 한 파일들이 존재
(버전이 매겨짐)
Local Repository 생성
Workspace 생성
git_ws: Repository 이 모여있는 최상위 폴더
% mkdir git_ws -> 터미널에서 작성
- Working Directory 생성
Workspace 로 이동한 뒤 Working Directory 생성
% cd git_ws
git_ws % mkdir test_project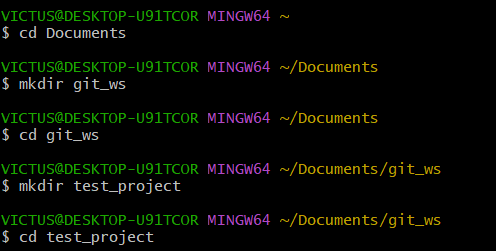
Git init
git init
-
폴더에서 Git 을 초기화하는 명령어를 사용하면 해당 폴더를 Git 이 관리하기 시작
-
test_project로 이동을 해서 폴더 안에서 git init 을 하는 순간 그 폴더는 Repository가 된다.
-> Git 이 폴더를 Working Directory로 인식하고 관리하기 시작한다라는 뜻
git_ws % cd test_project
test_project % git init
Initialized empty Git repository in /Users/nomaefg/.../git_ws/.git/- 마지막에 mater가 나오면 이 폴더는 git이 관리하고 있다고 할 수 있음, 우리가 보지 못하는 git 관리 프로그램들이 숨어져 있다

.git 확인
- .git 폴더가 생성된 것을 확인 → .git 으로 이동해서 파일을 살펴보면 Git 관련 파일들이 생성된 것을 확인 (ls -all 하면 숨겨진 파일까지 볼 수 있음)

-> git이 관리하는 Working Directory가 나온다
파일 생성
- Working Directory 에 파일을 생성
(touch 명령어 - 빈 파일을 생성)
test_project % touch test.txt
test_project % ls
test.txt
Git Status
- Git 에 존재하는 파일 확인(파일의 상태까지 확인할 수 있음)
git status
test_project % git status
On branch master # 넌 지금 On branch master(main)에 있다

No commits yet # 아직 commit은 없다

Untracked files:  # add 해야 할 파일이 있다
  (use "git add <file>..." to include in what will be committed)

test.txt

nothing added to commit
but untracked files present (use "git add" to track)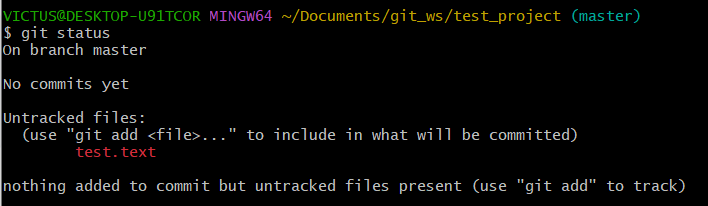
-> use "git add <file>..." to include in what will be committed 이 부분을 참고하자
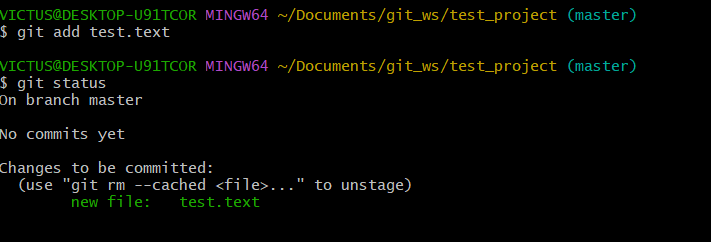
Git Add
- Working Directory 에서 변경된 파일을 Index (stage)에 추가
- add를 함으로써 2단계 영역(stage)으로 들어옴
git add <filename>
Git Commit
-
Index (stage) 에 추가된 변경사항을 HEAD 에 반영 (확정)
-
Commit을 함으로써 3단계 영역(HEAD)으로 들어옴
git commit -m "commit 에 대한 설명" <filename>

Remote Repository
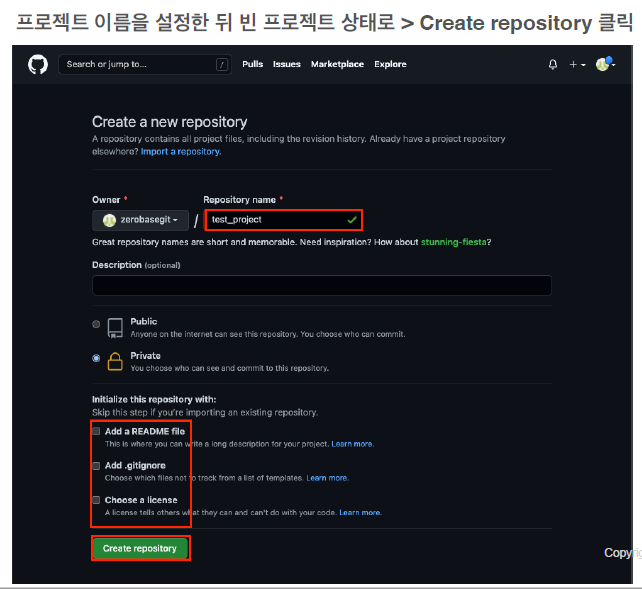
Remote Repository 생성
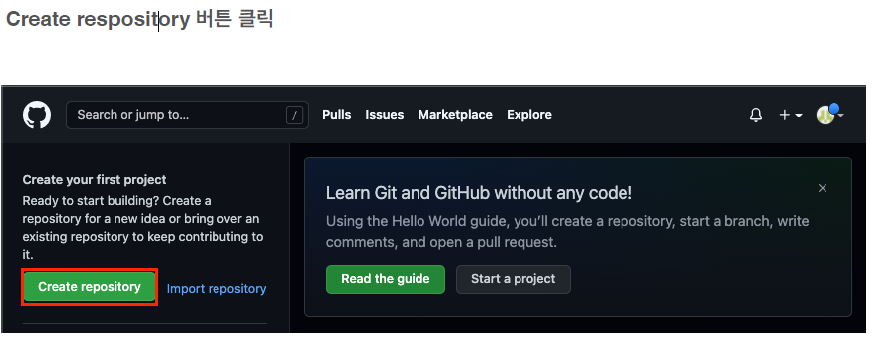
- Remote Repository 이름을 Local Repository 이름과 동일하게 하자
- Public : 누구나 볼 수 있게
- 우리가 하는 건 Local Repository를 먼저 생성하고, 비어있는 Remote Repository 를 연결하는걸 하는 중. 그래서 비어있어야 하기 때문에 아래에 따로 체크하지 않는다.
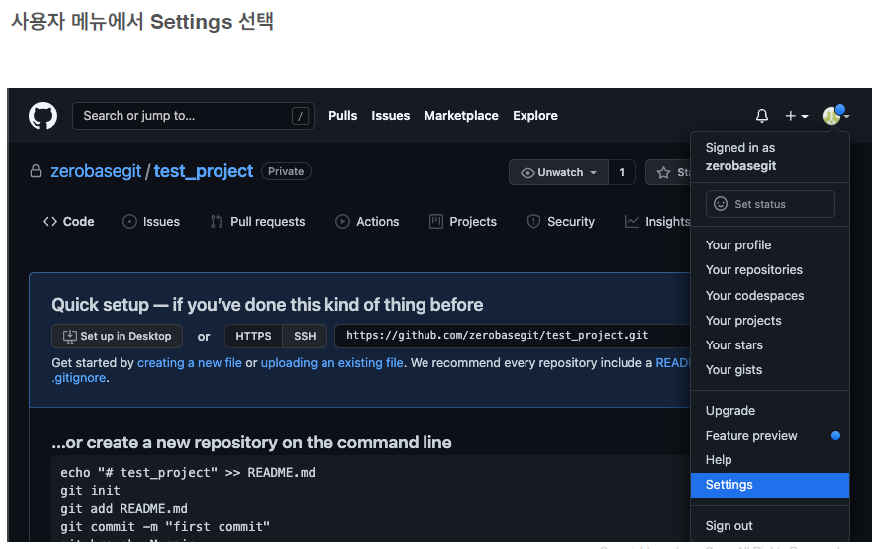
Github Token 생성
- 얼마전부터 보안상의 이유로 Remote Repository 접속 시 비밀번호 대신 Token 을 사용
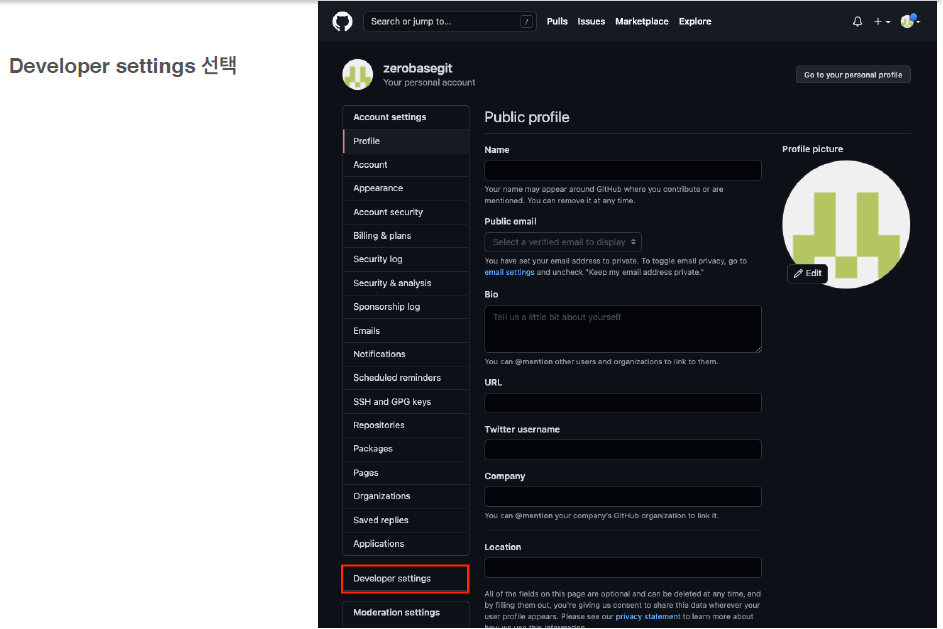
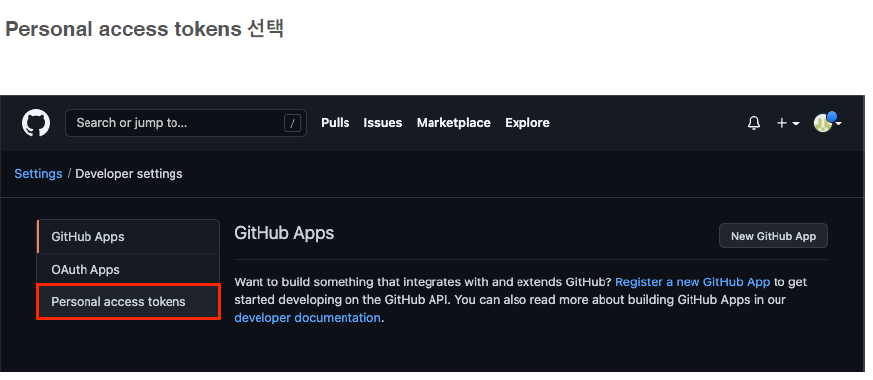
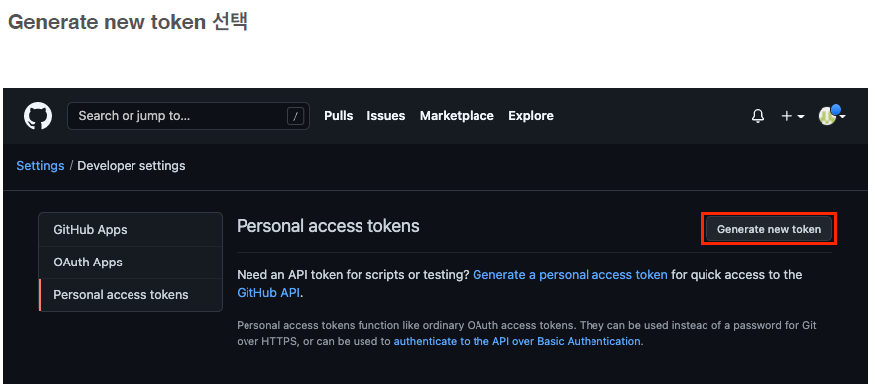
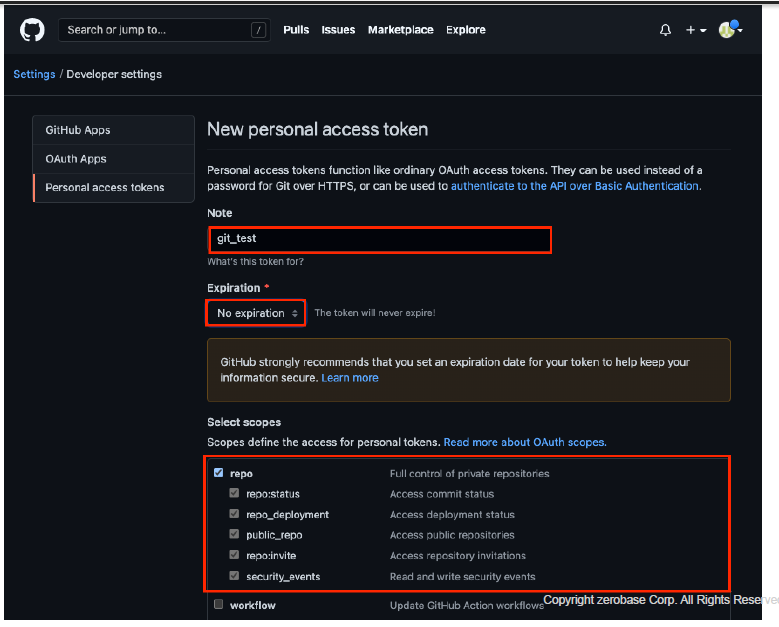
- Token 이름 입력 + No expiration 을 선택 + repo 선택 > Generate token 버튼 선택 (그림 다음 장)
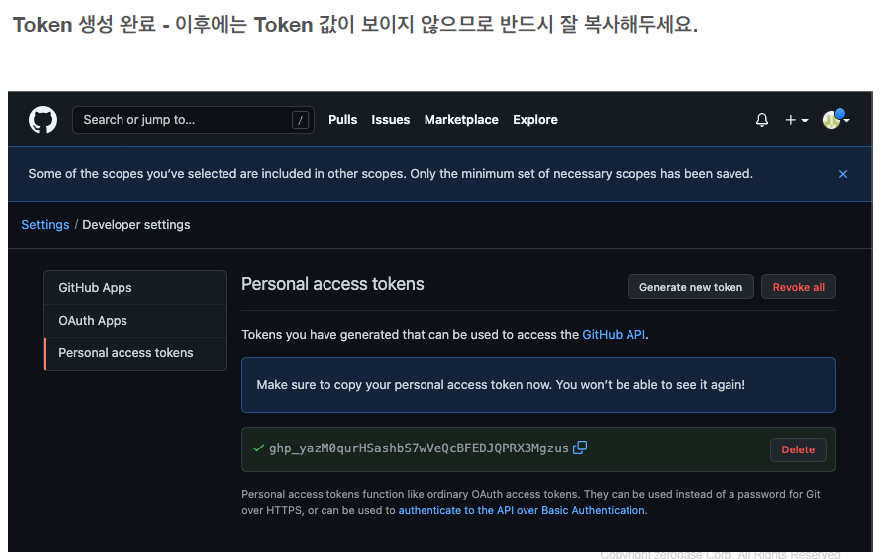
- 아래 토큰값을 어디에 메모
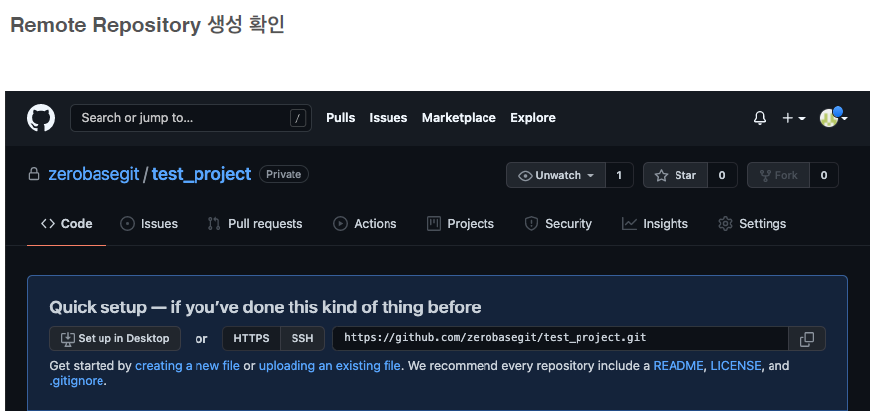
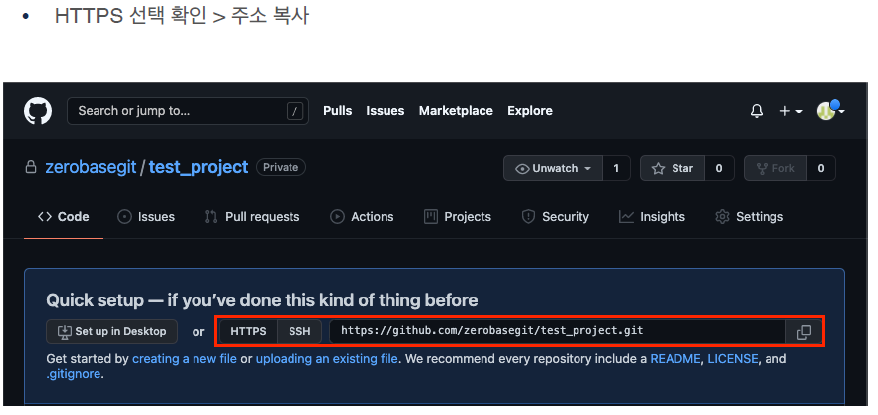
Remote Repository 등록
- Local Repository 에 연동할 Remote Repository 를 등록 (Token 사용)
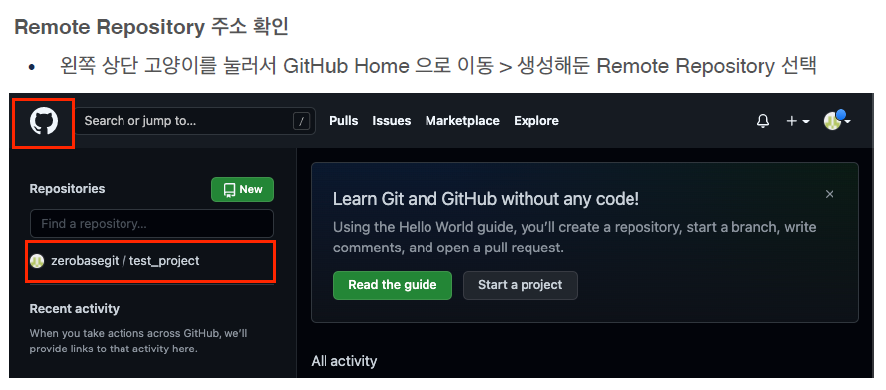
- 아래 http 주소가 Remote Repository 주소값
- Local Repository 에 Remote Repository 등록
• Remote Repository 등록
(이렇게 하면 id, pw를 Remote와 연동할때마다 입력해야됨)
git remote add origin https://github.com/<repository>.git내 컴퓨터 Local Repository 로 이동

Remote Repository 등록 with Username and Token
-> 이렇게 하면 id, pw를 Remote와 연동할때마다 입력안해도 됨
# 원래 한 줄인데 길어서 두줄로 함
# 주소값 안에 <username>:<token>@ 가 추가됨

git remote add origin https://<username>:<token>@
github.com/<repository>.git

# username : zero
# token : ghp_Ko 이라면(실제로는 길다)

git remote add origin https://zero:ghp_Ko@github.com~~
# 이렇게 넣어준다
예시
test_project % git remote add origin
https://zerobasegit:ghp_yazM0qurHSashbS7wVeQcBFEJ
2QPRX3Mgzus@github.com/zerobasegit/test_project.git
- 보안상 토큰값 안나오게 함
Remote Repository 정보 확인
git remote -v
예시
test_project % git remote -v
2origin https://zerobasegit:...Mgzus@github.com/zerobasegit/test_project.git (fetch)
3origin https://zerobasegit:...Mgzus@github.com/zerobasegit/test_project.git (push)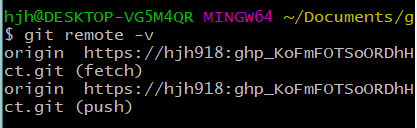
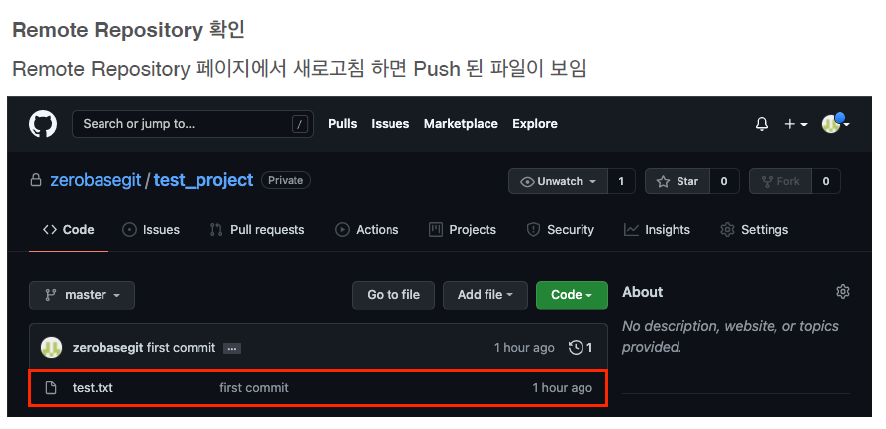
Remote Repository 에 변경내용 Push 하기
- Local Repository (HEAD) 에 반영된 변경내용을 Remote Repository 에도 반영하기 위해서는 Git Push 를 사용
Git Push
git push origin <branchname>예시
- origin 이라는 Repository(위에서 origin 이름으로 Repository 만듦)에 Local Repository의 master branch 를 할거임(master 가 안되면 main으로 해보자)
test_project % git push origin master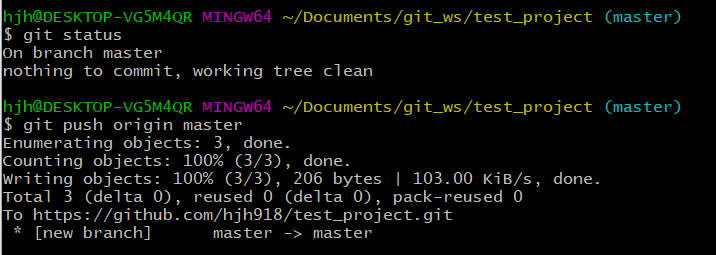
- first commit 이라고 적었던 메시지도 보임
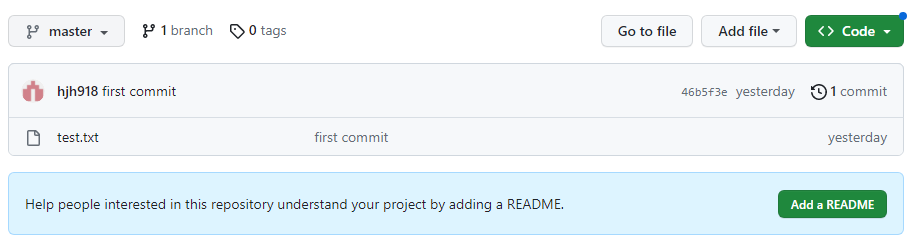
Remote Repository 에 Pull 하기
- Remote Repository 의 내용에 맞춰 Local Repository 를 갱신하려면 Git Pull 사용
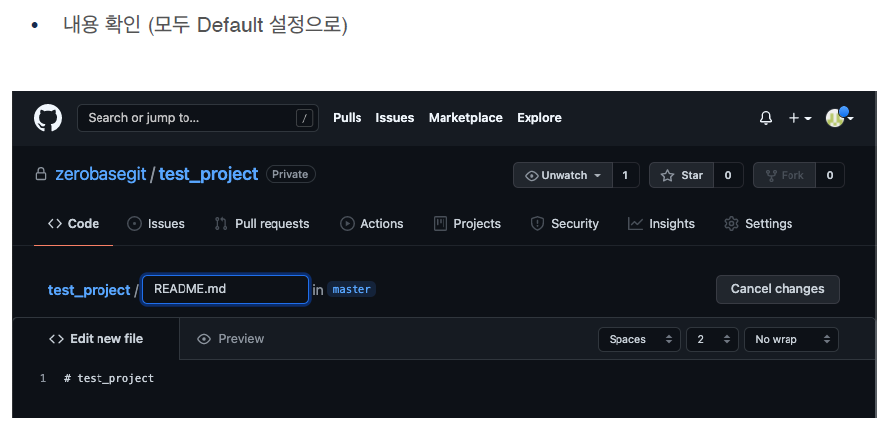
.md
- md 는 마크다운 약자로, 마크다운을 사용하는 파일이라는 뜻임
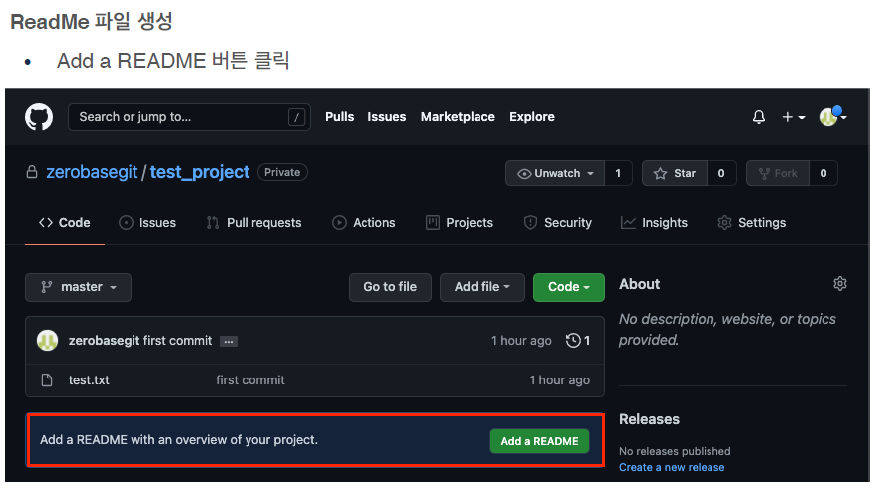
- 디폴트로 commit을 하면 Remote Repository 에서 README 파일을 하나 생성해서 add하고 commit까지 하는 효과가 생긴다
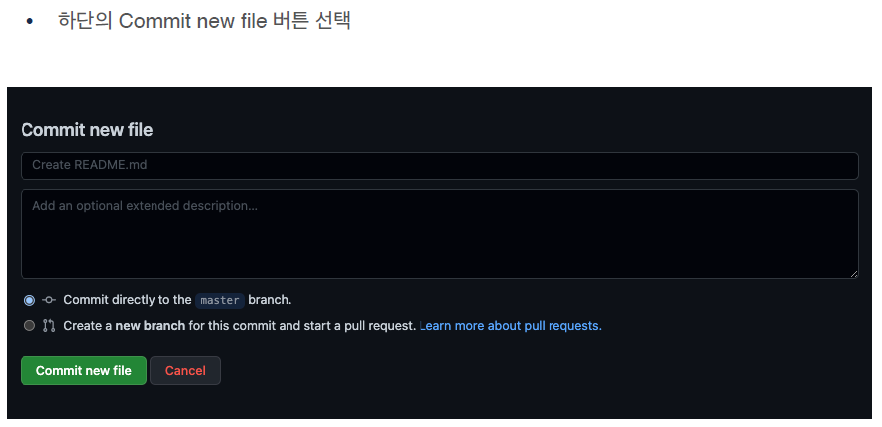
- Local Repository 에는 현재 README가 없어서 Local과 Remote의 상태가 달라져 Pull을 할 수 있다
Git Pull
git pull origin <branchname>에시
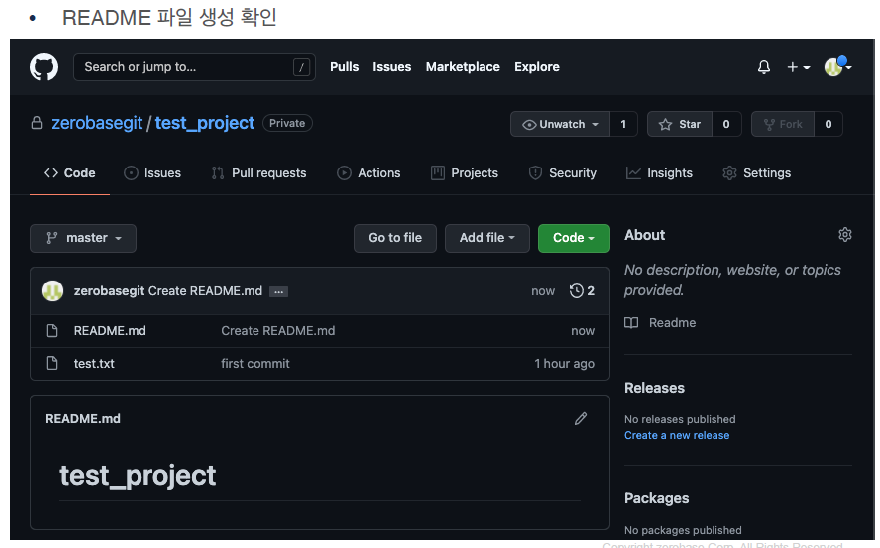
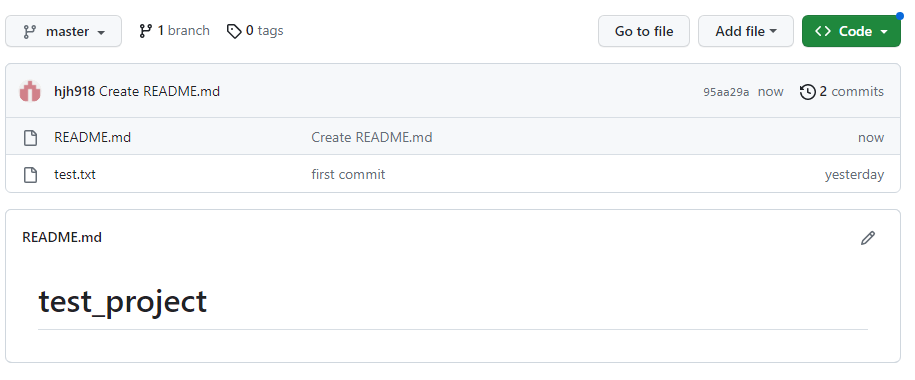
- ReadMe 파일을 Local Repository 로 Pull
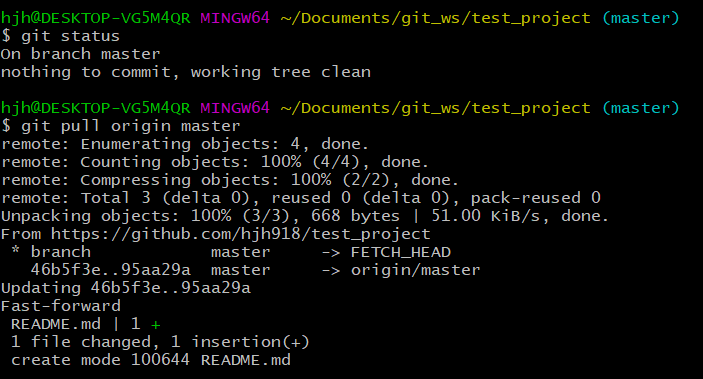
- 폴더안에 ReadMe 파일이 생김, pull 성공!

- Git Pull 확인
(README.md가 있으면 제대로 된 것)

문제
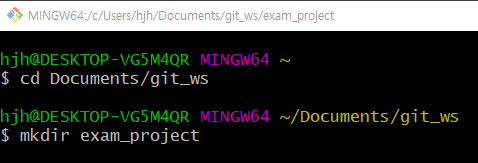
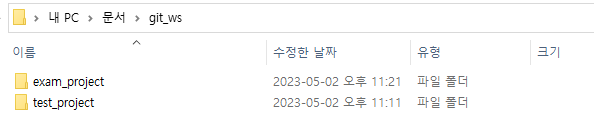
1. Local Repository 생성하기
• 위치 : git_ws 폴더 하위
• 이름 : exam_project
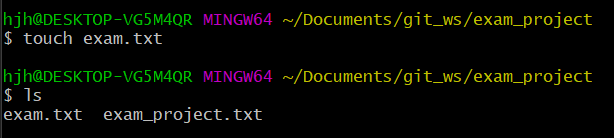
2. 파일 생성 후 Git 으로 관리 시작하기
• 파일 : exam.txt
>>touch exam

• Index 추가 (git add를 의미)
>> git add exam.txt

• HEAD 등록  (git commit을 의미)
>> git commit -m 'add exam.txt' exam.txt


3. Remote Repository 생성 하기
• 이름 : exam_project
• 빈 프로젝트
4. Remote Repository 등록 하기
• exam_project 의 Local Repository 에 앞서 생성한 remote repository 등록 후 확인
• token 은 앞서 수업에서 생성한 token 계속 사용

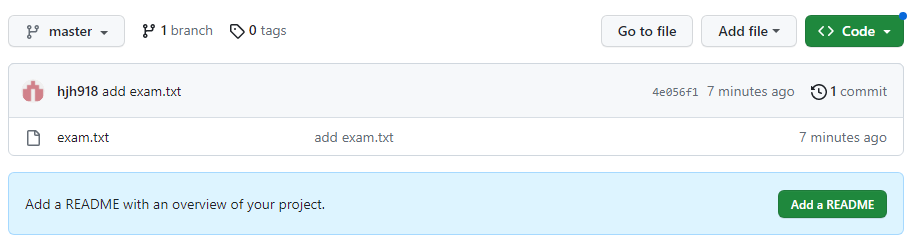
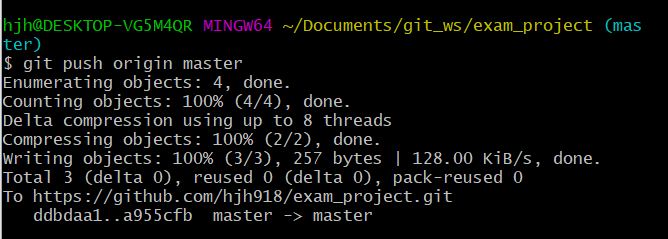
5. Local Repository 변경내용을 Remote Repository 에 반영하기
• commit 항목을 Remote Repository 에 반영 (push)
• Remote Repository 에서 exam.txt 확인

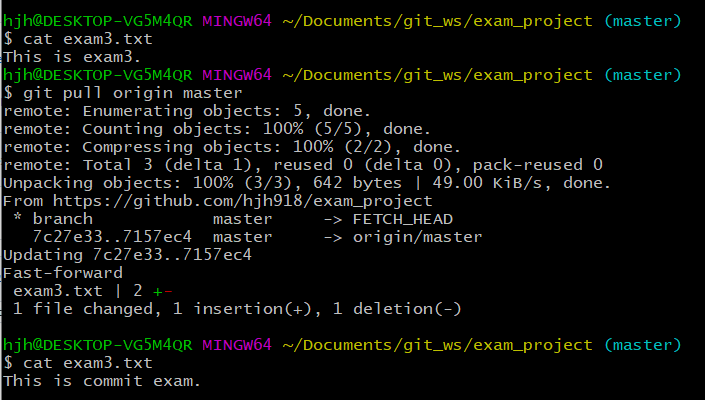
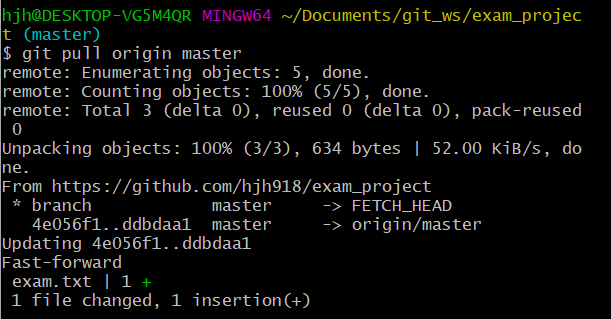
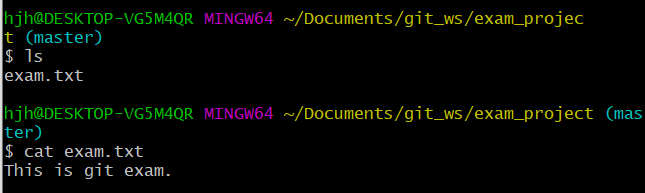
6. Remote Repository 변경 내용을 Local Repository 에 반영하기
-
exam.txt 파일 수정 : This is git exam.
-
Local Repository 에 반영 후 내용 확인

7. Commit 만들고 각각을 Local 과 Remote 에 반영하기
• Commit 1 :
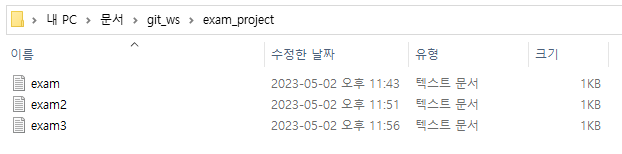
Local Repository 에서 exam2.txt 생성 후 Remote Repository 에 반영, 확인
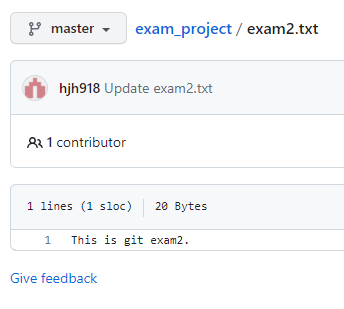
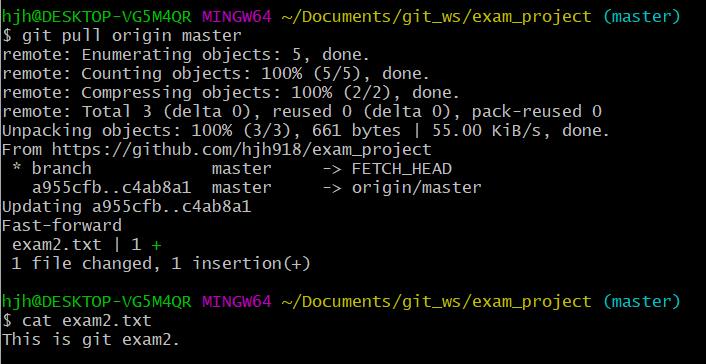
• Commit 2 :
Remote Repository 에서 exam2.txt 수정 후 Local Repository 에 반영, 확인 - This is git exam2.
• Commit 3 :
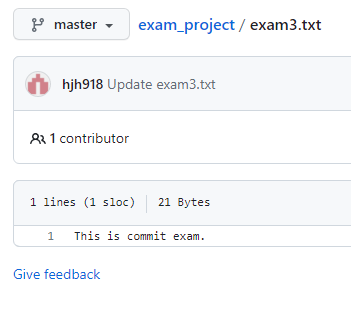
Local Repository 에서 exam3.txt 생성 후 Remote Repository 에 반영, 확인 - This is git exam3.
• Commit 4 :
Remote Repository 에서 exam3.txt 수정 후 Local Repository 에 반영, 확인 - This is commit exam.
Commit 1


Commit 2
Commit 3
cat > exam3.txt
This is exam3.
# 위까지 기재하고 Ctrl + d 눌러주면 됨
# 생성하면서 바로 내용입력됨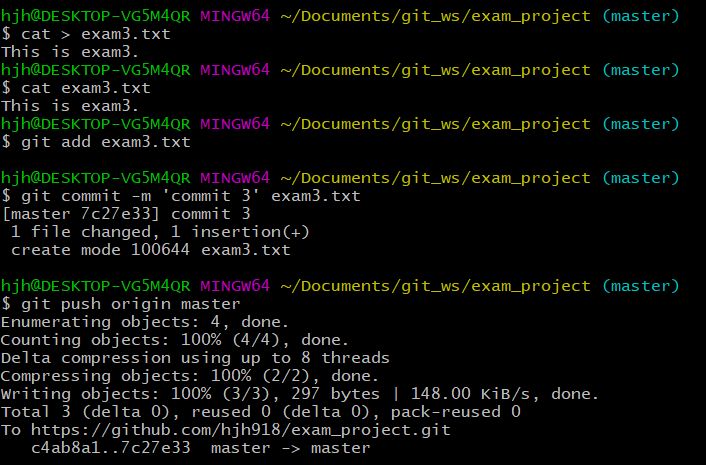

Commit 4