- DTO (Data Transfer Object)
계층간 데이터 교환을 위한 객체
db에서 데이터를 얻어 service, controller 등으로 보낼 때 사용하는 객체
데이터가 네트워크 통해 전송되는 방법 정의하는 객체
interface, class로 정의. (NestJs 공식 문서에서는 class 추천)
사용하는 이유? 데이터 유효성 체크 효율적, 타입으로도 사용
해당 프로젝트에서 Board 위한 프로퍼티 여러곳에서 사용.
한곳에서 프로퍼티 이름 바꾸려고 한다면 유지보수 매우 힘들다.
(한군데 바꾸면 다 바꿔야 함.)
이런 경우 DTO 사용. => 만들어둔 틀
- 게시물 생성 위한 DTO
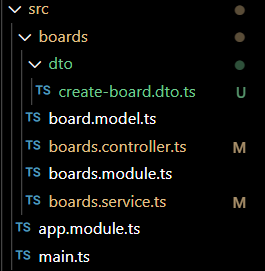

controller 와 service 에 DTO를 적용하자.
-
controller

-
service
// createBoard(title: string, description: string) {
//     const board: Board = {
//         id: uuid(), // 유니크한 id 값
//         title, // title: title
//         description,
//         status: BoardStatus.PUBLIC
//     }
//     this.boards.push(board); // 배열에 넣어줌
//     return board;
// }

createBoard(createBoardDto: CreateBoardDto) {
    // const title = createBoardDto.title;
    // const description = createBoardDto.description;
    const {title, description} = createBoardDto; // 같은 의미
    const board: Board = {
        id: uuid(), // 유니크한 id 값
        title, // title: title
        description,
        status: BoardStatus.PUBLIC
    }
    this.boards.push(board); // 배열에 넣어줌
    return board;
}- id로 특정 게시물 가져오기
서비스 먼저 구현하고 컨트롤러 구현. (정해진 순서는 없음)
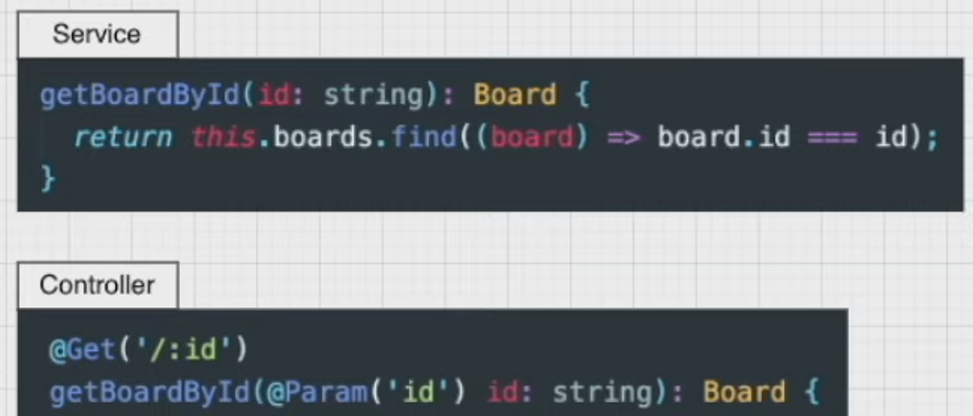
// boards.service.ts
...
    getBoardById(id: string): Board{
        return this.boards.find((board) => board.id === id);
    }
}
// boards.controller.ts
...
// localhost:3000/boards?id=123
// localhost:3000/boards/123
@Get('/:id')
getBoardById(@Param('id') id: string): Board { // 게시물 하나 리턴
return this.boardService.getBoardById(id);
// 파라미터 여러개 있는 경우 다 가져올 때는
// @Param() params: string[]
}
}-
id로 특정 게시물 지우기
-
controller
@Delete('/:id')
    deleteBoard(@Param('id') id: string): void {
        this.boardsService.deleteBoard(id);
}- service
deleteBoard(id: string): void {
        // 원 게시물 중 아이디 다른 것만 남김
        this.boards = this.boards.filter((board) => board.id !== id);
}- 게시물 업데이트
- controller
@Patch('/:id/status')
    updateBoardStatus(
        @Param('id') id: string,
        @Body('status') status: BoardStatus
    ) {
        return this.boardsService.updateBoardStatus(id, status);
}- service
updateBoardStatus(id: string, status: BoardStatus): Board {
        const board = this.getBoardById(id);
        board.status = status;
        return board;
}- Pipe
파이프는 @Injectable() 데코레이터 달린 클래스
data transformation(변형), validation(유효성) 체크에 사용
변형: 입력 데이터 원하는 형식으로 변환. 파이프에서 자동으로 변환
ex) string '7' => integer 7
유효성 체크: 유효한 경우 그대로 전달, 아니면 에러
메소드 호출되기 직전에 파이프 삽입.
파이프는 메소드로 향하는 인수 수신하고 이에 대해 작동.
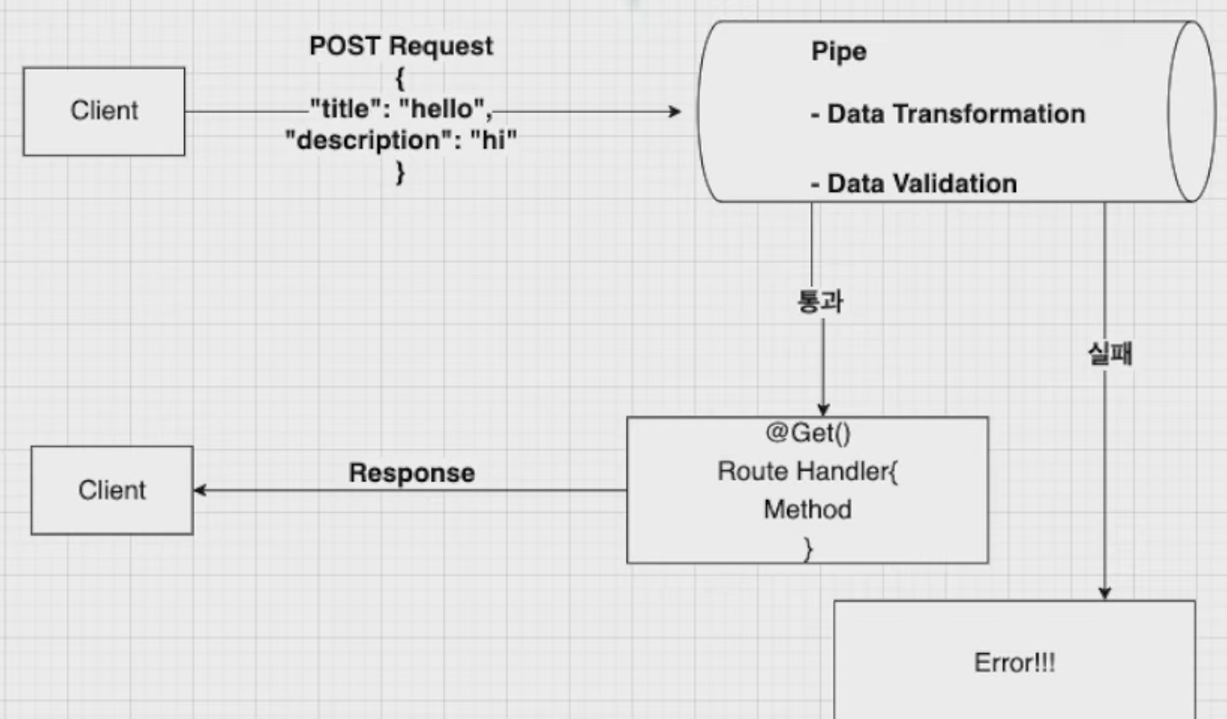
파이프 사용 방법 (binding pipes)
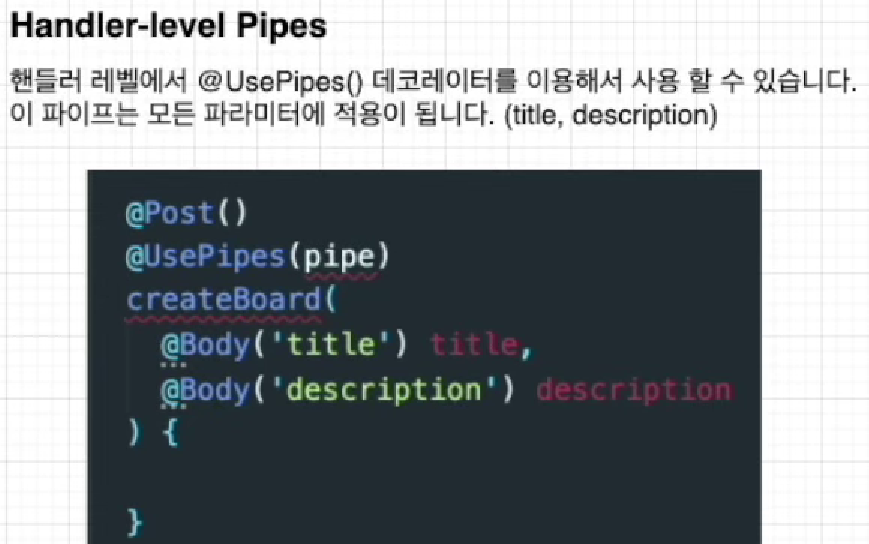
- 핸들러 레벨
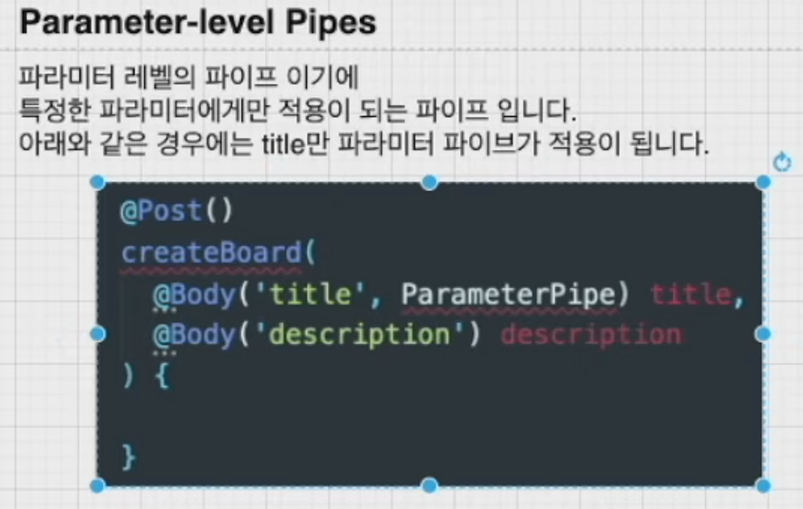
- 파라미터 레벨
- 글로벌 레벨
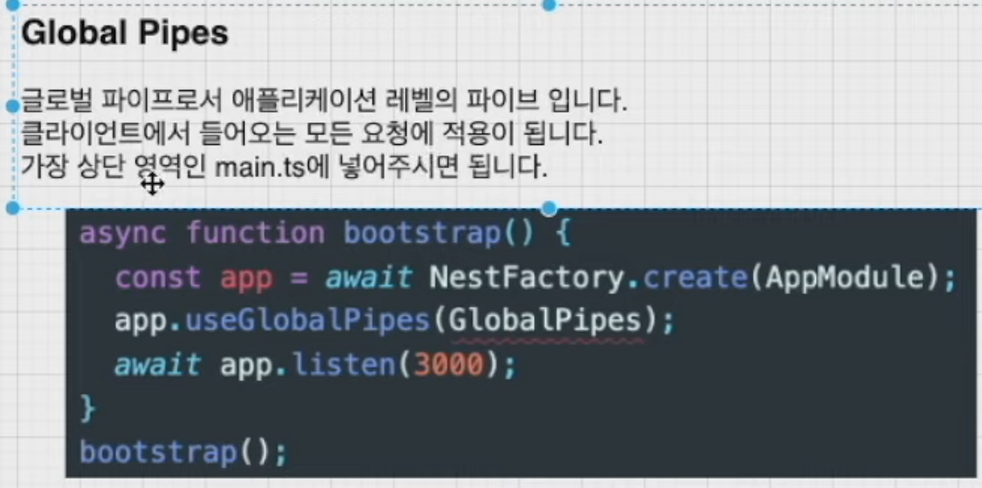
- 파이프를 이용해 게시물 유효성 체크
게시물 생성할 때 title, description 없어도 오류 안나고 만들어짐.
필요한 모듈 npm i class-validator class-transformer
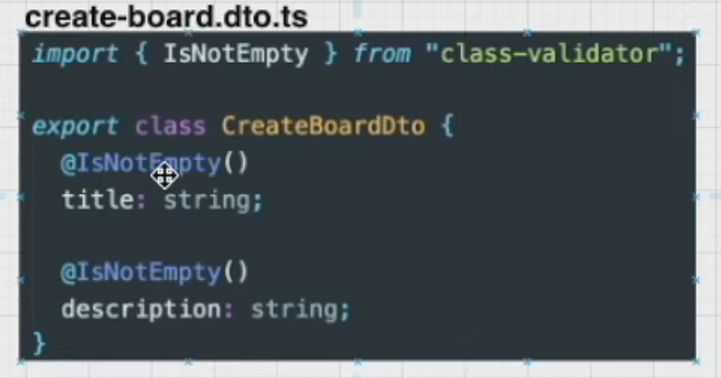
@IsNotEmpty - 유효성 체크
값 없으면 오류
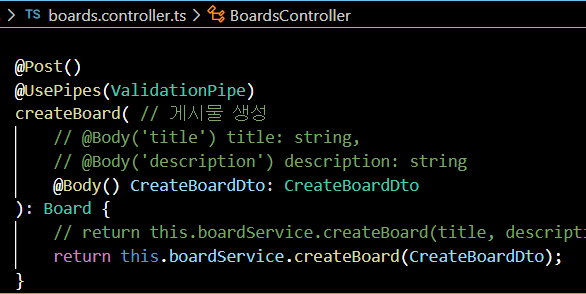
@UsePipes(ValidationPipe) 컨트롤러에서도 추가해줘야 함. (핸들러 레벨)
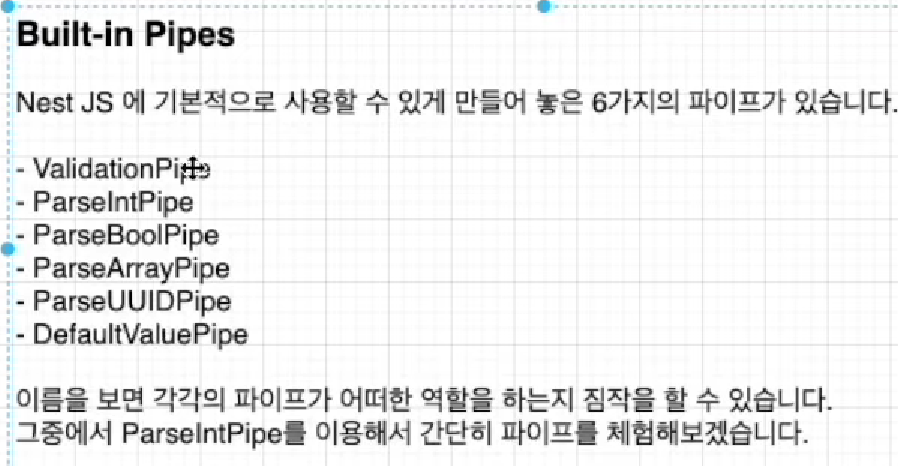
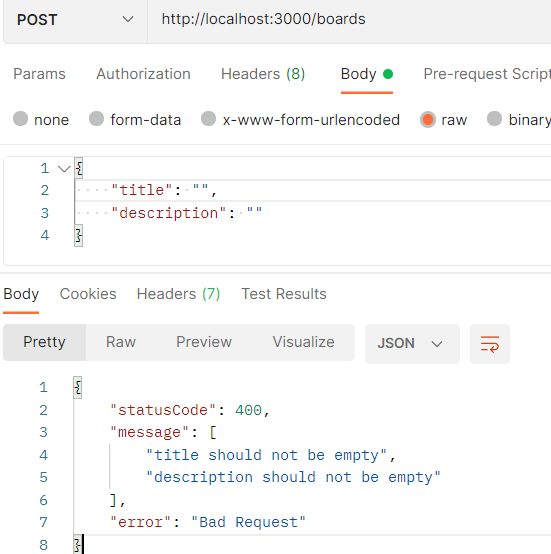
- 없는 아이디로 검색, 삭제 시
없다고 에러 표출해야 함.
getBoardById(id: string): Board {
        const found = this.boards.find((board) => board.id === id);

        if (!found) {
            throw new NotFoundException(`Can't find Board with id ${id}`);
        }
        return found;
    }

deleteBoard(id: string): void {
        const found = this.getBoardById(id);
        // 원 게시물 중 아이디 다른 것만 남김
        this.boards = this.boards.filter((board) => board.id !== found.id);
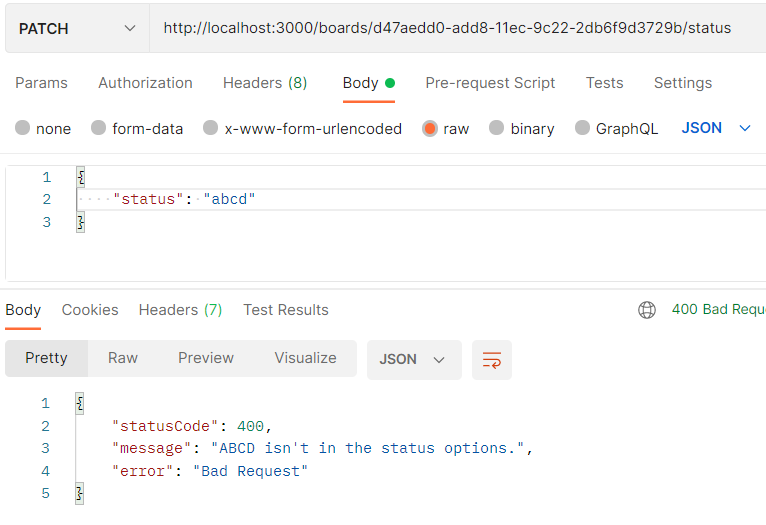
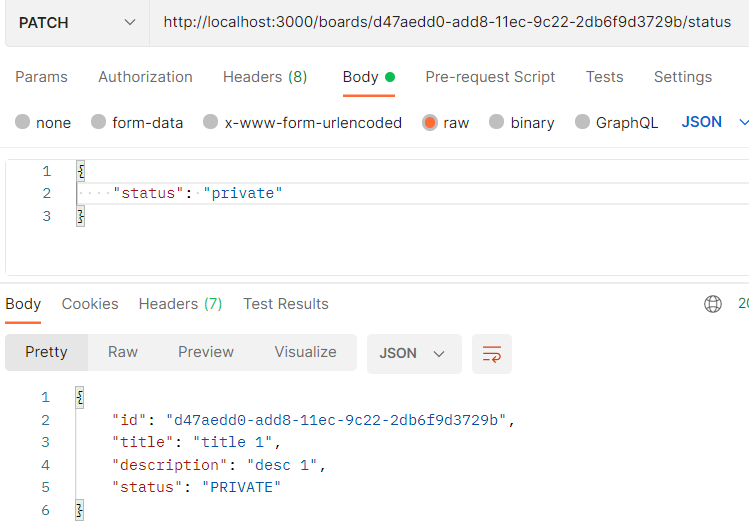
}- 커스텀 파이프를 이용해 유효성 체크
지금까지는 NestJS에서 이미 구성해놓은 built-in 파이프 사용했음.
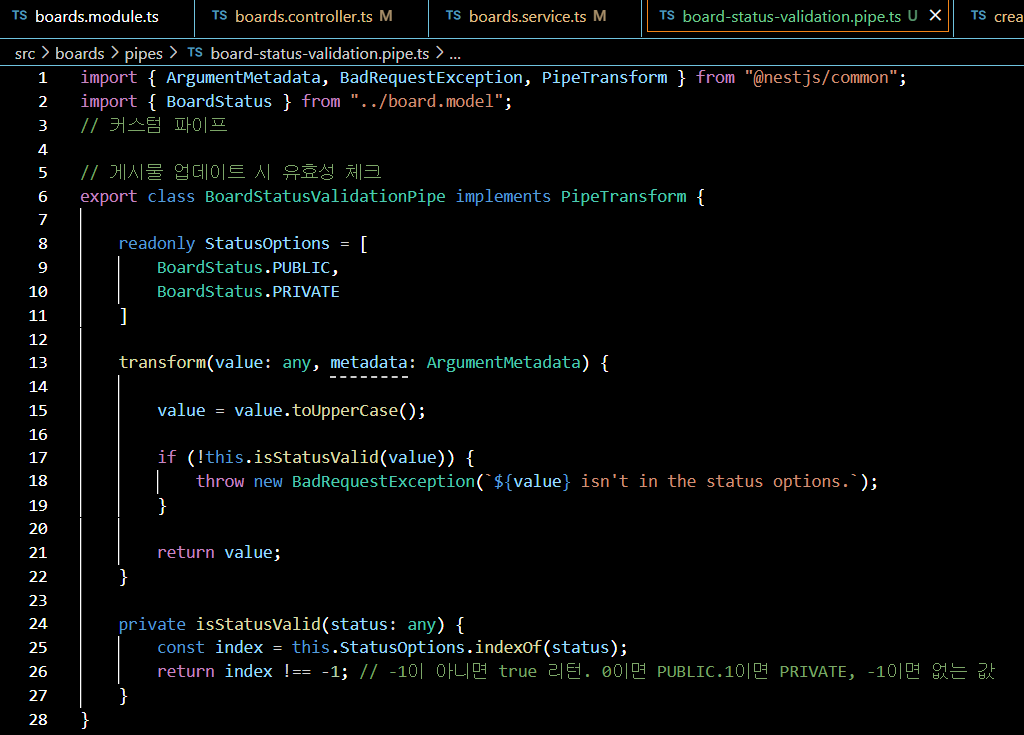
모든 커스텀 파이프는 PipeTransform 인터페이스 구현 해줘야 함.
PipeTransform 인터페이스는 모든 파이프에서 구현해줘야 하는 인터페이스
이것과 함께 모든 파이프는 transform() 메소드 필요
이 메소드는 nest가 인자 처리 위해 사용됨
두개의 파라미터 transform(처리된 값, 메타 데이터 포함한 객체)
리턴 값은 route 핸들러로 전해짐
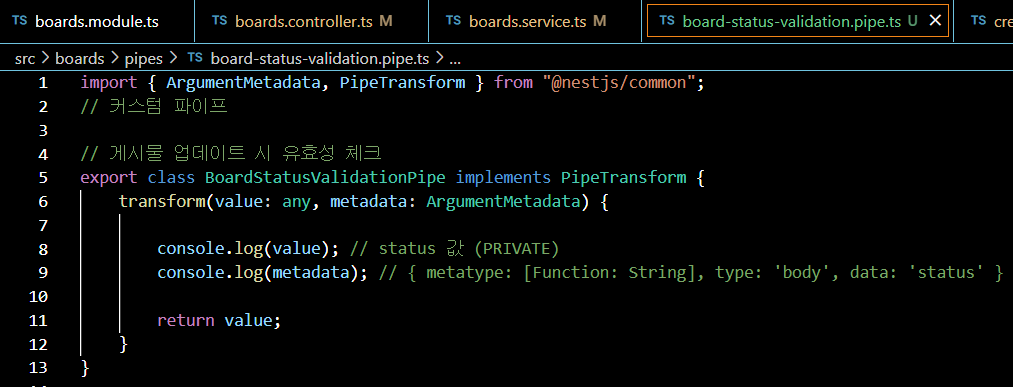

status값으로 PUBLIC, PRIVATE만 받기 위해 readonly 클래스 프로퍼티 사용.
읽기 전용 멤버는 클래스 외부에서 액세스 할 수 있지만 해당 값은 변경할 수 없음.
