모노리식 → MSA 전환
대형 서비스에 적합하지만, 현재 프로젝트가 그런 서비스라고 가정!하고 전환을 시작.
각 비지니스 로직을 분리해 개별 프로젝트로 생성.
제일 앞단에 API Gateway (분배기) 통해 서버 요청 분산 관리할 수 있다.
장점
- 서비스별 각각 스케일링이 가능
- 스케일 업 : 업그레이드! 사양을 업그레이드
- 스케일 아웃 : 서버를 여러대 추가해 확장
- 서비스 별 다른 환경
- 하나 off 되어도 나머지는 영향 x
이러한 이유들로 대형 서비스들 MSA로 전환. but, 단점도 존재.
단점
- 초기 구성 난이도
- 서버 간 호출 비용
- 분산 관리
- 하나 서비스 off 되어도, 서비스는 돌아감 → 제 기능x
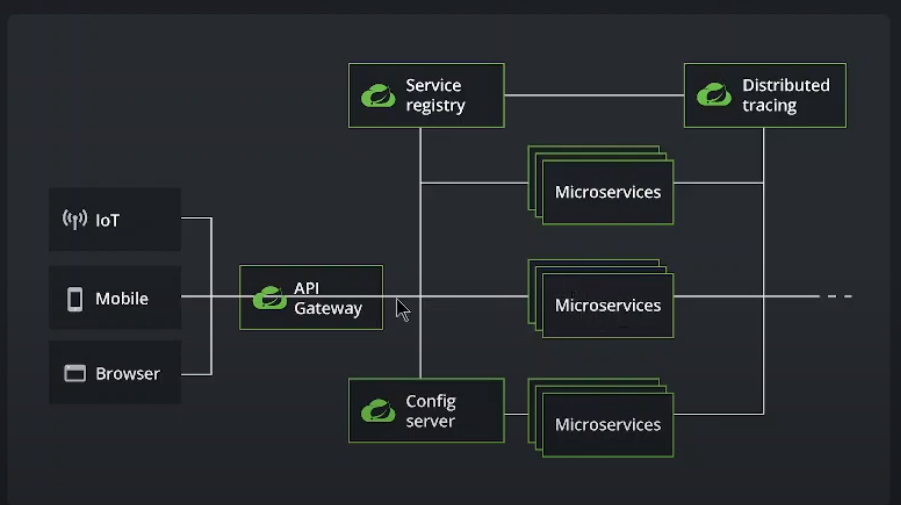
MSA 구성 요소
- 서비스 로직 (일반 비지니스 로직)
- 게이트웨이
- 맨 앞에서 요청 서버별로 분산시키는 역할
- 모니터링 서버
- 각 서버 관리 용
- 변수 관리 서버
- ex: 모든 서버마다 pw 변수 통일
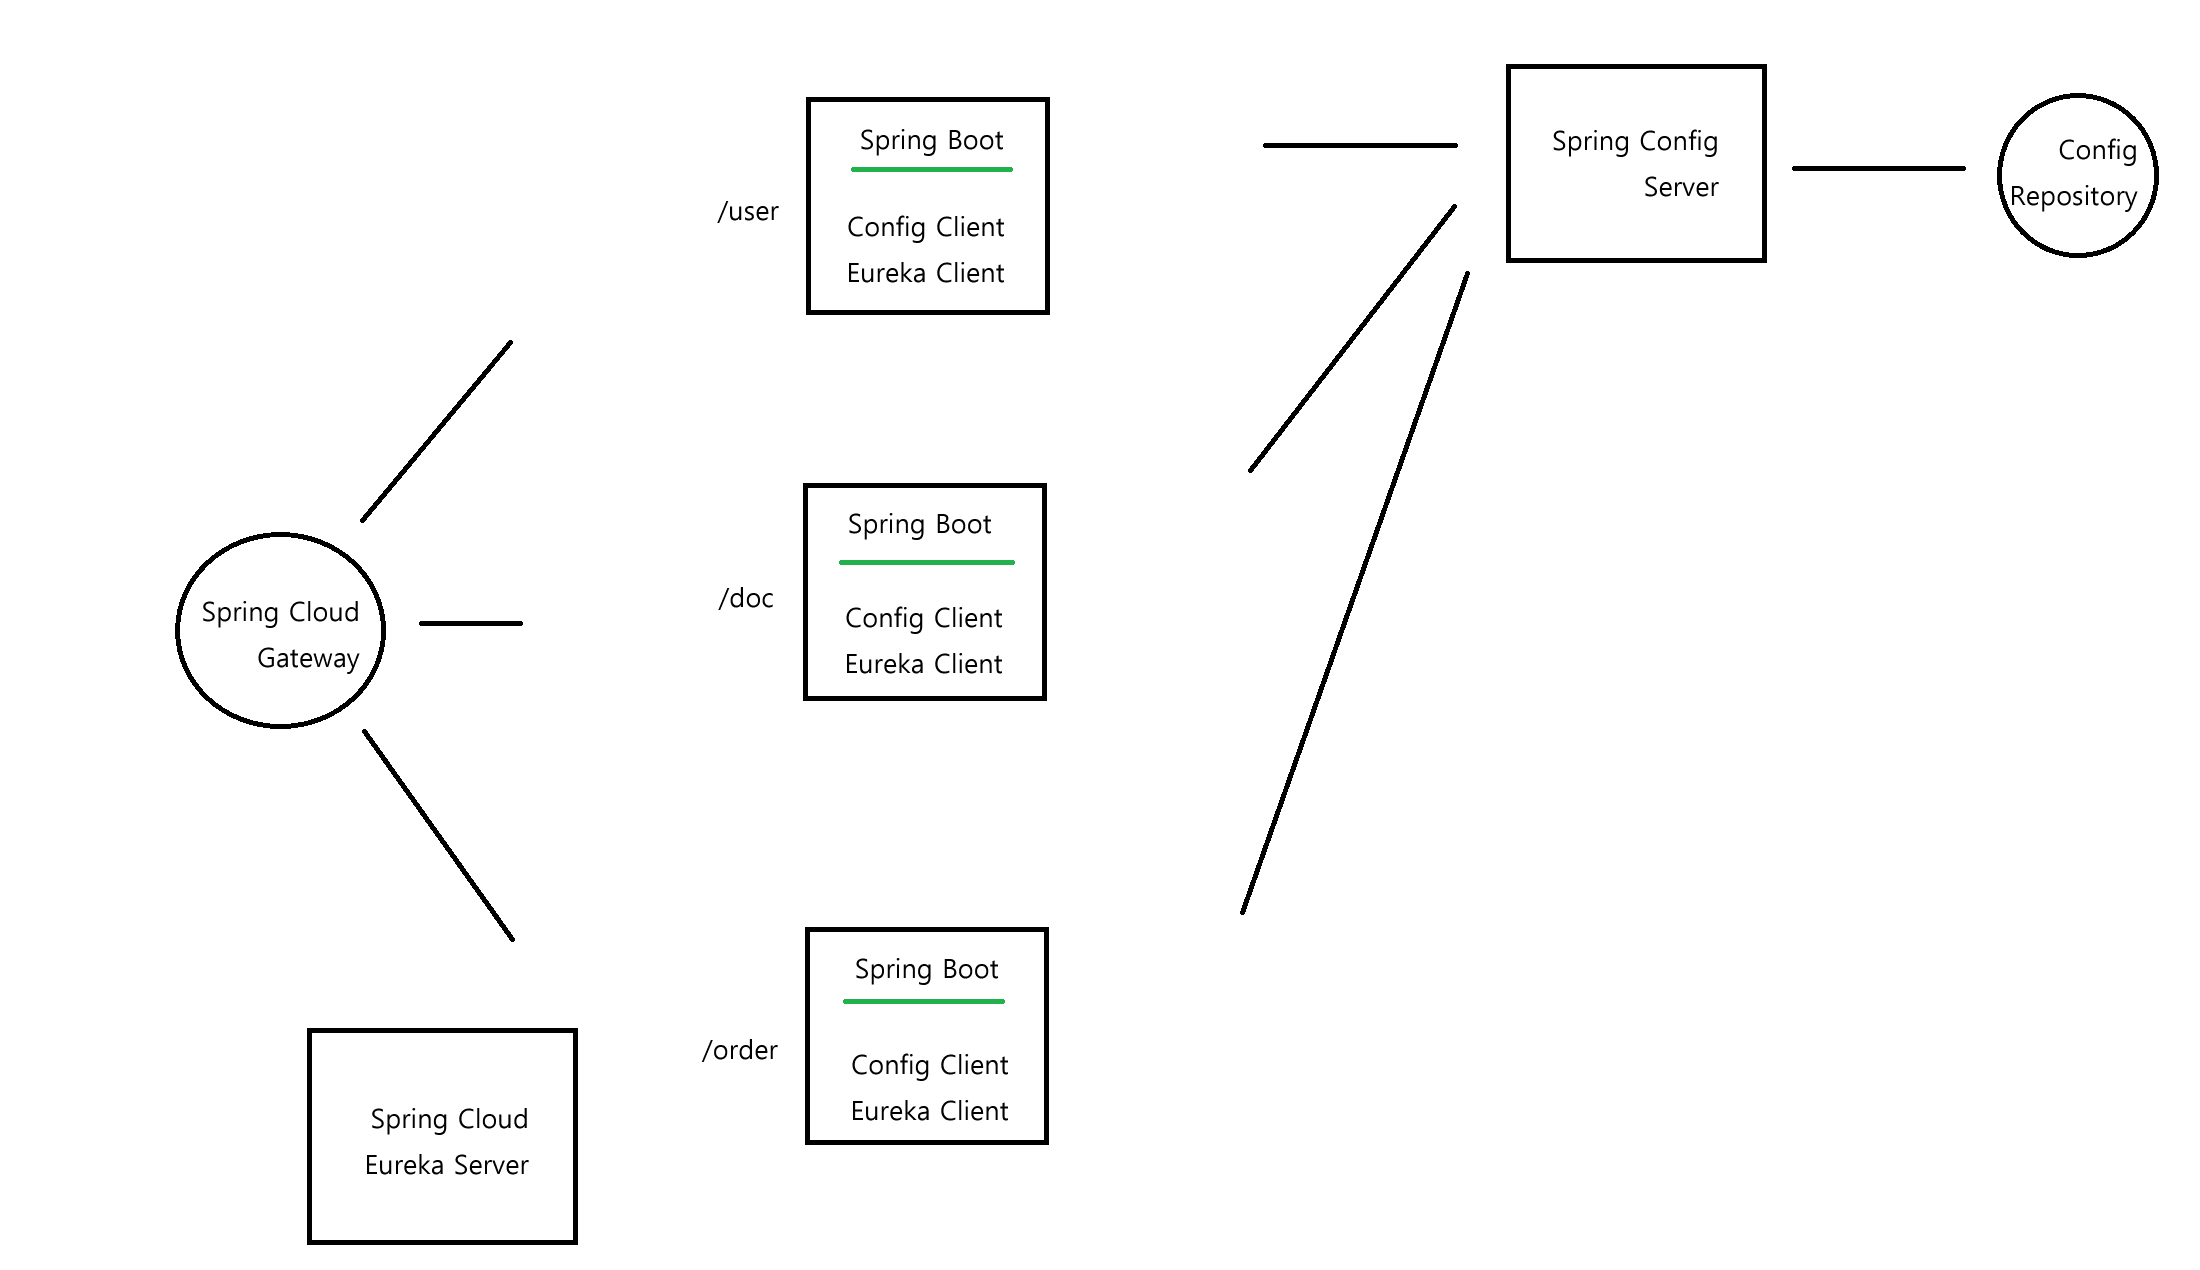
- SCG
- gateway로 들어온 요청에 맞게 분배
- 비지니스 로직
- 각 경로에 대해서 비지니스 로직을 각각 스프링 서버로 띄움 (3개)
- eureka server
- 각 서버 모니터링 하는 서버. 원하는 서버 등록해야 함.
- 모니터링 + SCG에게 목록 전달해 로드밸런싱 도움
- config server
- 단순히 변수 제공하는 매개체
- 각 스프링 서버는 application.properties 값 명시하지 않고, config server로부터 받아서 사용.
- config repository에 저장된 데이터 전달.
- config repository
- 깃허브 리포지토리 사용 가능.
Config Repository
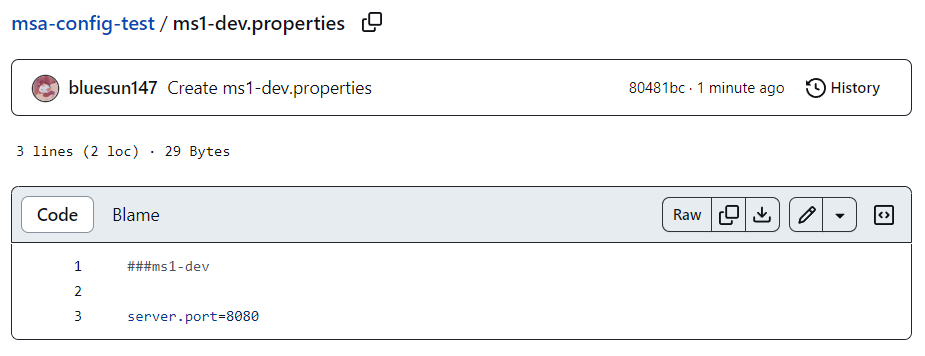
config repository를 깃허브에 private으로 만들었으므로 config server 접속 위해서 비대칭 키 사용.
public키는 깃허브 리포지토리에 저장해두고 config repository에서 private키 통해 접속.
쉘에서 ssh-keygen 명령어 통해 비대칭키 생성 (git bash를 사용했다)
ssh-keygen -m PEM -t rsa -b 4096 -C "코멘트"파일 위치
C:\Users\blues\.sshConfig Server
public키 내용 복사해서 깃허브 리포지토리에 등록.
settings - deploy keys
- 의존성
- dependency로 Spring Cloud Config의 Config Server 추가
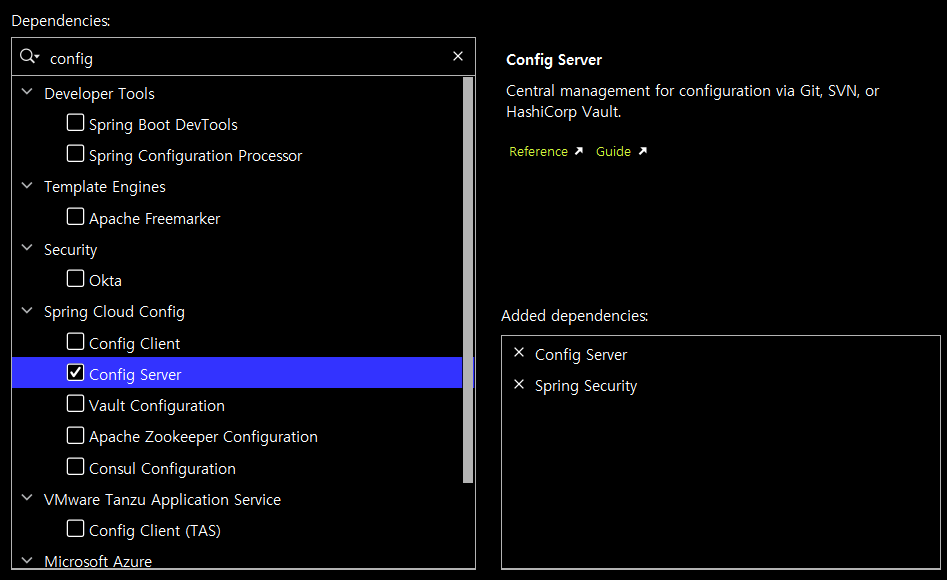
- Main 클래스에 @EnableConfigServer 어노테이션 추가.
- 깃허브 config 저장소 연결
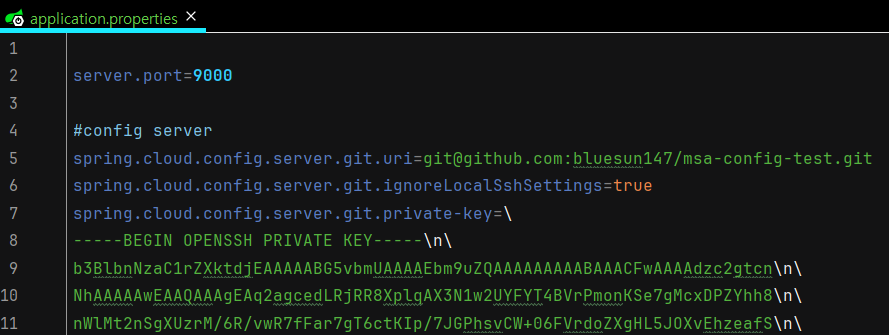
- config 서버 시큐리티 설정
- config 서버 외부에서 접속 못하도록 하기 위해.
@Configuration
@EnableWebSecurity
public class SecurityConfig {

    // 인코딩
    @Bean
    public BCryptPasswordEncoder bCryptPasswordEncoder() {

        return new BCryptPasswordEncoder();
    }

    // 시큐리티 필터
    @Bean
    public SecurityFilterChain filterChain(HttpSecurity http) throws Exception {
        http.csrf((auth) -> auth.disable());
        // 모든 경로에 대해 특정 권한 필요
        http.authorizeHttpRequests((auth) -> auth.anyRequest().authenticated());
        // httpBasic 통한 로그인
        http.httpBasic(Customizer.withDefaults());

        return http.build();
    }

    // 이 내부에 접근할 수 있는 id, pw
    // 한두개이기 때문에 인메모리로 저장
    @Bean
    public UserDetailsService userDetailsService() {
        UserDetails user1 = User.builder()
                .username("admin")
                .password(bCryptPasswordEncoder().encode("1234"))
                .roles("ADMIN")
                .build();

        return new InMemoryUserDetailsManager(user1);
    }
}
httpBasic 형식으로 로그인 진행
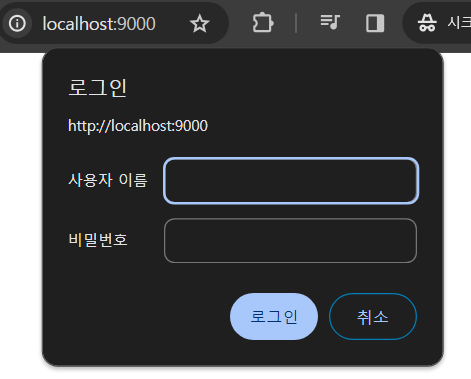
데이터 접근
로그인 후 config repository에 저장되어 있는 데이터 가져오려면 특정 경로로 접근해야 함.
- config client가 config server에 접근하는 주소
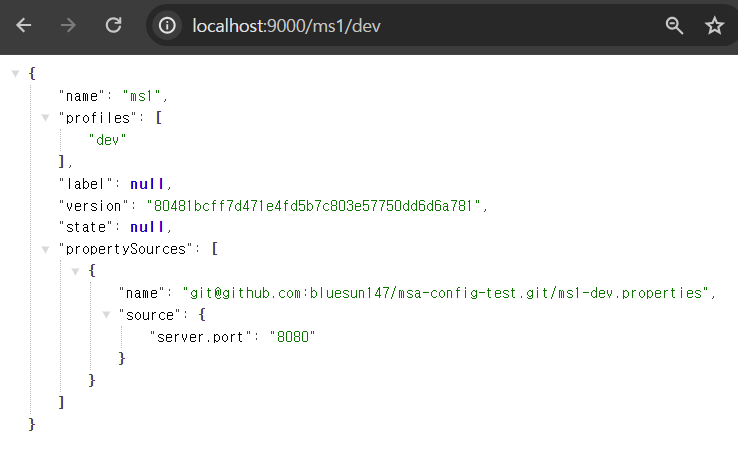
저장된 설정 정보 가져온 모습.
Config Client
config server는 config client가 요청하면 데이터를 전해줌.
스프링부트 어플리케이션에 config client 설정 진행.
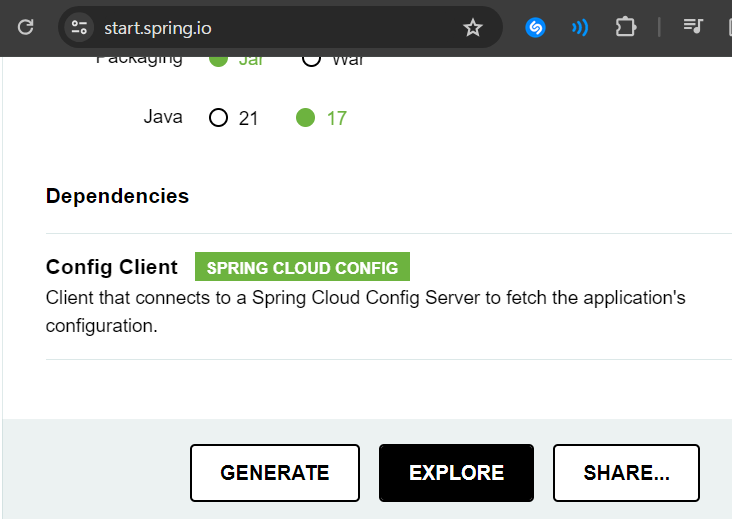
- 필수 의존성 추가
- Config Client
- spring initializer에서 explore
- build.gradle
plugins {
	id 'java'
	id 'org.springframework.boot' version '3.2.3'
	id 'io.spring.dependency-management' version '1.1.4'
}

group = 'com.example'
version = '0.0.1-SNAPSHOT'

java {
	sourceCompatibility = '17'
}

repositories {
	mavenCentral()
}

ext {
	set('springCloudVersion', "2023.0.0")
}

dependencies {
	implementation 'org.springframework.cloud:spring-cloud-starter-config'
	testImplementation 'org.springframework.boot:spring-boot-starter-test'
}

dependencyManagement {
	imports {
		mavenBom "org.springframework.cloud:spring-cloud-dependencies:${springCloudVersion}"
	}
}

tasks.named('test') {
	useJUnitPlatform()
}- config 서버와 연결 코드 추가
-
application.properties
spring.application.name=이름
spring.profiles.active=환경
spring.config.import=optional:configserver:http://아이디:비밀번호@아이피:포트

spring.application.name=ms1
spring.profiles.active=dev
spring.config.import=optional:configserver:http://admin:1234@localhost:9000
config repository에 여러개의 설정 파일 만들어두고, 각 클라이언트마다 필요한 설정 가져다 쓸 수 있음.
-
<참고>
https://www.youtube.com/playlist?list=PLJkjrxxiBSFBPk-6huuqcjiOal1KdU88R