오늘은 지난 주부터 이번 주까지 iOS 어플 만들기를 시작하면서 처음으로 받게 된 개인 프로젝트에 사용된 기술들을 모두 정리해보면서 다시 한 번 되짚어 보려고 한다!
과제 조건을 잘못 읽어서 의도치 않게 두 개의 버전을 만들었고 주어진 요건을 다 달성하지 못하는 고런 실수를 저질러 버렸는데... 다음부터는 다시 그러지 않겠다 다짐하면서 회고를 시작해보려 한다.
(혹여 시간이 된다면 어플을 초반 기획대로 마무리 해보고자 한다.)
먼저 제출용 버전부터!
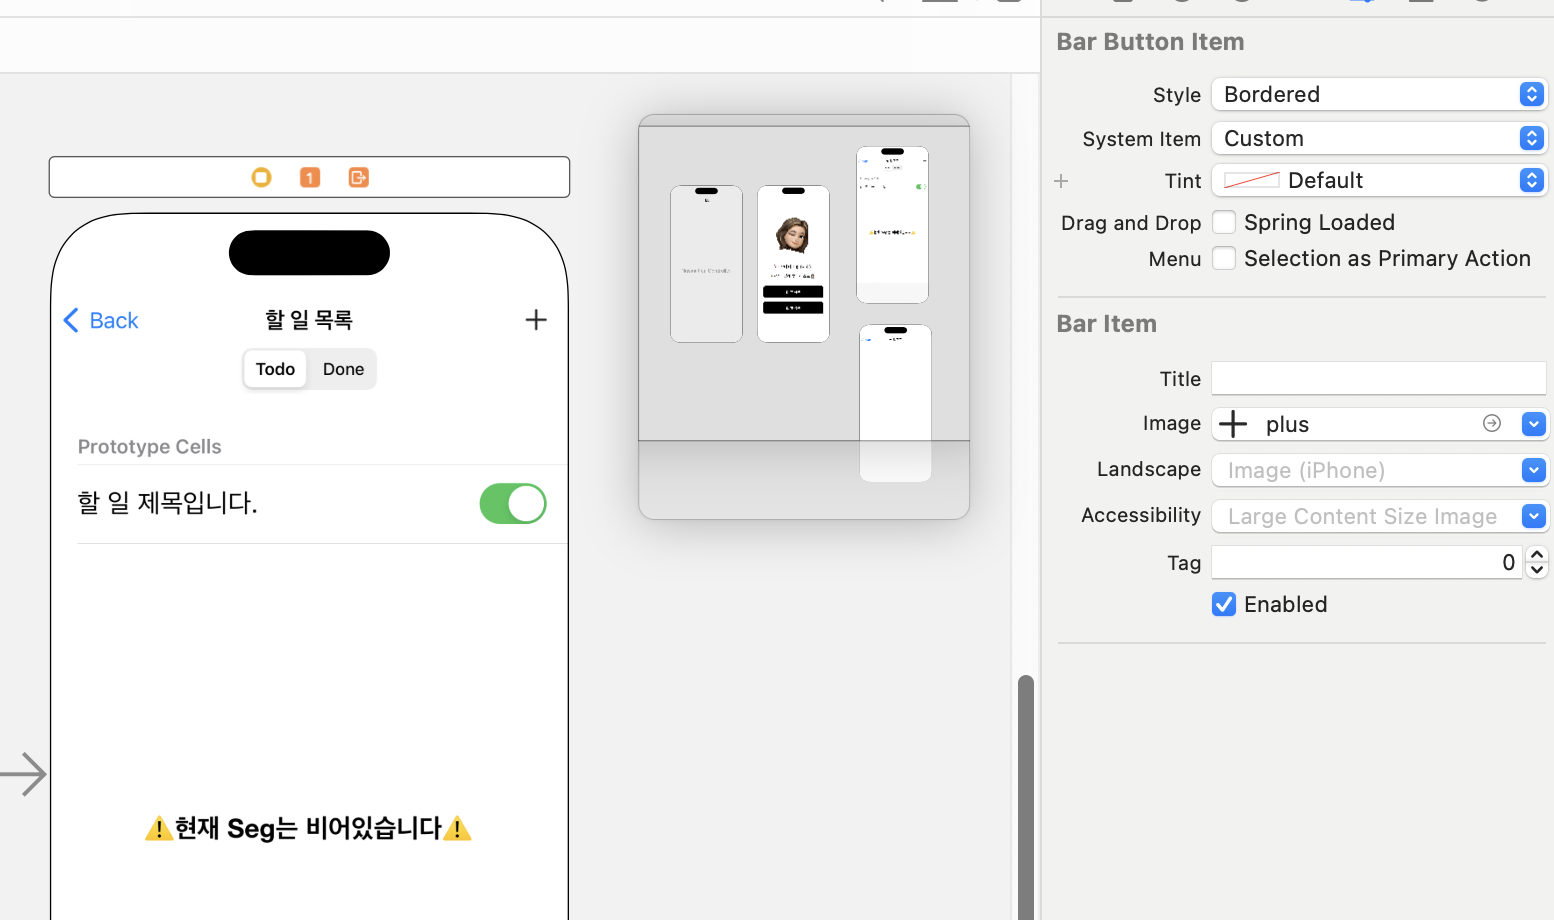
💁🏻♀️ Story Board를 사용한 Segue 화면전환
Xcode에는 storyboard를 이용해서 어느정도 앱의 레이아웃을 구현할 수 있다. 이는 웹 프론트엔드를 찍먹해 본 나로서는 굉장히 좋아보였고 적극적으로 활용을 해봐야겠다는 생각을 했다.
Segue는 화면 전환에 사용 되는데 화면 전환에는 4가지 종류로 구분해볼 수 있다.
- Show(Push)
- Show Details(Replace)
- Present Modally
- Present as Popover
📌 Show(Push)
: UINavigationController의 사용이 요구되는 segue 방식이다. navigation stack 위에 새로운 viewController를 push 하고 특히 어플에서 계층적인 화면이동이 있는 경우에 많이 사용된다. (navigation controller 미사용시 present modally 방식이 default값으로 사용된다.)
animates: true일 때, 오른쪽에서 왼쪽으로 새로운 view controller 화면이 슬라이드 되면서 기존 화면을 왼쪽으로 밀어내고 나타난다. 상단에 navigation bar에 title과 back button이 새로운 view controller에 같이 나타난다. (custom 가능) 이전 view controller로 돌아가기 위해서는 back button을 사용하거나 추가적으로 왼쪽 가장자리를 swipe하는 gesture를 사용해서도 이전 화면으로 돌아갈 수 있다.
📌 Show Details(Replace) & Present Modally : Show details 방식의 경우 UISplitViewController object 에서만 작동한다. 다른 ViewController 전체를 보여주는 것이 아니라 해당 Controller의 자식인 View를 target으로 삼아서 modal 방식으로 보여준다. modal 방식은 animation 채택 시 아래에서 위로 View를 띄워주는데 navigationBar가 보이지 않기 때문에 view의 내용을 대체할 때만 사용하면 좋을 것 같다.
📌 Present as Popover : 보통 iPad(아이패드) 어플에서 조그만 창을 현재의 content위에 띄울 때 사용한다고 한다. 추가적인 정보나 옵션을 전체 화면을 차지하지 않고 보여줄 수 있다. 창이 나타날 때 background는 dimmed 혹은 blurred 처리된다. outside를 tapping하는 것으로 popover 할 수 있다. 아이폰의 경우에는 full-screen modal presentation이 기본값이다.(custom 가능)
💁🏻♀️ Navigation Bar 설정하기
NavigationController를 이용하면서 Show 방법을 이용하면 Back버튼이 있는 navigation bar가 다음에 이어지는 ViewController에 나타난다. 이를 Custom 하는 방법을 정리해보고자 한다.
1. Storyboard를 이용하는 방법
생성된 navigation bar를 선택하고 우측 메뉴바(Navigation Item)에서 Title에 입력하면 중앙에 title이 나타난다.
우측 상단에 원하는 기능의 버튼을 배치하기 위해서는 navigation item object를 드래그해서 우측 상단에 드랍하면 된다. 사용해보지는 않았지만 우측 상단에 여러 개의 버튼도 배치할 수 있다. Bar Button Item Group을 이용하면 되는 듯 하다. Segue와 같은 Storyboard 상에서 해결되는 작업이 아니면 해당 ViewController의 class에 outlet과 action을 연결해서 action에 코드를 작성해줘야 한다.
Assets에 이미지를 미리 등록해놓으면 끌어다 놓은 아이템을 클릭하고 우측 메뉴바의 Image에서 선택할 수 있으며 스타일이나 색상, 이미지가 아닌 글자를 사용할 경우 title의 설정 등을 해줄 수 있다.
2. 코드 작성으로 해결하는 방법
코드 작성으로는 스토리보드의 기능도 당연히 가능하지만 좀 더 상세한 설정을 해줄 수 있다. 예를들어, back버튼의 글자를 변경하고 색상을 변경하는 등의 작업을 해줄 수 있다. 우측의 navigation bar item도 개별로 설정하고 배열로 선언함으로써 한번에 나타낼 수 있다. 코드로 작성할 경우 차지하는 크기를 잘 지정해줘야 할 것 같다.
예시
	override func viewDidLoad() {
        super.viewDidLoad()

        // navigaiton back 버튼 검정색 뒤로가기로 변경
        let backBarButtonItem = UIBarButtonItem(title: "뒤로가기", style: .plain, target: self, action: nil)
        backBarButtonItem.tintColor = .black  // 색상 변경
        self.navigationItem.backBarButtonItem = backBarButtonItem


    }
설정이 나타나길 원하는 VeiwController로 이동하기 전의 VeiwController에서 UIBarButtonItem()을 사용해서 title에는 back 대신에 나타나기를 원하는 글자를 설정해주면 된다. 인스턴스를 생성하고 .tintColor를 이용하면 색상을 변경할 수 있다. 생성한 인스턴스가 navigation bar의 item이라는 것도 self를 통해 선언해주면 끝이다.
당연하겠지만 우측의 navigation bar item도 코드로 설정할 수 있다.
예시
 override func viewDidLoad() {
 	super.viewDidLoad()
    self.toDoTable.delegate = self
    self.toDoTable.dataSource = self

    // margin(여백) 설정을 위해 configuration 선언
   var configuration = UIButton.Configuration.plain()
        configuration.contentInsets = NSDirectionalEdgeInsets(top: 0, leading: 0, bottom: 0, trailing: 5)

    // UIButton 인스턴스 선언 및 위치 지정, size를 이미지 본연의 사이즈로 지정
    let plusButton = UIButton(frame: CGRect(x: 0, y: 0, width: plusButtonImage.size.width, height: plusButtonImage.size.height))

     // UIButton 색상 설정이 필요할 경우
    plusButton.tintColor = .black

    // Assets에 저장해둔 이미지 인스턴스 생성
    let plusButtonImage = UIImage(named: "plus")!

    // UIButton을 글자가 아닌 이미지로 변경
    plusButton.setImage(plusButtonImage, for: .normal)

    // UIButton에 configuration 적용
    plusButton.configuration = configuration

    // UIButton 클릭 시 실행할 행동 지정
    plusButton.addTarget(self, action: #selector(plusPressed), for: .touchUpInside)

    // UIBarButtonItem의 인스턴스를 생성하면서 설정한 UIButton의 뷰를 입힘
   let plusBarButton = UIBarButtonItem(customView: plusButton)

    // navigationItem 중 오른쪽 아이템으로 선언
    self.navigationItem.rightBarButtonItems = [plusBarButton]
}
마지막 줄의 코드를 보면 알 수 있듯이 배열을 통해 다수의 rightbarButtonItems를 선언할 수 있다.
💁🏻♀️ UIViewController를 이용해서 UITableView와 UITableViewCell 설정하는 법
1. UITableViewDelegate와 UIDataSource
이 부분도 storyboard와 코드로 나눠서 적고 싶지만 개인 프로젝트 기한 내에 공부를 하면서 섞어서 하는 법만 익혔기 때문에 이 부분이라도 정리해보고자 한다. (UINavigationViewController를 사용한다는 가정하)
Storyboard에 UIViewController를 불러온 뒤 UITableView를 드래그해서 넣고 prototype cell에 원하는 요소들을 넣는다.
이후, UIViewController에 대한 cocoa class 파일을 작성하고 이곳에 storyboard의 UITableView의 outlet을 연결해 넣어야 한다! UIViewController가 UITableView를 상속받게 해야하고 그에 따라오는 것이 UITableViewDataSource와 UITableViewDelegate이다.
필수적으로 작성해야 하는 것은 UITableViewDataSource에 속한 두 가지 method다.
numberOfRowsInSection섹션 당 반환해야하는 row의 수를 작성하는 것 - 보통 데이터의 .count를 returncellForRowAt반환하는 cell에 대한 내용을 적고 cell을 반환
그 외 프로젝트에 사용한 것은 UITableViewDelegate의 heightForRowAt 하나 뿐이지만 정말 다양한 종류가 있으므로 더 많은 정보가 필요하다면 아래의 링크를 참고하자!
(선택사항)
heightForRowAtrow, 즉 cell의 높이를 설정
[애플 공식 문서] - UITableViewDelegate
[애플 공식 문서] - UITableViewDatasource
    // cell 행 수 반환
    func tableView(_ tableView: UITableView, numberOfRowsInSection section: Int) -> Int {
        return Int
    }

    // cell 반환
    func tableView(_ tableView: UITableView, cellForRowAt indexPath: IndexPath) -> UITableViewCell {
		// cell 구현
        return UITableViewCell
    }

    // cell 높이 지정
    func tableView(_ tableView: UITableView, heightForRowAt indexPath: IndexPath) -> CGFloat {
        return 50
   }
2. Cell에 배열을 사용해서 데이터 연결하기
사실 UserDefaults를 사용해서 시도해보다가 실패해서 제출용에서는 단순히 배열만 사용했고, 따로 만들었던 부분에서는 protocol을 선언하고 delegate를 이용해서 runtime 동안에는 정보가 저장되도록 했다.
차근차근 이 과정들을 다시 정리해보자!
먼저 cocoa class file을 만드는데 UITableViewCell 파일을 만들어야 한다.
그리고 여기에는 cell의 요소들을 모두 outlet으로 연결한다.
또한, cell의 identifier를 지정해준다.
참고로 한 TableViewController에서는 복수의 TableView에 대해 동일한 Identifier가 적용될 수 없고 한 TableView에서는 cell의 종류가 복수일 경우에 동일한 Identifier가 적용될 수 없다.
보통 대부분 한 종류인 경우 단순하게 "cell"이라고 짓는 것 같다.
UITableViewDataSource 중 cellForRowAt가 cell의 내용에 관한 것인데 이곳에 UITableViewCell에 대해 identifier와 함께 instance를 생성하고 각 outlet의 요소들을 연결지어 반환한다.
예시
// dummy 데이터
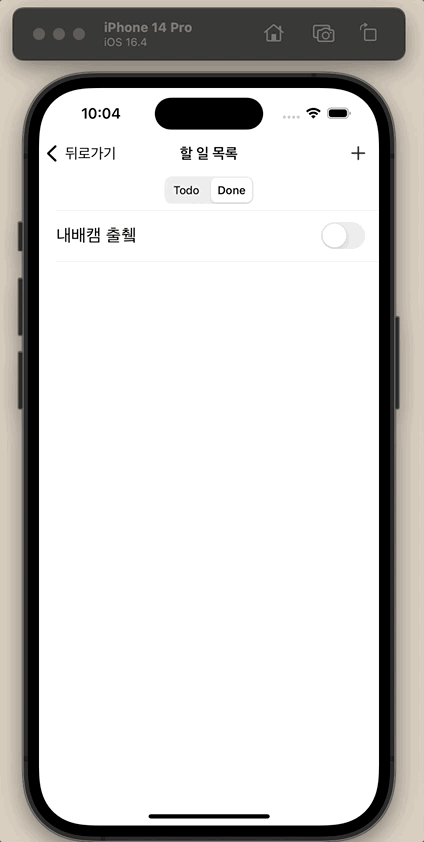
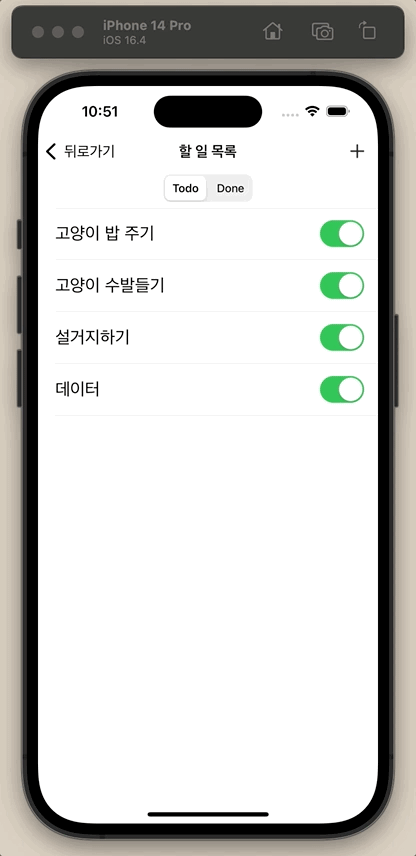
var todo = ["고양이 밥 주기", "고양이 수발들기", "내배캠 출췤", "설거지하기"]
var isCompleted = [true, true, false, true]
// outlet 요소
@IBOutlet weak var segControl: UISegmentedControl!
@IBOutlet weak var toDoTable: UITableView! // 필수
// 두 개의 배열 index를 비교해서 true인 것만 배열로 반환
func trueArray() -> [String]? {
var result = [String]()
for (index, value) in isCompleted.enumerated() {
if value == true{
result.append(todo[index])
}
}
return result
}
// 두 개의 배열 index를 비교해서 false인 것만 배열로 반환
func falseArray() -> [String]? {
var result = [String]()
for (index, value) in isCompleted.enumerated() {
if value == false{
result.append(todo[index])
}
}
return result
}
// TableView가 delegate와 dataSource를 해당 클래스 내에 정의한 것으로 선언
override func viewDidLoad() {
super.viewDidLoad()
toDoTable.delegate = self
toDoTable.dataSource = self
}
// cell 반환
func tableView(_ tableView: UITableView, cellForRowAt indexPath: IndexPath) -> UITableViewCell {
// TableViewCell의 instance를 생성, identifier로 구분
let cell = toDoTable.dequeueReusableCell(withIdentifier: "cell", for: indexPath) as! SegmentedControllerTableViewCell
let empty = toDoTable.dequeueReusableCell(withIdentifier: "empty") as! SegmentedControllerTableViewCell
// TableViewCell의 outlet 요소에 원하는 데이터 배열을 연결하는데 IndexPath.Type을 이용
if segControl.selectedSegmentIndex == 0 { // segmented control 구분
cell.title.text = trueArray()?[indexPath.row] // UILable에 [String]을 index 값에 따라 적용
cell.isCompleted.isOn = true // 해당 segmented control이 select 됐을 때 switch의 상태 정의
return cell
}
else if segControl.selectedSegmentIndex == 1 {
cell.title.text = falseArray()?[indexPath.row]
cell.isCompleted.isOn = false
return cell
}
return empty
}
3. Protocol Delegate를 이용해서 입력되는 데이터 유지하기
먼저 데이터를 입력하는 cocoa class 파일에 Protocol을 선언해준다. 나의 경우에는 protocol의 이름을 UpdatedDataDelegate로 지었고 파라미터의 데이터 타입은 해당 파일에서 받아서 넘겨줄 데이터 타입으로 정했다.
protocol UpdatedDataDelegate: AnyObject {
    func updateData(_ newData: [[String]])
}
이후 데이터를 받아서 출력할 UITableView가 채택된 cocoa class 파일에 Protocol에 대한 extension을 정의한다. 나의 경우에는 protocol의 함수를 재정의 했는데 받아온 데이터의 index 값을 해당 class의 변수에 할당했다.
extension TodoViewController: UpdatedDataDelegate {
    func updateData(_ newData: [[String]]) {
        self.todo = newData[0]
        self.emoji = newData[1]
        self.info = newData[2]
        self.dates = newData[3]
        self.toDoTable.reloadData()
    }
}
당연히 해당 데이터를 사용해서 cell을 반환하고 또 이 프로토콜의 delegate를 따라서 view를 그리라고도 선언해야한다.
  override func viewDidLoad() {
      super.viewDidLoad()
      self.toDoTable.delegate = self
      self.toDoTable.dataSource = self
  }
⭐️ ⭐️ 그리고 중요한 부분이자 내가 몇 시간을 헤맸던 부분은... 데이터를 입력받는 ViewController로 넘어가게 하는 object의 action에 이 뒤에 오는 ViewController가 이 delegate를 따를 것이라고 남겨줘야지 실제로 연결이 된다는 것!⭐️ ⭐️
예를 들어, 나의 경우에는 '+' 모양의 버튼을 누르게 되면 데이터를 입력받는 ViewController로 넘어가는데 이곳의 action에 연결된 함수에 선언해줬다.
    override func viewDidLoad() {
        super.viewDidLoad()
        self.toDoTable.delegate = self
        self.toDoTable.dataSource = self

		// 중략
        plusButton.addTarget(self, action: #selector(plusPressed), for: .touchUpInside)

        // 후략

    }

    // 불러와지는 function
    @objc private func plusPressed(_ sender: Any) {
        print("plus")
        // 데이터를 입력받는 ViewController의 Storyboard ID
        let popupViewControllerID = UIStoryboard(name: "Main", bundle: .none).instantiateViewController(identifier: "popupViewControllerID") as! PopupViewController
        popupViewControllerID.delegate = self // delegate를 따르겠다는 의미
        popupViewControllerID.view.backgroundColor = .white
        // 해당 ViewController로 전환(Show)
        navigationController?.pushViewController(popupViewControllerID, animated: true)
    }
💁🏻♀️ UIAlertController 사용하기
UIAlertController는 아래에서 위로 선택지가 뜨는 유형(.actionSheet)과 팝업처럼 알려서 버튼이나 textfield등으로 입력하는 유형(.alert) 이 두 가지가 있다. 이 중에서 내가 사용했고 정리해볼 내용은 .alert style이다.
@IBAction func plusButtonAct(_ sender: Any) {
        plusPressed(self)
}

@objc func plusPressed(_ sender: Any) {
	// title 과 아래에 뜨는 message 설정, style은 .alert로 지정
	let popup = UIAlertController(title: "할 일 입력", message: "해야 할 일을 입력하세요", preferredStyle: .alert)

    // 팝업에 쓸 버튼 생성
	let cancel = UIAlertAction(title: "취소", style: .cancel)
	let save = UIAlertAction(title: "저장", style: .default) { [self] (_) in

    // 저장 클릭 시 처리할 내용
      let txt = popup.textFields?[0]

      if txt!.text?.isEmpty != nil {
          todo.append(txt!.text!)
          isCompleted.append(true)
          self.toDoTable.reloadData()
      }
      else {print("nil")}
	} // 여기까지 save closure

	popup.addAction(cancel)
	popup.addAction(save)

	popup.addTextField() {(tf) in
		tf.placeholder = "해야 할 일을 입력하세요" // textfield의 placeholder 설정
    }
self.present(popup, animated: true)
}
💁🏻♀️ Segmented Control을 사용해서 TableView 그려내기
UIViewController로 cocoa file을 만들고 해당 class가 TableView의 Delegate와 Datasource를 따르게 하자. 그리고 storyboard에 segmented control을 넣고 outlet을 해당 class로 연결해 넣는다.
segmented control의 title은 storyboard 상에서 선택시 우측 메뉴에서도 변경 가능하고 코드로도 구현 가능하다.
action을 연결해 넣으면 값이 변함에 따라 action이 트리거 되는 것을 볼 수 있는데 Outlet이름.selectedSegmentIndex == 0과 같이 첫 번째 값은 0인 index 두 번째는 1 이런 식으로 값이 있고 이것을 조건문으로 코드를 짜면 된다.
@IBOutlet weak var segControl: UISegmentedControl!
@IBAction func segAction(_ sender: Any) {
        self.toDoTable.reloadData()
}
// segmented control의 조건에 따라 cell 행의 수 반환
func tableView(_ tableView: UITableView, numberOfRowsInSection section: Int) -> Int {
        print(segControl.selectedSegmentIndex)
        return segControl.selectedSegmentIndex == 0 ? trueArray()?.count ?? 1 : falseArray()?.count ?? 1
    }

// segmented control의 조건에 따라 cell 반환
func tableView(_ tableView: UITableView, cellForRowAt indexPath: IndexPath) -> UITableViewCell {
        let cell = toDoTable.dequeueReusableCell(withIdentifier: "cell", for: indexPath) as! SegmentedControllerTableViewCell
        let empty = toDoTable.dequeueReusableCell(withIdentifier: "empty") as! SegmentedControllerTableViewCell
        if segControl.selectedSegmentIndex == 0 {
            cell.title.text = trueArray()?[indexPath.row]
            cell.isCompleted.isOn = true
            return cell
        }
        else if segControl.selectedSegmentIndex == 1 {
            cell.title.text = falseArray()?[indexPath.row]
            cell.isCompleted.isOn = false
            return cell
        }
        return empty
    }
}


잘 읽었습니다. 좋은 정보 감사드립니다.