
Overview
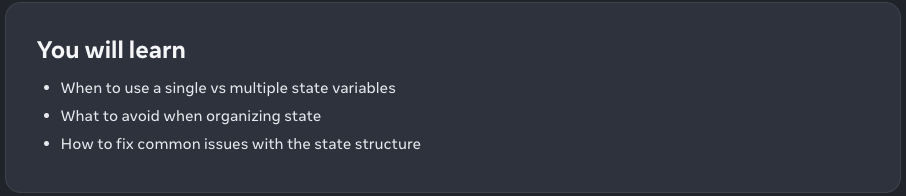
상태를 잘 구조화하면 수정하고 디버그하기 좋은 컴포넌트와 지속적인 버그 소스가 되는 컴포넌트 사이에 차이가 생길 수 있다. 다음은 상태를 구조화할 때 고려해야할 몇 가지 팁이다.
Principles for structuring state
일부 상태를 보유하는 컴포넌트를 작성할 때 사용할 상태 변수 수와 해당 데이터의 모양을 선택해야한다. 최적이 아닌 상태 구조에서도 올바른 프로그램을 작성하는 것이 가능하지만 더 나은 선택을 할 수 있도록 안내할 수 있는 몇 가지 원칙이 있다.
- 상태를 그룹화 해라. 항상 두 개 이상의 상태 변수를 동시에 업데이트 하는 경우 이를 단일 상태 변수로 병합하는 것을 고려해라.
- 상태의 모순을 피해라. 여러 상태가 서로 모순되고 “동의하지 않는” 방식으로 상태가 구성되면 실수할 여지가 남게된다. 이것을 피해라.
- 중복 상태를 피해라. 렌더링하는 동안 컴포넌트의 props나 기존 상태 변수에서 일부 정보를 계산할 수 있다면 해당 정보를 해당 컴포넌트의 상태에 넣지 않아야 한다.
- 상태에서 중복을 피해라. 여러 상태 변수 같에 또는 중첩된 객체 내에서 동일한 데이터가 복제되면 동기화를 유지하기가 어렵다. 가능하면 중복을 줄여라.
- 깊게 중첩된 상태를 피해라. 깊은 계층적 상태는 업데이트하기가 그리 편하지 않다. 가능하다면 상태를 평평한 방식으로 구조화하는 것을 선호한다.
이러한 원칙의 목표는 실수 없이 상태를 쉽게 업데이트할 수 있도록 하는 것이다. 상태에서 중복되고 중복된 데이터를 제거하면 모든 부분이 동기화 상태를 유지하는 데 도움이 된다. 이는 데이터베이스 엔지니어가 버그 가능성을 줄이기 위해 데이터베이스 구조를 “정규화”하려는 방법과 유사하다. 아인슈타인의 말을 빌리자면, “상태를 가능한 한 단순하게 만드십시오. 그러나 더 단순하지는 마십시오.”
이제 이러한 원칙이 실제로 어떻게 적용되는지 살펴보겠다.
Group related state
단일 또는 다중 상태 변수 사용이 확실하지 않을 수 있다.
이렇게 해야할까?
const [x, setX] = useState(0);
const [y, setY] = useState(0);
아니면 이렇게 해야할까?
const [position, setPosition] = useState({ x: 0, y: 0 });기술적으로는 이러한 접근 방식 중 하나를 사용할 수 있다. 그러나 일부 두 상태 변수가 항상 함께 변경되는 경우 이를 단일 상태 변수로 통합하는 것이 좋다. 그런 다음 커서를 움직이면 빨간색 점의 두 좌표가 모두 업데이트되는 다음 예와 같이 항상 동기화를 유지하는 것을 잊지 않는다.
import { useState } from 'react';

export default function MovingDot() {
  const [position, setPosition] = useState({
    x: 0,
    y: 0
  });
  return (
    <div
      onPointerMove={e => {
        setPosition({
          x: e.clientX,
          y: e.clientY
        });
      }}
      style={{
        position: 'relative',
        width: '100vw',
        height: '100vh',
      }}>
      <div style={{
        position: 'absolute',
        backgroundColor: 'red',
        borderRadius: '50%',
        transform: `translate(${position.x}px, ${position.y}px)`,
        left: -10,
        top: -10,
        width: 20,
        height: 20,
      }} />
    </div>
  )
}
데이터를 객체나 배열로 그룹화하는 또 다른 경우는 필요한 상태 조각 수를 모르는 경우이다. 예를 들어 사용자가 사용자 정의 필드를 추가할 수 잇는 양식이 있는 경우 유용하다.
💡 Pitfall상태 변수가 객체인 경우 다른 필드를 명시적으로 복사하지 않고는 그 안에 있는 하나의 필드만 업 데이트할 수 없다는 점을 기억해라. 예를 들어 위의 예에서는 y 속성이 전혀 없기 때문에 setPosition({ x: 100 }) 을 수행할 수 없다. 대신, x 만 설정하려면 setPosition({ ...position, x: 100 }) 을 수행하거나 두 개의 상태 변수로 분할하고 setX(100) 을 수행해야 한다.
Avoid contradictions in state
다음은 isSending 과 isSent 상태 변수가 포함된 호텔 피드백 양식이다.
import { useState } from 'react';

export default function FeedbackForm() {
  const [text, setText] = useState('');
  const [isSending, setIsSending] = useState(false);
  const [isSent, setIsSent] = useState(false);

  async function handleSubmit(e) {
    e.preventDefault();
    setIsSending(true);
    await sendMessage(text);
    setIsSending(false);
    setIsSent(true);
  }

  if (isSent) {
    return <h1>Thanks for feedback!</h1>
  }

  return (
    <form onSubmit={handleSubmit}>
      <p>How was your stay at The Prancing Pony?</p>
      <textarea
        disabled={isSending}
        value={text}
        onChange={e => setText(e.target.value)}
      />
      <br />
      <button
        disabled={isSending}
        type="submit"
      >
        Send
      </button>
      {isSending && <p>Sending...</p>}
    </form>
  );
}

// Pretend to send a message.
function sendMessage(text) {
  return new Promise(resolve => {
    setTimeout(resolve, 2000);
  });
}
이 코드가 작동하는 동안에는 “불가능” 상태에 대해 문을 열어 둔다. 예를 들어 setIsSent 와 setIsSending 을 함께 호출하는 것을 잊어버린 경우 isSending 과 isSent 가 동시에 true 인 상황이 발생할 수 있다. 컴포넌트는 복잡할수록 무슨 일이 일어났는지 이해하기가 더 어렵다.
isSending 과 isSent 는 동시에 true 가 될 수 없으므로 세 가지 유효한 status인 ****'typing' ,'sending' 과 'sent' 중 하나를 취할 수 있는 하나의 상태 변수로 바꾸는 것이 좋다.
import { useState } from 'react';

export default function FeedbackForm() {
  const [text, setText] = useState('');
  const [status, setStatus] = useState('typing');

  async function handleSubmit(e) {
    e.preventDefault();
    setStatus('sending');
    await sendMessage(text);
    setStatus('sent');
  }

  const isSending = status === 'sending';
  const isSent = status === 'sent';

  if (isSent) {
    return <h1>Thanks for feedback!</h1>
  }

  return (
    <form onSubmit={handleSubmit}>
      <p>How was your stay at The Prancing Pony?</p>
      <textarea
        disabled={isSending}
        value={text}
        onChange={e => setText(e.target.value)}
      />
      <br />
      <button
        disabled={isSending}
        type="submit"
      >
        Send
      </button>
      {isSending && <p>Sending...</p>}
    </form>
  );
}

// Pretend to send a message.
function sendMessage(text) {
  return new Promise(resolve => {
    setTimeout(resolve, 2000);
  });
}
가독성을 위해 일부 상수를 선언할 수 있다.
const isSending = status === 'sending';
const isSent = status === 'sent';
하지만 상태 변수가 아니므로 서로 동기화되지 않는 것에 대해 걱정할 필요가 없다.
Avoid redundant state
렌더링하는 동안 컴포넌트의 props나 기존 상태 변수에서 일부 정보를 계산할 수 있다면 해당 정보를 해당 컴포넌트의 상태에 넣지 않아야한다.
예를 들어, 다음 양식을 봐라. 작동하지만 중복된 상태를 찾을 수 있나?
import { useState } from 'react';

export default function Form() {
  const [firstName, setFirstName] = useState('');
  const [lastName, setLastName] = useState('');
  const [fullName, setFullName] = useState('');

  function handleFirstNameChange(e) {
    setFirstName(e.target.value);
    setFullName(e.target.value + ' ' + lastName);
  }

  function handleLastNameChange(e) {
    setLastName(e.target.value);
    setFullName(firstName + ' ' + e.target.value);
  }

  return (
    <>
      <h2>Let’s check you in</h2>
      <label>
        First name:{' '}
        <input
          value={firstName}
          onChange={handleFirstNameChange}
        />
      </label>
      <label>
        Last name:{' '}
        <input
          value={lastName}
          onChange={handleLastNameChange}
        />
      </label>
      <p>
        Your ticket will be issued to: <b>{fullName}</b>
      </p>
    </>
  );
}
여기에는 firstName , lastName 과 fullName 의 세 가지 상태 변수가 있다. 그러나 fullName 은 중복된다. 렌더링 중에 항상 firstName 과 lastName 에서 fullName 을 계산할 수 있으므로 상태에서 이를 제거해라.
이렇게 하면 된다.
import { useState } from 'react';

export default function Form() {
  const [firstName, setFirstName] = useState('');
  const [lastName, setLastName] = useState('');

  const fullName = firstName + ' ' + lastName;

  function handleFirstNameChange(e) {
    setFirstName(e.target.value);
  }

  function handleLastNameChange(e) {
    setLastName(e.target.value);
  }

  return (
    <>
      <h2>Let’s check you in</h2>
      <label>
        First name:{' '}
        <input
          value={firstName}
          onChange={handleFirstNameChange}
        />
      </label>
      <label>
        Last name:{' '}
        <input
          value={lastName}
          onChange={handleLastNameChange}
        />
      </label>
      <p>
        Your ticket will be issued to: <b>{fullName}</b>
      </p>
    </>
  );
}
여기서 fullName 은 상태 변수가 아니다. 대신 렌더링 중에 계산된다.
결과적으로 변경 핸들러는 이를 업데이트하기 위해 특별한 작업을 수행할 필요가 없다. setFirstName 이나 setLastName 을 호출하면 다시 렌더링이 트리거되고 다음 fullName 은 새로운 데이터에서 계산된다.
Don’t mirror props in state
중복 상태의 일반적인 예는 다음과 같은 코드다.****
function Message({ messageColor }) {
  const [color, setColor] = useState(messageColor);
여기서는 color 상태 변수가 messageColor props로 초기화된다. 문제는 상위 컴포넌트나 나중에 messageColor 의 다른 값을 전달하는 경우(예, 'blue' 대신 'red' ) color 상태 변수가 업데이트 되지 않는다는 것이다. 상태는 첫 번째 렌더링 중에만 초기화된다.
이것이 상태 변수의 일부 속성을 “미러링”하면 혼란을 초래할 수 있는 이유다. 대신, 코드에서 직접 messageColor props를 사용해라. 더 짧은 이름을 지정하려면 상수를 사용해라.
function Message({ messageColor }) {
  const color = messageColor;
이렇게 하면 상위 컴포넌트에서 전달된 prop과 동기화되지 않는다.
prop을 상태로 “미러링”하는 것은 특정 prop에 대한 모든 업데이트를 무시하려는 경우에만 의미가 있다. 관례적으로 prop 이름을 initial 이나 default 로 시작하여 새 값이 무시된다는 점을 명확히 한다.
Avoid duplication in state
이 메뉴 목록 컴포넌트를 사용하면 여러 가지 여행 간식 중에서 하나를 선택할 수 있다.
import { useState } from 'react';

const initialItems = [
  { title: 'pretzels', id: 0 },
  { title: 'crispy seaweed', id: 1 },
  { title: 'granola bar', id: 2 },
];

export default function Menu() {
  const [items, setItems] = useState(initialItems);
  const [selectedItem, setSelectedItem] = useState(
    items[0]
  );

  return (
    <>
      <h2>What's your travel snack?</h2>
      <ul>
        {items.map(item => (
          <li key={item.id}>
            {item.title}
            {' '}
            <button onClick={() => {
              setSelectedItem(item);
            }}>Choose</button>
          </li>
        ))}
      </ul>
      <p>You picked {selectedItem.title}.</p>
    </>
  );
}
현재는 선택한 항목을 selectedItem 상태 변수에 객체로 저장한다. 하지만 이는 좋지 않다. selectedItem 의 내용은 항목 목록 내의 items 중 하나와 동일한 객체이다. 이는 해당 항목 자체에 대한 정보가 두 곳에 복제된다는 의미다.
이것이 왜 문제가 될까? 각 항목을 편집 가능하게 만들어 보겠다.
import { useState } from 'react';

const initialItems = [
  { title: 'pretzels', id: 0 },
  { title: 'crispy seaweed', id: 1 },
  { title: 'granola bar', id: 2 },
];

export default function Menu() {
  const [items, setItems] = useState(initialItems);
  const [selectedItem, setSelectedItem] = useState(
    items[0]
  );

  function handleItemChange(id, e) {
    setItems(items.map(item => {
      if (item.id === id) {
        return {
          ...item,
          title: e.target.value,
        };
      } else {
        return item;
      }
    }));
  }

  return (
    <>
      <h2>What's your travel snack?</h2>
      <ul>
        {items.map((item, index) => (
          <li key={item.id}>
            <input
              value={item.title}
              onChange={e => {
                handleItemChange(item.id, e)
              }}
            />
            {' '}
            <button onClick={() => {
              setSelectedItem(item);
            }}>Choose</button>
          </li>
        ))}
      </ul>
      <p>You picked {selectedItem.title}.</p>
    </>
  );
}
항목을 먼저 “선택”을 클릭한 다음 편집하면 입력이 업데이트되지만 하단의 레이블에는 편집 내용이 반영되지 않는다. 이는 상태가 중복되어 selectedItem 을 업데이트하는 것을 잊었기 때문이다.
selectedItem 도 업데이트할 수 있지만 더 쉬운 수정 방법은 중복을 제거하는 것이다. 이 예에서는 selectedItem 객체(항목 내부 객체와 중복 생성) 대신 selectedId 를 상태로 유지한 다음 항목 배열에서 해당 ID를 가진 항목을 검색하여 selectedItem 을 가져온다.
import { useState } from 'react';

const initialItems = [
  { title: 'pretzels', id: 0 },
  { title: 'crispy seaweed', id: 1 },
  { title: 'granola bar', id: 2 },
];

export default function Menu() {
  const [items, setItems] = useState(initialItems);
  const [selectedId, setSelectedId] = useState(0);

  const selectedItem = items.find(item =>
    item.id === selectedId
  );

  function handleItemChange(id, e) {
    setItems(items.map(item => {
      if (item.id === id) {
        return {
          ...item,
          title: e.target.value,
        };
      } else {
        return item;
      }
    }));
  }

  return (
    <>
      <h2>What's your travel snack?</h2>
      <ul>
        {items.map((item, index) => (
          <li key={item.id}>
            <input
              value={item.title}
              onChange={e => {
                handleItemChange(item.id, e)
              }}
            />
            {' '}
            <button onClick={() => {
              setSelectedId(item.id);
            }}>Choose</button>
          </li>
        ))}
      </ul>
      <p>You picked {selectedItem.title}.</p>
    </>
  );
}
(또는 선택한 인덱스를 그대로 유지할 수도 있다.)
상태는 다음과 같이 복제된다.
items = [{ id: 0, title: 'pretzels'}, ...]selectedItem = {id: 0, title: 'pretzels'}
하지만 변경 후에는 다음과 같다.
items = [{ id: 0, title: 'pretzels'}, ...]selectedId = 0
중복은 사라지고 꼭 필요한 상태만 유지된다.
이제 선택한 항목을 편집하면 아래 메시지가 즉시 업데이트된다. 이는 setItems 가 다시 렌더링을 트리거하고 items.find(...) 가 업데이트된 제목으로 항목을 찾기 때문이다. 선택한 ID만 필수이므로 선택한 항목을 상태로 보관할 필요가 없다. 나머지는 렌더링 중에 계산될 수 있다.
Avoid deeply nested state
행성, 대륙, 국가로 구성된 여행 계획을 상상해 봐라. 다음 예와 같이 중첩된 객체와 배열을 사용하여 상태를 구조화하고 싶을 수 있다.
// App.js

import { useState } from 'react';
import { initialTravelPlan } from './places.js';

function PlaceTree({ place }) {
  const childPlaces = place.childPlaces;
  return (
    <li>
      {place.title}
      {childPlaces.length > 0 && (
        <ol>
          {childPlaces.map(place => (
            <PlaceTree key={place.id} place={place} />
          ))}
        </ol>
      )}
    </li>
  );
}

export default function TravelPlan() {
  const [plan, setPlan] = useState(initialTravelPlan);
  const planets = plan.childPlaces;
  return (
    <>
      <h2>Places to visit</h2>
      <ol>
        {planets.map(place => (
          <PlaceTree key={place.id} place={place} />
        ))}
      </ol>
  );
}
// places.js
export const initialTravelPlan = {
id: 0,
title: '(Root)',
childPlaces: [{
id: 1,
title: 'Earth',
childPlaces: [{
id: 2,
title: 'Africa',
childPlaces: [{
id: 3,
title: 'Botswana',
childPlaces: []
}, {
id: 4,
title: 'Egypt',
childPlaces: []
}, {
id: 5,
title: 'Kenya',
childPlaces: []
}, {
id: 6,
title: 'Madagascar',
childPlaces: []
}, {
id: 7,
title: 'Morocco',
childPlaces: []
}, {
id: 8,
title: 'Nigeria',
childPlaces: []
}, {
id: 9,
title: 'South Africa',
childPlaces: []
}]
}, {
id: 10,
title: 'Americas',
childPlaces: [{
id: 11,
title: 'Argentina',
childPlaces: []
}, {
id: 12,
title: 'Brazil',
childPlaces: []
}, {
id: 13,
title: 'Barbados',
childPlaces: []
}, {
id: 14,
title: 'Canada',
childPlaces: []
}, {
id: 15,
title: 'Jamaica',
childPlaces: []
}, {
id: 16,
title: 'Mexico',
childPlaces: []
}, {
id: 17,
title: 'Trinidad and Tobago',
childPlaces: []
}, {
id: 18,
title: 'Venezuela',
childPlaces: []
}]
}, {
id: 19,
title: 'Asia',
childPlaces: [{
id: 20,
title: 'China',
childPlaces: []
}, {
id: 21,
title: 'India',
childPlaces: []
}, {
id: 22,
title: 'Singapore',
childPlaces: []
}, {
id: 23,
title: 'South Korea',
childPlaces: []
}, {
id: 24,
title: 'Thailand',
childPlaces: []
}, {
id: 25,
title: 'Vietnam',
childPlaces: []
}]
}, {
id: 26,
title: 'Europe',
childPlaces: [{
id: 27,
title: 'Croatia',
childPlaces: [],
}, {
id: 28,
title: 'France',
childPlaces: [],
}, {
id: 29,
title: 'Germany',
childPlaces: [],
}, {
id: 30,
title: 'Italy',
childPlaces: [],
}, {
id: 31,
title: 'Portugal',
childPlaces: [],
}, {
id: 32,
title: 'Spain',
childPlaces: [],
}, {
id: 33,
title: 'Turkey',
childPlaces: [],
}]
}, {
id: 34,
title: 'Oceania',
childPlaces: [{
id: 35,
title: 'Australia',
childPlaces: [],
}, {
id: 36,
title: 'Bora Bora (French Polynesia)',
childPlaces: [],
}, {
id: 37,
title: 'Easter Island (Chile)',
childPlaces: [],
}, {
id: 38,
title: 'Fiji',
childPlaces: [],
}, {
id: 39,
title: 'Hawaii (the USA)',
childPlaces: [],
}, {
id: 40,
title: 'New Zealand',
childPlaces: [],
}, {
id: 41,
title: 'Vanuatu',
childPlaces: [],
}]
}]
}, {
id: 42,
title: 'Moon',
childPlaces: [{
id: 43,
title: 'Rheita',
childPlaces: []
}, {
id: 44,
title: 'Piccolomini',
childPlaces: []
}, {
id: 45,
title: 'Tycho',
childPlaces: []
}]
}, {
id: 46,
title: 'Mars',
childPlaces: [{
id: 47,
title: 'Corn Town',
childPlaces: []
}, {
id: 48,
title: 'Green Hill',
childPlaces: []
}]
}]
};이제 이미 방문한 장소를 삭제하는 버튼을 추가한다고 가정해 보겠다. 어떻게 할까? 중첩된 상태를 업데이트하려면 변경된 부분부터 객체의 복사본을 만들어야한다. 깊게 중첩된 장소를 삭제하려면 상위 장소 체인 전체를 복사해야한다. 이러한 코드는 매우 장황할 수 있다.
상태가 너무 중첩되어 쉽게 업데이트할 수 없는 경우 “플랫”으로 만드는 것이 좋다. 이 데이터를 재구성할 수 있는 한 가지 방법은 다음과 같다. 각 place 에 하위 장소의 배열이 있는 트리형 구조 대신 각 장소가 하위 장소에 ID의 배열을 보유하도록 할 수 있다. 그런 다음 각 장소 ID의 매핑을 해당 장소에 저장한다.
이 데이터 구조 조정은 데이터베이스 테이블을 보는 것을 상기시켜줄 수 있다.
// App.js

import { useState } from 'react';
import { initialTravelPlan } from './places.js';

function PlaceTree({ id, placesById }) {
  const place = placesById[id];
  const childIds = place.childIds;
  return (
    <li>
      {place.title}
      {childIds.length > 0 && (
        <ol>
          {childIds.map(childId => (
            <PlaceTree
              key={childId}
              id={childId}
              placesById={placesById}
            />
          ))}
        </ol>
      )}
    </li>
  );
}

export default function TravelPlan() {
  const [plan, setPlan] = useState(initialTravelPlan);
  const root = plan[0];
  const planetIds = root.childIds;
  return (
    <>
      <h2>Places to visit</h2>
      <ol>
        {planetIds.map(id => (
          <PlaceTree
            key={id}
            id={id}
            placesById={plan}
          />
        ))}
      </ol>
    </>
  );
}
// places.js
export const initialTravelPlan = {
0: {
id: 0,
title: '(Root)',
childIds: [1, 42, 46],
},
1: {
id: 1,
title: 'Earth',
childIds: [2, 10, 19, 26, 34]
},
2: {
id: 2,
title: 'Africa',
childIds: [3, 4, 5, 6 , 7, 8, 9]
},
3: {
id: 3,
title: 'Botswana',
childIds: []
},
4: {
id: 4,
title: 'Egypt',
childIds: []
},
5: {
id: 5,
title: 'Kenya',
childIds: []
},
6: {
id: 6,
title: 'Madagascar',
childIds: []
},
7: {
id: 7,
title: 'Morocco',
childIds: []
},
8: {
id: 8,
title: 'Nigeria',
childIds: []
},
9: {
id: 9,
title: 'South Africa',
childIds: []
},
10: {
id: 10,
title: 'Americas',
childIds: [11, 12, 13, 14, 15, 16, 17, 18],
},
11: {
id: 11,
title: 'Argentina',
childIds: []
},
12: {
id: 12,
title: 'Brazil',
childIds: []
},
13: {
id: 13,
title: 'Barbados',
childIds: []
},
14: {
id: 14,
title: 'Canada',
childIds: []
},
15: {
id: 15,
title: 'Jamaica',
childIds: []
},
16: {
id: 16,
title: 'Mexico',
childIds: []
},
17: {
id: 17,
title: 'Trinidad and Tobago',
childIds: []
},
18: {
id: 18,
title: 'Venezuela',
childIds: []
},
19: {
id: 19,
title: 'Asia',
childIds: [20, 21, 22, 23, 24, 25],
},
20: {
id: 20,
title: 'China',
childIds: []
},
21: {
id: 21,
title: 'India',
childIds: []
},
22: {
id: 22,
title: 'Singapore',
childIds: []
},
23: {
id: 23,
title: 'South Korea',
childIds: []
},
24: {
id: 24,
title: 'Thailand',
childIds: []
},
25: {
id: 25,
title: 'Vietnam',
childIds: []
},
26: {
id: 26,
title: 'Europe',
childIds: [27, 28, 29, 30, 31, 32, 33],
},
27: {
id: 27,
title: 'Croatia',
childIds: []
},
28: {
id: 28,
title: 'France',
childIds: []
},
29: {
id: 29,
title: 'Germany',
childIds: []
},
30: {
id: 30,
title: 'Italy',
childIds: []
},
31: {
id: 31,
title: 'Portugal',
childIds: []
},
32: {
id: 32,
title: 'Spain',
childIds: []
},
33: {
id: 33,
title: 'Turkey',
childIds: []
},
34: {
id: 34,
title: 'Oceania',
childIds: [35, 36, 37, 38, 39, 40, 41],
},
35: {
id: 35,
title: 'Australia',
childIds: []
},
36: {
id: 36,
title: 'Bora Bora (French Polynesia)',
childIds: []
},
37: {
id: 37,
title: 'Easter Island (Chile)',
childIds: []
},
38: {
id: 38,
title: 'Fiji',
childIds: []
},
39: {
id: 40,
title: 'Hawaii (the USA)',
childIds: []
},
40: {
id: 40,
title: 'New Zealand',
childIds: []
},
41: {
id: 41,
title: 'Vanuatu',
childIds: []
},
42: {
id: 42,
title: 'Moon',
childIds: [43, 44, 45]
},
43: {
id: 43,
title: 'Rheita',
childIds: []
},
44: {
id: 44,
title: 'Piccolomini',
childIds: []
},
45: {
id: 45,
title: 'Tycho',
childIds: []
},
46: {
id: 46,
title: 'Mars',
childIds: [47, 48]
},
47: {
id: 47,
title: 'Corn Town',
childIds: []
},
48: {
id: 48,
title: 'Green Hill',
childIds: []
}
};이제 상태가 “플랫”(”정규화”)이므로 중첩 항목을 업데이트하는 것이 더 쉬워졌다.
지금 장소를 삭제하려면 두 가지 수준의 상태만 업데이트하면 된다.
- 상위 장소의 업데이트된 버전은
childIds배열에서 삭제된 ID를 제외해야한다. - 루트 “테이블” 객체의 업데이트된 버전에는 상위 장소의 업데이트된 버전이 포함되어야 한다.
다음은 이를 수행할 수 있는 방법의 예이다.
import { useState } from 'react';
import { initialTravelPlan } from './places.js';

export default function TravelPlan() {
  const [plan, setPlan] = useState(initialTravelPlan);

  function handleComplete(parentId, childId) {
    const parent = plan[parentId];
    // Create a new version of the parent place
    // that doesn't include this child ID.
    const nextParent = {
      ...parent,
      childIds: parent.childIds
        .filter(id => id !== childId)
    };
    // Update the root state object...
    setPlan({
      ...plan,
      // ...so that it has the updated parent.
      [parentId]: nextParent
    });
  }

  const root = plan[0];
  const planetIds = root.childIds;
  return (
    <>
      <h2>Places to visit</h2>
      <ol>
        {planetIds.map(id => (
          <PlaceTree
            key={id}
            id={id}
            parentId={0}
            placesById={plan}
            onComplete={handleComplete}
          />
        ))}
      </ol>
    </>
  );
}

function PlaceTree({ id, parentId, placesById, onComplete }) {
  const place = placesById[id];
  const childIds = place.childIds;
  return (
    <li>
      {place.title}
      <button onClick={() => {
        onComplete(parentId, id);
      }}>
        Complete
      </button>
      {childIds.length > 0 &&
        <ol>
          {childIds.map(childId => (
            <PlaceTree
              key={childId}
              id={childId}
              parentId={id}
              placesById={placesById}
              onComplete={onComplete}
            />
          ))}
        </ol>
      }
    </li>
  );
}
상태를 원하는 만큼 중첩할 수 있지만 “플랫”으로 만들면 수많은 문제를 해결할 수 있다. 상태를 더 쉽게 업데이트할 수 있으며 중첩된 객체의 다른 부분에 중복이 없는 지 확인하는 데 도움이 된다.
💡 DEEP DIVEImproving memory usage
이상적으로는 “테이블” 객체에서 삭제된 항목(및 해당 하위 항목)을 제거하여 메모리 사용량을 높이는 것이 좋다. 이 버전은 그렇게 한다. 또한 Immer를 사용하여 업데이트 논리를 더욱 간결하게 만든다.
때로는 중첩된 상태 중 일부를 하위 컴포넌트로 이동하여 상태 중첩을 줄일 수도 있다. 이는 항목을 가리킬지 여부와 같이 저장할 필요가 없는 임시 UI 상태에 적합하다.
Recap
- 두 개의 상태 변수가 항상 함께 업데이트되는 경우 하나로 병합하는 것이 좋다.
- “불가능한” 상태가 생성되지 않도록 상태 변수를 신중하게 선택해라.
- 상태를 업데이트할 때 실수할 가능성을 줄이는 방식으로 상태를 구성해라.
- 동기화를 유지할 필요가 없도록 중복 및 중복상태를 피해라.
- 특별히 업데이트를 방지하려는 경우가 아니면 props를 “상태”로 설정하지 마라.
- selection과 같은 UI 패턴의 경우 객체 자체가 아닌 ID 또는 인덱스로 상태를 유지해라.
- 깊이 중첩된 상태를 업데이트하는 것이 복잡한 경우 평면화를 해라.