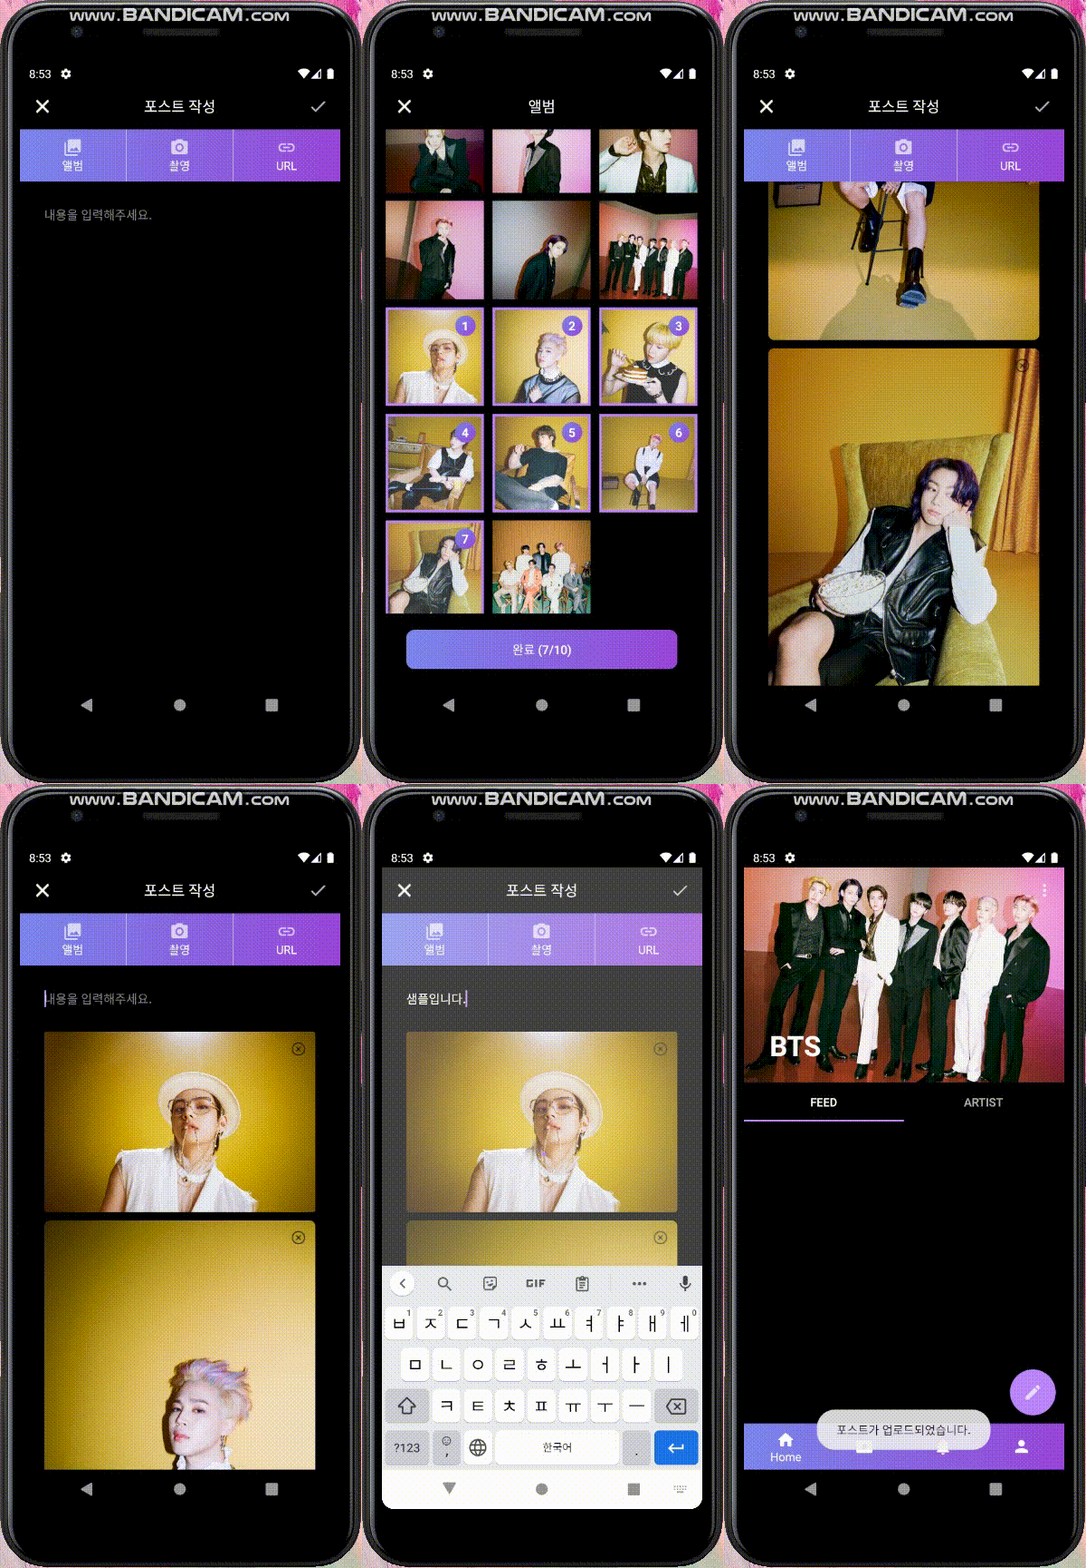
이번에는 Volley+를 이용해서 서버에 텍스트와 여러개의 이미지를 업로드해보았다.
Volley+ 사용하기
Implementaion
implementation 'dev.dworks.libs:volleyplus:+'기존에 Volley와 Volley+를 같이 사용하면 충돌 오류가 나므로, Volley+만 implementation해서 사용하자.
매니페스트 수정
<application
        android:allowBackup="true"
        android:icon="@mipmap/ic_launcher"
        android:label="@string/app_name"
        android:roundIcon="@mipmap/ic_launcher_round"
        android:supportsRtl="true"
        android:theme="@style/Theme.PURPLEU"
        android:usesCleartextTraffic="true"  ⬅ 추가
        tools:ignore="UnusedAttribute">

	⬇ 추가
        <uses-library android:name="org.apache.http.legacy" android:required="false"/>

        ...

</application>
JAVA 코드
// 포스트를 서버에 업로드하는 메소드
private void uploadPost() {
        // 서버로 보낼 데이터
        String post = et_post.getText().toString();

        // urlList를 json 배열로 변환
        JSONArray jsonArray = new JSONArray();
        for(int i=0; i<urlList.size(); i++) {
            try {
                JSONObject jsonObject = new JSONObject();
                jsonObject.put("url", urlList.get(i));
                jsonObject.put("urlTitle", urlTile.get(i));
                jsonObject.put("urlImage", urlImage.get(i));
                jsonObject.put("urlDescription", urlDescription.get(i));
                jsonArray.put(jsonObject);

            } catch (JSONException e) {
                e.printStackTrace();
            }
        }

        // 안드로이드에서 보낼 데이터를 받을 php 서버 주소
        String serverUrl="https://www.example.com/insert_post.php";

        // 파일 전송 요청 객체 생성[결과를 String으로 받음]
        SimpleMultiPartRequest smpr= new SimpleMultiPartRequest(Request.Method.POST, serverUrl, new Response.Listener<String>() {
            @Override
            public void onResponse(String response) {
                try {
                    JSONObject jsonObject = new JSONObject(response);
                    boolean success = jsonObject.getBoolean("success");
                    if(success) {
                        // 업로드 성공
                        Toast.makeText(WritePostActivity.this, "포스트가 업로드되었습니다.", Toast.LENGTH_SHORT).show();
                        finish();

                    } else {
                        // 업로드 실패
                        Toast.makeText(WritePostActivity.this, "포스트 업로드를 실패하였습니다.", Toast.LENGTH_SHORT).show();
                    }
                } catch (Exception e) {
                    e.printStackTrace();
                }
            }
        }, new Response.ErrorListener() {
            @Override
            public void onErrorResponse(VolleyError error) {
                Toast.makeText(WritePostActivity.this, "서버와 통신 중 오류가 발생했습니다.", Toast.LENGTH_SHORT).show();
            }
        });

        // 요청 객체에 보낼 데이터를 추가
        smpr.addStringParam("post", post);
        smpr.addStringParam("email", email);
        smpr.addStringParam("url", jsonArray.toString()); // json 배열을 문자열로 변환
        smpr.addStringParam("cntImage", String.valueOf(pathList.size())); // 첨부된 사진 개수

        //이미지 파일 추가 (pathList는 첨부된 사진의 내부 uri string 리스트)
        for(int i=0; i<pathList.size(); i++) {
            // uri 절대 경로 구하기
            String[] proj= {MediaStore.Images.Media.DATA};
            CursorLoader loader= new CursorLoader(this, Uri.parse(pathList.get(i)), proj, null, null, null);
            Cursor cursor= loader.loadInBackground();
            assert cursor != null;
            int column_index= cursor.getColumnIndexOrThrow(MediaStore.Images.Media.DATA);
            cursor.moveToFirst();
            String abUri= cursor.getString(column_index);
            cursor.close();
            // 이미지 파일 첨부
            smpr.addFile("image"+i, abUri);
        }

        // 서버에 데이터 보내고 응답 요청
        RequestQueue requestQueue= Volley.newRequestQueue(WritePostActivity.this);
        requestQueue.add(smpr);
}
이미지를 저장할 경로의 최상위 디렉토리 권한을 777로 설정
sudo chmod 777 -R /var
서버 insert_post.php 코드
<?php
    include "connect_db.php"; // db 연결 파일

    $post = $_POST["post"];
    $email = $_POST["email"];
    $urlList = $_POST["url"]; // json을 문자열로 받음
    $cntImage = $_POST["cntImage"]; // 첨부된 사진 개수
    $cntImage = (int)$cntImage;
    // 첨부된 사진 파일 받기
    $image = array();
    for($i=0; $i<$cntImage; $i=$i+1) {
        $image[] = $_FILES['image'.$i];
    }

    // 클라이언트로 보낼 응답 배열
    $result = array();

    // 20자 랜덤 문자열 생성하는 메소드
    function generateRandomString($length = 20) {
        $characters = '0123456789abcdefghijklmnopqrstuvwxyzABCDEFGHIJKLMNOPQRSTUVWXYZ';
        $charactersLength = strlen($characters);
        $randomString = '';
        for($i = 0; $i < $length; $i++) {
            $randomString .= $characters[mt_rand(0, $charactersLength - 1)];
        }
        return $randomString;
    }

    // 중복되지 않는 20자리 문자열을 postId로 설정
    $postId;
    $num = 1;
    while ($num > 0) {
        $postId = generateRandomString(20);
        // 중복되는 id인지 확인
        $sql = "select postId from post_tbl where postId = '$postId'";
        $res = mysqli_query($connect, $sql);
        $num = mysqli_num_rows($res);
    }

    // 서버에 저장된 사진의 uri 리스트
    $uriList = array();
    if(count($image) > 0) {
    	// 첨부된 사진이 있을 때
    	$server = 'https://www.example.com/';
        $uploadDir = 'postImage'; // 서버에서 사진을 저장할 디렉토리 path
        for($i=0; $i<count($image); $i=$i+1) {
            $tmp_name = $image[$i]["tmp_name"];
            $oldName = $image[$i]["name"]; //ex) example.jpg
            $type = $image[$i]["type"]; // application/octet-stream
            $oldName_array = explode(".", $oldName);
            $type = $oldName_array[(count($oldName_array)-1)]; //ex) jpg
            $name = $postId.'_'.$i.'.'.$type; //ex) 1ccBMk7aYsIJqmX23ZNq_1.jpg
            $path = "$uploadDir/$name";
            // 임시 경로에 저장된 사진을 $path로 옮김
            move_uploaded_file($tmp_name, $path);
            $uriList[] = $server.$path;
        }
    }
    // jsonArray를 문자열로 변환
    $uriList = json_encode($uriList);

    // db에 포스트 저장하기
    $sql = "insert into post_tbl (postId, post, imageList, urlList, publisher, uploadDate)";
    $sql.= " values ('$postId', '$post', '$uriList', '$urlList', '$email', now())";
    $res = mysqli_query($connect, $sql);
    if($res) {
        // 포스트 저장 완료
        $result["success"] = true;

    } else {
        // 리뷰 저장 실패
        $result["success"] = false;
    }

    mysqli_close($connect);

    // 배열을 json 문자열로 변환하여 클라이언트에 전달
    echo json_encode($result);

?>
여기까지는 큰 문제가 없어보였는데, 계속 오류가 나서 찾아보니....
volley:basicnetwork.performrequest: unexpected response code 413
413 오류 코드 내용을 찾아보았다.
오류 코드 설명
413 Request Entity Too Large
The server is refusing to process a request because the request entity is larger than the server is willing or able to process. The server MAY close the connection to prevent the client from continuing the request.
ㅠㅠ까먹고 있었다. 파일을 서버로 보내기 위해서는 서버의 파일업로드 max용량을 늘려야한다!!!
서버의 php.ini 파일 수정
post_max_size = 400M // POST로 서버에 보낼 수 있는 최대 용량
file_uploads = On // 파일 업로드 가능
upload_max_filesize = 300M // 최대 파일 사이즈
max_file_uploads = 20 // 한꺼번에 업로드할 수 있는 최대 파일 개수
최대 용량은 내맘대로 정했다.
서버의 .conf 파일 수정
내 서버는 nginx이므로, nginx.conf 파일을 열어 수정했다.
http {
	...

	client_max_body_size 400M; // 추가

    	...
}
php와 서버 재시작
sudo systemctl restart php7.4-fpm.service
sudo service nginx reload
apache에서는 php.ini 변경 후, 서버 재시작만 해주어도 적용이 되지만, nginx에서는 그렇지 않다.
꼭 php도 재시작 해주자!
여기까지 마치고나니, 모든 파일이 정상적으로 저장되는 것을 확인할 수 있었다.

감사합니다
포스팅을 보고 문제가 해결되었습니다 ㅋㅋ