백기선 님의 인프런 강의 : 스프링 부트 개념과 활용
을 강의를 듣고 정리하였습니다.
스프링부트 공식 가이드 의 다음 페이지를 참고하였습니다.
프로젝트 생성
강의에서는 maven, java8을 사용하였지만, 이번에는 gradle, java 11을 이용하여 생성
| 환경 : java 11, gradle
기타 의존성은 추후 추가
의존성
기본
생성한 뒤 초기 의존성은 다음과 같다
plugins {
	id 'org.springframework.boot' version '2.4.3'
	id 'io.spring.dependency-management' version '1.0.11.RELEASE'
	id 'java'
}

group = 'com.sample'
version = '0.0.1-SNAPSHOT'
sourceCompatibility = '11'

repositories {
	mavenCentral()
}

dependencies {
	implementation 'org.springframework.boot:spring-boot-starter'
	testImplementation 'org.springframework.boot:spring-boot-starter-test'
}

test {
	useJUnitPlatform()
}
들어가 있는 의존성은 스프링 부트 스타터이다
기본 설정
화면 띄우기
의존성
여기에 웹설정을 하기 위한 starter-web 과 개발 편리성을 위해 자동으로 저장후 리로딩해주는 devtools 의존성을 추가해준다.
build.gradle
implementation 'org.springframework.boot:spring-boot-starter-web'
compileOnly("org.springframework.boot:spring-boot-devtools")
참고 : devtools
간단한 컨트롤러 추가
com.sample.bbo.controller.HelloController.java
package com.sample.bbo.controller;

import org.springframework.web.bind.annotation.RestController;
import org.springframework.web.bind.annotation.RequestMapping;

@RestController
public class HelloController {

    @RequestMapping("/")
    public String index() {
        return "스프링 부트를 시작합니다!";
    }

}
기존 프로그램과 충돌이 나지 않게 포트 수정
resources/application.yaml
server:
  port: 8087
실행

애플리케이션 시작시 실행되는 프로그램 설정
메인 어플리케이션을 보면 다음과 같이 되어있다.
Application.java : 일반
import org.springframework.boot.SpringApplication;
import org.springframework.boot.autoconfigure.SpringBootApplication;

@SpringBootApplication
public class BboApplication {

	public static void main(String[] args) {

		SpringApplication.run(BboApplication.class, args);
	}

}
각각의 의미는 다음과 같다.
- @SpringBootApplication 어노테이션 : SpringBootConfiguration, ComponentScan, EnableAutoConfiguration 3가지 기능이 하나로 합쳐저 있다.
-
@SpringBootConfiguration : 컨피그레이션 설정
- 뒤의 두개는 빈을 등록하는 설정이다.
-
@ComponentScan : 내부 스캔
- Configuration, Repository, Service, Controller, RestController
- Component라는 어노테이션이 달린 의존성이 스캔된다.
-
@EnableAutoConfiguration : 외부 스캔
- 만약에 ComponentScan 스캔을 하고 EnableAutoConfiguration을 할때 둘의 내용이 겹치는 것이 있다면 뒤의 내용으로 덮어써진다.
- factories 밑에 있는 의존성이 스캔됨
- com 밑의 패키지에서 다른 구성 요소, 서비스를 찾도록 스캔한다.
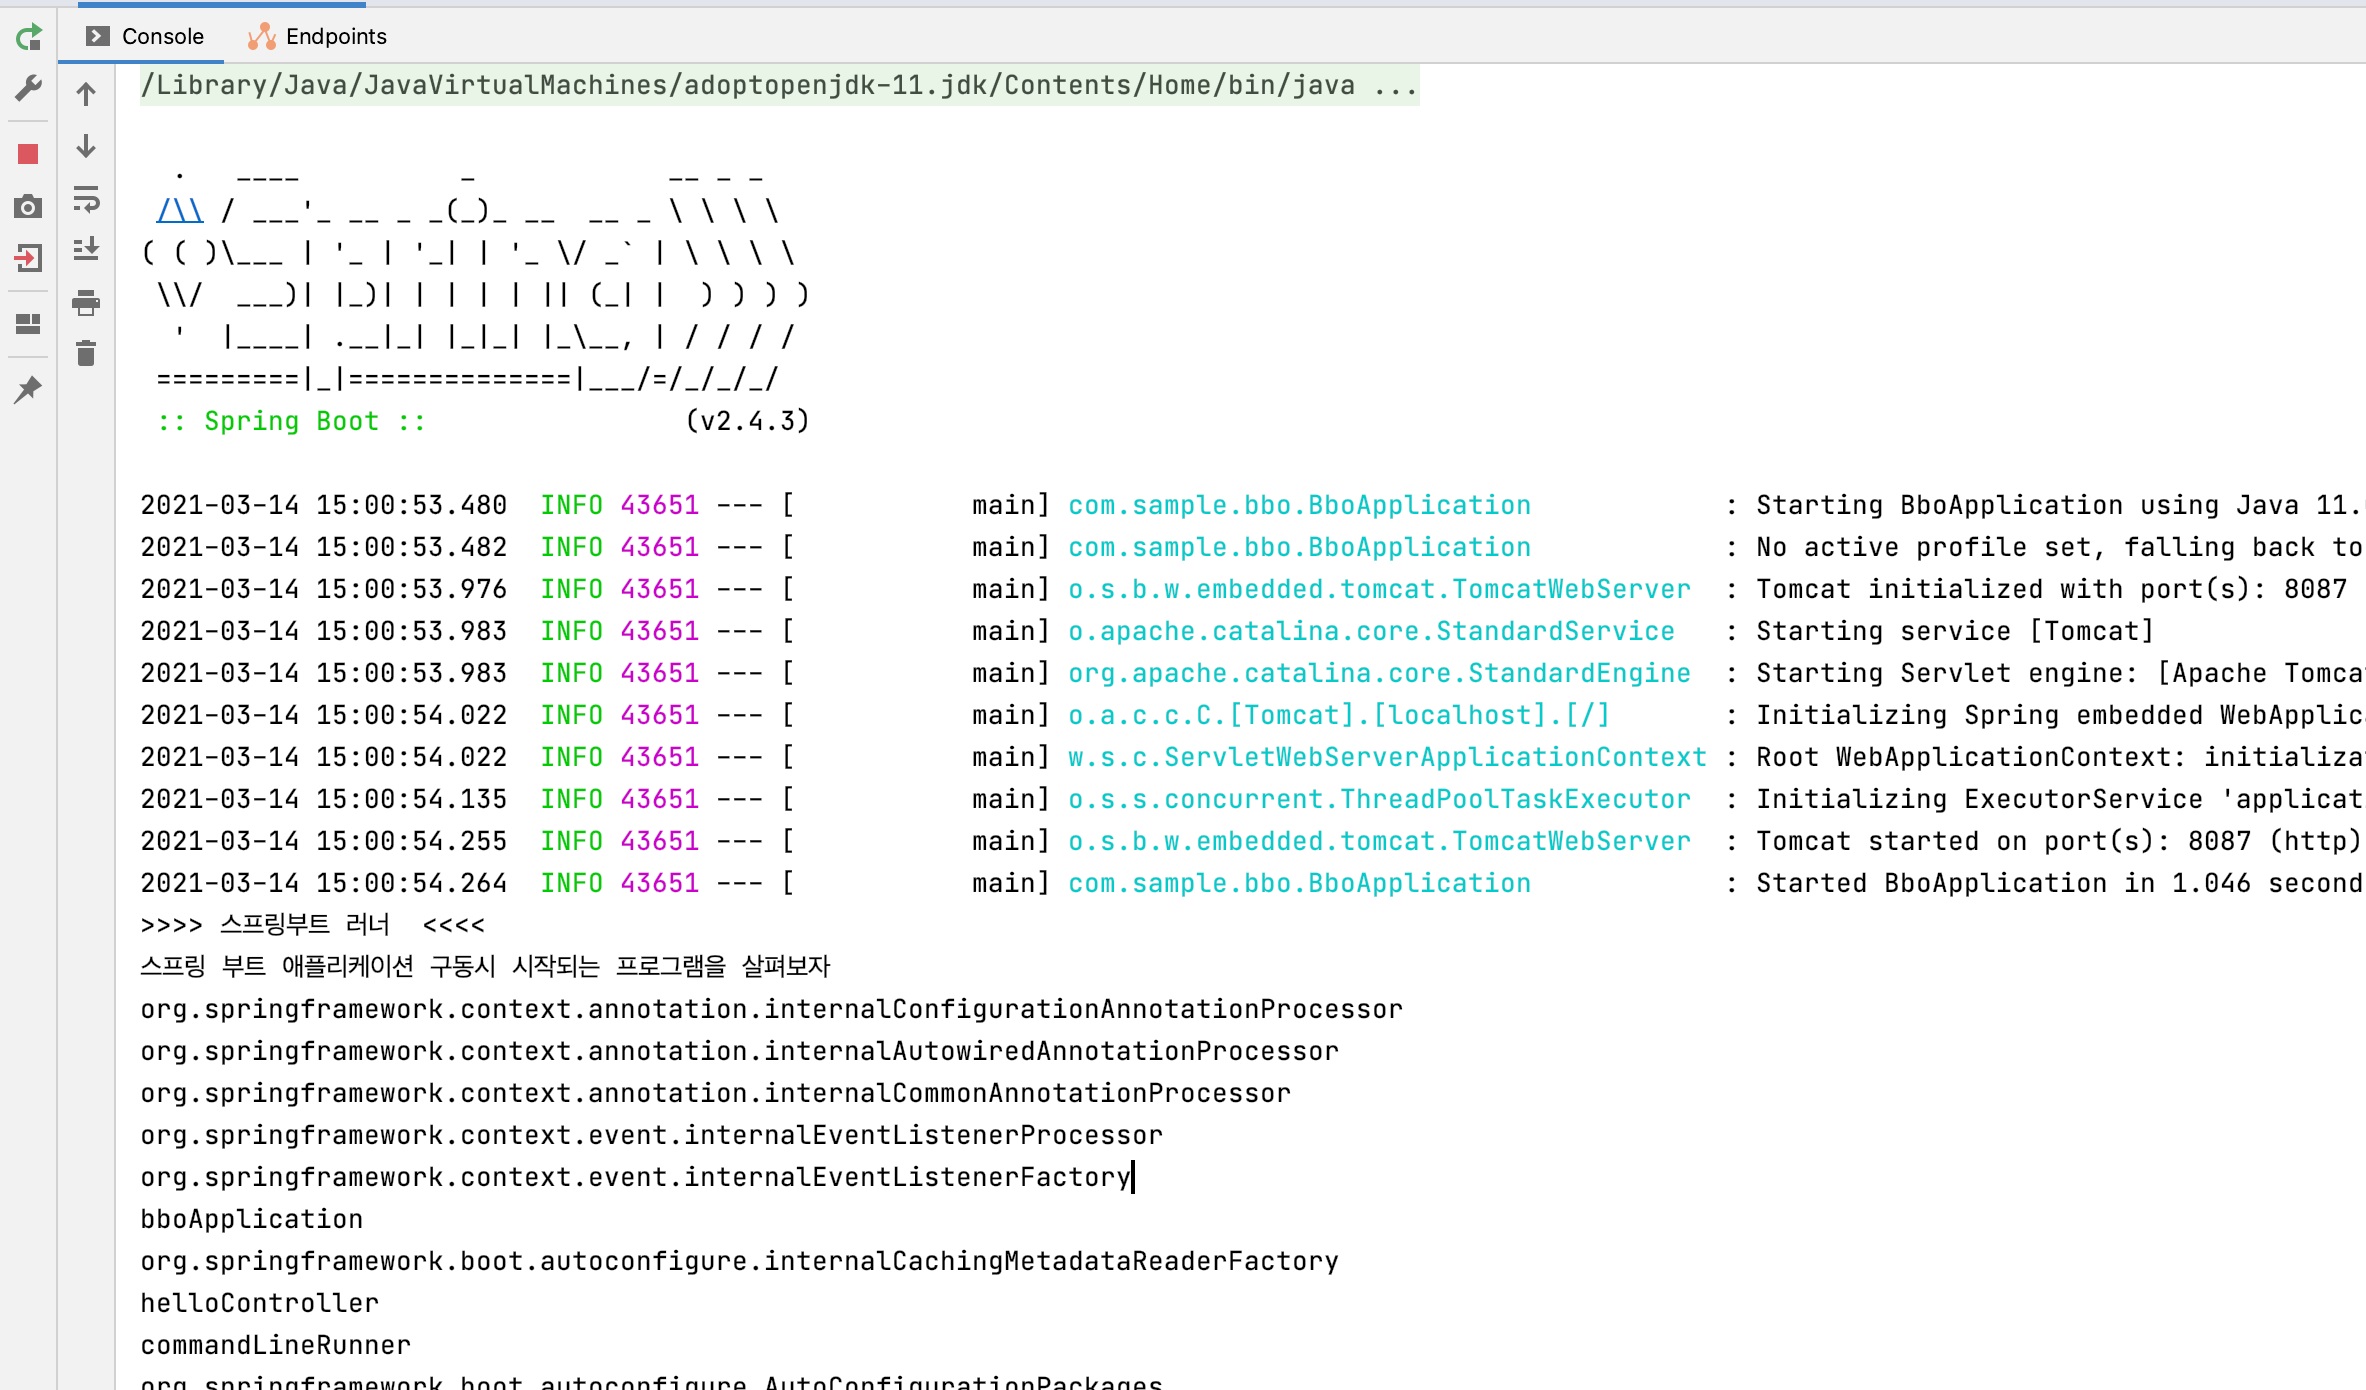
여기에서 Runner 메서드를 추가해 스프링 부트 구동시점에 실행되는 프로그램을 추가할 수 있다.
ApplicationContext를 출력해보는 러너클래스를 실행하봤다.
ApplicationContext 개념은 여기를 참고하자
@SpringBootApplication
public class BboApplication {

	public static void main(String[] args) {
		SpringApplication.run(BboApplication.class, args);
	}

	@Bean
	public CommandLineRunner commandLineRunner(ApplicationContext ctx) {
		return args -> {

			System.out.println(">>>> 스프링부트 러너  <<<< ");
			System.out.println("스프링 부트 애플리케이션 구동시 시작되는 프로그램을 살펴보자");

			String[] beanNames = ctx.getBeanDefinitionNames();
			for (String beanName : beanNames) {
				System.out.println(beanName);
			}

		};
	}

}

컨피그레이션 커스텀
- SpringBootApplication 대신에 다음과 같이 사용할 수 있다.
import org.springframework.boot.SpringApplication;
import org.springframework.boot.autoconfigure.EnableAutoConfiguration;
import org.springframework.context.annotation.ComponentScan;
import org.springframework.context.annotation.Configuration;

//@SpringBootApplication


@Configuration
@ComponentScan
@EnableAutoConfiguration
public class BboApplication {

	public static void main(String[] args) {
		SpringApplication app = new SpringApplication(BboApplication.class);
		//app.setWebApplicationType(WebApplicationType.NONE);
		// WebApplicationType 이 None이면 웹 어플리케이션을 띄우는 것이 아니기 때문에
		// EnableAutoConfiguration을 빼도 에러가 안난다.

 		app.run(args);
	}

}
ApplicationEvent and Listeners
참고 | 공식 사이트 : events and listeners
어떤 이벤트는 실제로 ApplicationContext가 생성되기 전에 트리거되므로 리스너를 @Bean으로 등록할 수 없지만, SpringApplication.addListener 메서드나 SpringApplicationBuilder.listeners 메서드를 사용하면 등록할 수 있다.
애플리케이션이 생성되는 방식에 관계 없이 이러한 리스너를 자동으로 등록하려면 META-INF / spring.factories 파일을 프로젝트에 추가하고 org.springframework.context.ApplictionListener=key 이용하여 가져올 수 있다.
ApplicationStartingEvents VS ApplicationStartedEvent
SampleListener.java
import org.springframework.boot.context.event.ApplicationStartingEvent;
import org.springframework.context.ApplicationListener;
import org.springframework.stereotype.Component;

// 어떤 리스너를 상속 받을지 명시해야 한다.
//@Component
public class SampleListener implements ApplicationListener<ApplicationStartingEvent> {
// ApplicationStartingEvents 는 아직 Context  가 만들기 전에 생성되는 것이기 때문에
// 이렇게 Bean 타입을 줘도 로그인이 안된다.
//


    @Override
    public void onApplicationEvent(ApplicationStartingEvent applicationStartingEvent){
        System.out.println("========================");
        System.out.println("Application is Starting");
        System.out.println("========================");
    }

}
Application.java
public static void main(String[] args) {
		SpringApplication app = new SpringApplication(BboApplication.class);

		app.addListeners(new SampleListener());
		app.run(args);

}

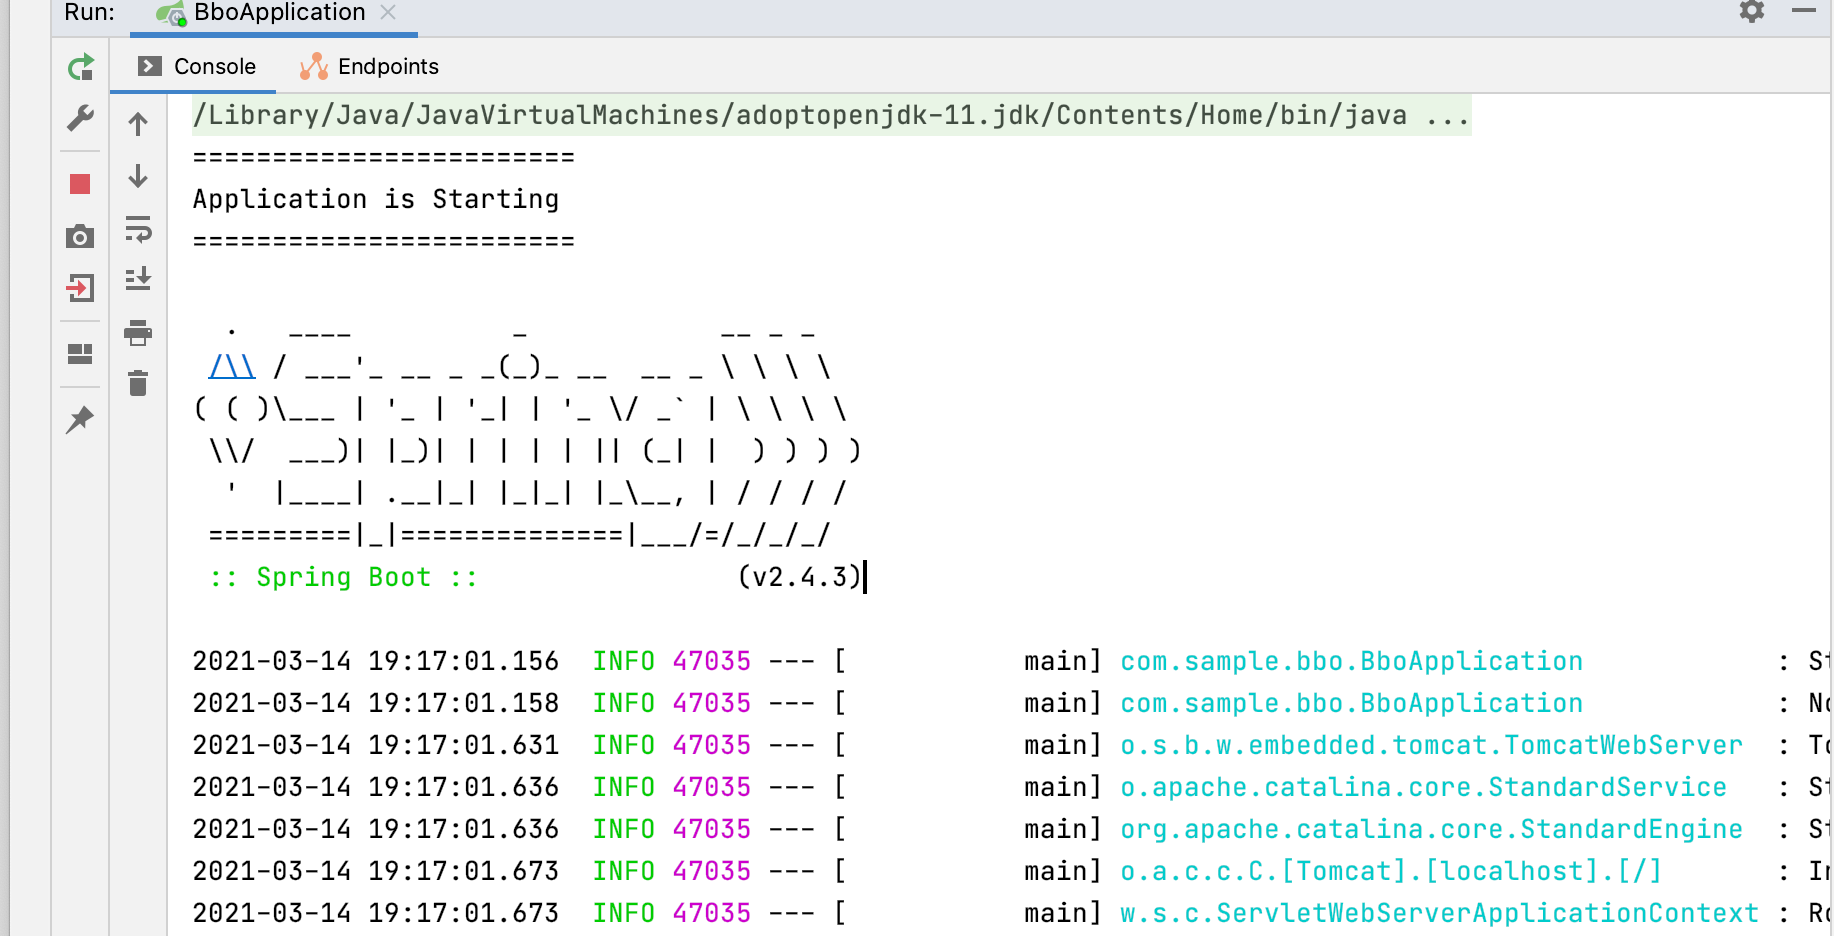
이 방법을 보면 @Component로 빈으로 등록하지 않았다.
ApplicationStartingEvents는 아직 Context가 만들어지기 전에 생성되는 것이기 때문에 만약 Bean 타입 어노테이션을 선언해주고 사용한다고 해도 소용이 없다.
위의 사진처럼 Context가 생성되기 전에 로딩하는 것 말고 Bean 타입을 사용해 Context가 만들어 진후 생성해보는 방법은 ApplicationStartedEvents 를 사용하는 것이다.
먼저, Application.java 에서 호출한 이벤트리스너를 주석처리해준다.
	public static void main(String[] args) {
		SpringApplication app = new SpringApplication(BboApplication.class);

		//app.addListeners(new SampleListener());
		app.run(args);

	}
SampleListener.java
: 그리고 ApplicationStartingEvent를 ApplicationStartedEvent로 변경해준다.
@Component
public class SampleListener implements ApplicationListener<ApplicationStartedEvent> {


    @Override
    public void onApplicationEvent(ApplicationStartedEvent applicationStartedEvent){
        System.out.println("========================");
        System.out.println("Application is Starteds");
        System.out.println("========================");
    }

}

이외에도 다양한 이밴트들이 존재한다.
| 이벤트 명 | 설명 |
|---|---|
| ApplicationStartingEvent | ApplicationStartingEvent는 리스너 및 이니셜 라이저 등록을 제외하고는 실행 시작시 처리 전에 전송한다 |
| ApplicationEnvironmentPreparedEvent | ApplicationEnvironmentPreparedEvent는 컨텍스트에서 사용할 환경으로 알려져 있지만 컨텍스트가 생성되기 전에 전송한다 |
| ApplicationContextInitializedEvent | ApplicationContext가 준비되고 ApplicationContextInitializer가 호출되었지만 Bean이 로드되기 전에 ApplicationContextInitializedEvent가 전송된다. |
| ApplicationPreparedEvent | ApplicationPreparedEvent는 Bean이 로드된 후 리프레시 되기전에 전송된다. |
| ApplicationStartedEvent | ApplicationStartedEvent는 컨텍스트가 리플레시 되고 애플리케이션 및 커멘드 라인 러너가 호출 되기전에 전송된다. |
| AvailabilityChangeEvent | AvailabilityChangeEvent는 LivenessState.CORRECT와 함께 바로 전송되어 애플리케이션이 살아있다는 것을 가리킨다. |
| ApplicationReadyEvent | ApplicationReadyEvent는 모든 응용 프로그램 및 커맨드 라인 러너가 호출 된 후에 전송된다. |
| AvailabilityChangeEvent | AvailabilityChangeEvent는 ReadinessState.ACCEPTING_TRAFFIC과 함께 바로 전송되어 애플리케이션이 요청을 처리 준비가 되었음을 나타낸다. |
| ApplicationFailedEvent | 시작시 예외가 있어 실패한 경우 나타냄 |
Web Environment
SpringApplication은 사용자를 대신하여 올바른 유형의 ApplicatioContext를 생성하려고 시도한다. WebApplicationType을 결정하는데 사용되는 알고리즘은 다음과 같다
| 종류 | Type | |
|---|---|---|
| Spring MVC | SERVLET | AnnotationConfigServletWebServerApplicationContext |
| Spring WebFlux | REACTIVE | AnnotationConfigReactiveWebServerApplicationContext |
| None | NONE | AnnotationConfigApplicationContext |
설정 소스
@SpringBootApplication
public class SpringApplication{
	public static void main(String [] args){
		SpringApplication app = new SpringApplication(SpringApplication.class);
		app.setWebApplicationType(WebApplicationType.REACTIVE);
		app.run(args);
	}
}
매개변수 사용하기
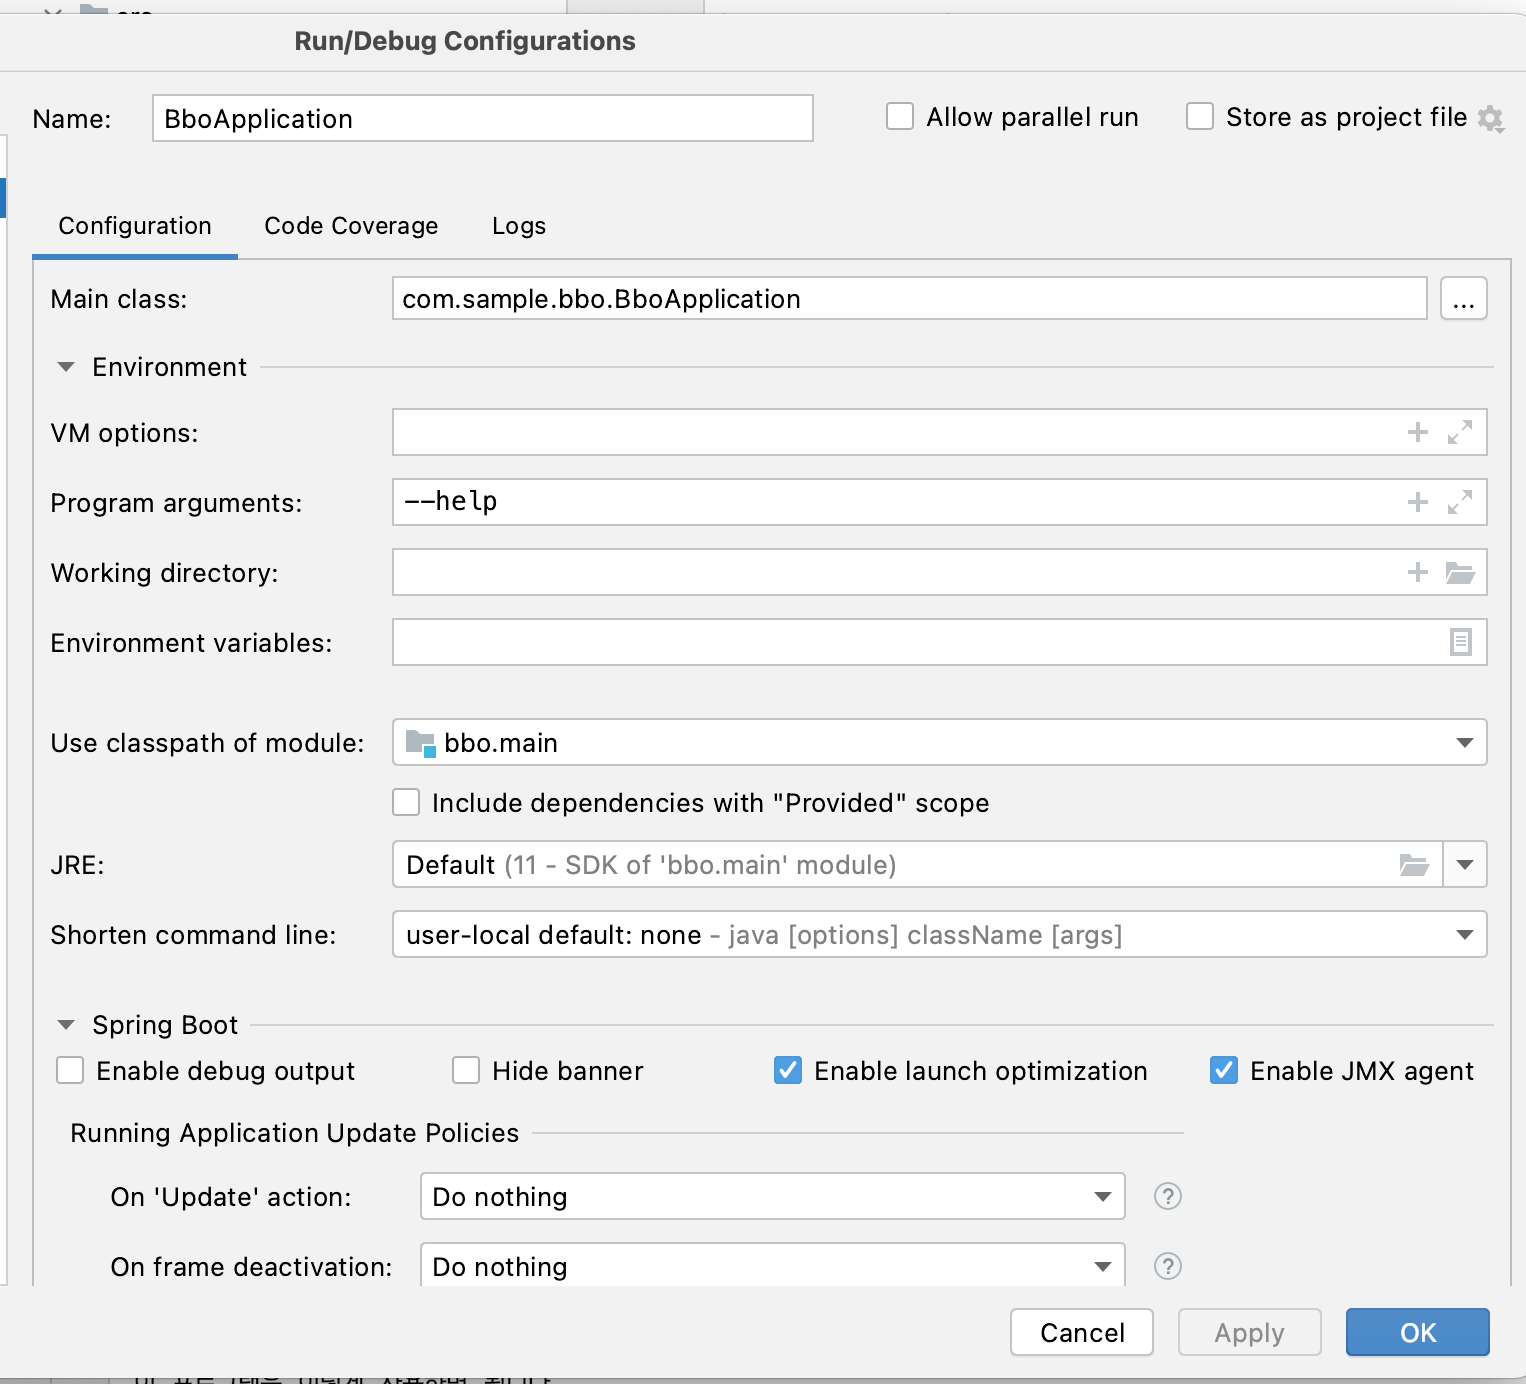
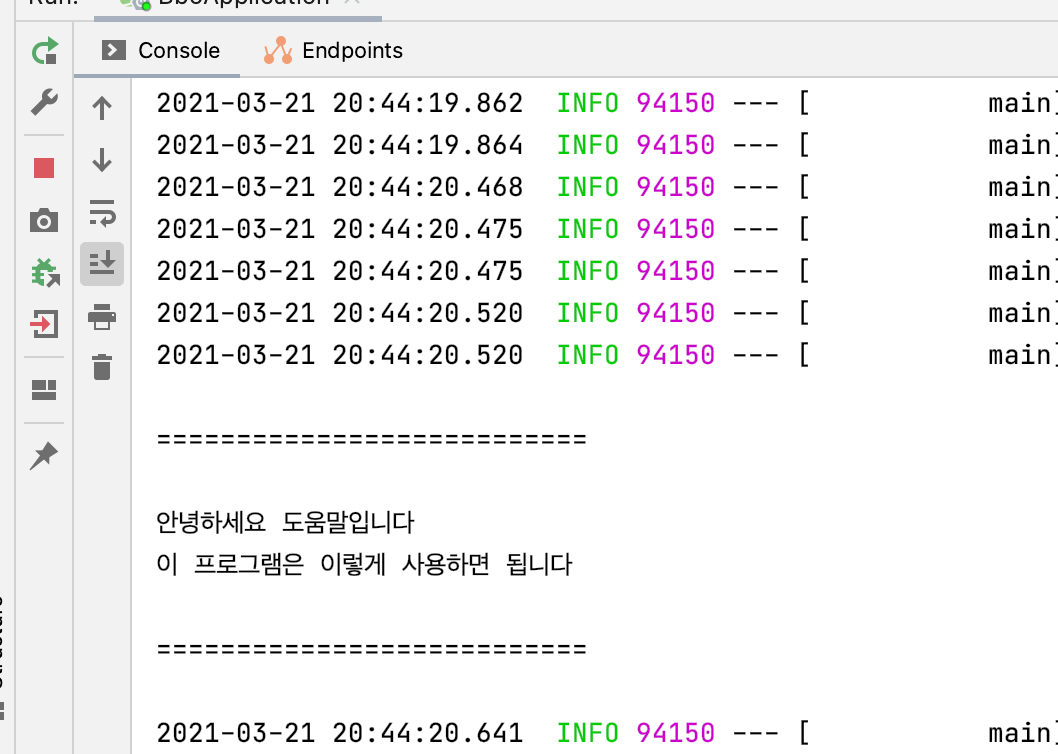
애플리케이션을 실행할 때 인자를 활용해서 옵션을 주는 경우가 많다. 예를 들어 java jar sample.jar --help 와 같이 내가 직접 커스텀한 옵션을 주어서 옵션에 대한 설명 같은 서비스를 제공할 수 도 있다.
이렇게 application Arguments를 사용하고 싶으면 SpringApplication.run()과 org.springframework.boot.ApplicationArguments 을 이용하여 구현가능하다.
ApplicationArguments
:

@Component
public class ArguTestBean {


    @Autowired
    public  ArguTestBean(ApplicationArguments args) {
        boolean help = args.containsOption("help");

        if(help){
            System.out.println("\n===========================\n");
            System.out.println("안녕하세요 도움말입니다");
            System.out.println("이 프로그램은 이렇게 사용하면 됩니다");
            System.out.println("\n===========================\n");
        }
    }
}
실행

SpringApplication.run()
스프링어플리케이션이 시작된 후 특정 코드를 실행해야 하는 경우에는 ApplicationRunner 또는 CommandLineRunner 인터페이스로 구현 가능하다
두 인터페이스 모두 동일한 방식으로 작동하며 SpringApplication.run(...) 완료되기 직전에 호출되는 단일 실행 메소드를 제공
이 작업은 애플리케이션 시작 전 트래픽 수신을 실행하기 전에 작업에 적합한다.
특히, CommandLineRunner는 애플리케이션 arguments에 대한 접근을 제공한다.
@Component
public class ArguTestBean  implements CommandLineRunner {

    public void run(String... args) {
        // Do something...
    }

}
또한 CommandLineRunner나 ApplicationRunner나 org.springframework.core.Ordered 혹은 org.springframework.core.annotation.Order 가 꼭 필요하다.
