Ansible
IT System, Infrastructure (Server, Storage, OS, Network) 자동화하는 관리 도구
"Server 설정, Application 배포, 작업 스케줄링" 을 스크립트로 처리

괸리해야 할 서버가 100대인 경우 모든 서버를 똑같은 보안 패치를 설치해야 한다고 가정할때 기존
방식대로라면 일일이 원격접속해서 작업해야하지만 Ansible 방식으로 한다면 내 컴퓨터에서 명령어
한줄이면 모든 PC가 작업이 완료됩니다.
특징
- Agentless로 대상 서버에 별도의 소프트웨어 설치 없이 ssh 접속만 활성화 되어있으면 된다.
- YAML file로 설정을 저장하여 작업을 정의(playbook 형식)
- 같은 작업을 여러 서버에 똑같이 반복이 가능하고 대상 서버의 개수 제한이 없다(확장성)
- 같은 작업을 여러번 실행해도 같은 결과를 보여준다. (멱등성)
구성 요소
- Control Node : Ansible이 설치된 컴퓨터 (명령을 내리는 곳)
- Managed Node : 관리 대상 서버 (명령을 받는 곳)
- Inventory : 관리할 서버들의 목록과 IP 주소를 적어둔 파일
- 대상 파일의 IP(Domain)만 정의하는게 아닌 다른 정보(접속 정보 - SSH IP, Port User)
- Static Inventory, Dynamic Inventory
- yaml(yml), ini 파일 형식
- Group에 대상 서버를 추가하여 사용(ungrouped도 존재)
- all (모든 대상), Group 이름을 지정하면 해당 그룹에만 적용
- 그룹 이름에는 _(언더바)만 허용
- Playbook : 어떤 작업을 할지 정의해둔 시나리오 파일 (YAML 형식)
- yaml(yml), ini 파일 형식으로 지정
- Inventory에서 정의한 서버들이 적용할 동작을 정의
- ad-hoc : 필요한 Module을 단발성으로 사용
- playbook : 동작 시킬 작업들을 yaml 파일로 일괄 적용
- Module : Ansible이 실행하는 작은 프로그램
- 단위
- Playbook에서 Task이 어떻게 수행될지를 지정
- ansible-doc -I : 사용할 수 있는 모든 Module을 나열하고 간단한 설명
- ansible-doc : 특징 Module의 상세 설명
※ Variable 변수
ansible 환경에서 사용할 변수
- 전역 범위 : 명령어로 실행 할 때 (-e 옵션) 또는 ansible 구성 단계에서 설정 변수
- 플레이 범위 : 플레이 단계에서 정의한 변수
- 호스트 범위 : 등록한 호스트 그룹 또는 개별 호스트에서 설정한 변수
- 우선 순위
- 전역 범위 > 플레이 범위 > 호스트 범위
- 실습 -
테스트 환경
3대 Guest (Rocky9.7)
- ansible-host / Mem 2G / 10.9.0.200
- ansible-node01 / Mem 1G / 10.9.0.201
- ansible-node02 / Mem 1G / 10.9.0.202
SSH 키 발급 해서 넘겨주는 방법 (Windows)
해당 작업 시 -k 옵션을 안 붙이고 명령을 보낼 수 있습니다
# RSA 키 생성 (Windows)
ssh-keygen -t rsa -b 4096
# hosts pc로 RSA 파일 전송 (Windows -> Linux)
# 위치 : C:\Users\<<사용자 이름>>\.ssh
scp id_rsa.pub root@10.9.0.200:/root/.ssh/authorized_keys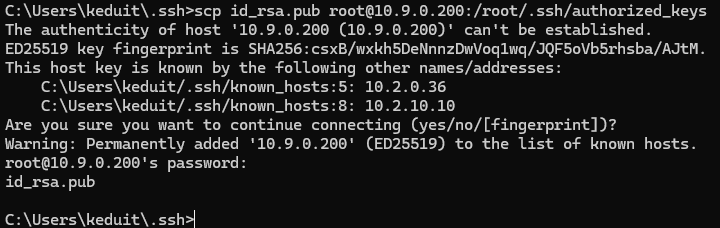
SSH 키 발급 해서 넘겨주는 방법 (Linux)
# RSA 키 생성 (Linux)
ssh-keygen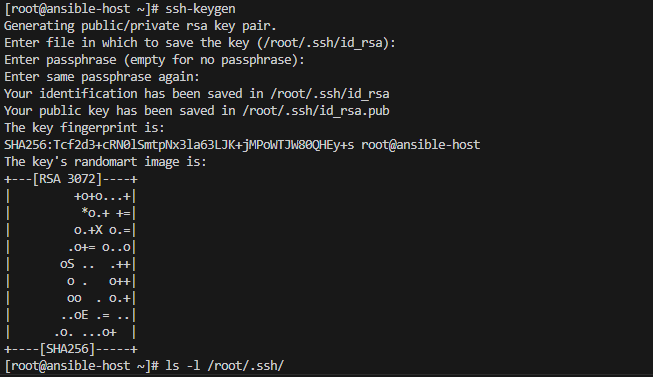
# hosts pc로 id_rsa.pub 파일 전송 (Linux -> Linux)
ssh-copy-id root@10.9.0.201 && ssh-copy-id root@10.9.0.202
실습 1
설치할 패키지 (Host)
dnf install -y epel-release
dnf install -y ansible
관리 대상 리스트 등록 (hosts가 관리할 컴퓨터)
Ansible은 기본적으로 어떤 서버에 접속해야 할지 모릅니다. 따라서 /etc/ansible/hosts 파일에 IP 주소나 도메인을 적어줌으로써 hosts가 관리할 서버들은 해당 컴퓨터들이라고 목록을 작성 하는 것입니다.
#/etc/ansible/hosts
...
[rockylinux]
10.9.0.201
10.9.0.202
SSH 접속이 가능한지 확인
해당 명령어를 작성 할 경우 “이 서버의 식별 번호 (Fingerprint)”를 신뢰 할 수 있니?” 라고 묻고, 승인하면
~/.ssh/known_hosts 라는 파일에 저장하게 됩니다.
> ansible all -m ping -k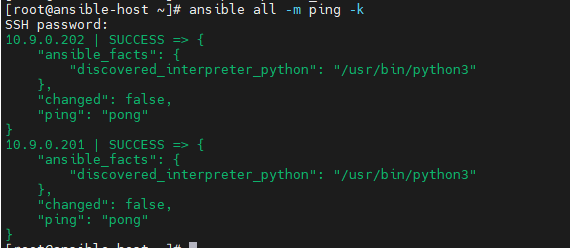
실습 2 (ad-hoc)
인벤토리에 있는 모든 서버에 접속해서, 특정 명령어를 대상 서버에 전달 (실제 리눅스 명령어)
Shell Module
# uptime
ansible all -m shell -a "uptime" -k
# last reboot
ansible all -m shell -a "last reboot" -k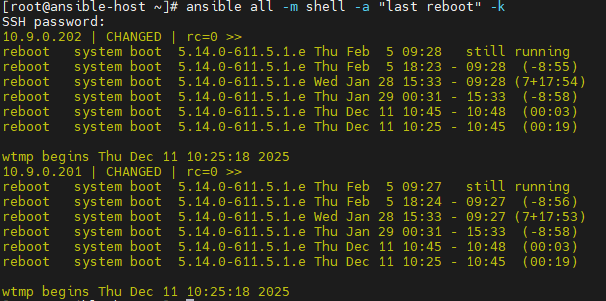
# ifconfig
ansible all -m shell -a "ifconfig" -k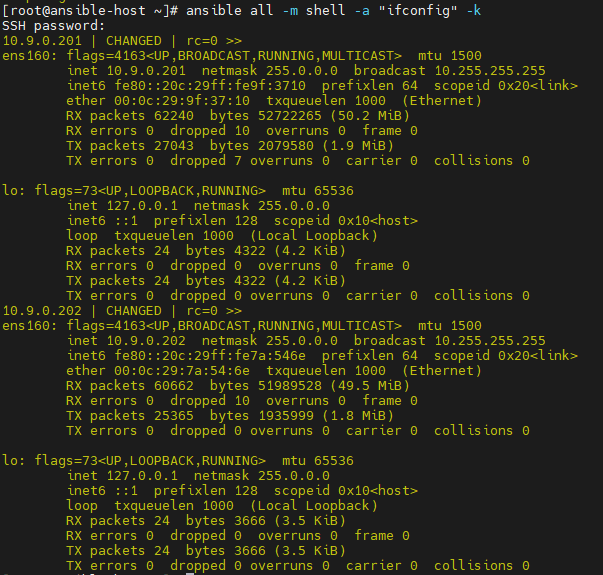
User Module
# user 생성
ansible all -m user -a "name=ans01" -k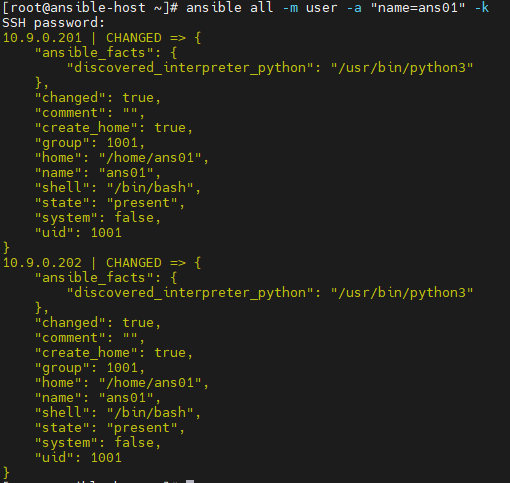
# user 확인 (shell)
ansible all -m shell -a "tail -1 /etc/passwd" -k
# user 삭제
# User Module에서 삭제 : state=absent
ansible all -m user -a "name=ans01 state=absent" -k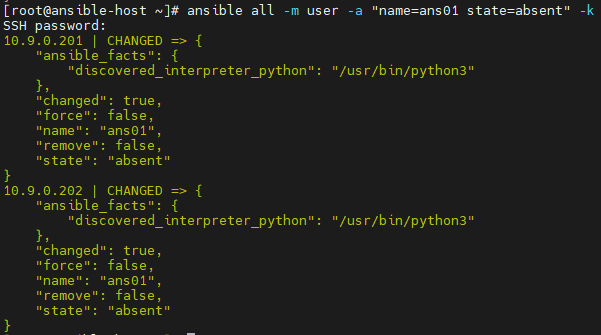
Dnf Module
# httpd 설치
ansible all -m dnf -a "name=httpd state=present" -k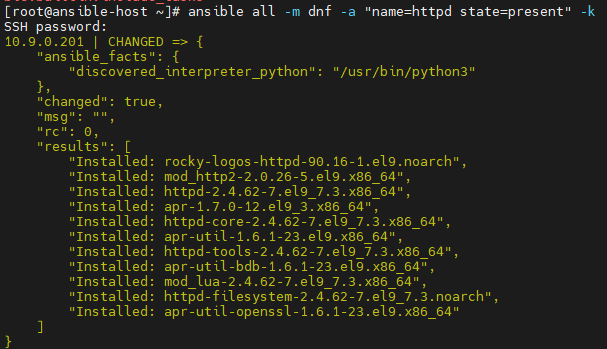
# httpd 상태 확인 (Shell)
ansible all -m shell -a "systemctl status httpd" -k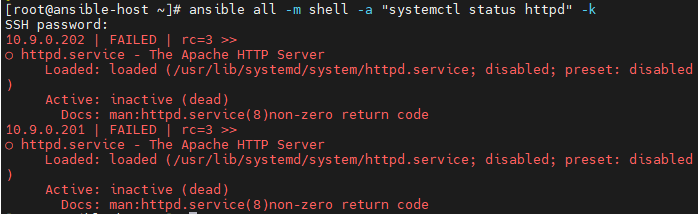
Copy Module
# 복사할 File 생성
echo "My Web Server" > index.html

# copy module로 복사
ansible all -m copy -a "src=/root/index.html dest=/var/www/html/index.html" -k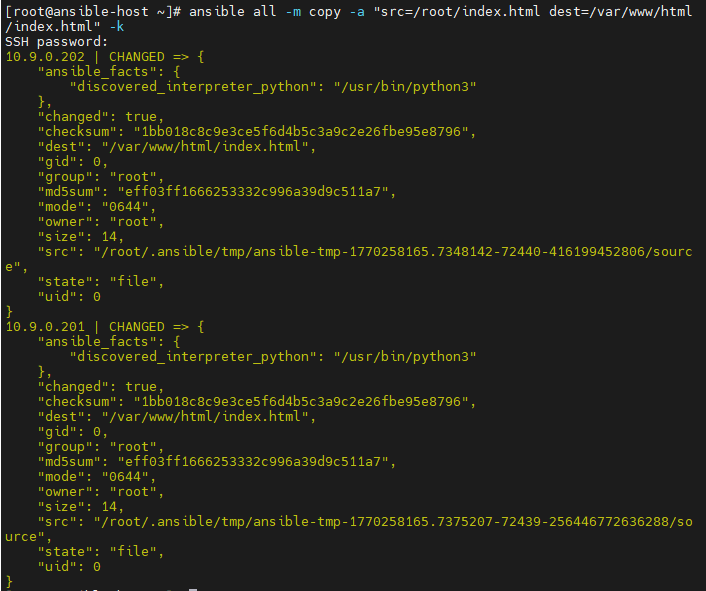
# index.html 파일 복사 됐는지 확인 (Shell)
ansible all -m shell -a "cat /var/www/html/index.html" -k
Systemd Module
# httpd service 실행
ansible all -m systemd -a "name=httpd.service state=started" -k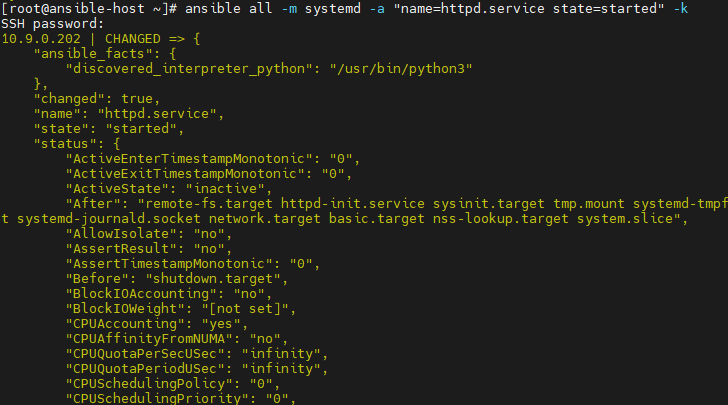
# ansible host에서 curl로 확인
curl 10.9.0.201
curl 10.9.0.202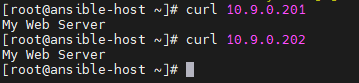
실습 3 (Playbook)
ad-hoc처럼 단발성으로 실행하는 명령어들의 집합을 play라고 하는데, 그런 play가 1개 이상 있는 집합을 playbook이라고 한다.
# playbook yaml 작성 규칙
--- : 시작
name : 작업 구분용 이름
hosts : 작업 대상
tasks : 적용할 작업
... : 종료 (생략 가능)
# 문법 검사
ansible-playbook playbooks/create_user.yaml --syntax-check
# 파일 실행
ansible-playbook playbooks/create_user.yaml -kans01 라는 이름의 유저 생성
playbooks/create_user.yaml 파일 생성 후 아래와 같이 작성
---
- name: Create User Playbook
  hosts: all
  tasks:
  - name: Create user
    user:
      name: ans01
      uid: 1100
      state: present
...
epel-release, Nginx 패키지 설치와 Nginx 실행
playbooks/install_nginx.yaml 파일 생성 후 아래와 같이 작성
---
- name: Install nginx
  hosts: all
  gather_facts: false  #정보를 수집하는 과정을 생략 (설치 속도 UP)
  tasks:
    - name: Install epel-release
      dnf:
        name: epel-release
        state: present
    - name: Install nginx
      dnf:
        name: nginx
        state: present
    - name: Start nginx
      systemd:
        name: nginx
        state: started
...
copy 모듈을 사용해 index.html 파일 복사
playbooks/copy_index.yaml 파일 생성 후 아래와 같이 작성
---
- name: Copy index.html to nginx
hosts: all
tasks:
- name: Copy local index.html to Nginx Web Server
copy:
src: /root/index.html
dest: /usr/share/nginx/html/index.html
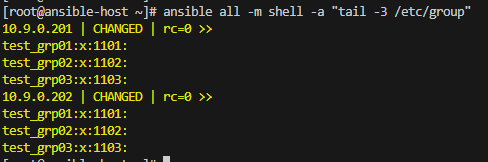
...실습 3-2 (Playbook-loop)
create_group_loop.yaml 파일 생성 후 아래와 같이 작성
---
- name: Create Group by loop
  hosts: all
  tasks:
    - name: Add Group loop
      group:
        name: "{{ item.gname }}"
        state: present
      loop:
        - gname: "test_grp01"
        - gname: "test_grp02"
        - gname: "test_grp03"
...
실습 3-3 (Playbook)
---
- name: Exam01
  hosts: all
  gather_facts: false
  tasks:
    - name: Create User Group
      group:
        name: "{{ item.name }}"
        state: present
      loop:
        - { name: "g-adm" }
        - { name: "g-test" }
    - name: Create User
      user:
        name: "{{ item.name }}"
        group: "{{ item.group }}"
        uid: "{{ item.uid }}"
        state: present
      loop:
        - { name: "u-adm", group: "g-adm", uid: 2000 }
        - { name: "u-test01", group: "g-test", uid: 3001 }
        - { name: "u-test02", group: "g-test", uid: 3002 }
    - name: Install package traceroute
      dnf:
        name: traceroute
        state: present
    - name: Stop crond.service
      systemd:
        name: crond
        state: stopped
    - name: Create file
      file:
        path: /root/503.html
        state: touch
        mode: 0644
...
정리 블로그