@Nest/Swagger
Swagger는 API 문서 자동화도구이다. Nest를 실질적으로 프로젝트에 적용한 적이 없었기 때문에 이전에는 DB를 기록하는 방식으로 DBdiagram이라는 웹 서비스를 이용했었다. API의 변경사항이 있을때마다 수기로 작성해서 변경시켜줘야하는 부분에서 번거로움이 많았고, 프론트엔드와 의사소통 과정중에 변동사항을 일일히 모아서 적용시켜야 했었다. Swagger라는 Nest 툴을 이용하면 이러한 API 문서를 따로 작성할 필요 없이 구현 코드를 수정하면서 API 문서를 같이 수정할 수 있다. (아무래도 개발자들은 모든걸 코드로 해결하고 싶어하는 것 같다(?))
만약에 코드와 API 문서를 따로 관리하게 되면, 코드는 수정되고 API 문서는 갱신하지 않아 최신화되지 않으면 다른 팀원들에게 공유된 API 문서가 실제 코드내의 API와 다른 문제가 발생할 수 있다. 그리고, 일일히 문서화하는 것에서 큰 실수가 발생할 수 있지만 실제 구동을 코드에 영향주지 않으면서 테스트할 수 있다는 점이 크게 장점이다.
다른 장점으로는 Swagger로 작성된 API 페이지를 따로 생성해서 실제로 값을 요청하고 응답을 확인하는 테스트할 수 있는 인터페이스를 제공한다는 것이다. /api/docs 이런 페이지에서 실제로 확인할 수 있다.
NestJS에서 Swagger install
Swagger를 사용하는 방법은 간단하다. NestJS에서 사용할 수 있도록 모듈이 제공되고 있다. 아래의 모듈들을 설치하면 된다.
Swagger-ui-express를 사용하는 경우
npm install --save @nestjs/swagger swagger-ui-expressNestJS(fastify)를 사용하는 경우
npm install --save @nestjs/swagger fastify-swagger
NestJS에서 Swagger 사용하기
swagger-home
main.ts에서SwaggerModule를 사용해서 아래와 같이 초기화한다.import { NestFactory } from '@nestjs/core'; import { AppModule } from 'src/app.module'; import { setupSwagger } from 'src/util/swagger'; async function bootstrap() { const app = await NestFactory.create(AppModule); // ... 생략 setupSwagger(app); await app.listen(3000); } void bootstrap();따로
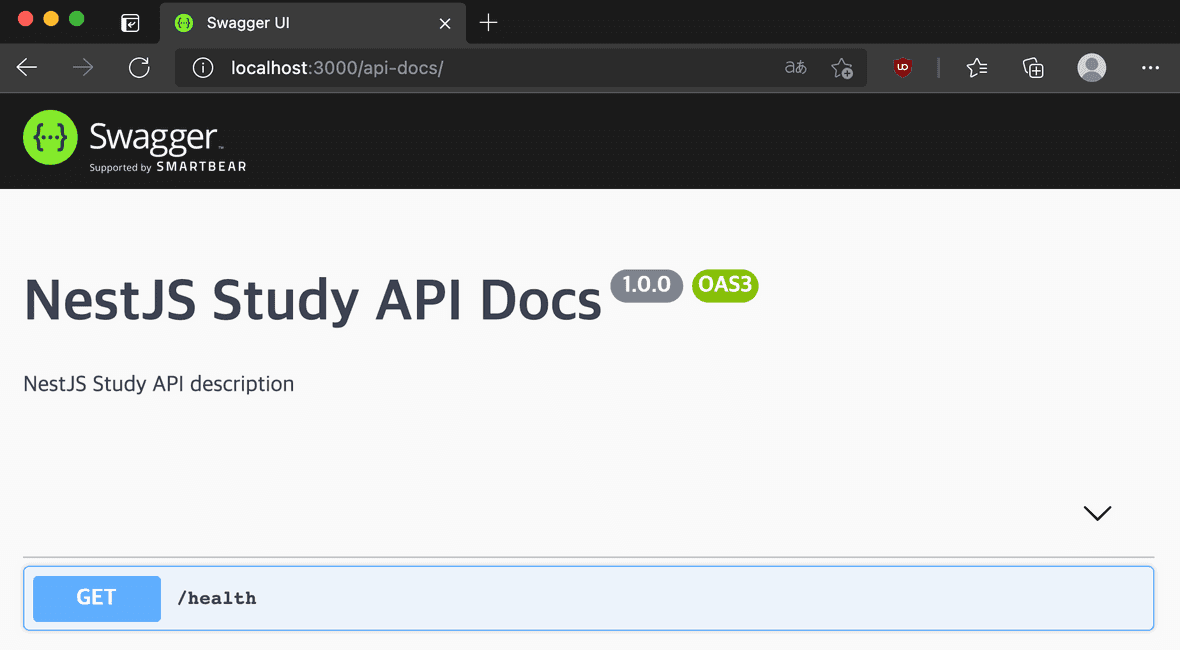
setupSwagger를 만들 수도 있다.DocumentBuilder로 문서의 기본을 구성할 수 있다. 제목, 설명, 버전 등과 같은 속성을 설정할 수 있는 몇 가지 메서드를 제공한다. API 문서를 만들기 위해SwaggerModule의createDocument()메서드를 사용한다.import { INestApplication } from '@nestjs/common'; import { SwaggerModule, DocumentBuilder } from '@nestjs/swagger'; /** * Swagger 세팅 * * @param {INestApplication} app */ export function setupSwagger(app: INestApplication): void { const options = new DocumentBuilder() .setTitle('NestJS Study API Docs') .setDescription('NestJS Study API description') .setVersion('1.0.0') .build(); const document = SwaggerModule.createDocument(app, options); SwaggerModule.setup('api-docs', app, document); }아래의 코드에서
setup()메서드를 통해서Swagger UI를 Mount하는 Path를 설정할 수 있다. 브라우저에서 http://localhost:3000/api-docs로 이동하면 Swagger UI가 표시된다.SwaggerModule.setup('api-docs', app, document);
swagger-controller
기초 구성은 끝났으니 이제 만들어진 API에 문서화를 해보자.
@nestjs/swagger에서 제공하는 데코레이터들을 사용하면 된다.
import { ApiTags, ApiOperation, ApiResponse } from '@nestjs/swagger';

@Controller('v1/users')
@ApiTags('유저 API')
export class UserController {
  constructor(private readonly userService: UserService) {}

  @Post()
  @ApiOperation({ summary: '유저 생성 API', description: '유저를 생성한다.' })
  @ApiCreatedResponse({ description: '유저를 생성한다.', type: User })
  async create(@Body() requestDto: UserCreateRequestDto, @Res() res: Response) {
    const user: User = await this.userService.createUser(requestDto);

    return res.status(HttpStatus.CREATED).json(user);
  }
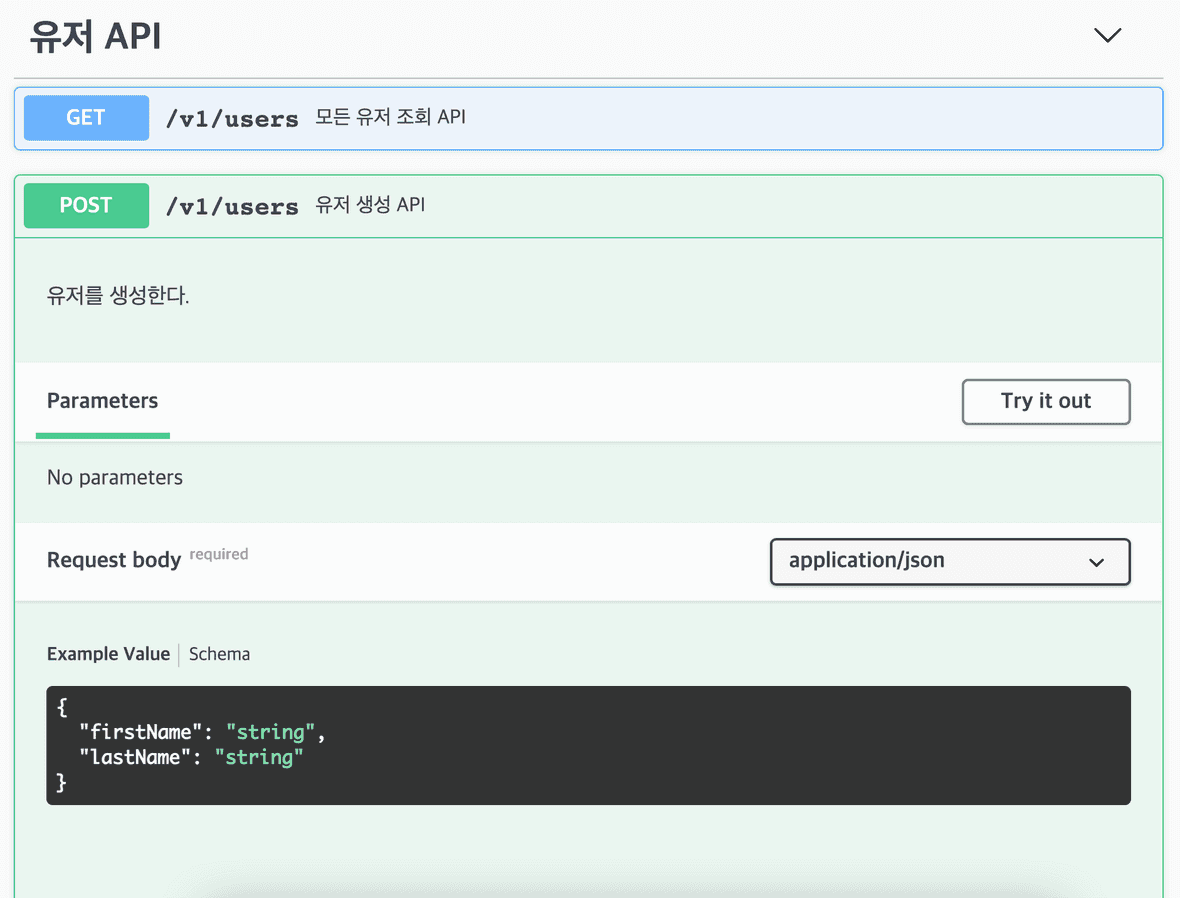
}컨트롤러(Controller)에만 Swagger를 사용하고 Swagger UI를 확인해본다.

swagger-api-test
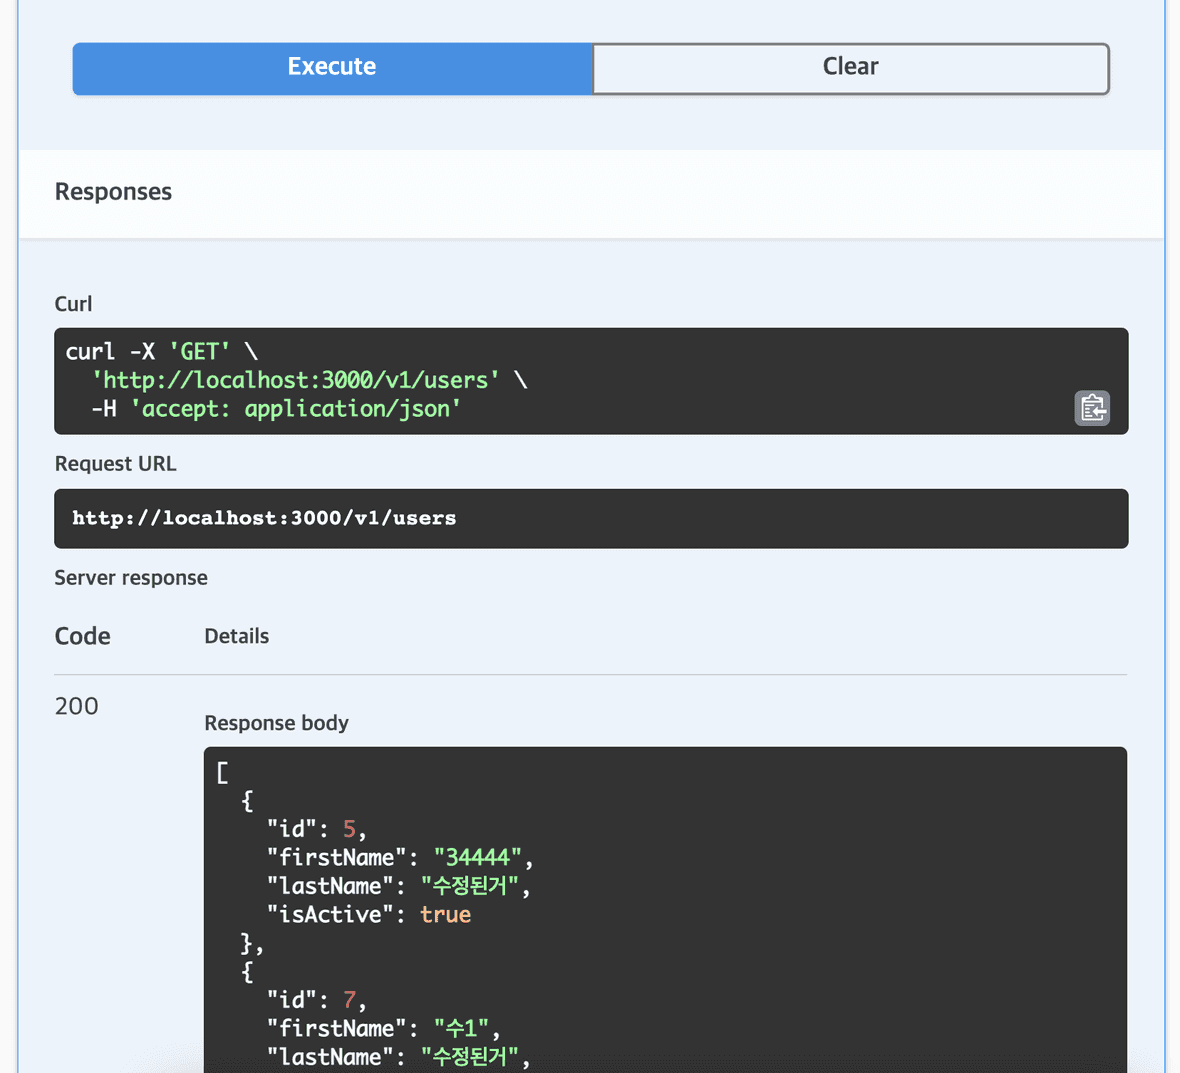
API에 대한 Swagger UI가 만들어졌는데, Try it out버튼을 클릭하면 API의 동작을 테스트할 수 있는 화면이 나온다.

Execute 버튼을 클릭하면 API를 호출해서 응답을 확인할 수 있다.
@ApiTags()로 ‘유저 API’를 설정하였는데 해당 컨트롤러가 어떤 API 인지 설정할 수 있다. 각 API에 대한 설명으로는 @ApiOperation()로 설정할 수 있다. @ApiCreatedResponse()와 같은 API 응답에 대해서 정의할 수 있는 데코레이터를 제공한다.
@nestjs/swagger에서 제공하는 API 응답 데코레이터들은 아래와 같다. 개별내용은 나중에 포스팅으로 정리하도록 하겠다. 현재 필요한 내용들은 위에 내용들이 대부분이지만, 추가적인 응답에 대한 정의도 내릴 수 있는 것으로 보인다. 모든 데코레이터는 Api%로 시작한다!
@ApiOkResponse()
@ApiCreatedResponse()
@ApiAcceptedResponse()
@ApiNoContentResponse()
@ApiMovedPermanentlyResponse()
@ApiBadRequestResponse()
@ApiUnauthorizedResponse()
@ApiNotFoundResponse()
@ApiForbiddenResponse()
@ApiMethodNotAllowedResponse()
@ApiNotAcceptableResponse()
@ApiRequestTimeoutResponse()
@ApiConflictResponse()
@ApiTooManyRequestsResponse()
@ApiGoneResponse()
@ApiPayloadTooLargeResponse()
@ApiUnsupportedMediaTypeResponse()
@ApiUnprocessableEntityResponse()
@ApiInternalServerErrorResponse()
@ApiNotImplementedResponse()
@ApiBadGatewayResponse()
@ApiServiceUnavailableResponse()
@ApiGatewayTimeoutResponse()
@ApiDefaultResponse()
유저를 생성하는 API의 코드에서는 UserCreateRequestDto 클래스를 사용하는데 이 클래스는 현재는 Swagger UI에서는 표시되어 있지 않다.
swagger-dto-schema
import { ApiPropertyOptional } from '@nestjs/swagger';

export class UserCreateRequestDto {
  @ApiProperty({ description: '이름' })
  firstName!: string;

  @ApiProperty({ description: '성' })
  lastName!: string;
}
UserCreateRequestDto 클래스의 속성에 @ApiProperty() 데코레이터를 사용해서 Swagger 문서화를 할 수 있다. @ApiProperty()에서 제공하는 옵션들을 활용해서 다양한 설정도 할 수 있다. 보통 DTO를 정의할 때는 @Column() 정의가 마무리되는 마지막에 @ApiProperty()를 이용해서 정의해준다.
그렇게 작성하고나면 API 명세와 마찬가지로 Swagger UI에서 UserCreateRequestDto 클래스의 Schema도 확인할 수 있다.
swagger-user-schema
import { Entity, Column, PrimaryGeneratedColumn } from 'typeorm';
import { ApiProperty } from '@nestjs/swagger';

@Entity()
export class User {
  @PrimaryGeneratedColumn()
  @ApiProperty({ description: 'id' })
  id!: number;

  @Column({
    length: 50,
  })
  @ApiProperty({ description: '이름' })
  firstName!: string;

  @Column({
    length: 50,
  })
  @ApiProperty({ description: '성' })
  lastName!: string;

  @Column({ default: true })
  @ApiProperty({ description: '활동' })
  isActive!: boolean;

  static of(params: Partial<User>): User {
    const user = new User();

    Object.assign(user, params);

    return user;
  }
}
컨트롤러에서 반환하는 타입을 User로 설정하였는데 User.ts도 Dto 클래스와 같은 방식으로 Swagger를 사용할 수 있다.
마치며
Swagger를 사용하지 않고 Wiki와 같이 API 문서를 따로 관리한다면Swagger보다 더 유연한 API 문서 제공이 가능할 수 있다. 하지만 Wiki를 사용한다면 코드를 수정할 때마다 최신화하는 것을 잊지 말아야 한다. 이 부분이 굉장히 불편하고 실제로 프로젝트를 진행하면서 많은 방해가 되기도한다. 또 추가적으로 Postman처럼 API를 테스트할 수 있는 도구를 제공해야 한다. 물론 Swagger를 통해서 문서화의 일부를 유연하게 가져갈 수 있지만, 문서화를 통해서 진행하는것이 훨씬 더 명확하기 때문에 놓치지 않는 것이 중요하다.
더 많은 @nestjs/swagger의 데코레이터들은 여기에서 확인할 수 있다. 공식문서의 OPENAPI 단락에서 더 많은 정보를 얻을 수 있다.
Reference
https://docs.nestjs.com/openapi/introduction
https://docs.nestjs.com/openapi/decorators


