
Lambda는 서버리스 컴퓨팅 서비스이다. zip이나 컨테이너 이미지로 업로드만 하면 Lambda는 모든 유형의 애플리케이션이나 백엔드서비스에 자동으로 이벤트를 감지해서 실행할 수 있다.
이번에 처음 시도하는 Lambda는 로컬에서 zip을 만들어서 awscli를 이용해서 s3로 파일을 전송하는 방식을 사용할 예정
1. 로컬에서 Lambda만들기
1-1. 세팅하기
ℹ️ 작업환경
- 우분투@20.04
npm i aws-sdk sharp
sudo apt-get install awscli
awscli를 설치하면 터미널로 aws 명령어를 사용할 수 있다. 명령어를 사용하려면 해당 서비스의 사용 권한이 있는 엑세스키를 등록해야한다.
ℹ️ 다음 명령어를 통해서 IAM에서 생성한 계정의 키와 access key, region, output format을 등록한다. IAM에서 키를 생성하는 방법은 링크를 참조한다.
aws configure1-2. 패키지를 zip으로 압축하기
일단 index.js 파일을 생성해서 원하는 로직을 작성한다.
아래소스는 AWS Lambda S3 트리거 사용 예의 소스와 제로초님의 소스를 참고함.
// dependencies
const AWS = require('aws-sdk')
const util = require('util')
const sharp = require('sharp')

// get reference to S3 client
const s3 = new AWS.S3()

exports.handler = async (event, context, callback) => {
  // Read options from the event parameter.
  console.log(
    'Reading options from event:\n',
    util.inspect(event, { depth: 5 })
  )
  const srcBucket = event.Records[0].s3.bucket.name
  // Object key may have spaces or unicode non-ASCII characters.
  const srcKey = decodeURIComponent(
    event.Records[0].s3.object.key.replace(/\+/g, ' ')
  )
  const filename = srcKey.split('/')[srcKey.split('/').length - 1]
  const ext = srcKey.split('.')[srcKey.split('.').length - 1].toLowerCase()
  const dstKey = 'resized/' + filename

  // Infer the image type from the file suffix.
  const typeMatch = srcKey.match(/\.([^.]*)$/)
  if (!typeMatch) {
    console.log('Could not determine the image type.')
    return
  }

  // Check that the image type is supported
  const imageType = typeMatch[1].toLowerCase()
  if (imageType != 'jpg' && imageType != 'png') {
    console.log(`Unsupported image type: ${imageType}`)
    return
  }

  // Download the image from the S3 source bucket.

  try {
    const params = {
      Bucket: srcBucket,
      Key: srcKey
    }
    var origimage = await s3.getObject(params).promise()
  } catch (error) {
    console.log(error)
    callback(error)
    return
  }

  // set thumbnail width. Resize will set the height automatically to maintain aspect ratio.
  const width = 400

  // Use the sharp module to resize the image and save in a buffer.
  try {
    var buffer = await sharp(origimage.Body).resize(width).toBuffer()
  } catch (error) {
    console.log(error)
    callback(error)
    return
  }

  // Upload the thumbnail image to the destination bucket
  try {
    const destparams = {
      Bucket: srcBucket,
      Key: dstKey,
      Body: buffer,
      ContentType: 'image'
    }

    const putResult = await s3.putObject(destparams).promise()
    callback(null, dstKey)
  } catch (error) {
    console.log(error)
    callback(error)
    return
  }

  console.log(
    'Successfully resized ' +
      srcBucket +
      '/' +
      srcKey +
      ' and uploaded to ' +
      srcBucket +
      '/' +
      dstKey
  )
}
이제 이 패키지를 zip으로 압축한다. 패키지를 압축할 때는 node_modules까지 압축해야한다.
npm i
zip -r <패키지이름> ./*
1-3. s3로 패키지 올리기
aws s3 cp <패키지이름> <s3url>s3url은 Accessing a bucket링크를 참조하면 어떤 형식으로 url이 되어 있는지 포맷확인이 가능하다.
-
Virtual-hosted–style access => https://bucket-name.s3.Region.amazonaws.com/key name
-
Path-style access => https://s3.Region.amazonaws.com/bucket-name/key name
-
Accessing a bucket through S3 access points => https://AccessPointName-AccountId.s3-accesspoint.region.amazonaws.com.
-
Accessing a bucket using S3:// => S3://bucket-name/key-name
2. Lambda 세팅
2-1. 함수생성

함수를 생성할 때는 s3를 생성한 region과 동일하게 생성해준다.

함수명을 넣고 함수를 생성한다. 사용자지정역할을 생성하려면 IAM에서 커스텀역할을 생성할 수 있다.
이후 만들어진 함수에 가서 구성탭에서
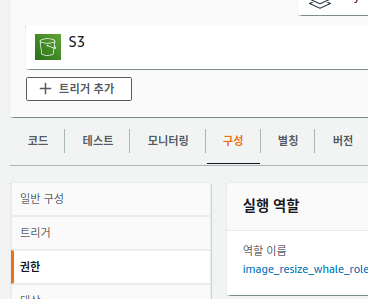
- 트리거를 추가한다: 트리거설정시 버킷이 동일한경우에는 무한재귀가 될 수 있으니 꼭 접두사를 넣거나 버킷을 달리한다.
- 권한에 역할과 정책이 등록되어 있는지 확인한다.
- 일반구성 탭에서 편집을 통해 제한 시간과 메모리를 수정할 수 있다.
2-2. 코드생성
코드는 이미 s3에 올라와 있으니 그것을 바인딩해준다.

참고링크