강의 chap2-2
Hello 서블릿
1. 목표
- 스프링 부트 환경에서 서블릿을 등록하고 사용해보자
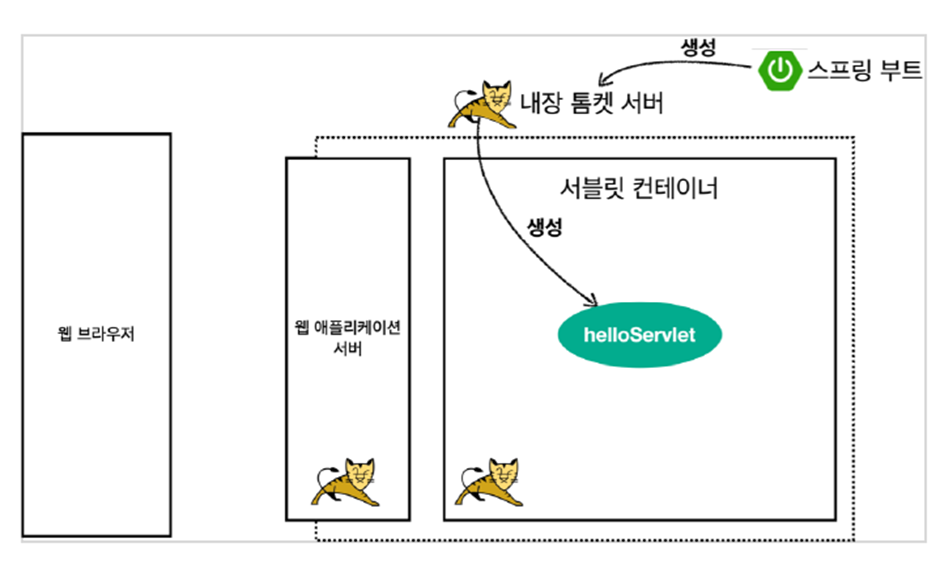
2. 서블릿 환경 구성
-
@ServletComponentScan : 스프링 부트는 서블릿을 직접 등록하고 사용할 수 있도록 해준다.
-
하위 컴포넌트들을 다 뒤져서 서블릿을 등록하게끔 해준다.
-
HelloServlet.class
@WebServlet(name = "helloServlet", urlPatterns = "/hello")
public class HelloServlet extends HttpServlet {
@Override
protected void service(HttpServletRequest request, HttpServletResponse response) throws ServletException, IOException {
System.out.println("HelloServlet.service");
System.out.println("request = " + request);
System.out.println("response = " + response);
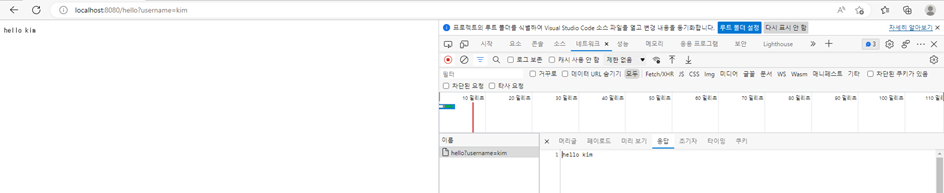
String username = request.getParameter("username");
System.out.println("username = " + username);
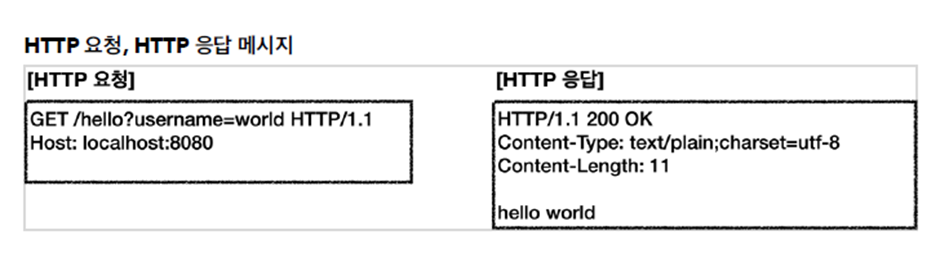
response.setContentType("text/plain");
response.setCharacterEncoding("utf-8");
response.getWriter().write("hello " + username);
}
}
-
HttpServlet을 상속받아야 한다.
-
ServletApplication
@ServletComponentScan // 서블릿 자동 등록
@SpringBootApplication
public class ServletApplication {

   public static void main(String[] args) {
      SpringApplication.run(ServletApplication.class, args);
   }

}
3. Http 요청 메시지를 확인하고 싶은 경우
- application.properties에 logging.level.org.apache.coyote.http11=debug 추가해준다.
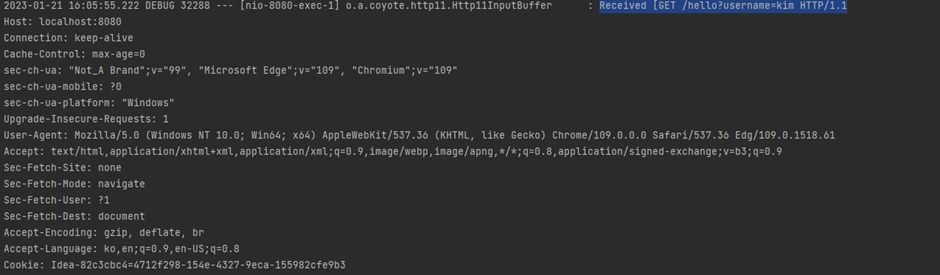
- 운영 서버에 이렇게 모든 요청 정보를 다 남기면 성능 저하가 일어날 수 있으므로 개발 단계에서만 적용해야 한다.
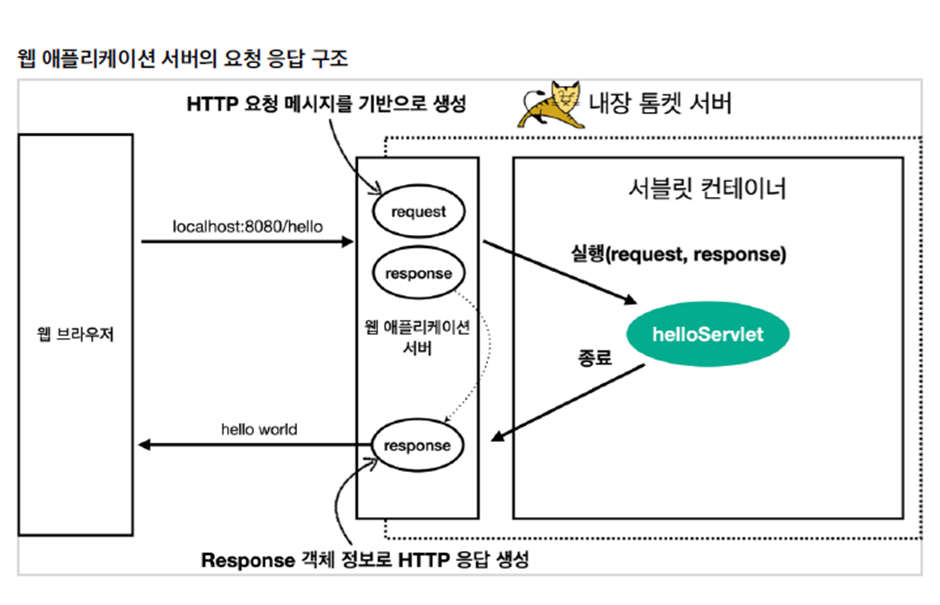
4. 정리
출처
인프런 강의 - 김영한
스프링 MVC 1편 - 백엔드 웹 개발 핵심 기술
https://www.inflearn.com/course/%EC%8A%A4%ED%94%84%EB%A7%81-mvc-1/dashboard

안녕하세요