목적
인스타그램 계정을 검색하면 해당계정의 이미지와 해시태그만 크롤링 하는 사이트를 제작한다.
제작과정
우선 파이썬과 크롤링을 하기위해 beautifulsoup4 와 selenium을 사용하였고, 파이썬 데이터를 html파일에 던져주기 위해 django 웹프레임워크를 사용하였다.
파이썬애니웨어로 장고 서버 호스팅을 하려고 했지만, 파이썬애니웨어 자체에서 크롬드라이버를 지원하지않아 파이어폭스 드라이버로 추후에 바꿨는데, 이것도 지원을 하지 않는지 브라우저 드라이버를 파이썬애니웨어에서 인식하지 못해 시간관계상 서버호스팅은 나중에하기로 결정하였다.
장고 프로젝트 , 앱 생성
- Mac os terminal
django-admin startproject instaPrj : instaPrj 프로젝트 생성
cd instaPrj : 방금 만든 장고 프로젝트 이동 (manage.py 가 있는 폴더로 이동)
python manage.py startapp main : instaPrj 프로젝트안에 main 앱 생성
이렇게 app 생성이 새로 되었으면, 방금 새로만든 장고 프로젝트 instaPrj의 settings.py에 가서 아래와 같이 수정한다.
* instaPrj -> settings.py

ALLOWED_HOSTS = ['*']  # 호스팅 할때 허용할 도메인주소 입력 (그냥 편하게 * 를 입력하였다)
DEBUG = False # 호스팅이 시작되면 false로 줘서 오류페이지에서 클라이언트가 내부 소스코드를 보지 못하게 막음
INSTALLED_APPS = [
    'django.contrib.admin',
    'django.contrib.auth',
    'django.contrib.contenttypes',
    'django.contrib.sessions',
    'django.contrib.messages',
    'django.contrib.staticfiles',
    'main', # 방금 만든 앱 이름을 추가
]
TIME_ZONE = 'Asia/Seoul' # 장고 프로젝트 시간을 한국으로 바꿈
STATIC_ROOT = os.path.join(BASE_DIR, 'static') # static 파일의 경로를 설정함
이렇게 됬으면 앱이 추가, settings.py가 변경된것이니까 settings.py나 models.py에 변경사항이 있을때 마다 migarte 혹은 makemigrations을 해줘야한다. (해당 프로젝트에서 model은 사용하지 않았음)
- Mac os terminal
python manage.py makemigrations main : 마이그레이션 파일 생성
python manage.py migrate main : 마이그레이션 적용
장고 url 매핑
터미널에서 모두 입력 했으면 url을 매핑해준다.
* instaPrj -> urls.py

from django.contrib import admin
from django.urls import path
from django.urls.conf import include

urlpatterns = [
    path('admin/', admin.site.urls),
    path('',include('main.urls')), # url주소 뒤에 아무것도 기입하지 않으면 main의 urls.py 로 가라는 뜻
]
instaPrj의 url을 매핑 하였으면 main 앱에 urls.py를 생성하여 매핑해준다.
* main -> urls.py

from django.urls.conf import path
from main import views


app_name= 'main' # app_name은 해당 앱에 별칭을 부여함. (별칭 사용은 코드를 줄이기위함)

urlpatterns=[
    path('index/',views.index,name='index'),
    # url뒤에 index가 붙으면 views의 index함수를 호출하라는 뜻. name='index'는 별칭을 부여함.
    path('detail_img/',views.detail_img,name='detail_img'),
]
views.py 함수정의, 크롤링
main앱의 url을 매핑하였다면 views.py로 가서 해당되는 함수를 작성해준다.
그리고 크롤링할 브라우저, firefox의 driver인 geckodriver를 다운받아 instaPrj 폴더안으로 이동시킨다.
* main -> views.py

from django.shortcuts import render
from django.http import HttpResponse
from urllib.request import urlopen
from urllib.parse import quote_plus
from bs4 import BeautifulSoup
from selenium import webdriver
import time

def index(request):
    return render(request,'main/index.html')

    # 장고는 인수값으로 먼저 항상 request를 작성해줘야 한다.
    # index 함수가 호출되면 main앱의 index.html 로 가라는 뜻.

def detail_img(request):

    baseUrl = 'https://gramtower.com/profile/'
    plusUrl = request.GET.get('account')
    plusUrl = str(plusUrl)
    url = baseUrl + quote_plus(plusUrl)

    # 크롤링할 url을 baseUrl에 담아주고, index.html에서 넘어온 get방식의 인스타그램 계정명 데이터를 plusUrl에 담아준다.
    # plusUrl을 str()로 문자열로 변경해주고, 인스타그램계정주소 특성상 계정url이 아스키코드로 변환이 되니까 문자열을 아스키코드로 변환해주는 quote_plus 함수를 써서 url에 담아준다.

    driver = webdriver.Firefox(executable_path='/Users/kimbyeonguk/Desktop/practice/django/instaPrj/geckodriver')
    driver.get(url)

    pageDown = 30
    while pageDown:
        driver.execute_script("window.scrollTo(0, document.body.scrollHeight);")
        time.sleep(1)
        pageDown -= 1

    # 페이지 끝까지 자동으로 스크롤을 30번 해준다

    html = driver.page_source
    soup = BeautifulSoup(html)

    instaImg = soup.select('div.grid-item>div>a')
    instaText = soup.select('div.grid-item>div.p-4>div.break-words')

    imgSrcList = []
    textList = []
    posts = {}

    for i in instaImg:
        imgSrcList.append(i.img['src'])

    # 인스타그램 이미지를 스크래핑해서 imgSrcList 에 넣어준다

    for i in instaText:
        textList.append(i)

    # 인스타그램 해시태그를 스크래핑해서 textList 에 넣어준다

    for i in range(len(imgSrcList)):
        img = imgSrcList[i]
        text = textList[i]
        posts.update({img:text})

    # 인스타그램 이미지와 해시태그를 posts 딕셔너리에 key와 value로 넣는다


    driver.close()

    return render(request,'main/detail_img.html',{'posts':posts})

    # main의 detail_img.html에 posts 사전형 변수를 던져준다.
템플릿 파일
이제 템플릿 파일인 html을 작업한다.
참고로 장고에서 가장 멋진 기능은 기본 html을 만들어놓으면 block으로 템플릿파일을 상속 받고 확장할 수 있다. html의 일부를 재사용이 가능하다는 뜻이다. 코드를 줄이기 위함인데, 자세한 설명은 다음 링크를 들어가자.
base.html 에서는 인스타그램 계정을 입력후 검색버튼을 누르면 해당 인스타그램 계정을 get방식으로 main앱의 urls.py에 있는 detail_img로 보낸다.
* templates -> main -> base.html

{%load static%}
<!-- load static은 정적 파일을 불러온다 추후에 설명한다.-->
<!DOCTYPE html>
<html>
  <head>
    <meta charset="utf-8">
    <link rel="stylesheet" href="{%static 'main/reset.css'%}">
    <!-- {%static 'main/reset.css'%}은 정적파일의 경로를 불러온다. 추후에 설명한다.-->
    <link rel="stylesheet" href="{%static 'main/base.css'%}">
    <link rel="stylesheet" href="{%static 'main/detail_img.css'%}">
    <link href="https://fonts.googleapis.com/css2?family=Do+Hyeon&display=swap" rel="stylesheet">
    <title>인스타그램 사진가져오기</title>
  </head>
  <body>
    <div class="wrap">
      <section class="search_section">
        <form class="search_form" action="{%url 'main:detail_img'%}" method="get">
            <h1>인스타그램 이미지 가져오기</h1>
            <input type="text" placeholder=" 인스타그램 계정을 입력하세요.." name="account">
            <button type="submit">Search</button>
        </form>
      </section>
      <section class="result_section">
        {%block content%}
        {%endblock%}
        <!--block 으로 템플릿을 확장한다-->
      </section>
    </div>
  </body>
</html>
index.html 은 아직 인스타그램 계정 이미지를 크롤링 하기 전을 렌더링 해줄거라, 비워뒀다.
* templates -> main -> index.html

{%extends 'main/base.html'%}
<!--extends로 base.html을 상속받는다-->
{%block content%}
{%endblock%}
detail_img 에서는 for문으로 posts의 key(이미지)와 value(해시태그)를 렌더링 해준다.
striptags 는 해당 스크래핑 데이터의 html태그를 제거, cut:'' 은 지정한 문자를 제거한다.
* templates -> main -> detail_img.html

{%extends 'main/base.html'%}
{%block content%}
  {%for key,value in posts.items %}
  <div class="post">
    <img src="{{key}}" width="100px" height="100px">
    <h1>{{value|striptags|cut:'['|cut:']'|cut:','}}</h1>
  </div>
  {%endfor%}
{%endblock%}
css 파일
* static -> main -> base.css

@charset "UTF-8";

body{
  font-family: 'Do Hyeon', sans-serif;
  color:#dbdbdb;
}

.wrap{
  display: flex;
  flex-direction: column;
  width: 100%;
  background: #c9c8c5;
}

.search_section{
  order:1;
  display: flex;
  justify-content: center;
  align-items: center;
  width: 100%;
  height: 100px;
}

.search_form h1{
  order:1;
  font-size: 30px;
  color:white;
}

.search_form input{
  order:2;
  width:500px;
  height:50px;
  margin-left: 20px;
  margin-right: 20px;
  font-size: 20px;
  border-radius: 8px;
  color:gray;
  border: 3px solid black;
  margin-top: -5px;
}

.search_form input::placeholder {
  color: #d4d3d2;
  font-style: italic;
}

.search_form button{
  order:3;
  border:3px solid black;
  border-radius: 6px;
  background: #9e9e9e;
  font-size: 30px;
}

.search_form h1, .search_form input, .search_form button{
  display: inline;
}

.result_section{
  order:2;
  width: 100%;
  background:white;
}
* static -> main -> detail_img.css
.post{
float:left;
margin-top: 30px;
margin-bottom: 30px;
margin-left: 70px;
width: 350px;
height: 500px;
border: 2px solid black;
border-radius: 5px;
background: #dbdbdb;
padding: 10px;
}
.post img{
width:350px;
height: 300px;
}
.post h1{
margin-top: 10px;
width:350px;
height: 200px;
font-size: 25px;
color: black;
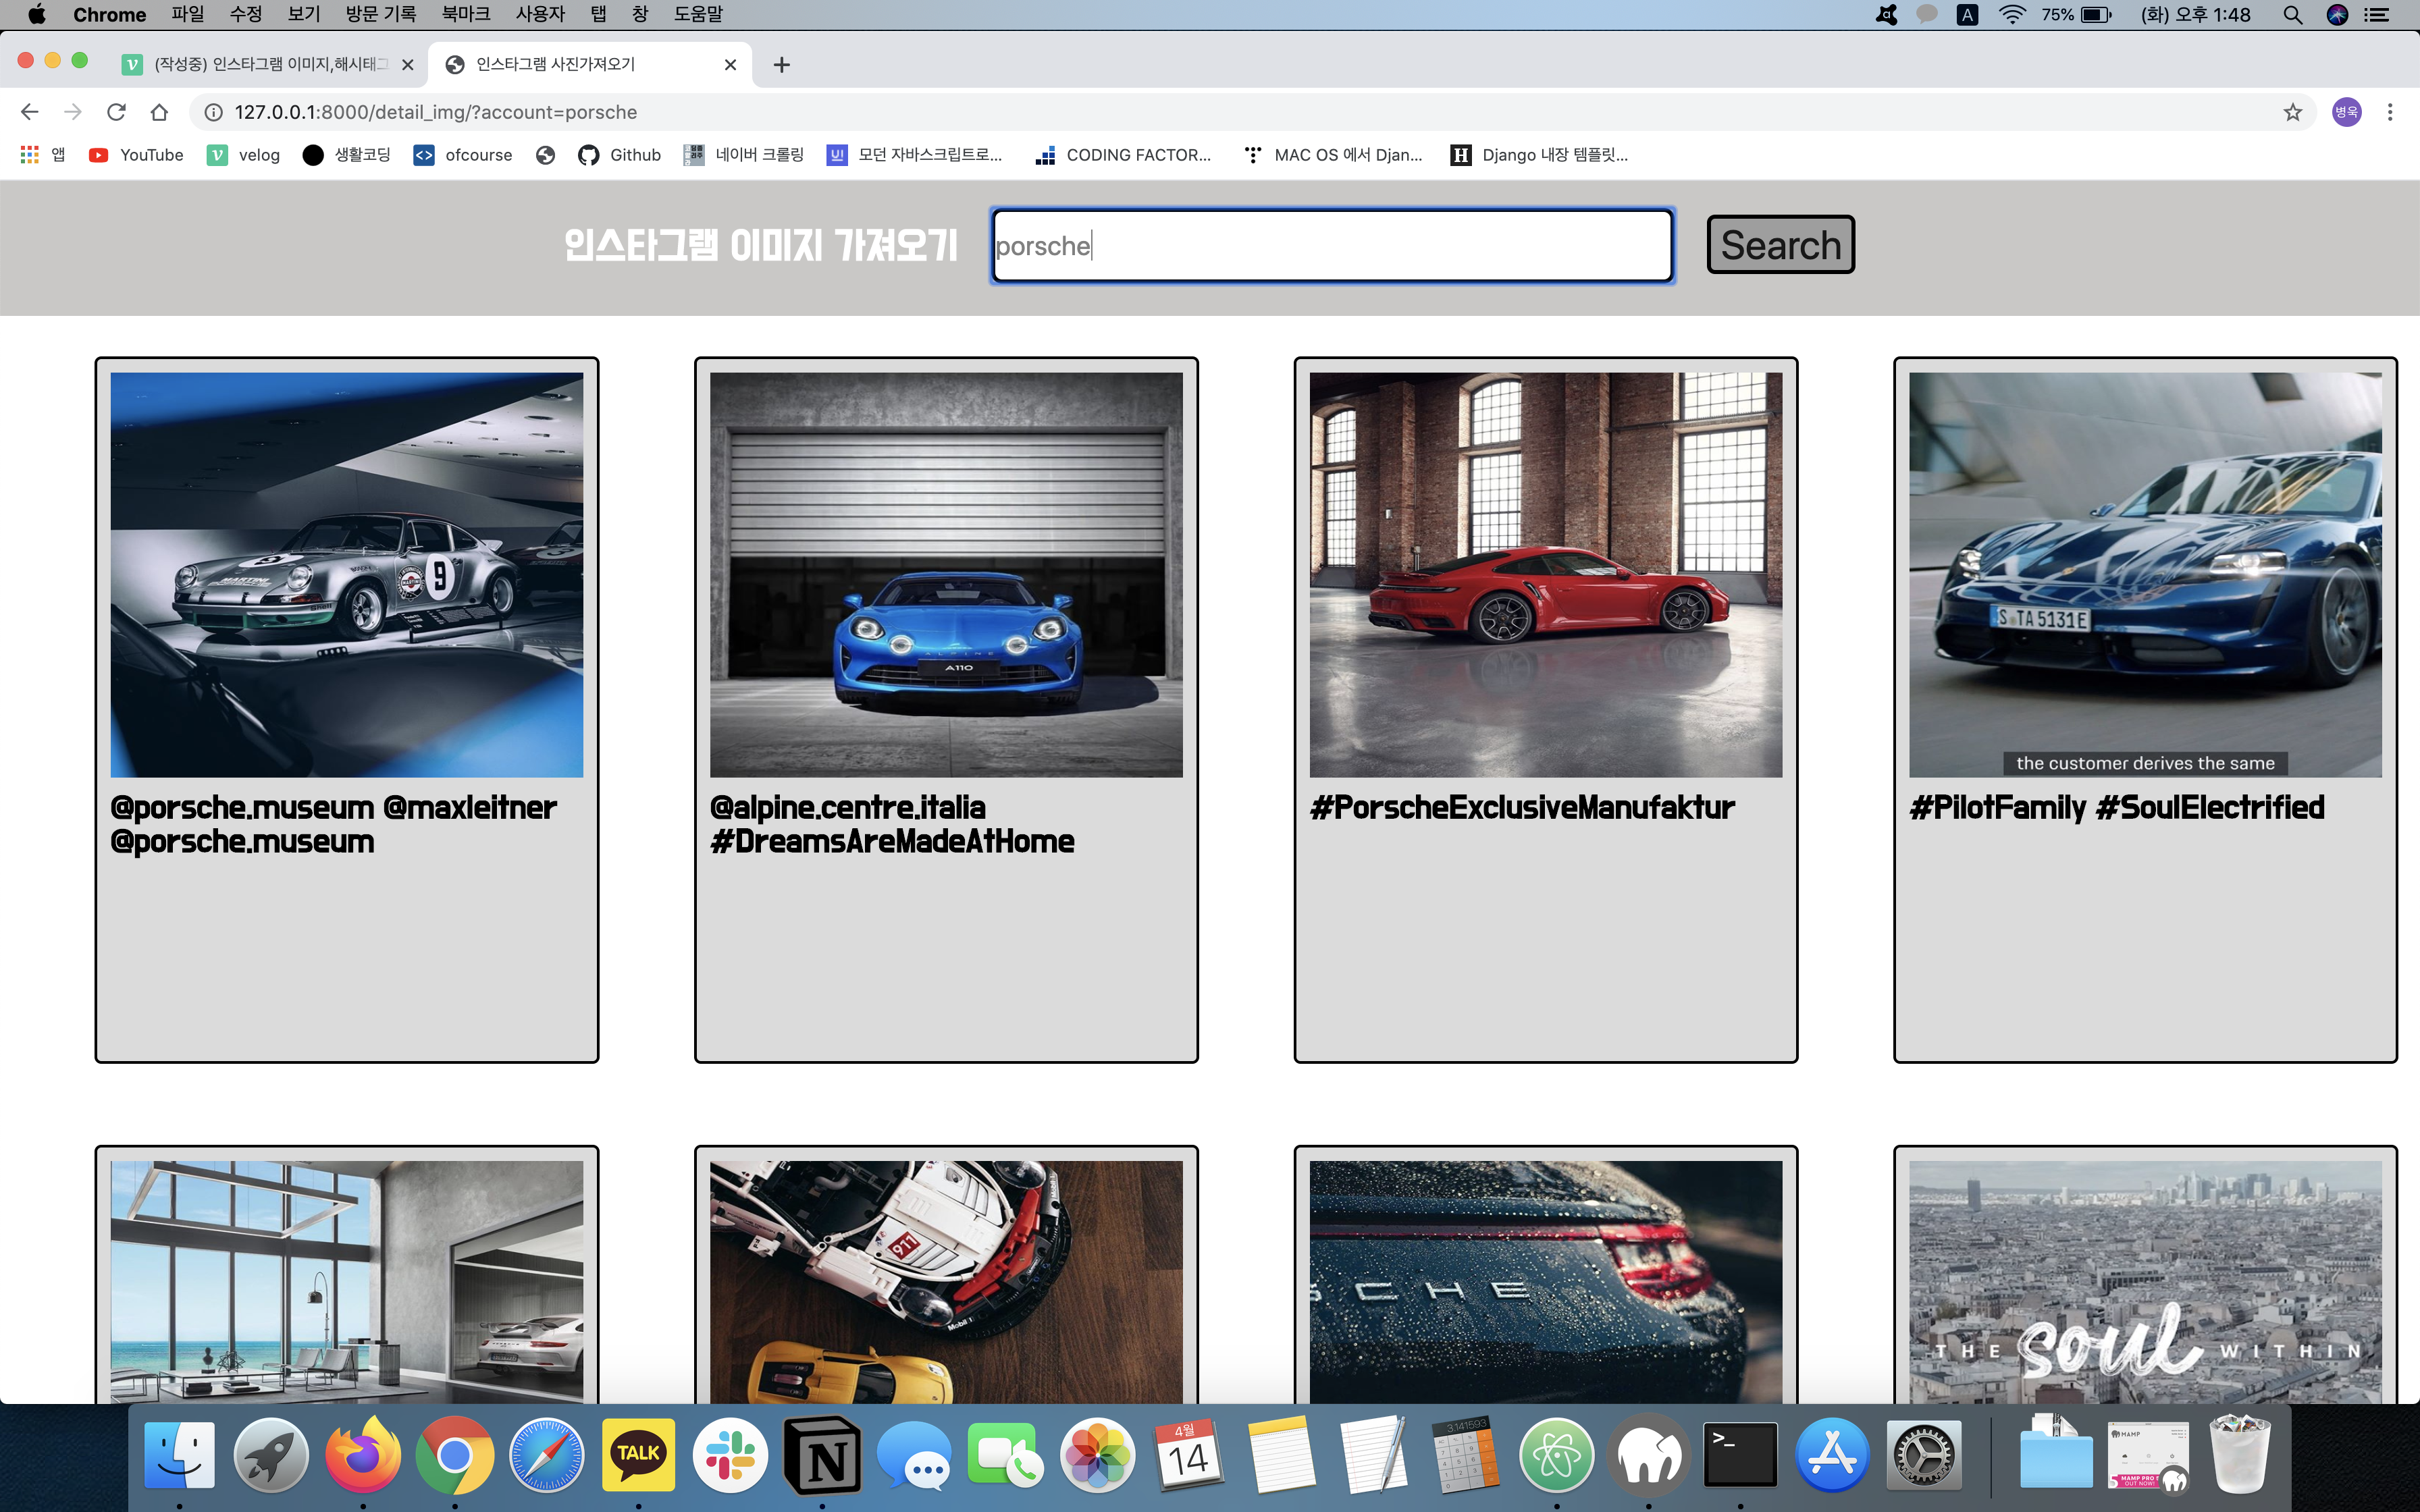
}결과
porsche 계정의 모든 이미지와 모든 해시태그를 가져온다.
후기
이번주에 어머니가 다리가 다치시는 바람에 벼락치기로 코딩했다. 엎친데 덮친격이라고, 이번주에 강남으로 이사가 있어서 더더욱 시간이 촉박했다. 다음에는 해시태그 뿐만이 아닌 좋아요도 가져오고 댓글, 댓글 수도 가져와서 작업해봐야겠다. 다음주 부터는 사전스터디가 끝나니, 사전스터디가 끝나면 저녁마다 크롤링과 장고에 대해 공부좀 해야겠다.