5. 문자기반의 보조스트림
5.1 BufferedReader와 BufferedWriter
- 버퍼를 이용해서 입출력의 효율을 높일 수 있도록 해주는 역할을 한다.
- BufferedReader의 readLine() 데이터를 라인 단위로 읽음
- BufferedWriter의 newLine() 줄바꿈을 해주는 메서드
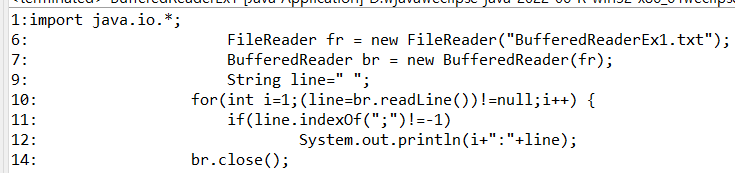
import java.io.*;

class BufferedReaderEx1 {
	public static void main(String[] args) {
		try{
			FileReader fr = new FileReader("BufferedReaderEx1.txt");
			BufferedReader br = new BufferedReader(fr);

			String line=" ";
		    for(int i=1;(line=br.readLine())!=null;i++) {
		    	if(line.indexOf(";")!=-1)
		    		System.out.println(i+":"+line);
		    }
		    br.close();

		}catch(IOException e) {}

	}

}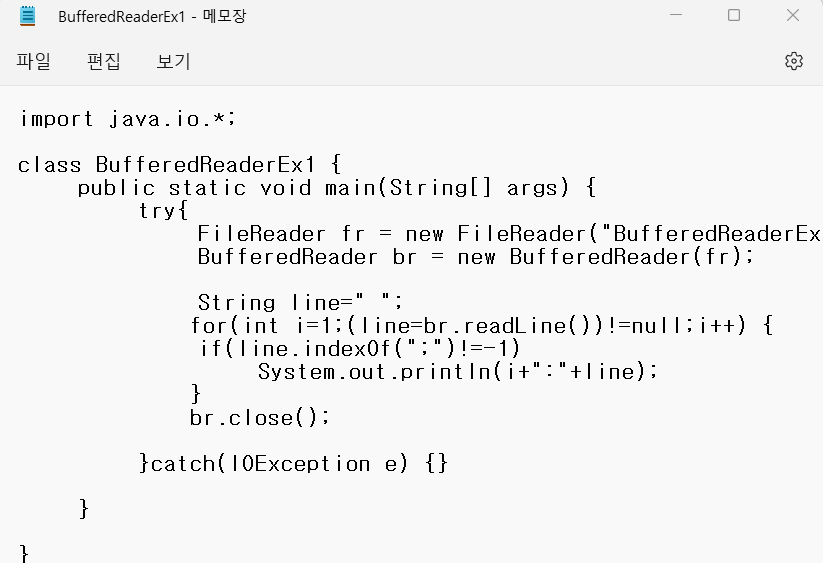
👆 indextOf()를 이용해서 ';'를 포함하는 문장을 출력한다.
5.2 InputStreamReader와 OutputStreamWriter
- 바이트기반 스트림을 문자기반 스트림으로 연결
- 바이트기반 스트림의 데이터를 지정된 인코딩의 문자데이터로 변환하는 작업
import java.io.*;

class InputStreamReaderEx {
	public static void main(String[] args) {
		String line = "";

		try {
			InputStreamReader isr = new InputStreamReader(System.in);
			BufferedReader br = new BufferedReader(isr);

			System.out.println("사용중인 OS의 인코딩 :"+isr.getEncoding());

			do {
				System.out.println("문장을 입력하세요. 마치시려면 q를 입력하세요.>");
				line = br.readLine();
				System.out.println("입력하신 문장: "+line);
			}while(!line.equalsIgnoreCase("q"));

			br.close();
			System.out.println("프로그램이 종료되었습니다.");

		}catch(IOException e) {}

	}

}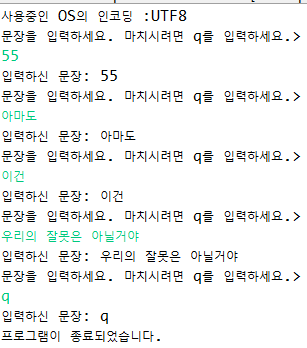
👆BufferedReader와 InputStream의 System.in을 연결하기 위해서
InputStreamReader을 사용
6. 표준입출력과 File
6.1 표준입출력-System.in,System.out,System.err
✔️ 표준입출력은 콘솔을 통한 데이터 입력과 콘솔로의 데이터 출력을 의미
✔️java에는 3가지 입출력 스트림 :System.in, System.out, System.err
✔️ 자바 어플리케이션에서는 위 스트림을 자동으로 생성해주기 때문에
생성자를 통해서 new연산을 하지 않고 사용이 가능하다.
✔️ System.err : 콘솔로의 데이터를 출력하는데 사용
public final class System {
   public final static InputStream in = nullInputStream();
   public final static PrintStream out = nullInputStream();
   public final static PrintStream err = nullInputStream();
   ...
}
✔️ System 클래스의 선언된 클래스 변수 in,err,out
import java.io.*;
class StandardIOEx1 {
	public static void main(String[] args) {
		try {
			int input =0;

			while((input=System.in.read())!=-1) {
				System.out.println( "input :"+input+", (char)input :"
						                                          +(char)input );
			}

		}catch(IOException e) {
			e.printStackTrace();
		}

	}

}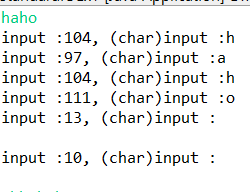
👆 몇가지를 살펴보자
① System.in.read()가 호출되면 코드의 진행을 멈추고 콘솔에 커서가 깜박이며 사용자 입력을 받음.
② Enter나 ctrl+z 동시 누름을 통해서 종료
③ Enter는 \r과 \n의 입력으로 간주
④ \r은 현재 커서의 첫줄로 이동을 의미
⑤ Enter키를 사용자 입력으로 간주하지 않으려면 System.in + BufferedReader의 readLine()메서드 이용
6.2 표준입출력의 대상변경 - setOut(),setErr(),serIn()
System.out,System.in,System.err의 입출력화면-> 콘솔화면
setOut(), setIn(), serErr()을 통해서 다른 입출력 대상 변경
| 메서드 | 설명 |
|---|---|
| static void setOut(PrintStream out) | 출력을 지정된 PrintStream으로 변경 |
| static void setErr(PrintStream err) | 출력을 지정된 PrintStream으로 변경 |
| static void setIn(PrintStream in) | 입력을 지정된 PrintStream으로 변경 |
import java.io.*;
class StandardIOEx3 {
public static void main(String[] args) {
PrintStream ps = null;
FileOutputStream fos =null;
try {
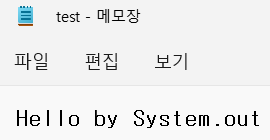
fos = new FileOutputStream("test.txt");//기본 스트림 FileOutputStream 출력할 곳 test.txt
ps = new PrintStream(fos); //System.setOut의 매개변수 PrintStream
System.setOut(ps); //콘솔 창이 아닌 test.txt에 출력하도록 대상 변경 System.out의 경우만 출력 저기에
} catch(FileNotFoundException e) {
System.out.println("File no found.");
}
System.out.println("Hello by System.out");
System.err.println("Hello by System.err");
}
}
6.3 RandomAccessFile
- 하나의 클래스로 파일에 대한 입출력 모두 가능
- DataInput, DataOutput 인터페이스를 구현
따라서 DataInputStream/DataOutputStream처럼 기본자료형 단위로 데이터 읽고 쓴다.- 파일의 어느 위치에서나 읽기/쓰기가 가능한다.
->이는 파일포인터로 인해 가능한 작업
-> 순차적으로 파일의 첫 부분부터 시작하나 seek(long pos), skipByte(int n)을 통해서 포인터의 위치 변경
import java.io.*;
class RandomAccessFileEx1 {
public static void main(String[] args) {
try {
RandomAccessFile raf = new RandomAccessFile("test1.txt","rw");//읽기 쓰기 모드
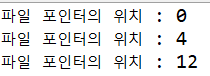
System.out.println("파일 포인터의 위치 : "+raf.getFilePointer());
raf.writeInt(100);
System.out.println("파일 포인터의 위치 : "+raf.getFilePointer());
raf.writeLong(100L);
System.out.println("파일 포인터의 위치 : "+raf.getFilePointer());
}catch(IOException e) {
e.printStackTrace();
}
}
}
👆
① 생성자
RandomAccessFile(File file, String mode)
RandomAccessFile(String fileName, String mode)
-> 주이진 file에 읽기 또는 쓰기를 하기 위한 RandomAccessFile인스턴스를 생성한다.
mode의 값은 "r","rw","rws": 메타정보+파일내용,"rwd" : 파일 내용만
② long getFilePointer() 메서드 : 파일의 포인터 위치를 알려준다.
import java.io.*;

class RandomAccessFileEx2 {
	public static void main(String[] args) {
                    //번호,국어,영어,수학
		int[] score = {1,100, 90, 90,
				       2, 70, 90,100,
				       3,100,100,100,
				       4, 70, 60, 80,
				       5, 70, 90, 100
				       };

		try {
			RandomAccessFile raf = new RandomAccessFile("score2.txt","rw");
			for(int i=0;i<score.length;i++) {
				raf.writeInt(score[i]);
			}
			//raf.seek(0);
			while(true) {
				System.out.println(raf.readInt());
			}
		}catch(EOFException eof) {

		}catch(IOException e) {
			e.printStackTrace();
		}

	}

}
👆 아무것도 출력되지 않는다.
그 이유는 raf.writeInt(score[i])저장 후 포인터가 파일의 마지막으로 이동되었고
그 포인터 부분을 출력하기 때문이다.
따라서 while(true) 전에 포인터의 위치를 처음으로 바꿔주는 raf.seek(0)으로 바꿔준다.
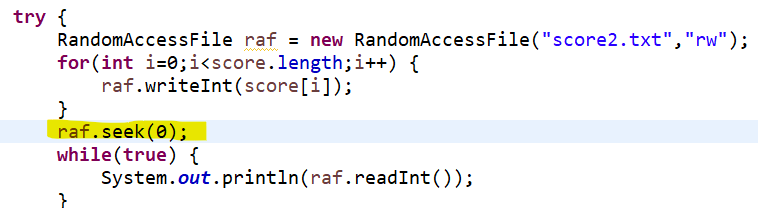

그 결과 위와 같은 출력 결과가 나온다.
import java.io.*;

class RandomAccessFileEx3 {
	public static void main(String[] args) {
		int sum =0 ;
		try {
			RandomAccessFile raf = new RandomAccessFile("score2.txt","r");
			int i=4;

			while(true) {
				raf.seek(i);
				sum+=raf.readInt();
				i+=16;//영어,수학,번호 건너띄고 국어의 위치로 다시 돌아오기 위해 16
			}
		}catch(EOFException e) {
			System.out.println("sum : "+sum);
		}catch(IOException e) {
			e.printStackTrace();
		}

	}

}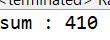
👆 아까 나는 앞서 말했다. RandomAccessFile은 DataInput과 DataOutput을 구현했기 때문에 기본형 자료 단위로 데이터를 읽을 수 있다. 따라서 int의 단위인 4byte단위로 데이터를 읽으므로 국어의 총점은 16byte씩 건너띄고 값을 더한다.
6.4 File
자바에서 File클래스를 통해서 파일과 디렉토리를 다룰 수 있다.
import java.io.*;

class FileEx1 {
	public static void main(String[] args) throws IOException {
		File f = new File("D:\\java\\eclipse-workspace\\ch02\\FileEx1.java");//① 이미 있는 파일을 참조
		File newF = new File("D:\\java\\eclipse-workspace\\ch02\\newFileEx1.java");//②-1 새로운 파일을 만드는 경우
		newF.createNewFile();
		String fileName = f.getName();
		int pos = fileName.lastIndexOf(".");//"."이 들어간 가장 마지막 위치를 반환

		System.out.println("경로를 제외한 파일 이름 - "+fileName);
		System.out.println("확장자를 제외한 파일 이름 - "+fileName.substring(0,pos));//0부터 pos-1까지
		System.out.println("확장자 - "+fileName.substring( pos+1));//pos+1부터 마지막까지

		System.out.println("경로를 포함한 파일 이름 - "+f.getPath());
		System.out.println("파일의 절대 경로      - "+f.getAbsolutePath());
		System.out.println("파일의 정규 경로      - "+f.getCanonicalPath());
		System.out.println("파일이 속해있는 디렉토리 - "+f.getParent());
		System.out.println();
		System.out.println("File.pathSeparator - "+File.pathSeparator);
		System.out.println("File.pathSeparatorChar - "+File.separatorChar);
		System.out.println("File.separator - "+File.separator);
		System.out.println("File.separatorChar - "+File.separatorChar);
		System.out.println();
		System.out.println("user.dir="+System.getProperty("user.dir"));//현재 프로그램이 실행중이 디렉토리
        System.out.println("sun.boot.class.path="+System.getProperty("sun.boot.class.path"));//기본적인 경로

	}

}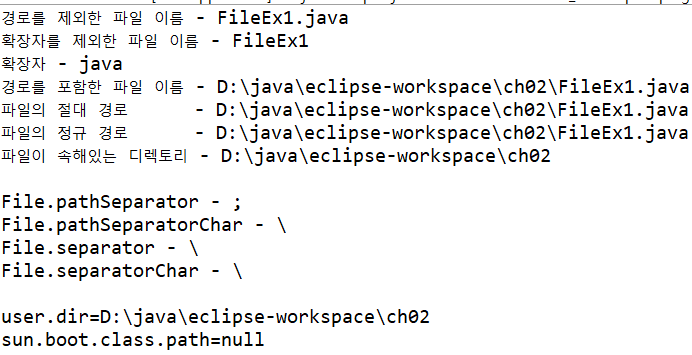
👆 이 예제를 통해서 생성자와 메서드, static 변수를 정리해보자
- 생성자
File(String fileName) : 경로 포함 또는 파일이름 단, 파일이름만 지정하는 경우는 현재 이 프로그램이 실행되는 위치에 파일이 존재
File(String pathName, String fileName) : 경로와 파일을 분리해서
File(File pathName, String fileName) : 경로를 파일 인스턴스로 받음.
File 인스턴스 생성 ≠ 파일이나 디렉토리의 생성File f = new File("c:\jdk1.8\work\ch15","FileEx1.java");
또는
File dir = new File("c:\jdk1.8\work\ch15");
File f = new File(dir, "FileEx1.java")
파일명이나 디렉토리명이 유효하지 않더라고 컴파일 에러나 예외를 발생시키지 않음새로운 파일의 생성
- 새로운 파일을 생성하기 위해서 File 인스턴스를 생성
- 출력 스트림을 생성 or createNewFile()을 호출
- 절대경로 vs. 정규경로
절대경로 : 파일시스템의 루트부터 시작해서 파일의 전체 경로, 하나의 파일에 대해서 둘 이상의 절대 경로가 존재할 수 있음
정규경로 : 기호나 링크 등을 포함하지 않는 유일한 경로
import java.io.*;

class FileEx2 {
	public static void main(String[] args) {
         if(args.length !=1) {
        	 System.out.println("USAGE : java FileEx2 DIRECTORY");
        	 System.exit(0);
         }
         File f = new File(args[0]);//디렉토리 넣기 EX)D:\java\eclipse-workspace\ch02

         if(! f.exists() || !f.isDirectory() ) { //파일이 존재하지 않고 디렉토리가 아니라면
        	 System.out.println("유효하지 않은 디렉토리 입니다.");
        	 System.exit(0);
         }
         File[] files = f.listFiles() ; //디렉토리의 파일목록을 File배열로 반환

         for(int i=0;i<files.length;i++) {
        	 String fileName= files[i].getName();
        	 System.out.println(
        			 files[i].isDirectory() ? "["+fileName+"]" : fileName);
         }
	}

}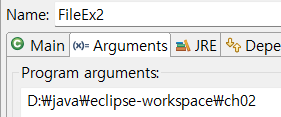
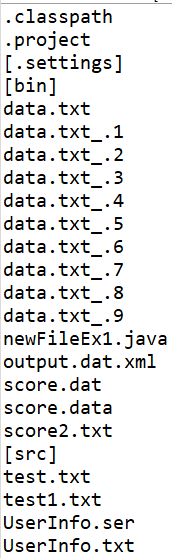
👆지정한 폴더에 포함된 파일과 디렉토리의 목록을 보여준다.
import java.io.*;
import java.util.ArrayList;

class FileEx3 {
	static int totalFiles = 0;
	static int totalDirs = 0;

	public static void main(String[] args) {
		if(args.length !=1) {
			System.out.println("USAGE : java FileEx3 DIRECTORY");
			System.exit(0);
		}

		File dir = new File(args[0]);//디렉토리 넣기 D:\java\eclipse-workspace\ch02

		if(!dir.exists()||!dir.isDirectory()) { //파일이 없거나 디렉토리가 아닌경우
			System.out.println("유효하지 않은 디렉토리 입니다.");
			System.exit(0);
		}

		printFileList(dir);//메서드 정의

		System.out.println();
		System.out.println("총 "+totalFiles+"개의 파일");
		System.out.println("총 "+totalDirs+"개의 디렉토리");
	}

	public static void printFileList(File dir) {
		System.out.println(dir.getAbsolutePath()+"디렉토리");//절대경로
		File [] files = dir.listFiles();//dir에 있는 파일 그리고 디렉토리를 File 배열에 넣기

		ArrayList subDir = new ArrayList();//import java.util.ArrayList();// 디렉토리 안의 서브 디렉토리를 넣을 arraylist

		for(int i=0;i<files.length;i++) {
			String filename = files[i].getName();
			if(files[i].isDirectory()) {//디렉토리인 경우
				filename = "["+filename+"]"; //디렉토리는 괄호
				subDir.add(i+"");//String의 형태로 값을 넣는다는 이야기
				//files의 몇 번째가 디렉토리인지 그 index값을 String으로
				//subDir에 넣는다.
			}
			System.out.println(filename);
		}
		int dirNum = subDir.size();//서브 디렉터리 수
		int fileNum = files.length-dirNum; // 파일 수

		totalFiles +=fileNum;
		totalDirs+=dirNum;

		System.out.println(fileNum+"개의 파일, "+dirNum+"개의 디렉토리");
		System.out.println();

		for(int i=0;i<subDir.size();i++) {
			int index = Integer.parseInt((String)subDir.get(i));
			printFileList(files[index]);//재귀함수 서브디렉토리의 파일과 디렉터리 수 반환

		}
	}

}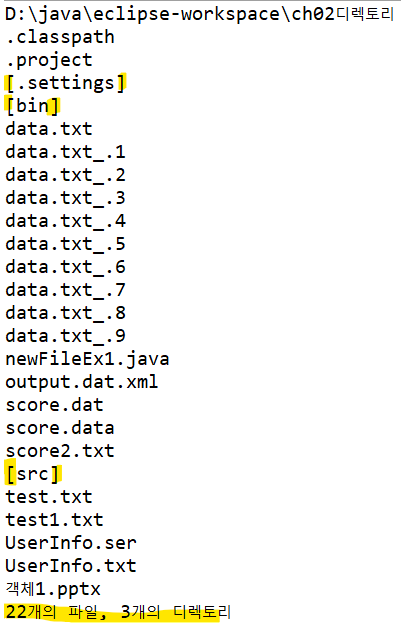

👆 이 예제에서 살펴봐야할 것은
- 디렉토리를 경로를 받아서 거기의 파일 목록들을 리스트로 만드는 메서드listFiles()
- 만약 그 list에 하위 디렉토리가 있는 경우에는 그 표시를 [하위 디렉토리 이름]으로 출력하고 subDir(ArrayList) 에 listFiles()로 만든 list의 몇 번째 인덱스로 그 하위 디렉토리가 있었는지 그 값을 String(i+"")으로 넣는다는 것
- 이제 subDir의 값들을 돌며 하위 디렉토리의 파일들을 다시 재귀함수를 통해서 파일목록들과 하위디렉토리의 하위디렉토리에 접근하는 방법으로 진행된다.
import java.io.*;
import java.text.SimpleDateFormat;
import java.util.Date;


class FileEx4 {
	public static void main(String[] args) {
		String currDir = System.getProperty("user.dir");
		System.out.println(currDir);
		File dir = new File(currDir);

		File[] files = dir.listFiles();

		for(int i=0;i<files.length;i++) {
			File f = files[i];
			String name = f.getName();
			//simpleDateFormat시용법
			//① Date today = new Date;
			//② SimpleDateFormat sd = new SimpleDateFormat("패턴");
			//③ sd.format(today);
			SimpleDateFormat df = new SimpleDateFormat("yyyy-MM-dd HH:mma");
			String attribute="";
			String size="";

			if(files[i].isDirectory()) {
				attribute ="DIR";
			} else {
				size = f.length()+"";
				attribute = f.canRead()? "R":" ";
				attribute+=f.canWrite()?"W":" ";
				attribute+=f.isHidden()? "H":" ";
			}
			System.out.printf("%s %6s %s\n"
					,df.format(new Date(f.lastModified())),attribute,size,name);
		}

	}

}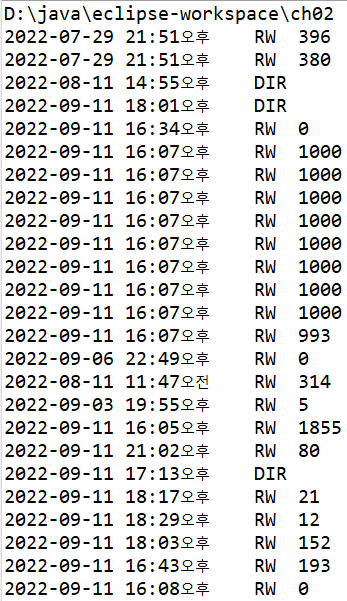
👆 현재 디렉토리에 속한 파일과 다렉토리의 이름과 크기 등 상세정보 출력
여기서 우리는 앞 서 배웠던 부분을 복습하자.
① Date today = new Date();
② SimpleDateFormat df = new SimpleDateFormat(패턴);
③ String result = df.format(today);
의 순서로 사용된다는 것!
import java.io.*;
import java.text.SimpleDateFormat;
import java.util.*;

class FileEx5_1
  {
	public static void main(String[] args) {
		if(args.length !=1 || args[0].length()!=1 // args에 값 하나가 아니거나 args[0]의 길이가 1이 아닌경우
				||"tTlLnN".indexOf(args[0])==-1) { //  args[0]의 값이 "tTlLnN"에 없을 때 -1
			System.out.println("USAGE : java FileEx5 SORT_OPTION    ");
			System.out.println(" SORT_OPTION :                      ");
			System.out.println("   t    Time ascending sort.        ");
			System.out.println("   T    Time descending sort.       ");//오래된 것 first
			System.out.println("   l    Length ascending sort.      ");
			System.out.println("   L    Length descending sort.     "); //길이 긴 것 first
			System.out.println("   n    Name ascending sort.        ");
			System.out.println("   N    Name descending sort.       "); //이름 긴 것 first
			System.exit(0);
		}

		final char option = args[0].charAt(0);

		String currDir = System.getProperty("user.dir");
		File dir = new File(currDir);
		File[] files = dir.listFiles();

	Comparator comp = new Comparator() { //익명클래스 : 선언과 동시에 바로 사용
			public int compare(Object o1, Object o2) {
				long time1= ((File)o1).lastModified();
				long time2= ((File)o2).lastModified();

				long length1 = ((File)o1).length();
				long length2 = ((File)o2).length();

				String name1= ((File)o1).getName().toLowerCase();
				String name2= ((File)o2).getName().toLowerCase();

				int result =0;

				switch(option) {
				case 't':
					if(time1-time2>0) result =1;
					else if (time1-time2 ==0) result=0;
					else if(time1- time2 < 0) result=-1;
					break;
				case 'T':
					if(time1-time2>0) result =-1;
					else if (time1-time2 ==0) result=0;
					else if(time1- time2 < 0) result= 1;
					break;
				case 'l':
					if(length1 -length2>0) result=1;
					else if(length1-length2==0) result=0;
					else if(length1-length2<0) result=-1;
					break;
				case 'L':
					if(length1 -length2>0) result=-1;
					else if(length1-length2==0) result=0;
					else if(length1-length2<0) result=1;
					break;
				case 'n':
					result = name1.compareTo(name2);
					break;
				case 'N':
					result = name2.compareTo(name1);
				    break;
				}
				return result;
			}

			public boolean equals(Object o) {return false;}
		};

		Arrays.sort(files,comp);

		for(int i=0;i<files.length;i++) {
			File f = files[i];
			String name = f.getName();
			SimpleDateFormat df = new SimpleDateFormat("yyyy-MM-dd HH:mm");
			String attribute ="";
			String size ="";

			if(files[i].isDirectory()) {
				attribute = "DIR";
			} else {
				size = f.length()+"";
				attribute = f.canRead() ? "R" :" ";
				attribute+=f.canWrite() ? "w" : " ";
				attribute+=f.isHidden()? "H" : " ";
			}
			System.out.printf( "%s %3s %s%n"
					,df.format(new Date(f.lastModified())),attribute,size,name);
		}

	}

}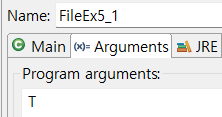
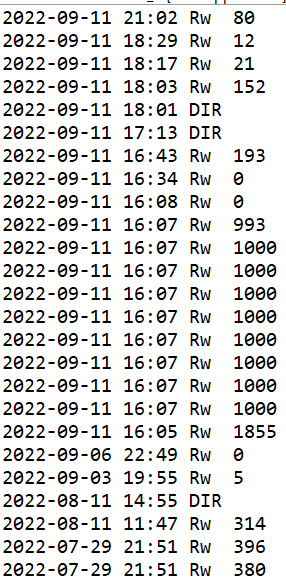
👆 커멘드 라인데 option 값을 넣어서 파일을 룰을 만들어서 출력하는 예제
import java.io.*;

public class FileEx6 {
    static int found = 0;

	public static void main(String[] args) {
		if(args.length != 2 ) { // argument에 2개가 저장되어 있지 않은 경우 EX) 1개 나 3개..등등
 			System.out.println("USAGE : java FileEx6 DIRECTORY KEYWORD");
			System.exit(0);
		}
		File dir = new File(args[0]);
		String keyword = args[1];

		if(!dir.exists() || !dir.isDirectory()) {
			System.out.println("유효하지 않은 디렉토리입니다.");
			System.exit(0);
		}

		try{
			findInFiles(dir,keyword); //정의된 메서드
		}catch (IOException e) {
			e.printStackTrace();
		}
		System.out.println();
		System.out.println("총 "+found+"개의 라인에서 '"+keyword+"'을/를 발견하였습니다.");
	}
   public static void findInFiles(File dir, String keyword) throws IOException
   {// dir에 있는 java, bak, txt 파일을 읽어 keyword가 등장하는 라인의 수를 읽는 메서드를 정의

	   File[] files = dir.listFiles();

	   for(int i=0;i<files.length;i++) {
		   if(files[i].isDirectory()) { //stack에 쌓이는 메서드들을 상상하자 결구 하위 디렉토리부터 출력될 것
			   findInFiles(files[i],keyword);
		   }else {
			   String filename = files[i].getName();
			   String extension =
					   filename.substring(filename.lastIndexOf(".")+1); // 확장자 이름만 따기

			   extension = "," + extension +","; // 앞 뒤에 구분자를 넣는다 매우 중요!!

			   // 구분자를 넣어서 indextOf가 읽을 때 java로 읽도록 ..!! ava를 읽지 않고
		       if(",java,txt,bak,".indexOf(extension)==-1) continue ;//만약 확장자가 java,txt,bak이 아니라면 반복문 처음으로가서 다음 반복문 진행

		       filename = dir.getAbsolutePath() + File.separator + filename;

		       FileReader fr = new FileReader(filename);
		       BufferedReader br = new BufferedReader(fr); // 파일을 한줄한줄 읽기 위해서

		       String data ="";
		       int lineNum =0;

		       while((data = br.readLine())!=null) {
		    	   lineNum++; // 읽은 라인의 수

		    	   if(data.indexOf(keyword)!=-1) { //data 즉 파일의 하나의 라인에서 keyword가 발견된 경우
		    		   found ++;
		    		   System.out.println(  "["+filename
		    				   +"("+lineNum+")"+"]"+data); // filename(몇번째 줄) : keyword가 등장하는 줄
		    	   }

		       } //while
		       br.close();
		   }


	   }//for

   } //main
} //class
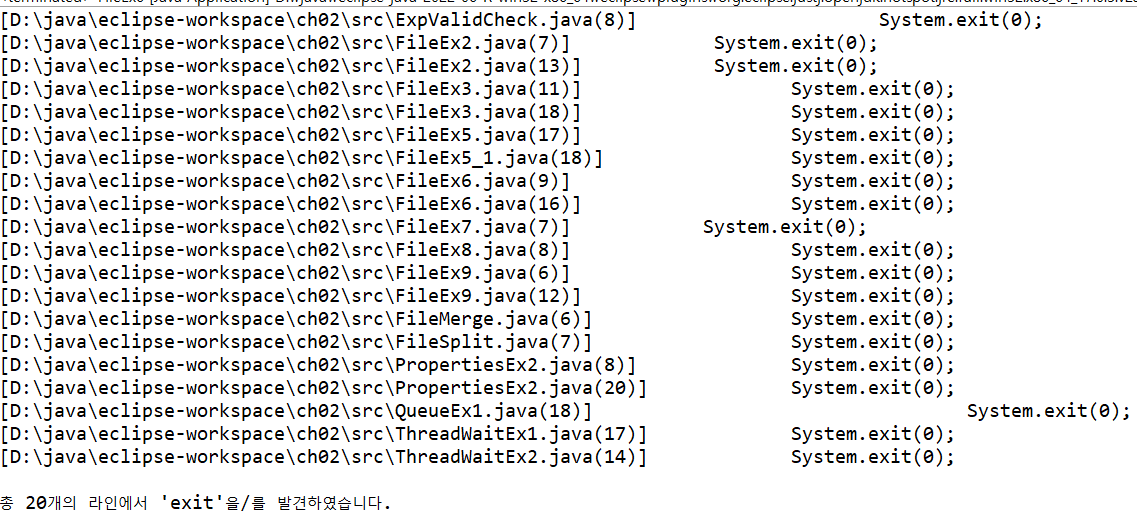
👆 이건 java,txt,bak 형태의 어떤 경로\이름.확장자(몇번째 줄) 어떤 형태로 System.eixt(0)가 등장했는지 출력하며 그래서 총 번 등장했는지 출력한다.
따라서 한줄한줄 읽기 위해서 BufferedReader의 readLine()을 이용했으며
만약 java,txt,bak이 아닌경우에는 다음 파일로 넘어가도록 continue;를 통해서 반복문의 다음 차순으로 넘어가도록 설정했단.
import java.io.*;

public class FileEx7 {
	public static void main(String[] args) throws Exception {
	if(args.length !=1) {
		System.out.println("USAGE : java FileEx7 pattern");
		System.exit(0);
	}
	String currDir = System.getProperty("user.dir");

	File dir = new File(currDir);
	final String pattern = args[0]; //

	//pattern이 들어간 파일 목록을 만들기
	//이 때는 list(FilenameFilter ft) 사용
	String[] files = dir.list(new FilenameFilter() {
		public boolean accept(File dir, String name) {
			return name.indexOf(pattern) !=-1;//true인 파일 이름만 배열에 들어감
		}
	});
	//pattern이 들어간 파일 출력
	for(int i=0;i<files.length;i++) {
		System.out.println(files[i]);
	}

	}

}
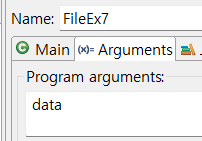
👆 현재 프로그램이 실행되는 디렉토리에 내가 커멘드라인에 설정한 이름이 들어가는 파일목록을 출력하는 예제이다.
여기서 살펴볼 것은
- String[] list(FilenameFilter filter) 메서드이다.
String list를 반환하되, FilenameFilter에 의해서 구현된 조건에 맞는 파일만 list에 들어가도록 한다.
여기서는 파일 이름에 커맨드 라인의 패턴이 들어가는 파일만 리스트에 담도록 했다.
import java.io.*;

class FileEx8 {
	static int deleteFiles =0;
	public static void main(String[] args) {
		if(args.length != 1) {
			System.out.println("USAGE : java FileEx8 Extension");
			System.exit(0);
		}

		String currDir = System.getProperty("user.dir");

		File dir = new File(currDir);
		String ext = "."+args[0];

		delete(dir,ext);// 매서드 정의
		System.out.println(deleteFiles+"개의 파일이 삭제되었습니다.");

	}
	public static void delete(File dir, String ext) {
		File[] files = dir.listFiles();

		for(int i=0;i<files.length;i++) {
			if(files[i].isDirectory()) {
				delete(files[i],ext); //재귀함수
			}else {
				String filename = files[i].getAbsolutePath();

				if(filename.endsWith(ext)) { //endsWith()는 특정 문자열로 끝나는지 boolean 타입으로 리턴
					System.out.println(filename);
					if(files[i].delete()) {
						System.out.println(" - 삭제 성공");//삭제
						deleteFiles++;
					}else {
						System.out.println(" - 삭제 실패");
					}


				}//끝에 ext가 들어가는지의 if
			}//디렉토리가 아닌 파일인 경우의 else
		}//dir의 파일 목록을 도는 for문
	}//mail

}//class
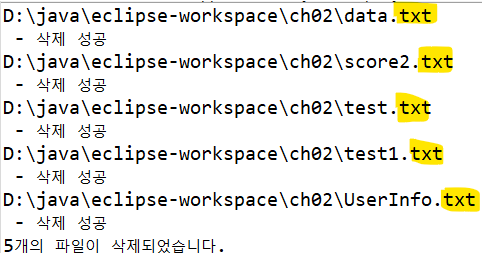
👆 커랜드 라인에 내가 삭제하고자 하는 파일 형태를 입력하고
재귀함수를 통해서 전체 파일에서 내가 삭제하고자 하는 파일 형태를 가진 모든 파일을 삭제한다.
7 직렬화(Serialization)
객체를 컴퓨터에 저장했다가 다시 꺼내 쓸 수 없을지 또는 네크웍을 통해 컴퓨터 간에 서로 객체를 주고 받을 수는 없을까?
7.1 직렬화란?
객체를 데이터 스트림으로 만드는 것
= 객체에 저장된 데이터를 스트림에 쓰기(write)위해 연속적인 데이터로 변환하는 것

- 객체는 오직 인스턴스 변수들로만 구성 (메서드 포함 X)
7.2 ObjectInputStream ObjectOutputStream
- 직렬화에는 ObjectOutputStream, 역직렬화는 ObjectInputStream
- 각각 OutputStream과 InputStream을 상속받지만 기반스트림이 필요한 보조스트림
//객체 직렬화
FileOutputStream fos = new FileOutputStream("objectfile.ser");
ObjectOutputStream out = new ObjectOutputStream(fos);
out.wirteObject(new UserInfo());
//objectfile.ser에  UserInfo객체를 직렬화하여 저장
//역직렬화는 입력스트림, writeObject()대신 readObject()를 사용 //readObject()의 반환값이 Object이므로 형변환 필수 FileInputStream fis = new FileInputStream("objectfile.ser"); ObjectInputStream in = new ObjectInputStream(fis); UserInfo info = (UserInfo) in.readObject();
- 자동직렬화 수행할 때는 defaultReadObject()와 defaultWriteObject()
7.3 직렬화가 가능한 클래스 만들기-Serializable, transient
직렬화가 가능한 클래스를 만드는 법은 4가지
① 상속받는 클래스가 Serializable을 구현하고 있어야 한다.
public class SuperInfo implements Serializable {
  String name;
  String password;
 }
 public class UserInfo extends SuperUserInfo {
   int age;
 }
② 클래스가 Serializable인터페이스를 구현한다.
그러나 상속받는 클래스가 있는 경우는 ①을 만족하지 않는 경우
직접 구현하도록 한다.
public class SuperInfo {
  String name;
  String password;
 }
 public class UserInfo extends SuperUserInfo implements Serializable {
   int age;

 }
예제 UserInfo2를 통해서 알아보자
③ 클래스가 Serializable인터페이스를 구현한다.
상속받는 클래스가 없다.
 public class UserInfo implements Serializable {
   int age;

 }
④ 직렬화하고자 하는 객체의 클래스에 직렬화가 불가능한 객체에 대한 참조를 포함하고 있다면 제어자 transient를 불여서 직렬화 대상에서 제외 또는 보안상 직렬화가 불가능한 경우
 public class UserInfo implements Serializable {
   String name;
   transient String password;
   int age;
   transient Object obj = new Object();

 }
Object는 모든 클래스의 최고 조상인데 Serializable를 구현하지 않았기 때문에
제외시킨다. 단 아래의 경우는 가능하다.
 public class UserInfo implements Serializable {
   String name;
   transient String password;
   int age;
   Object obj = new String("abc"); //String은 직렬화가 가능
 }
이제 예제를 통해 자세히 알아보자
public class UserInfo implements java.io.Serializable {

	String name;
	String password;
	int age;

	public UserInfo() {
		this("Unknown","1111",0);

	}
	public UserInfo(String name, String password, int age) {
		this.name = name;
		this.password = password;
		this.age = age;
	}
	public String toString() {
		return "("+name+","+password+","+age+")";
	}

}
import java.io.*;
import java.util.ArrayList;

public class SerialEx1 {
	public static void main(String[] args) {
		try {
			String fileName = "UserInfo.ser";
			FileOutputStream fos = new FileOutputStream(fileName);
			BufferedOutputStream bos = new BufferedOutputStream(fos);

			ObjectOutputStream out = new ObjectOutputStream(bos);

			UserInfo u1 = new UserInfo("JavaMan","1234",30);
			UserInfo u2 = new UserInfo("JavaWoman","4321",35);

			ArrayList<UserInfo> list = new ArrayList<>();

			list.add(u1);
			list.add(u2);

			//객체를 직렬화
			out.writeObject(u1);
			out.writeObject(u2);
			out.writeObject(list);
			out.close();
			System.out.println("직렬화가 잘 끝났습니다.");
		}catch(IOException e) {
			e.printStackTrace();
		}

	}

}


👆 이 예제는 ArrayList와 같은 객체를 직렬화하면 ArrayList에 저장된 객체들과 각 객체의 인스턴스변수가 참조하고 있는 객체들까지 직렬화
import java.io.*;
import java.util.ArrayList;

public class SerialEx2 {
	public static void main(String[] args) {
		try {
			String fileName = "UserInfo.ser";
			FileInputStream fis = new FileInputStream(fileName);
			BufferedInputStream bis = new BufferedInputStream(fis);

			ObjectInputStream in = new ObjectInputStream(bis);

			//이제 역직렬화
			// 1. readObject()의 반환값은 Object이므로 형변환
			// 2. 직렬화 순서를 기억해서 그 순서대로 역직렬화 -> 이게 어려울 정도로 객체가 많다면 ArrayList로
			UserInfo u1 =(UserInfo)in.readObject();
			UserInfo u2 =(UserInfo)in.readObject();
			ArrayList list =(ArrayList)in.readObject();

			System.out.println(u1);
			System.out.println(u2);
			System.out.println(list);

		}catch(Exception e) {
			e.printStackTrace();
		}

	}

}
👆 역직렬화 예제
// 1. readObject()의 반환값은 Object이므로 형변환
// 2. 직렬화 순서를 기억해서 그 순서대로 역직렬화 -> 이게 어려울 정도로 객체가 많다면 ArrayList로
import java.io.*;

class SuperUserInfo{ //Serializable을 구현하지 않은 조상클래스
	String name;
	String password;

	SuperUserInfo(){
		this("Unknown","1111");
	}
	SuperUserInfo(String name, String password){
		this.name = name;
		this.password = password;
	}
}

public class UserInfo2 extends SuperUserInfo implements java.io.Serializable
{
    int age ;

    public UserInfo2() {
    	this("Unknown","1111",0);
    }
    public UserInfo2(String name, String password, int age) {
    	super(name,password); //직렬화할 수 없는 객체가 포함됨
    	this.age =age;
    }
    public String toString() {
    	return "("+name+","+password+","+age+")";
    }
    // 직적 직렬화
    private void writeObject(ObjectOutputStream out) throws IOException {
    	out.writeUTF(name);
    	out.writeUTF(password);
        out.defaultWriteObject();
    }
    private void readObject(ObjectInputStream in) throws IOException,ClassNotFoundException {
    	name = in.readUTF();
    	password = in.readUTF();
    	in.defaultReadObject();
    }
}
👆 이 예시는 앞 서 배웠던 2번에 해당
② 클래스가 Serializable인터페이스를 구현한다.
그러나 상속받는 클래스가 있는데 Serializable을 구현하지 않는다면..!
직접 직렬화를 구현해야 한다!
private void writeObject(ObjectOutputStream out) throws IOException {
out.writeUTF(name);
out.writeUTF(password);
out.defaultWriteObject();
}
private void readObject(ObjectInputStream in) throws IOException,ClassNotFoundException {
name = in.readUTF();
password = in.readUTF();
in.defaultReadObject();
}
7.4 직렬화가능한 클래스의 버전관리
- 직렬화된 객체를 역직렬화할 때는 직렬화 했을 때와 같은 클래스 사용
그러나 클래스 이름은 같은데 중간에 내용이 수정되어서 역직렬화를 실패하는 경우 예외가 발생한다.- 직렬화될 때 객체는 클래스에 정의된 멤버들의 정보를 이용해서 serialVersionUID라는 클래스의 버전을 자동생성해서 직렬화 내용에 포함.
- 그러나 static변수나 상수 또는 transient가 붙은 인스턴스 변수가 추가되는 경우에는 직렬화에 영향을 미치지 않음(당연한 말이지만)-> 버전을 다르게 인식하도록 할 필요 없음.
- 직렬화할 때 클래스 버전 == 역직렬화할 때 클래스의 버전
- 조금만 변경되어도 해당 클래스를 재배포하는 것은 프로그램 관리하기 어렵다
-> 따라서 클래스 버전을 수동으로 관리할 필요가 있다.class MyData implements java.io.Serializable { static final long serialVersionUID = 351874561266588L; int value1; } //이렇게 serialVersionUID를 추가로 정의 // 수동으로 했기 때문에 내용이 바뀌어도 자동생성 값이 아닌 저 값을 유지- serialVersionUID는 정수값, 다른 클래스간은 같은 값 가질 수 없음
- 보통은 serialver.exe를 사용해서 생성된 값을 사용 (serialver 클래스이름)