
저번 포스트에 언급했듯이 이번엔 Eureka Server의 구축에 대한 이야기를 해보고자 합니다.
Eureka란
Nefilx에서 제공하는 OSS Service Registry로 Eureka Server와 Eureka Client로 이루어져있습니다.
이 중 Eureka Server는 마이크로 서비스들의 정보를 발견해 Registry에 등록하고 로드밸런싱을 제공하는 미들웨어 서버입니다.
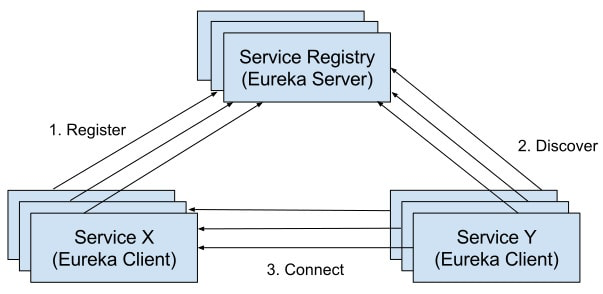
이미지 출처 : https://www.dineshonjava.com/implementing-microservice-registry-with-eureka/
Eureka Server 구축
Eureka Server는 위에 언급했듯이 마이크로 서비스들의 정보를 Registry에 등록합니다.
이 때의 마이크로 서비스들은 Eureka Client로 정의됩니다.
Eureka Server는 Eureka Client의 Heartbeat를 수신해 해당하는 Eureka Client가 정상적으로 수행중인지 체크합니다.
Heartbeat가 정상적으로 수신되지 않는다면 Eureka Server는 Eureka Client가 수행 중이 아니라고 판단해 해당 Eureka Client의 정보를 Registry에서 삭제합니다.
1. 의존성 주입
build.gradle
ext {
    set('springCloudVersion', "2023.0.3")
}

dependencies {

    // security
    implementation 'org.springframework.boot:spring-boot-starter-security'
    testImplementation 'org.springframework.security:spring-security-test'

    // dev
    compileOnly 'org.projectlombok:lombok'
    annotationProcessor 'org.projectlombok:lombok'

    // spring cloud config
    implementation 'org.springframework.cloud:spring-cloud-starter-config'

    // spring cloud eureka server
    implementation 'org.springframework.cloud:spring-cloud-starter-netflix-eureka-server'
}

dependencyManagement {
    imports {
        mavenBom "org.springframework.cloud:spring-cloud-dependencies:${springCloudVersion}"
    }
}

tasks.named('test') {
    useJUnitPlatform()
}

tasks.register("prepareKotlinBuildScriptModel") {}

bootJar {
    enabled = true
}

jar {
    enabled = false
}
위와 같이 저는 Eureka Server 의존성 외에 Security와 Spring Cloud Config를 추가로 의존성 주입했습니다.
이유는 다음과 같습니다.
Spring Security : config server와 마찬가지로 Eureka Server에는 각 마이크로 서비스들의 정보가 등록이 되므로 보안상 중요 정보들이 다뤄지기 때문에 Security 의존성이 필요했습니다.
Spring Cloud Config : Config Server를 통해 Eureka에 필요한 환경 변수들을 가져올 예정이므로 필요했습니다.
2. application.yml 수정
application.yml
spring:
  application:
    name: ${EUREKA_APP_NAME}
  profiles:
    active: ${APP_PROFILE}
  config:
    import: optional:configserver:${CONFIG_SERVER_URI}
${EUREKA_APP_NAME} : Eureka Server의 이름입니다. ${APP_PROFILE}과 조합해 설정 파일을 특정합니다.
${APP_PROFILE} : dev 또는 prod와 같은 프로파일 이름입니다. ${EUREKA_APP_NAME}과 조합해 설정파일을 특정합니다.
${CONFIG_SERVER_URI} : 설정 파일을 관리하고 있는 Config Server의 URI입니다.
ex ) http://${CONFIG_USERNAME}:${CONFIG_PASSWORD}@localhost:8888CONFIG_USERNAME과 CONFIG_PASSWORD는 이전 포스트를 확인해주세요.
3. 로직 작성
SecurityConfig.java
@Configuration
@EnableWebSecurity
public class SecurityConfig implements WebMvcConfigurer {

    @Value("${eureka.username}")
    private String username;

    @Value("${eureka.password}")
    private String password;

    @Bean
    public BCryptPasswordEncoder bCryptPasswordEncoder() {

        return new BCryptPasswordEncoder();
    }

    @Bean
    public SecurityFilterChain filterChain(HttpSecurity http) throws Exception {
        return http
            .csrf(AbstractHttpConfigurer::disable)
            .authorizeHttpRequests((auth) -> auth.anyRequest().authenticated())
            .httpBasic(Customizer.withDefaults())
            .build();
    }

    @Bean
    public UserDetailsService userDetailsService() {

        UserDetails user = User.builder()
            .username(username)
            .password(bCryptPasswordEncoder().encode(password))
            .roles("ADMIN")
            .build();

        return new InMemoryUserDetailsManager(user);
    }
Security의 구조는 Config Server와 동일하고 이전 포스트에서 말씀드렸듯이 프로젝트 기획에 따라 DB와의 연동해도 무방합니다.
EurekaServerApplication.java
아래와 같이 메인클래스에 @EnableEurekaServer 어노테이션을 붙혀 활성화합니다.
@EnableEurekaServer
@SpringBootApplication
public class EurekaServerApplication {

    public static void main(String[] args) {
        SpringApplication.run(EurekaServerApplication.class, args);
    }
}
4. 동작 확인
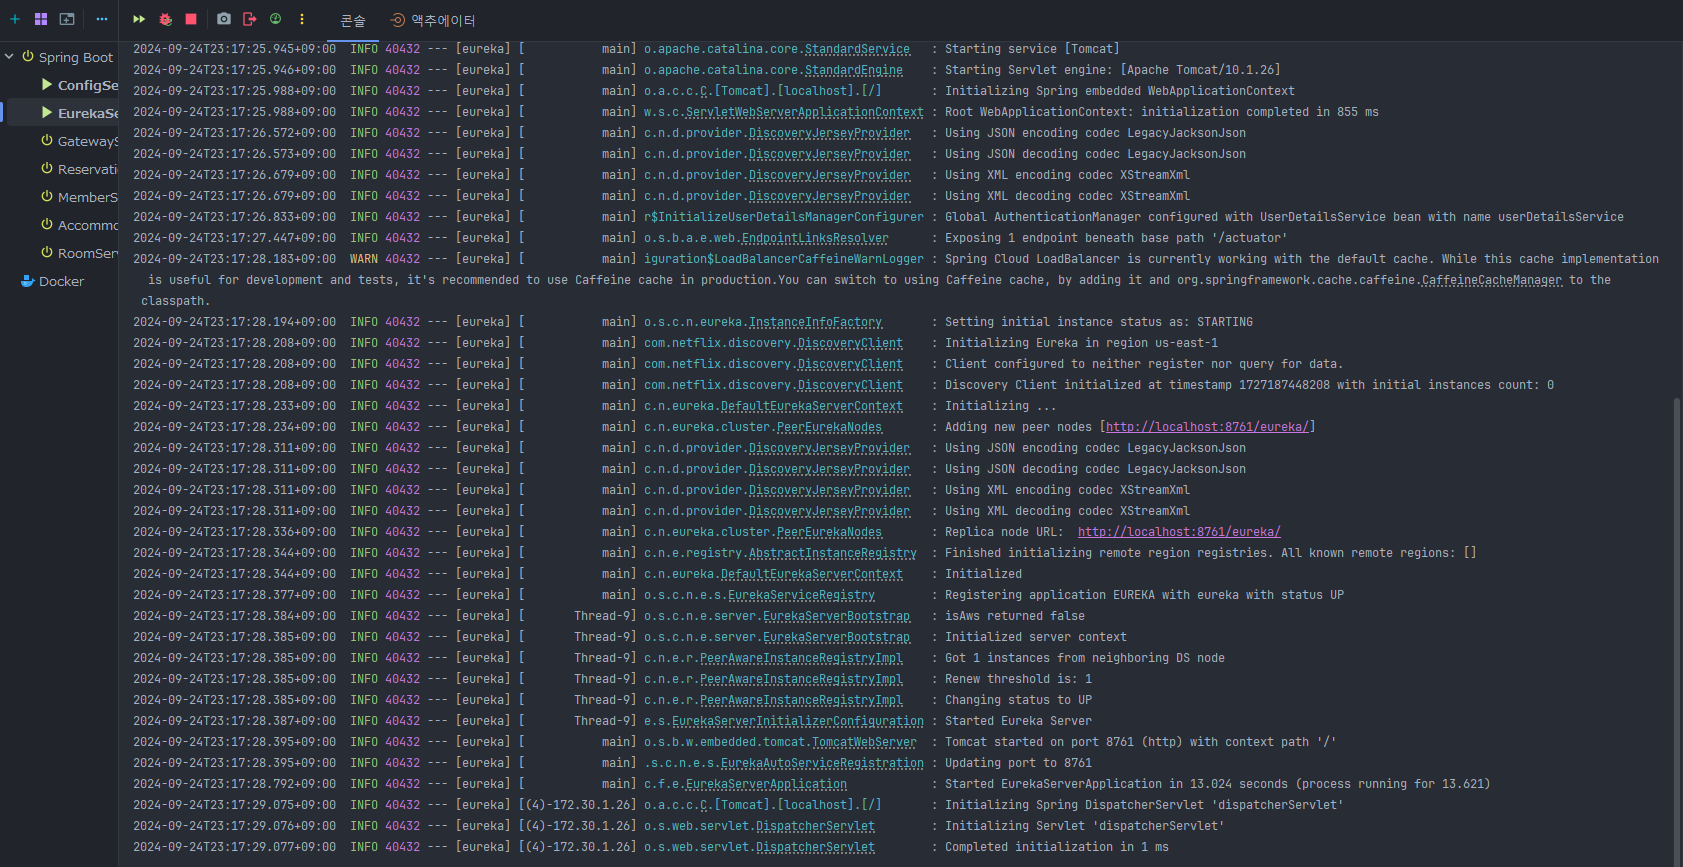
Eureka Server를 실행하기 위해선 Config Server가 먼저 실행되어야 합니다. 그 후 Eureka Server를 실행했을 때 문제가 없다면 아래와 같이 8761 포트 번호로 실행이 되는 것을 확인할 수 있습니다.
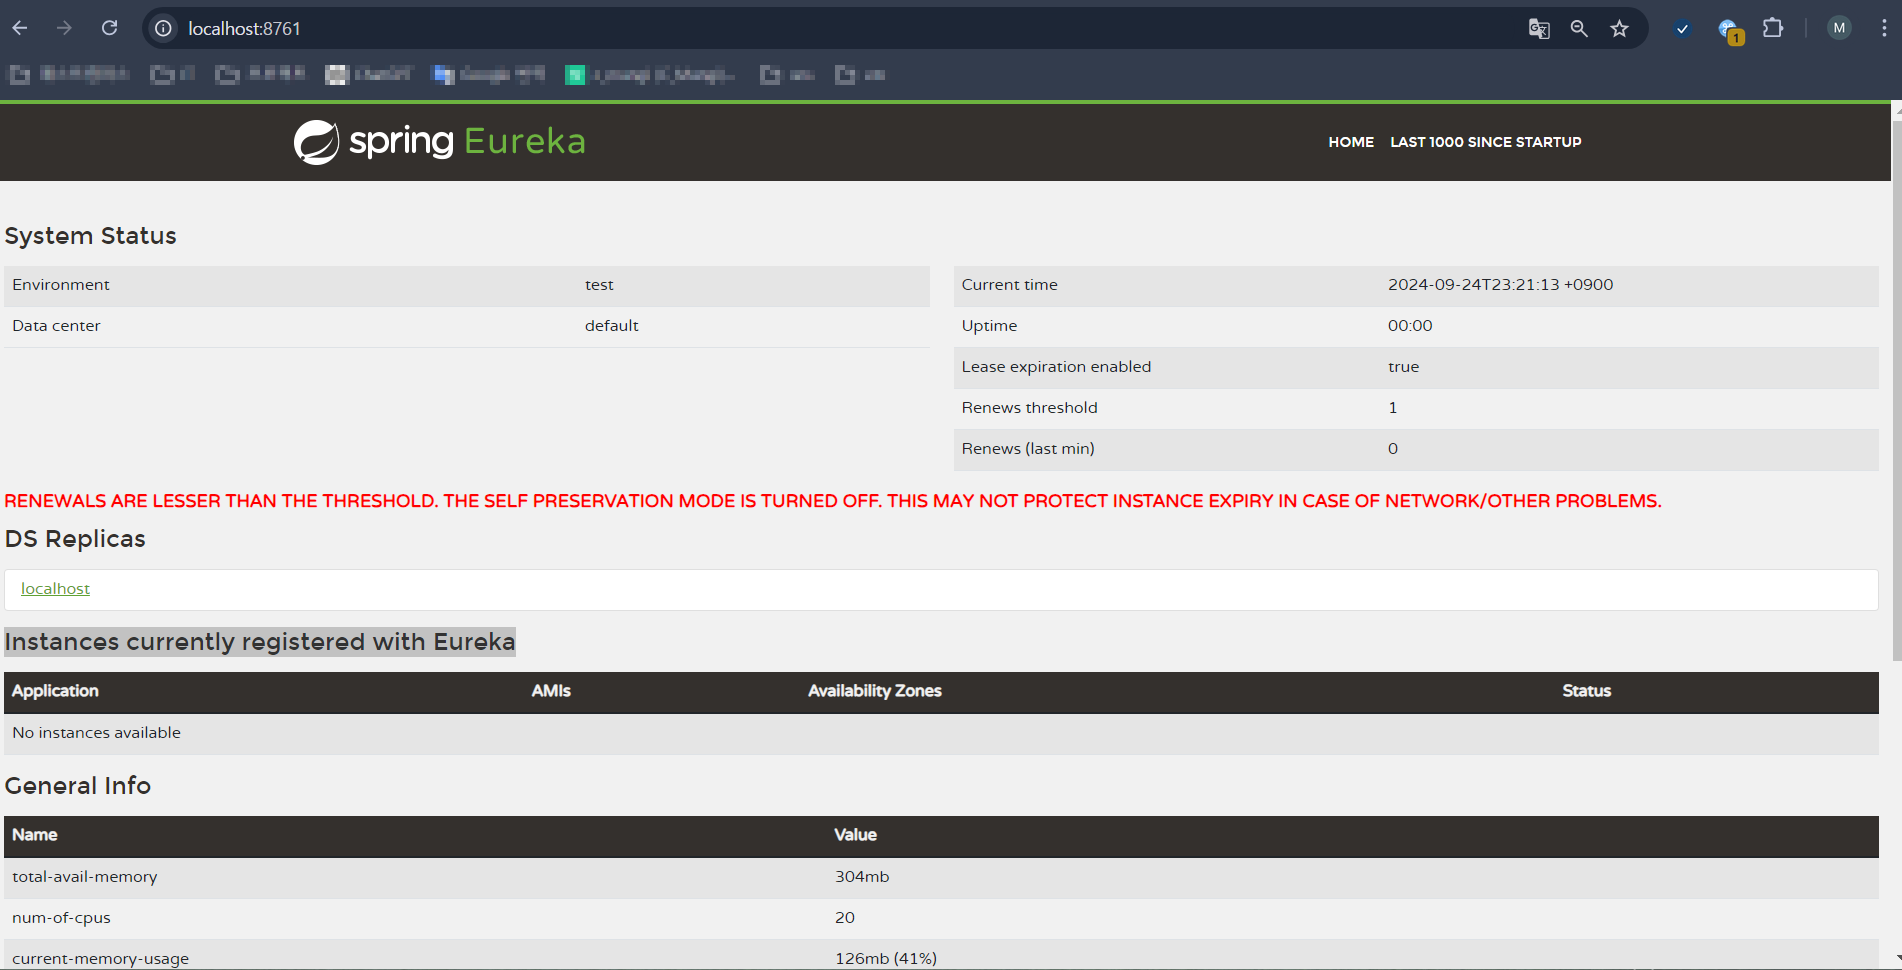
이후 웹에서 http://localhost:8761 로 접속해 User name과 Password를 입력하면 다음과 같은 페이지가 뜨면 정상적으로 Server가 동작하고 있는 것입니다.
다만 현재로썬 마이크로 서비스를 등록하지 않았기에 Instances currently registered with Eureka 부분이 공란인 것을 확인할 수 있습니다. 등록하게 된다면 해당 마이크로 서비스의 정보를 볼 수 있습니다.
다음은 게이트웨이 서비스에 대해 포스팅하겠습니다.