0. Intro
오늘은 Toast UI Editor 라이브러리의 사용법과 적용기에 대해 포스팅해 보려 합니다.
1. Install
npm i @toast-ui/react-editor2. Coding
(1) Editor
import React, { useRef } from 'react';
import styled from '@emotion/styled';
import { Editor } from '@toast-ui/react-editor';
import '@toast-ui/editor/dist/toastui-editor.css';

const Container = styled.div`
  box-sizing: border-box;
  width: 100%;
  height: 100vh;
  display: flex;
  flex-direction: column;
  padding: 30px 25px;
`;

const ButtonContainer = styled.div`
  height: 60px;
  display: flex;
  justify-content: space-between;
  align-items: center;
  margin-top: 15px;
`;

const Button = styled.button`
  border-radius: 15px;
  width: 150px;
  height: 60px;
  outline: none;
  border: none;
  background-color: skyblue;
  font-size: 20px;
  font-weight: 700;
  cursor: pointer;

  &:hover {
    opacity: 0.5;
  }
`;

const MarkDownExample = `
## Hello World
### Happy Hacking
> React Programming
`;

function App() {
  const editorRef = useRef<Editor>(null);

  const onSubmitBtnClick = () => {
    const txt = editorRef.current?.getInstance().getMarkdown();
    alert(txt);
  };

  const onChangeBtnClick = () => {
    editorRef.current?.getInstance().setMarkdown(MarkDownExample, false);
  };

  return (
    <Container>
      <Editor
        previewStyle="vertical"
        height="100%"
        initialValue=" "
        language="ko-KR"
        previewHighlight={false}
        ref={editorRef}
      />
      <ButtonContainer>
        <Button onClick={onChangeBtnClick}>Change</Button>
        <Button onClick={onSubmitBtnClick}>Submit</Button>
      </ButtonContainer>
    </Container>
  );
}
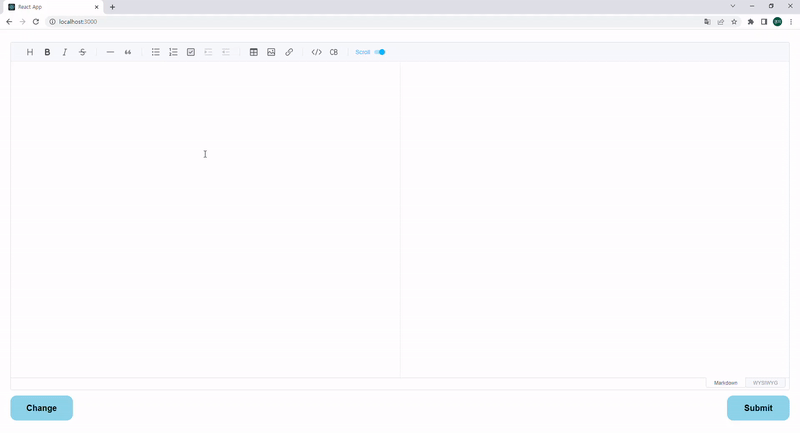
export default App;- Submit 버튼을 누르면 마크다운 editor에 입력들을 받아와 alert를 띄워준다.
- 입력을 받아오려면 Editor 컴포넌트에 ref를 받아와 getInstance().getMarkdown() 메서드를 이용하면 된다.
- Change 버튼을 누르면 기존의 마크다운에 어떠한 입력이 있을지라도 editor의 내용을 MarkDownExample로 바꿔준다.
- 간단하게 Setter라고 생각할 수 있다. 이전과 마찬가지로 ref를 받아와 getInstance().setMarkdown() 메서드를 이용하면 된다.
- setMarkdown의 두번째 인자는 컨텐츠가 업데이트 된 후, 스크롤을 컨텐츠의 end로 이동시킬지 여부를 결정하는 파라미터이다.
- 그 외 사용한 Props
- previewStyle : ‘tab’으로 지정하면 탭 UI를 이용하여 editor와 preview를 전환할 수 있고, ‘vertical’으로 지정하면 왼쪽에는 editor, 오른쪽에는 preview가 위치한다.
- previewHighlight : preview에서 현재 editing하고 있는 부분을 highlighting 처리를 할지에 대한 설정
(2) Viewer
import React from 'react';
import styled from '@emotion/styled';
import { Viewer } from '@toast-ui/react-editor';
import '@toast-ui/editor/dist/toastui-editor.css';

const Container = styled.div`
  box-sizing: border-box;
  width: 100%;
  height: 100vh;
  padding: 30px 50px;
`;

const MarkDownExample = `
## Hello World
### Happy Hacking
> React Programming
`;

function App() {
  return (
    <Container>
      <Viewer initialValue={MarkDownExample} />
    </Container>
  );
}

export default App;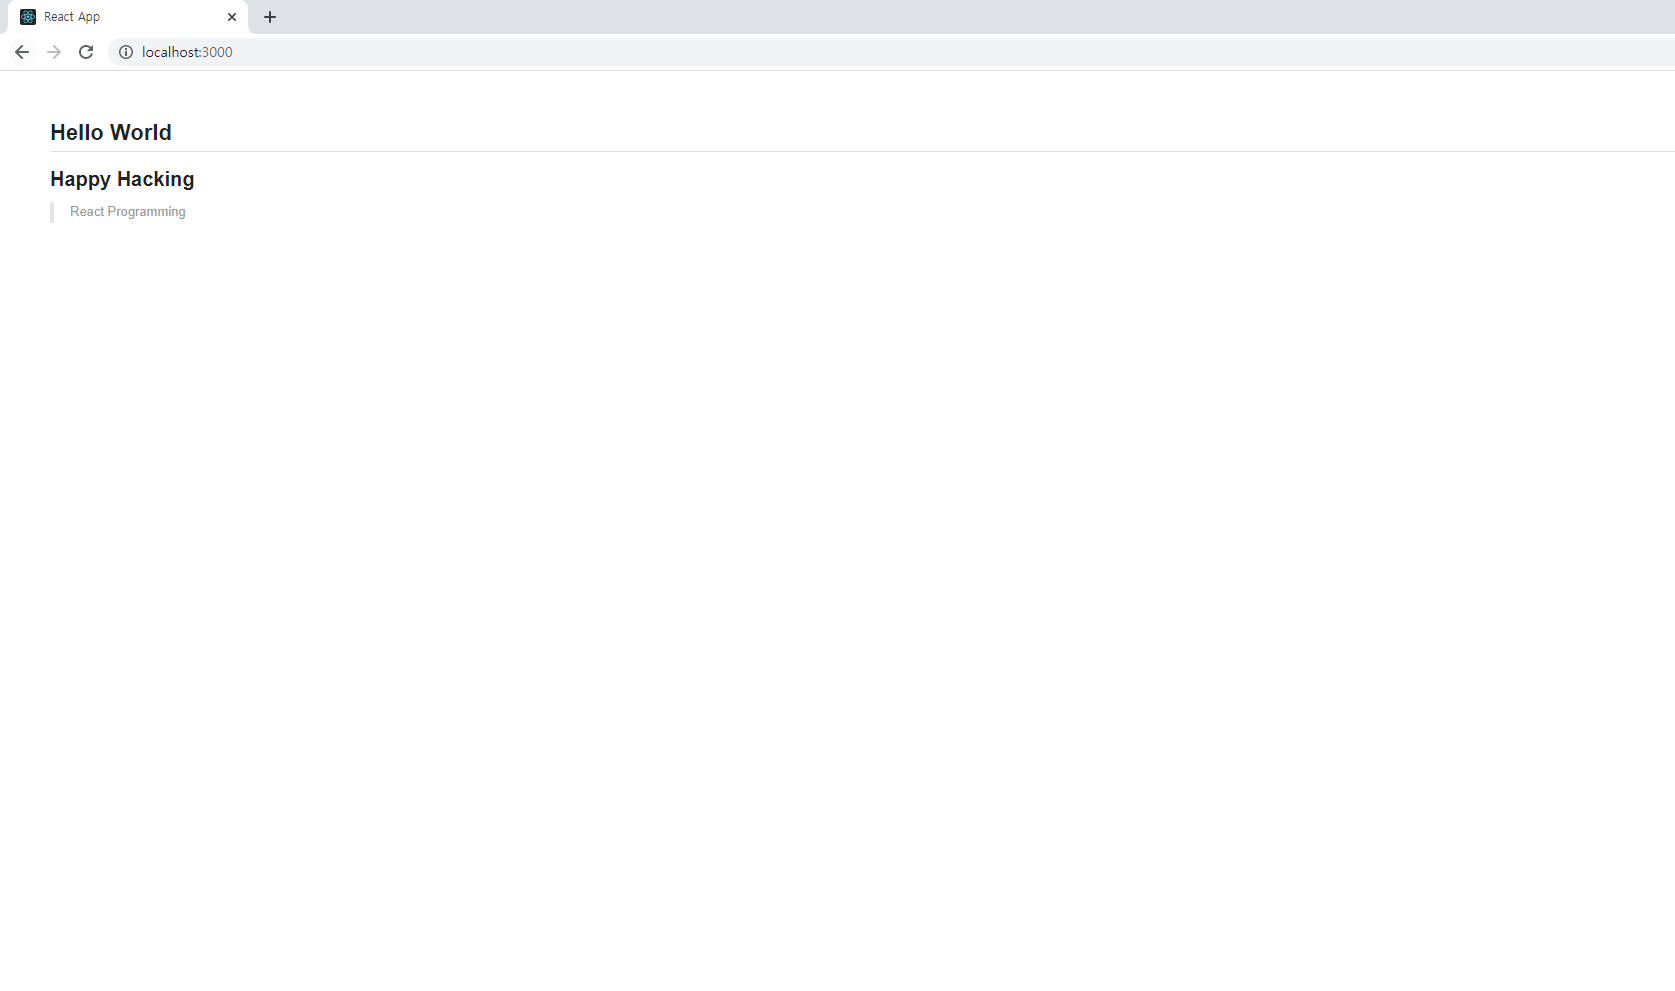
3. TIL
(1) WYSIWYG(위지위그)
- WYSIWYG : What You See Is What You Get, “보는 대로 얻는다”라는 뜻으로 문서 편집 과정에서 화면에 포맷된 낱말, 문장이 출력물과 동일하게 나오는 방식을 말한다.
(2) useRef
참고자료
- https://nhn.github.io/tui.editor/latest/ToastUIEditorCore
- https://github.com/nhn/tui.editor/tree/master/apps/react-editor
- https://curryyou.tistory.com/470
- https://leego.tistory.com/entry/React-에디터로-TOAST-UI-Editor-사용해보기
- https://velog.io/@khy226/React-Toast-UI-Editor-적용기
- http://forward.nhnent.com/hands-on-labs/toastui.editor-ext/04.html

개발 일지를 작성합니다