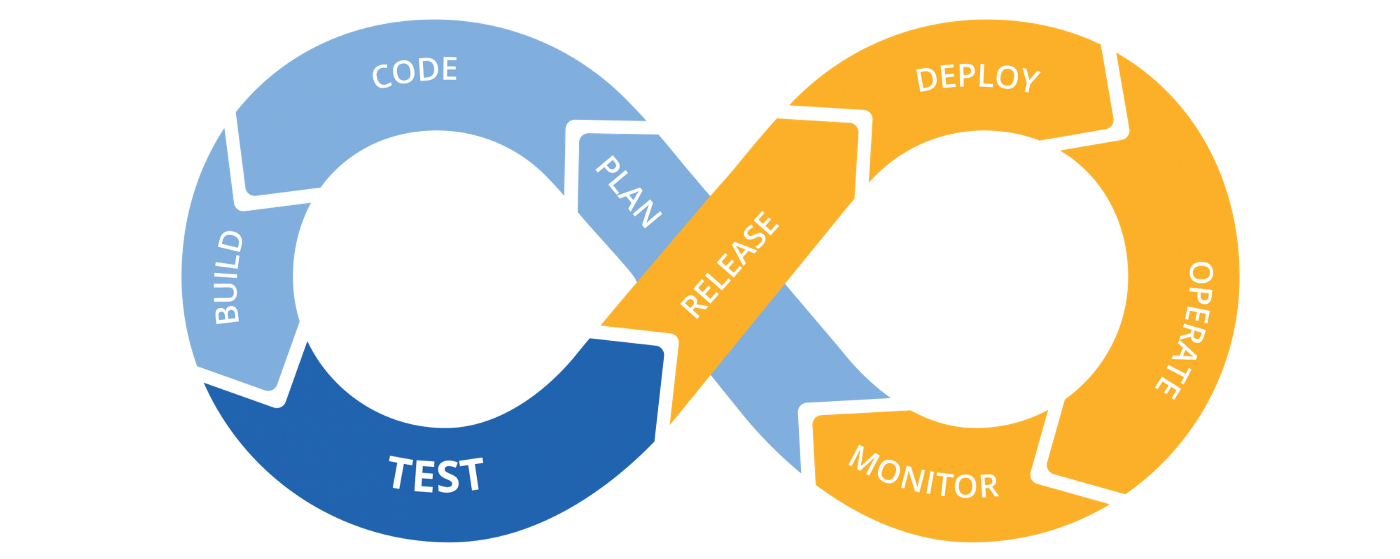
CI/CD란?
CI: Continuous intergraion, 지속적인 통합
CD: Continuous Delivery & Continuous Deployment, 지속적인 서비스 제공 & 지속적인 배포
CI는 어플리케이션에 대한 새로운 코드 변경 사항을 정기적으로 빌드, 테스트 하여 공유 레포지토리에 통합할 수 있도록 합니다. 따라서 여러명의 개발자가 동시에 코드 작업을 할 경우 서로 충돌할 수 있는 문제를 해결할 수 있습니다.
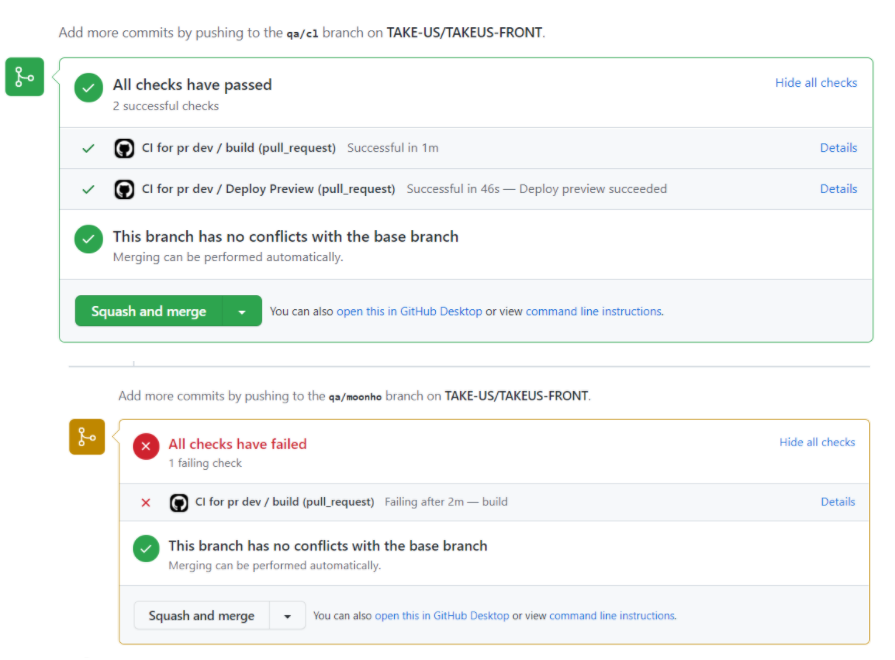
예를 들어, 한 개발자가 자신의 브랜치에서 작업을 하고 merge를 진행하기 전 pr을 생성하면 다음 사진과 같이 테스트, 빌드의 과정을 거쳐 변경사항이 문제가 없는지를 확인시켜줍니다.
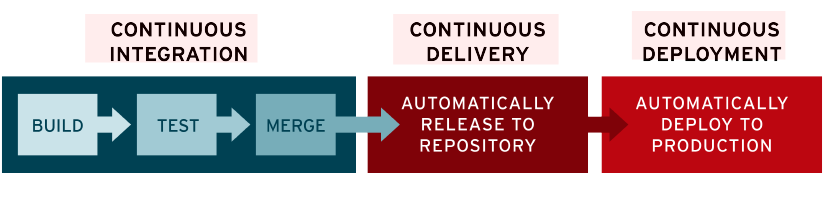
CD는 지속적인 서비스제공 및 지속적인 배포를 의미합니다. 지속적인 서비스 제공과 지속적인 배포라는 두 용어는 상호 교환적으로 사용되며 모두 파이프라인 추가 단계에 대한 자동화를 뜻합니다. 지속적인 제공은 개발자가 적용한 변경사항이 버그테스트를 거쳐 레포지토리에 자동 업로드되는 것을 뜻하고, 지속적인 배포는 개발자의 변경사항을 레포지토리에서 고객이 사용가능한 프로덕션 환경까지 자동으로 릴리즈 하는 것을 의미합니다.
이러한 자동화는 변경사항을 확인하기 편하게 해주기 때문에(가시성) 개발팀과 비지니스팀간의 소통을 원할하게 할 수 있도록 도와줍니다.
Firebase hosting + Github actions를 활용하여 간단한 CI/CD 구축
사이드 프로젝트를 진행하면서 CI/CD를 구축해놓으면 개발팀의 변경사항들을 다른 팀원들이 빠르게 파악할 수 있기 때문에 QA나 진행상황 공유와 같은 과정을 쉽게 진행할 수 있었습니다. 그래서 Firebase hosting과 Github Actions를 활용하여 아주 간단하게 CI/CD를 구축하는 방법을 알아보도록 하겠습니다.
Firebase hosting 사용하기
먼저 firebase hosting을 사용하기 위해 다음 명령어를 이용해 firebase-tools를 설치해준 후 로그인을 진행해줍니다.
yarn add global firebase-tools
firebase login
프로젝트 세팅
1. 프로젝트를 생성하고 github 레포지토리에 연결해줍니다.
npx create-react-app '프로젝트 이름'
git remote add '레포지토리'
저는 예전에 작업하던 레포를 이용해보겠습니다.
https://github.com/chaerin00/kakaofriends-shop
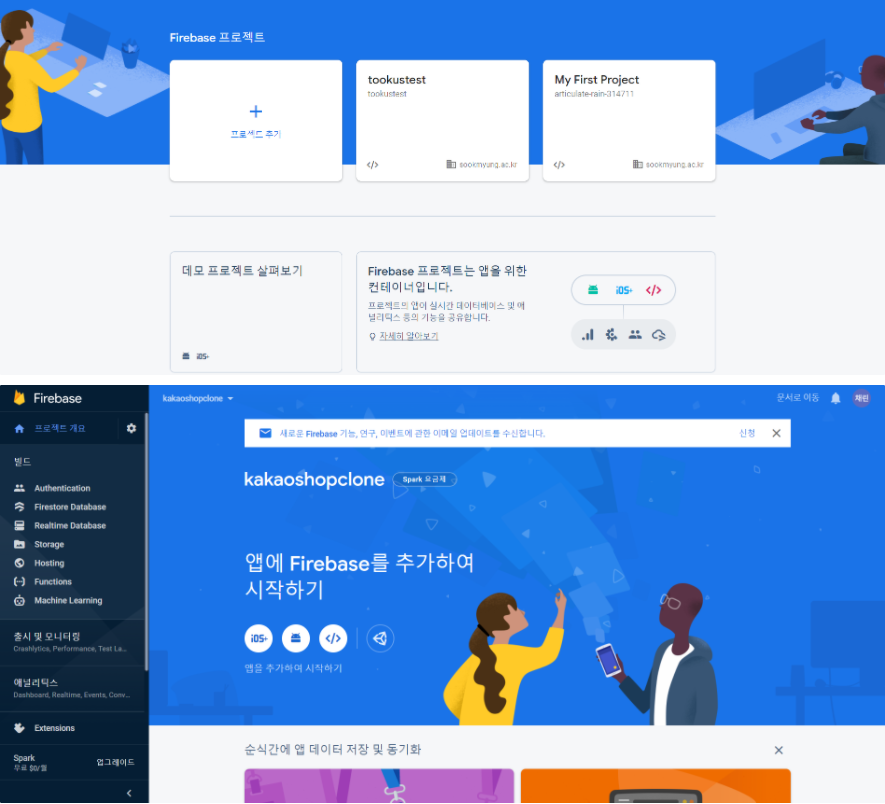
2. firebase에서 프로젝트를 생성시켜 줍니다.
3. 프로젝트에 firebase 세팅
vscode 터미널에서 firebase init명령어를 실행시켜줍니다.
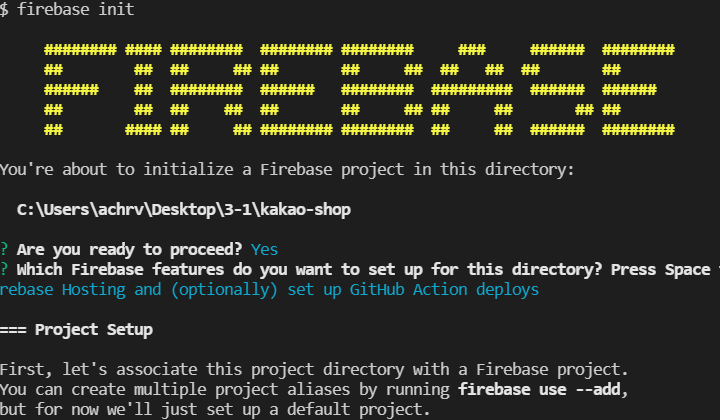
주석을 참고하여 자신의 프로젝트에 맞게 선택해줍니다.
$ firebase init

     ######## #### ########  ######## ########     ###     ######  ########
     ##        ##  ##     ## ##       ##     ##  ##   ##  ##       ##
     ######    ##  ########  ######   ########  #########  ######  ######
     ##        ##  ##    ##  ##       ##     ## ##     ##       ## ##
     ##       #### ##     ## ######## ########  ##     ##  ######  ########

You're about to initialize a Firebase project in this directory:

  C:\Users\achrv\Desktop\3-1\kakao-shop

? Are you ready to proceed? Yes
/** 저희는 firebase의 hosting을 사용할 거기 때문에 다음 옵션을 선택합니다*/
? Which Firebase features do you want to set up for this directory? Press Space to select features, then Enter to confirm your choices. Hosting: Configure files for Firebase Hosting and (optionally) set up GitHub Action deploys
=== Project Setup

First, let's associate this project directory with a Firebase project.
You can create multiple project aliases by running firebase use --add,
but for now we'll just set up a default project.

/** 아까 프로젝트를 생성했으므로 Use an existing project 옵션을 선택합니다. */
? Please select an option: Use an existing project
/** 아까 생성한 프로젝트를 선택합니다. */
? Select a default Firebase project for this directory: kakaoshopclone (kakaoshopclone)
i  Using project kakaoshopclone (kakaoshopclone)

=== Hosting Setup

Your public directory is the folder (relative to your project directory) that
will contain Hosting assets to be uploaded with firebase deploy. If you
have a build process for your assets, use your build's output directory.

/** 여기서 public 디렉토리 명을 build로 바꿔줍니다. (yarn build를 실행시킨 후 build/index.html을 바라보게 하기 위해서) */
? What do you want to use as your public directory? build
? Configure as a single-page app (rewrite all urls to /index.html)? Yes
? Set up automatic builds and deploys with GitHub? Yes
? File build/index.html already exists. Overwrite? No
i  Skipping write of build/index.html

i  Detected a .git folder at C:\Users\achrv\Desktop\3-1\kakao-shop
i  Authorizing with GitHub to upload your service account to a GitHub repository's secrets store.

Visit this URL on this device to log in:
https://github.com/login/oauth/authorize?client_id=89cf50f02ac6aaed3484&state=27656089&redirect_uri=http%3A%2F%2Flocalhost%3A9005&scope=read%3Auser%20repo%20public_repo

Waiting for authentication...

+  Success! Logged into GitHub as chaerin00

/** (자신의 github ID)/(레포지토리 이름) 을 입력합니다.*/
? For which GitHub repository would you like to set up a GitHub workflow? (format: user/repository) chaerin00/kakaofriends-shop

+  Created service account github-action-378041119 with Firebase Hosting admin permissions.
+  Uploaded service account JSON to GitHub as secret FIREBASE_SERVICE_ACCOUNT_KAKAOSHOPCLONE.
i  You can manage your secrets at https://github.com/chaerin00/kakaofriends-shop/settings/secrets.

? Set up the workflow to run a build script before every deploy? Yes
? What script should be run before every deploy? (npm ci && npm run build) y
/** 저는 yarn을 사용하기 위해 yarn && yarn build를 입력해주었습니다 */
? What script should be run before every deploy? yarn && yarn build

+  Created workflow file C:\Users\achrv\Desktop\3-1\kakao-shop\.github/workflows/firebase-hosting-pull-request.yml
? Set up automatic deployment to your site's live channel when a PR is merged? Yes
/** 자신의 레포지토리의 default branch 이름으로 설정해줍니다. */
? What is the name of the GitHub branch associated with your site's live channel? develop

+  Created workflow file C:\Users\achrv\Desktop\3-1\kakao-shop\.github/workflows/firebase-hosting-merge.yml

i  Action required: Visit this URL to revoke authorization for the Firebase CLI GitHub OAuth App:
https://github.com/settings/connections/applications/89cf50f02ac6aaed3484
i  Action required: Push any new workflow file(s) to your repo

i  Writing configuration info to firebase.json...
i  Writing project information to .firebaserc...

+  Firebase initialization complete!
설정이 모두 끝났다면 변경사항을 git push 해줍니다
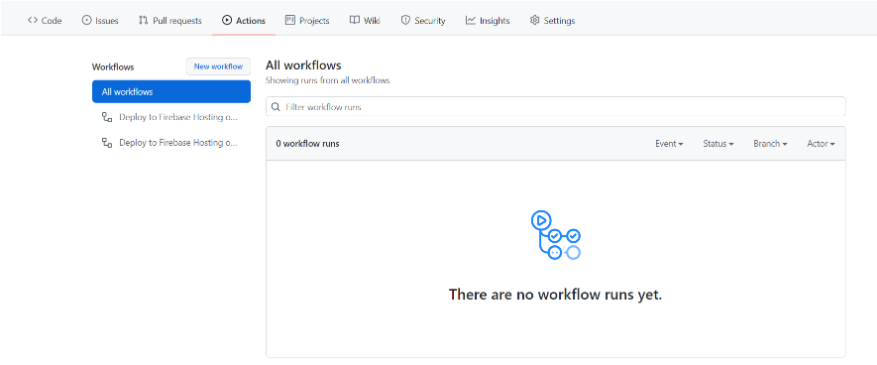
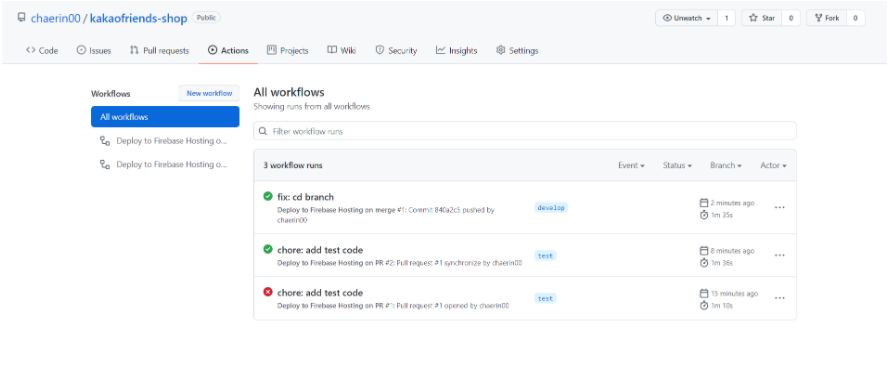
그리고 github repository의 actions에 들어가면 workflow가 추가된 것을 볼 수 있습니다.
CI/CD 작동 확인하기
이제 변경사항을 추가해서 pull request를 만들어보겠습니다.
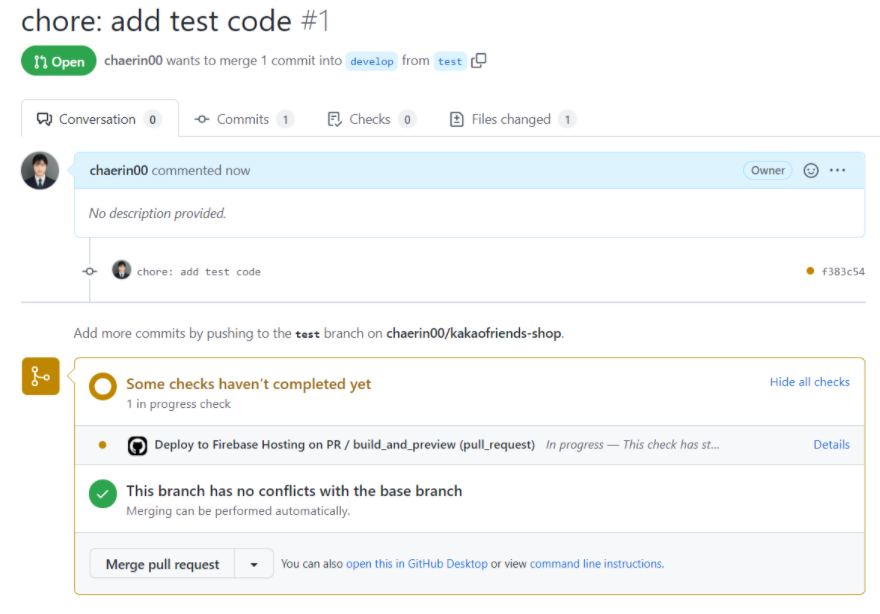
저는 yarn build과정에서 실패했다고 나옵니다. 오류들을 수정해서 다시 git push를 해보겠습니다.

이번에는 모든 check를 통과했습니다. 상단에 나오는 링크에 들어가면 해당 pr의 변경사항이 적용된 어플리케이션을 볼 수 있습니다.
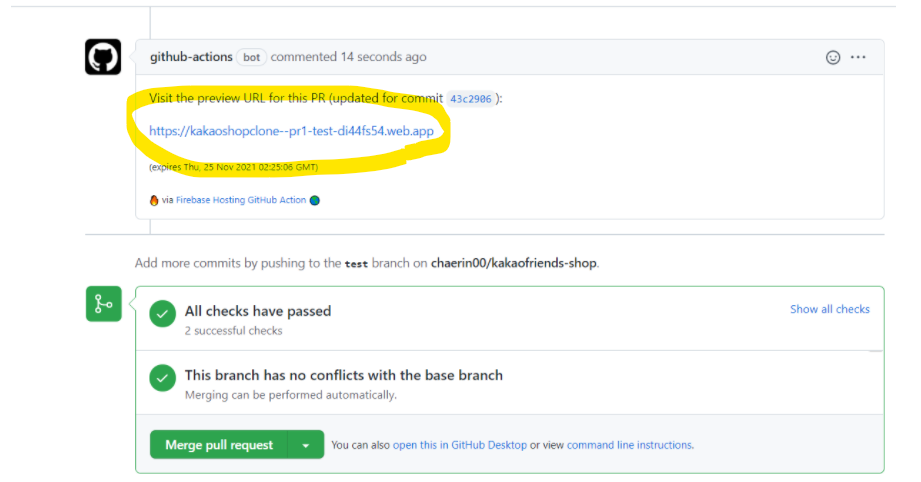
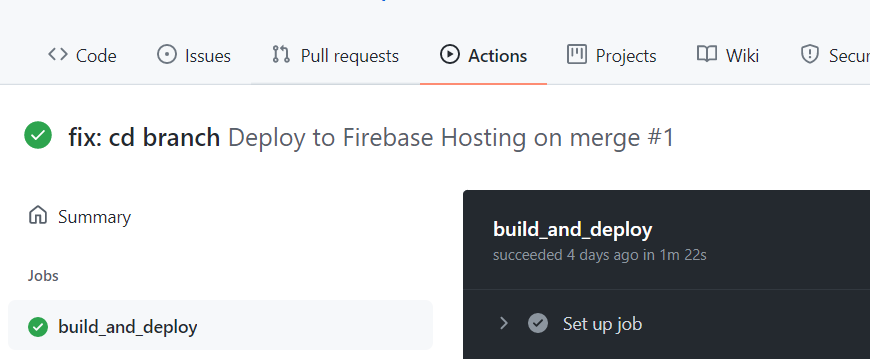
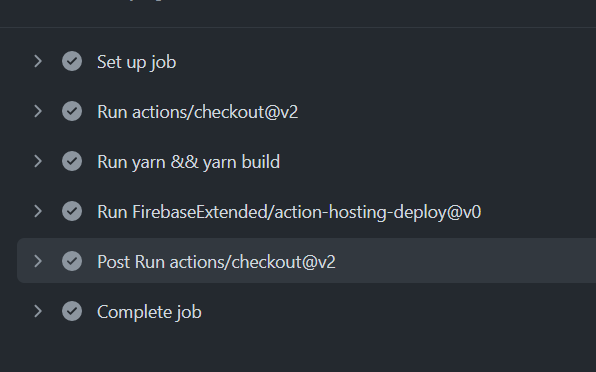
이제 merge pull request를 해주고 github actions에 들어가보면 deploy가 진행되고 있는걸 볼 수 있습니다.
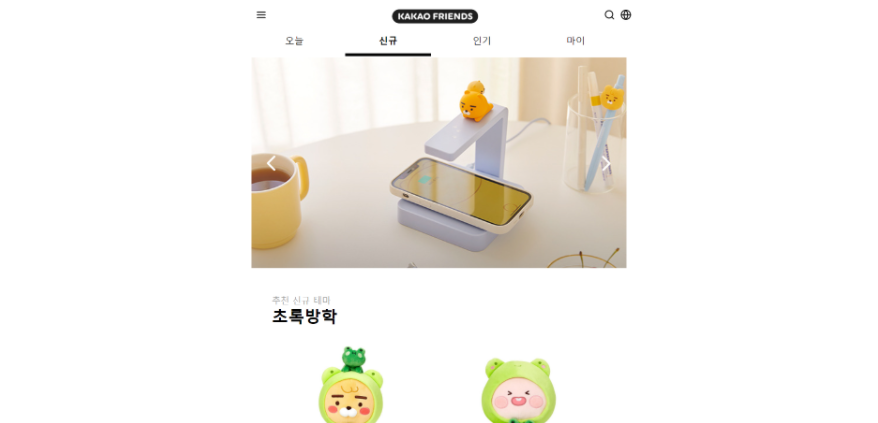
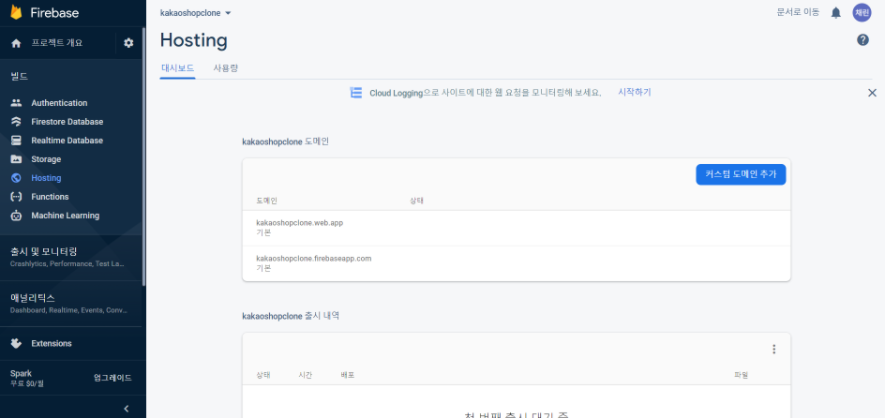
이제 아까 생성했던 firebase의 hosting tab에 들어가서 연결된 .wep.app으로 끝나는 url로 들어가보면 프로젝트가 배포되어있는걸 확인할 수 있습니다!
파일 살펴보기
firebase-hosting-merge.yml
name: Deploy to Firebase Hosting on merge
"on":
  push:
    branches:
      - develop
jobs:
  build_and_deploy:
    runs-on: ubuntu-latest
    steps:
      - uses: actions/checkout@v2
      - run: yarn && yarn build
      - uses: FirebaseExtended/action-hosting-deploy@v0
        with:
          repoToken: "${{ secrets.GITHUB_TOKEN }}"
          firebaseServiceAccount: "${{ secrets.FIREBASE_SERVICE_ACCOUNT_KAKAOSHOPCLONE }}"
          channelId: live
          projectId: kakaoshopclone
firebase-hosting-pull-request.yml
name: Deploy to Firebase Hosting on PR
'on': pull_request
jobs:
  build_and_preview:
    if: '${{ github.event.pull_request.head.repo.full_name == github.repository }}'
    runs-on: ubuntu-latest
    steps:
      - uses: actions/checkout@v2
      - run: yarn && yarn build
      - uses: FirebaseExtended/action-hosting-deploy@v0
        with:
          repoToken: '${{ secrets.GITHUB_TOKEN }}'
          firebaseServiceAccount: '${{ secrets.FIREBASE_SERVICE_ACCOUNT_KAKAOSHOPCLONE }}'
          projectId: kakaoshopclone
프로젝트 .github 파일에 위와 같은 파일들이 생성된 것을 볼 수 있습니다. 이 코드가 무엇을 뜻하는지 살펴보도록 하겠습니다.
-
name : workflow의 이름
다음과 같이 github action에서 실행되는 workflow의 이름을 name을 이용하여 지정합니다. -
on : 어떤 이벤트가 발생했을 때 해당 workflow를 실행시킬지 작성
"on":
  push:
    branches:
      - develop
# develop 브랜치에 push가 일어나면 해당 workflow를 trigger- jobs
jobs:
  build_and_preview:
    if: '${{ github.event.pull_request.head.repo.full_name == github.repository }}'
    runs-on: ubuntu-latest
    steps:
      - uses: actions/checkout@v2
      - run: yarn && yarn build
      - uses: FirebaseExtended/action-hosting-deploy@v0
        with:
          repoToken: '${{ secrets.GITHUB_TOKEN }}'
          firebaseServiceAccount: '${{ secrets.FIREBASE_SERVICE_ACCOUNT_KAKAOSHOPCLONE }}'
          projectId: kakaoshopclone
-
workflow는 다양한 job으로 구성된다.(이 경우는 build_and_preview 한 가지)
-
job밑에는 step들이 존재한다.
-
run-on은 어떤 OS에서 실행될지 지정(이 경우는 ubuntu)
-
uses는 이미 만들어진 액션을 사용할 때 지정
The first step uses an action named actions/checkout@v2. This is an action provided by GitHub that will check out your repository onto the runner, so that it can be built and tested.
-
with는 action에서 사용될 함수의 argument를 provide
참고문헌:
https://resources.github.com/whitepapers/GitHub-Actions-Cheat-sheet/

저도 같은 에러코드로 종료되었는데 에러 어떻게 수정하셨나요?