오늘은 이메일 기능을 구현해보겠다
회원가입 확인인증메일, 업무지시 이메일, 실적집계, 뉴스래터 같은곳에 쓰인다
먼저 node-mailer.js 라는 파일을 만들어 준다

그 다음 터미널 창으로 nodemailer를 설치해준다
npm install nodemailer하지만 우리는 메일 서버가 없으므로 메일을 테스트하는 사이트를 활용해 보겠다
여기로 들어가 회원가입을 해주자
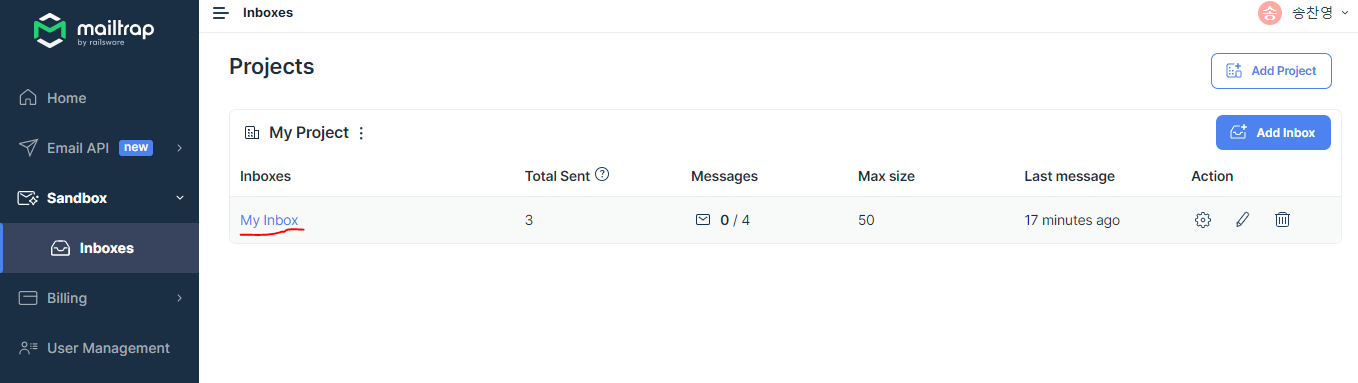
그 다음 센드박스의 indox에서 my inbox를 클릭
빨간색 동그라미 부분을 nodemailer로 바꿔주자
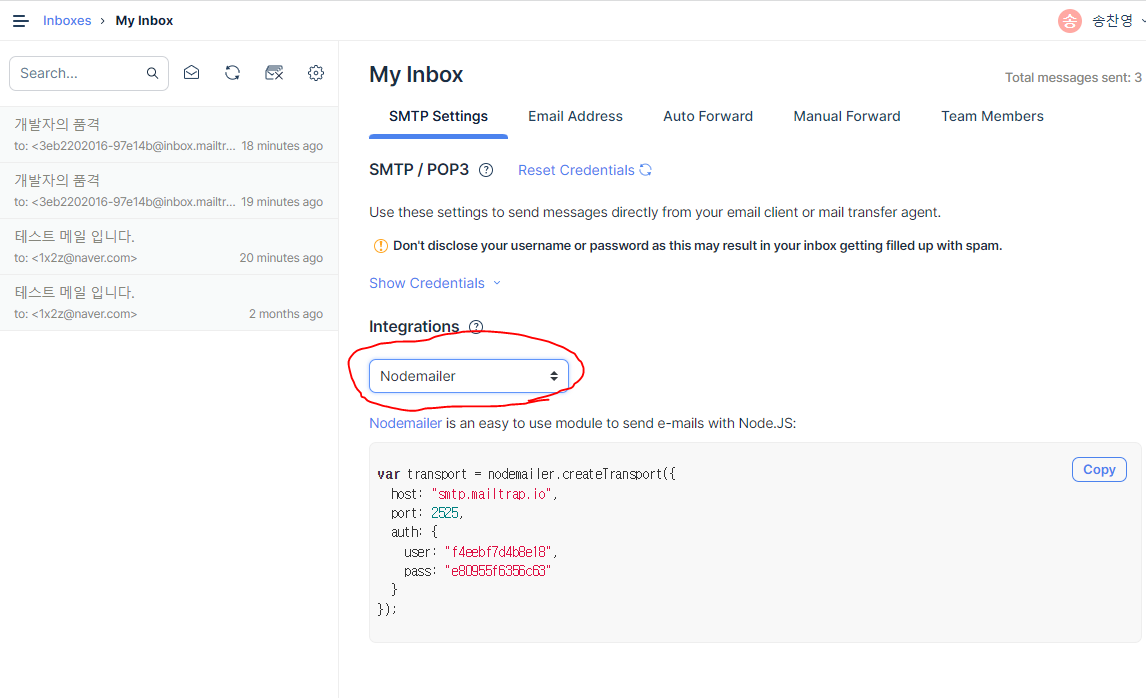
vs코드로 넘어가서 nodemailer를 불러와주고 email 오브젝트를 만들어준다
오브젝트 내용은 mailtrap의 nodemailer 예시를 참고한다
const nodemailer = require('nodemailer');

const email = {
    "host" : 'smtp.mailtrap.io',
    "port" : 2525,
    "secure" : false,
    "auth": {
        "user": "f4eebf7d4b8e18", // generated ethereal user
        "pass": "e80955f6356c63", // generated ethereal password
      }
}
send 함수를 만든 후 email 위치로 data를 보내는 createTransport를 만든뒤 실패했을경우 error를 콘솔창에 띄워주고 성공했을시 info를 콘솔창에 띄워준다
const send = async (data) => {
    nodemailer.createTransport(email).sendMail(data, function(error, info){
        if(error){
            console.log(error);
        }else{
            console.log(info);
            return info.response;
        }
    });
};
그 다음 내용과 보내는이, 받는이, 제목, 내용을 적은 content 오브젝트를 만들고 send함수를 실행시켜 준다
받는이는
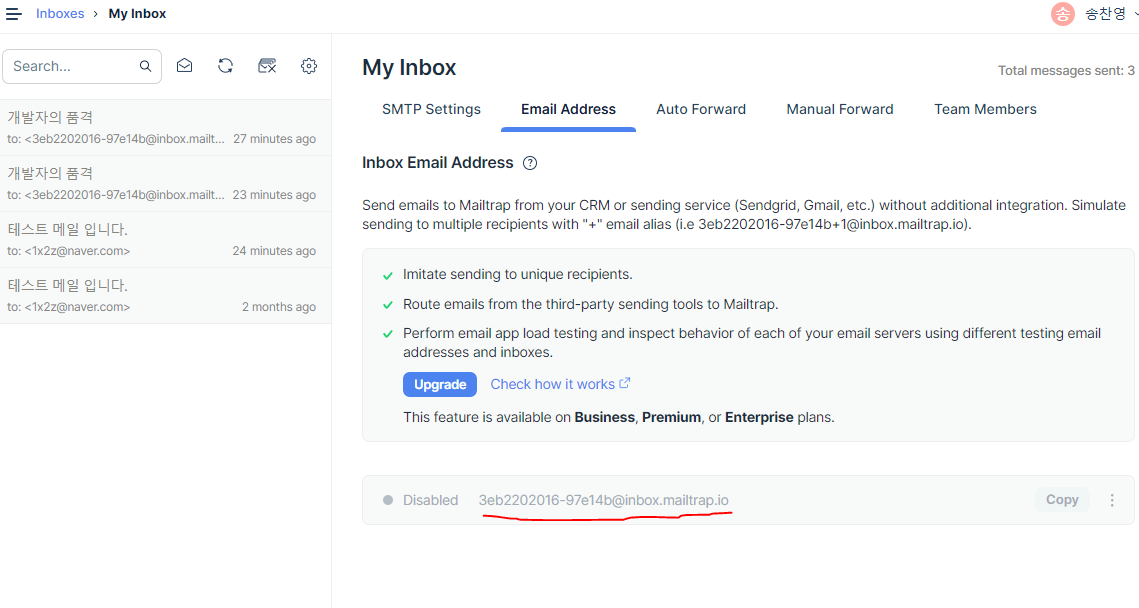
이부분을 적어주면 된다
보내는 타입은 text 와 html도 가능하며 html로 보냈을시 스마트폰 화면에서 보이는 것도 확인할 수 있다
const content = {
    from :"1x2z@naver.com",
    to : "3eb2202016-97e14b@inbox.mailtrap.io",
    subject : "개발자의 품격",
    //text : "개발자의 품격 - nodemailer 이메일 보내기"
    html : "<h2>개발자의 품격 - nodemailer 이메일 보내기</h2>"
};

send(content);
풀코드
const nodemailer = require('nodemailer');

const email = {
    "host" : 'smtp.mailtrap.io',
    "port" : 2525,
    "secure" : false,
    "auth": {
        "user": "f4eebf7d4b8e18", // generated ethereal user
        "pass": "e80955f6356c63", // generated ethereal password
      }
}

const send = async (data) => {
    nodemailer.createTransport(email).sendMail(data, function(error, info){
        if(error){
            console.log(error);
        }else{
            console.log(info);
            return info.response;
        }
    });
};

const content = {
    from :"1x2z@naver.com",
    to : "3eb2202016-97e14b@inbox.mailtrap.io",
    subject : "개발자의 품격",
    //text : "개발자의 품격 - nodemailer 이메일 보내기"
    html : "<h2>개발자의 품격 - nodemailer 이메일 보내기</h2>"
};

send(content);
4일차에 배운 스케줄러와 활용한다면 정해진 시간에 이메일을 보내는 프로그램을 만들수 있다!!

스마트팜 개발