3.0
Javascript와 HTML의 연결성에 대해 살펴보았다. document로 html의 문서를 가져올 수 있다.
ex. console창에 document.title, document.body 호출
그리고 이렇게 document를 호출함으로써 JS에서 html값을 수정할 수도 있다.
3.1
console.dir -> 자바스크립트에서 HTML을 읽을 수 있다.
getElementById(string) : html에서 id를 통해 element를 찾을 수 있게 도와줌.

이를 통해 js로 html의 요소를 가져오고 변형할 수 있다.
3.2
div tag -> 영역 설정할 때 사용
요소를 가져오는 효과적인 방법
- getElementsByClassName() : 많은 element를 가져올때 쓴다. (array를 반환)
- getElementsByTagName() : name을 할당할 수 있다.(array를 반환)
->array를 반환하므로 title.innerText와 같은 방식은 오류발생. 하위 태그 단독으로 가져오기가 어려움. - querySelector() -> element를 CSS 방식으로 검색할 수 있다.
ex. document.querySelector(".hello h1");
-> 굉장히 다양하게 쓸 예정. h1 태그가 여러개일경우 첫번째로 검색된 element만 반환. 모든 element를 찾고 싶다면 querySelectorAll을 사용하면 된다. (array 반환) - querySelector("#hello); == getElementById("hello");
3.3
- element 내부를 보고싶다면 console.dir();
이 안에서 on으로 시작하는 것 -> event, 이 항목들은 모두 JavaScript object라는 것을 이해해야 함. - event는 listen할 수 있다.
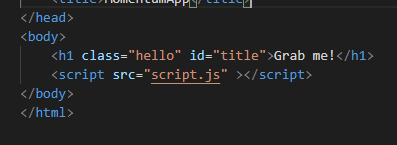
1) const title =document.querySelector("div.hello:first-child h1");
로 html 태그 알맞게 가져오기.
2) function 정의
event를 할 때 어떠한 일이 발생할지 함수 정의.
ex.
function handleTitleClick(){
    hellos.style.color="blue"
}
3) hellos.addEventListender("click", handleTitleClick);
click이라는 event가 발생하였을 때, 위에서 정의한 함수 실행. 여기서 중요한 것은 handleTitleClick()이 아니라는 것. 우리가 실행하는 것이 아닌, event가 발생했을 때 js가 실행해야 하기 때문.
이러한 식으로 어떠한 event가 작동하였을 때 이를 listen하고, 함수를 작동하게 할 수 있음
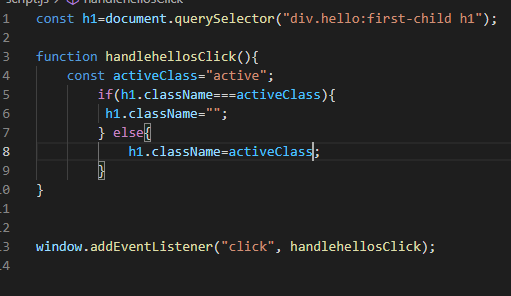
3.4 event +
const hellos=document.querySelector("div.hello:first-child h1");

function handlehellosClick(){
    hellos.style.color="blue"
}

function handleMouseLeave(){
    hellos.innerText="mouse is gone!";
}

function handleMouseEnter(){
    hellos.innerText="mouse is here!";
}

hellos.addEventListener("click", handlehellosClick);
hellos.addEventListener("mouseenter", handleMouseEnter);
hellos.addEventListener("mouseleave", handleMouseLeave);
3.5 event ++
지금까지 event를 다루는 방법으로 다음과 같은 문법을 사용했다.
hellos.addEventListener("click", handlehellosClick);
hellos.addEventListener("mouseenter", handleMouseEnter);
hellos.addEventListener("mouseleave", handleMouseLeave);
그러나 이는 다음과 같이도 바꿀 수 있다.
hellos.onclick= handlehellosClick;
hellos.onmouseenter=handleMouseEnter;
hellos.onmouseleave=handleMouseLeave;
(강의자는 전자를 더 선호)
다양한 event들을 배웠다.
const hellos=document.querySelector("div.hello:first-child h1");

function handlehellosClick(){
    hellos.style.color="blue"
}

function handleMouseLeave(){
    hellos.innerText="mouse is gone!";
}

function handleMouseEnter(){
    hellos.innerText="mouse is here!";
}

function handleWindowResize(){
    document.body.style.backgroundColor="tomato";
}

function handleWindowCopy(){
    alert("copier!");
}

function handleWindowOffline(){
    alert("SOS no WIFI");
}

function handleWindowOnline(){
    alert("good WIFI");
}
hellos.onclick= handlehellosClick;
hellos.onmouseenter=handleMouseEnter;
hellos.onmouseleave=handleMouseLeave;

window.addEventListener("resize", handleWindowResize);
window.addEventListener("copy", handleWindowCopy);
window.addEventListener("offline", handleWindowOffline);
window.addEventListener("online", handleWindowOnline);
(신기한 기능들이 많고, 바로바로 반응이 되니 개인적으로 지금까지 한 것들 중 가장 재미있었다)
3.6
- if 와 else를 사용하여 조금 더 디테일하게 event표현
const hellos=document.querySelector("div.hello:first-child h1");

function handlehellosClick(){
    const current=hellos.style.color;
    let newColor;
    if(current==="blue"){
        newColor="red";
    }
    else{
        newColor="blue"
    }
    hellos.style.color=newColor;

}


window.addEventListener("click", handlehellosClick);
(중간중간 변수를 사용하면 훨씬 명료하고 간단하게 표현할 수 있음.)
3.7
*js if문에서 같은지 확인할 때에는 등호를 세개쓰기
-지금까지처럼 js안에서 html과 각각대응하지않고, 색깔에 관한 부분을 css에 넘겨주어서 서로 분담하여 상호작용할 수 있도록 고쳐보았음.

- js에서는 string을 그대로 쓰는 것보다는 변수를 이용하는 것이 좋음. 철자를 잘못 적게 되면 찾기가 굉장히 힘들어지기 때문.
- ** 문제: 이런 식으로 class자체를 바꿔버리면 색깔 외 기존 class가 가지고 있었던 font..etc까지 없어져버림. 따라서 기존 class를 유지하면서 일부만 바꿀 수 있는 방법이 필요함.
3.8
2번과 같은 문제를 해결하기 위해 classList 사용
const h1=document.querySelector("div.hello:first-child h1");

function handlehellosClick(){
    const clickedClass = "clicked";
        if(h1.classList.contains(clickedClass)){
         h1.classList.remove(clickedClass);
        } else{
            h1.classList.add(clickedClass);
        }
}


window.addEventListener("click", handlehellosClick);
contains-> 있는지 확인. remove 제거 add 더함
이를 통해 기존 class를 이용하면서 위 사항을 구현할 수 있음. 그런데 사실, 이와 같은 행위는 실제 업무에서 굉장히 자주 쓰이기 때문에, 이를 대체할 수 있는 강력한 함수가 있으며, 이를 toggle라고 함.
const h1=document.querySelector("div.hello:first-child h1");

function handlehellosClick(){
        h1.classList.toggle("clicked");
}

h1.addEventListener("click", handlehellosClick);
위와 아래 코드는 같은 역할을 함. toggle는 리스트에 clicked가 있으면 제거를, 없으면 추가를 하는 역할.