[React] RTK 사용
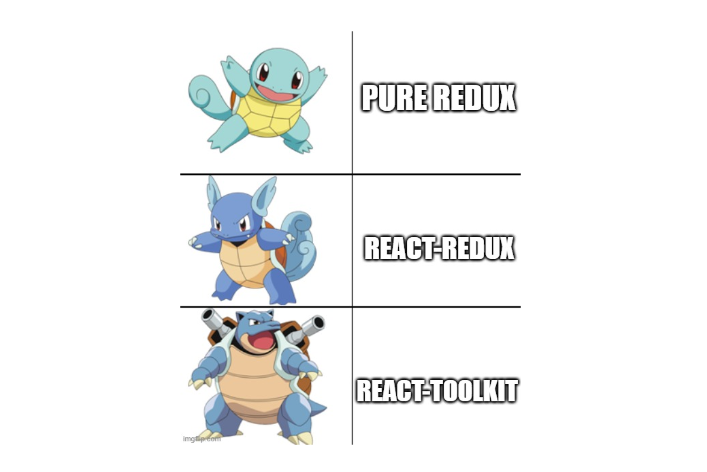
마침 포켓몬 과제를 하는 중이었는데
짤이 너무 찰떡이다ㅎㅎ-제출 1시간 전 버그 발견해 당황한 박감자-
RTK
React tool kits를 포켓몬 과제에 적용 했을때의 노트
먼저 포켓몬 과제에서 포켓몬 리스트에 대한 상태와 생태 변환 함수는 아래와 같았다.
import { useState } from "react";
import "./App.css";
import Router from "./shared/Router";
import { PokemonContext } from "./context/PokemonContext";

function App() {
  const [pokemonList, setPokemonList] = useState([]);

  const addPokemonHandler = (pokemon) => {
    setPokemonList((prevList) => {
      if (prevList.length < 6 && !prevList.includes(pokemon)) {
        return [...prevList, pokemon];
      } else {
        if (prevList.includes(pokemon)) {
          // 중복 확인
          alert("중복된 포켓몬이 있습니다.");
        } else {
          // 6개 초과시
          alert("6개 초과");
        }

        return [...prevList];
      }
    });
  };

  const removePokemonHendler = (pokemon) => {
    setPokemonList((prevList) => {
      const newList = prevList.filter((item) => {
        return JSON.stringify(item) !== JSON.stringify(pokemon);
      });

      return [...newList];
    });
  };

  return (
    <PokemonContext.Provider
      value={{ pokemonList, addPokemonHandler, removePokemonHendler }}
    >
      <Router />
    </PokemonContext.Provider>
  );
}

export default App;
이를 PokemonContext를 만들어 관리하고 있던 상태
그리고서 RTK로 refactor 할때 store 만들기, 리듀서 만들기, 그리고 상태 변환은 dispatch로 변환만 해주면 간단히 할 수 있었다.
RTK 설치
yarn add @reduxjs/toolkit리덕스 redux, react-redux 설치도 잊지 않기
Store 만들기
우선 store를 만들어준다
// src/redux/config/configureStore.js
import { configureStore } from "@reduxjs/toolkit";
import pokemonSelectorSlice from "../slices/PokemonSelectorSlice";

// RTK store
const store = configureStore({
    reducer: {
       // 이부분은 리듀서 만들고 하는게 흐름이 편하다
       pokemonSelector: pokemonSelectorSlice,
    }
});

export default store;
만드는 건 간단하며, 리듀서 부분은 리듀서 함수를 만들고 나서 적어주는 것이 흐름상 편하다.
리듀서 만들기
이전에 RTK 없이 일반 리듀서를 만들때 상수 정해주고 switch를 통해 케이스를 다 나누어 주었지만 RTK는 이를 쉽게 줄여준다
import { createSlice } from "@reduxjs/toolkit";
import { toast } from "react-toastify";

const initialState = {
  selectedPokemonList: [],
};

const pokemonSelectorSlice = createSlice({
  name: "pokemonSelector",
  initialState: initialState,
  reducers: {
    // 포켓몬 추가
    addPokemon: (state, action) => {
		// ...
    },

    // 포켓몬 삭제
    removePokemon: (state, action) => {
		// ...
    },

    // 포켓몬 전체 삭제
    clearPokemonList: (state) => {
		// ...
    },
  },
});

export const { addPokemon, removePokemon, clearPokemonList } =
  pokemonSelectorSlice.actions;
export default pokemonSelectorSlice.reducer;- 이전처럼 initialState를 정해주는 것은 동일하다
createSlice를 이용해pokemonSelector를 만들어준다.- 초기 상태 값은 배정한다
- 상태 변화를 일으키는 함수를
reducer에 객체로 담아준다. - 리듀서와 액션 함수를
export한다
이제 App에서 전달하는 부분을 지워주고
import "./App.css";
import Router from "./shared/Router";
import { ToastContainer } from "react-toastify";
import "react-toastify/dist/ReactToastify.css";

function App() {
  return (
    <>
      <Router />
      <ToastContainer />	{/* 알림 기능 추가 */}
    </>
  );
}

export default App;
dispatch를 통해 상태를 업데이트해보자
상태 변환은 dispatch로
예시로 대시보드에서 리스트 초기화와 선택된 포켓몬 삭제 리듀서 액션 함수들을 불러왔다.
function Dashboard() {
  const dispatch = useDispatch();

  // 리스트 받아오기 (redux 사용)
  const pokemonList = useSelector(
    (state) => state.pokemonSelector.selectedPokemonList
  );
  const removePokemonHandler = (pokemon) => {
    dispatch(removePokemon(pokemon));
  };
  const clearPokemonHandler = () => {
    dispatch(clearPokemonList());
  };

  // 비어있는 슬롯 수
  const emptyCell = Array(6 - pokemonList.length).fill({});

  return (
    <StyledDashboard>
      <h3>나만의 포케몬</h3>
      <StCellWrapper>
        {[...pokemonList, ...emptyCell].map((pokemon) => {
          if (Object.keys(pokemon).length > 0) {
            return (
              <PokemonCard
                key={pokemon.id}
                pokemon={pokemon}
                buttonText={`삭제`}
                cardButtonHandler={removePokemonHandler}
              />
            );
          } else {
            return <PokeballCell key={Math.random()} />;
          }
        })}
      </StCellWrapper>
      <StResetBtn onClick={clearPokemonHandler}>
        <StResetImg src={RestartImg} alt="" />
      </StResetBtn>
    </StyledDashboard>
  );
}dispatch를 사용한 Handler를 따로 만들어 호출했다. 중요한 건 어떠한 상태 변화도 Dispatch로
중복 확인 에러
Context API를 사용했을때 중복을 확인하는 코드를 includes를 사용해서 구현하고 작동도 문제 없이 되었다
const addPokemonHandler = (pokemon) => {
  setPokemonList((prevList) => {
    if (prevList.length < 6 && !prevList.includes(pokemon)) {
      return [...prevList, pokemon];
    } else {
      if (prevList.includes(pokemon)) {
        // 중복 확인
        alert("중복된 포켓몬이 있습니다.");
      } else {
        // 6개 초과시
        alert("6개 초과");
      }
      return [...prevList];
    }
  });
};
이 코드를 Redux reducer로 옮겼을때 아래와 같았다
addPokemon: (state, action) => {
  const pokemon = action.payload;
  if (
    state.selectedPokemonList.length < 6 &&
    !state.selectedPokemonList.includes(pokemon)
  ) {
    state.selectedPokemonList.push(pokemon);
    toast.success(`${pokemon.korean_name}(이)가 추가되었습니다!`);
  } else {
    if (state.selectedPokemonList.includes(pokemon)) {
      // 중복 확인
      toast.error("중복된 포켓몬이 있습니다.");
    } else {
      // 6개 초과시
      toast.error("포켓몬 최대수 6마리를 초과하였습니다.");
    }
  }
},
헌데 중복 확인 작동을 안 하는 것이었다ㅠㅠ. 찾아보니 includes는 얕은 검색에 해당하여 개체를 확인할 때 기대한대로 실행이 되지 않을 수도 있다고 한다. 따라서 some을 사용하거나 JSON.stringify (얕은 복사와 깊은 복사 사이)를 사용해서 확인하는 것이 더 확실하다고 한다. 이를 따라 바꾼 코드가 아래와 같다.
객체가 존재하는지 확인하는 것이 아닌 동일한 id 값을 가지고 있는지 some을 통하여 찾았다.
addPokemon: (state, action) => {
  const pokemon = action.payload;

  // 중복 확인
  const isDuplicate = state.selectedPokemonList.some(
    (item) => item.id === pokemon.id
  );

  if (state.selectedPokemonList.length < 6 && !isDuplicate) {
    state.selectedPokemonList.push(pokemon);
    toast.success(`${pokemon.korean_name}(이)가 추가되었습니다!`);
  } else {
    if (isDuplicate) {
      toast.error("중복된 포켓몬이 있습니다.");
    } else {
      // 6개 초과시
      toast.error("포켓몬 최대수 6마리를 초과하였습니다.");
    }
  }
},
마치며...
RTK 강의 내용을 적으려고 했지만, 결국 과제에 적용을 하게 되어서 과정이 어떠했는지를 설명하며 RTK 사용법을 다시 한 번 복습해본 TIL
(나 뭐라는 거니...)