기본 코드
import pygame as pg

pg.init()

screen = pg.display.set_mode((800, 600))
running = True
while running:
    for event in pg.event.get():
        if event.type == pg.QUIT:
            running = False
    pg.display.update()

pg.quit()
실행해보면 검은색 화면이 나오는 코드이다. 여기에 pygame에 들어있는 fill 함수를 사용해 색깔을 입혀볼 것이다.
색깔 입히기
컴퓨터는 빨강, 초록, 파랑으로 디스플레이에서 모든 색을 표현한다. pygame에서도 (R, G, B)로 색깔 정도를 조정해 색상을 지정할 수 있다. 우리는 pg.display.set_mode((800, 600))로 지정한 screen모듈에 fill()이라는 걸 이용해 색깔을 입혀볼 것이다.
import pygame as pg

pg.init()

screen = pg.display.set_mode((800, 600))

red = (255, 0, 0) # (R, G, B) 빨강, 초록, 파랑


running = True
while running:
    for event in pg.event.get():
        if event.type == pg.QUIT:
            running = False
    # 빨강 색으로 색깔 채우기
    screen.fill(red)

    pg.display.update()
pg.quit()
결과 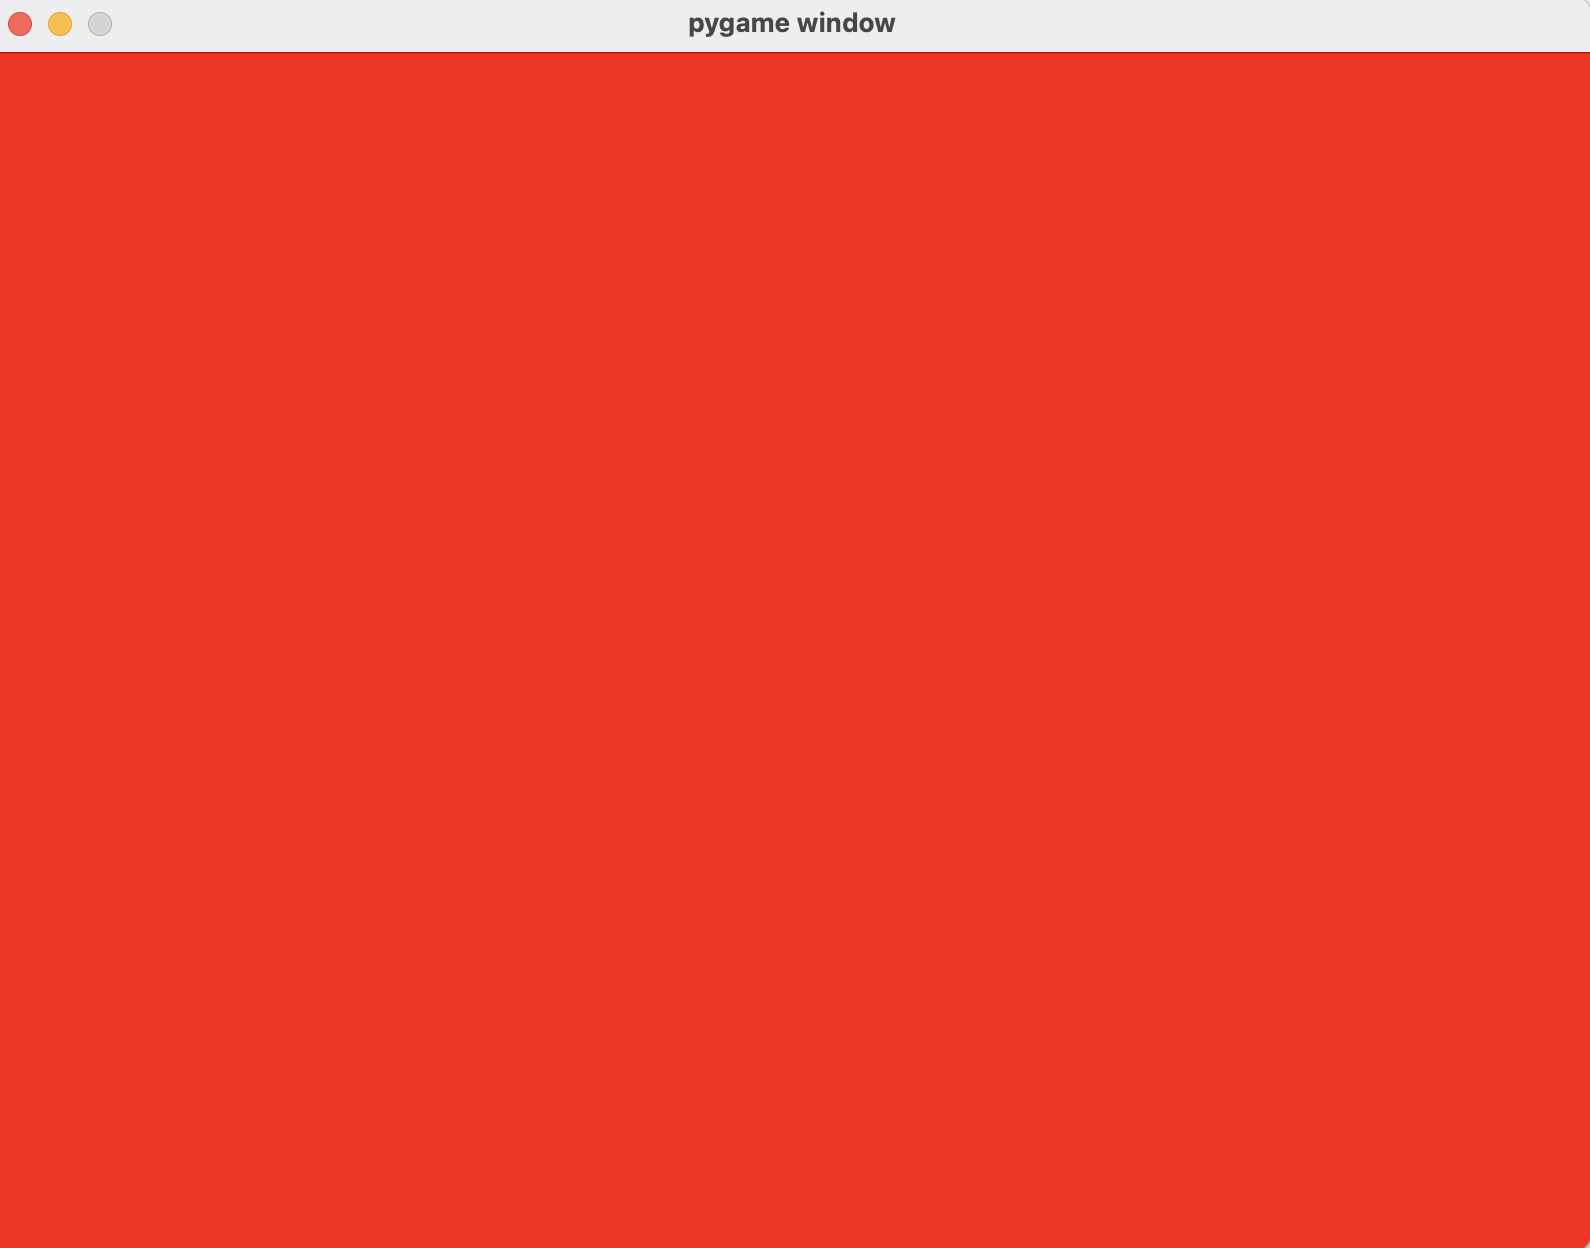
주의할 점은 (R,G,B)가 fill 함수의 인자로 들어가야 한다. 만약 코드를 screen.fill(255, 0, 0)로 작성하면 버그가 난다. 왜냐하면 
(https://www.pygame.org/docs/ref/surface.html#pygame.Surface.fill)
공식 사이트에도 나와 있듯이 fill() 함수가 받을 수 있는 인자는 color, rect, speicial_flag가 있고 rect하고 speicial_flag는 함수 안에 기본값이 설정되어 있으니 우린 color만 넣어주면 된다. 만약 튜플로 안 넣어주면 각각의 인자가 다 다르니 TypeError가 난다. 잘못하면 나처럼 삽질할 수 있다.
Rect 생성

pygame에서는 좌표가 아래로 갈수록 좌표가 커지고 오른쪽으로 갈수록 좌표가 커진다.
Rect 객체 생성:
pygame.Rect(x, y, width, height) -> Rect
pygame.Rect((x, y), (width, height)) -> Rect
x, y는 좌표, width, height는 가로, 세로의 길이를 말한다. 보통 첫 번째를 많이 쓴다
Rect 그리기
Rect를 만들었으니 이제 그려볼 때다. Rect 객체는 pygame.draw.rect()를 이용해 그릴 수 있다.
Rect 그리기:
pg.draw.rect(surface, col)
여기서 surface는 Rect를 그릴 공간, color는 (R,G,B) 튜플, rect는 Rect객체를 의미한다. 위 코드에선 surface는 화면인 screen에 해당한다. 그리고 pg.draw.rect()를 포함해서 화면에 그려야 하는 코드들은 screen.fill() 앞에 있어야 한다. 왜냐하면 코드는 위에서 부터 읽어지기 때문에 rect를 그리고 하얀색으로 칠하면 코드가 오류가 난거처럼 보인다.
import pygame as pg
pg.init()
screen = pg.display.set_mode((800, 600))
red = (255, 0, 0) # (R, G, B) 빨강, 초록, 파랑
rect = pg.Rect(100, 100, 100, 100) # Rect 생성
running = True
while running:
for event in pg.event.get():
if event.type == pg.QUIT:
running = False
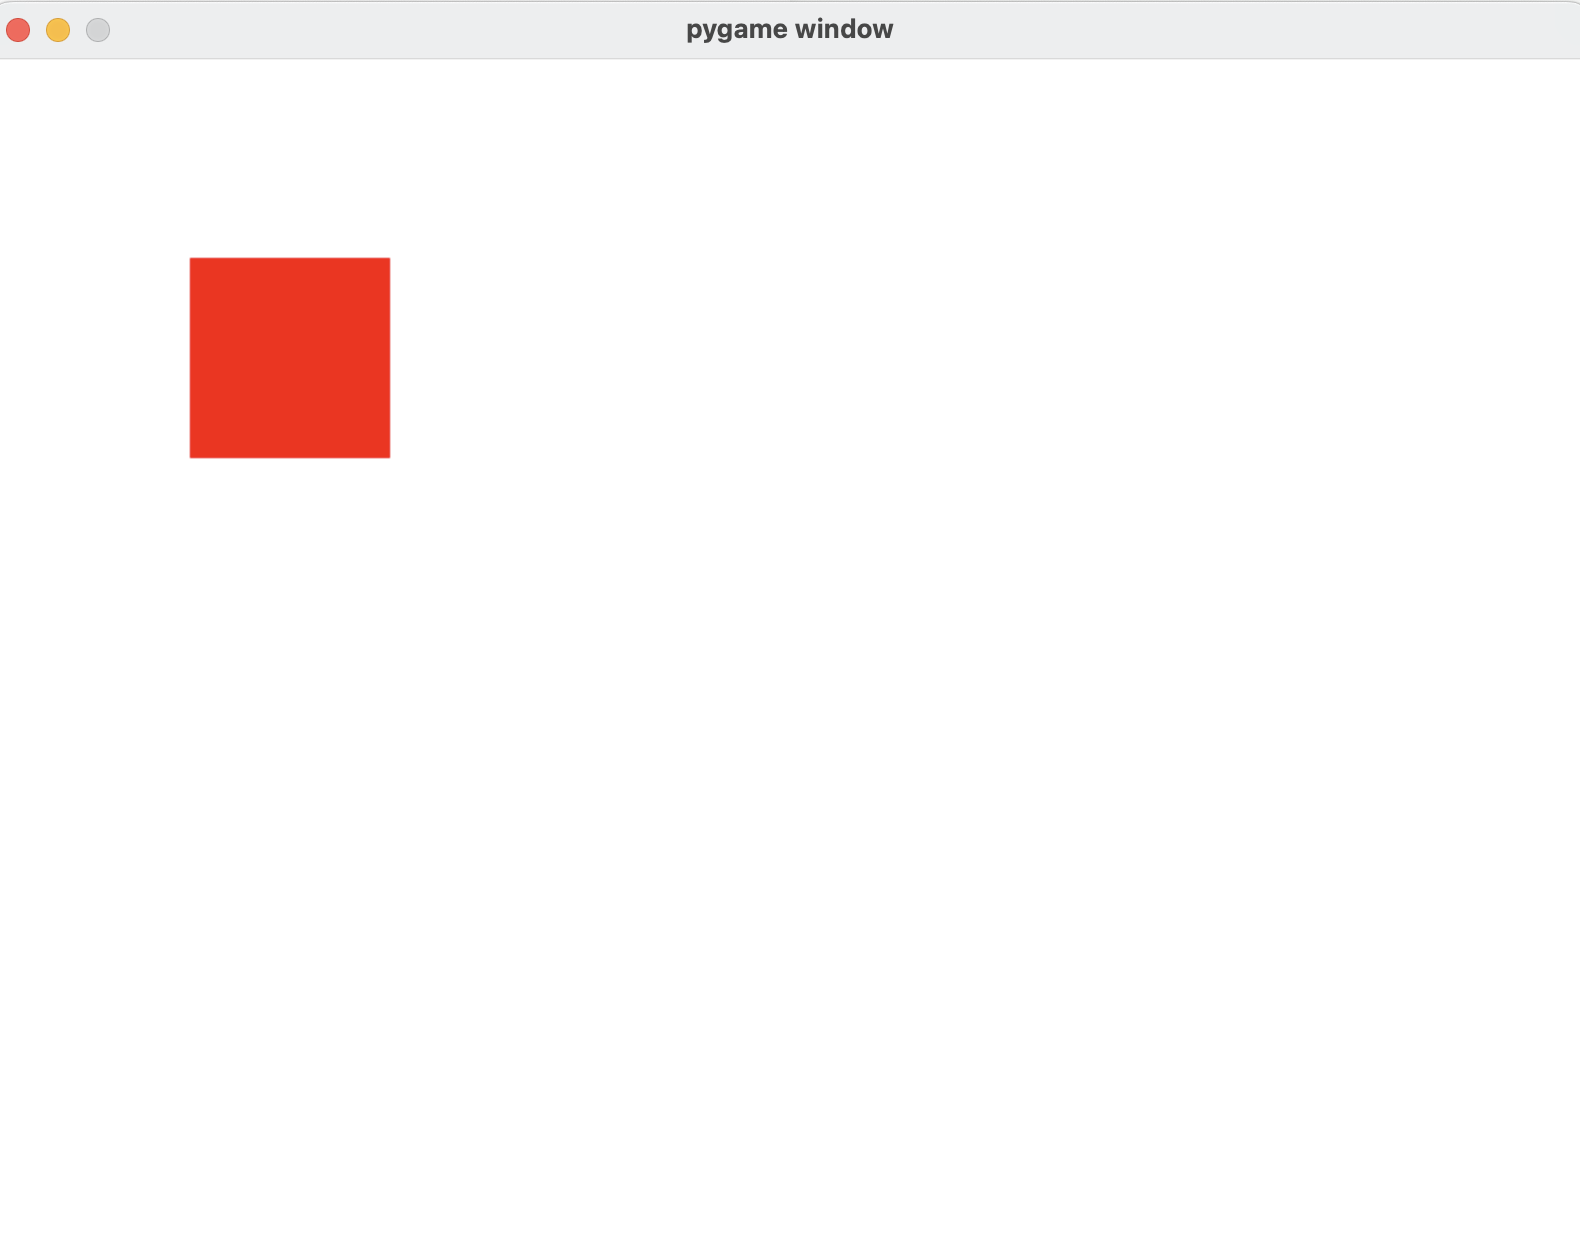
# 빨강 색으로 색깔 채우기
screen.fill((255, 255, 255))
pg.draw.rect(screen, red, rect) # Rect 생성, 반드시 fill() 앞
pg.display.update()
pg.quit()결과
Rect 움직이기
import pygame as pg

pg.init()

Clock = pg.time.Clock() # Clock() 모듈 호출
screen = pg.display.set_mode((800, 600))

loc = [0, 0]
red = (255, 0, 0)  # (R, G, B) 빨강, 초록, 파랑
rect = pg.Rect(*loc, 100, 100) # Rect 생성

running = True
while running:
    Clock.tick(60) # 1초당 60프레임 실행되게 설정
    for event in pg.event.get():
        if event.type == pg.QUIT:
            running = False

    rect = pg.Rect(*loc, 100, 100)
    loc[0] += 1

    # 빨강 색으로 색깔 채우기
    screen.fill((255, 255, 255))
    pg.draw.rect(screen, red, rect)

    pg.display.update()
pg.quit()
결과
loc이라는 리스트를 만들어 rect의 지정했고 반복문으로 오른쪽으로 1만큼 이동시키게 했다. 만약 화면에 닿았을 때 그만 멈추고 싶다면 반복문 안에loc[0] += 1 대신
if loc[0] < screen.get_width() # = 화면 크기 800
	loc[0] += 1
같이 제어하면 된다. 참고로 screen에는 screen.get_width() : 화면 가로, screen.get_height() : 화면 세로, screen.get_size() : (화면 가로, 화면 세로)를 알 수 있다.