⑤ FloatingActionButton
ImageView를 상속받음 --> src로 버튼 내부 이미지 설정 가능
기본적으로 검은색 tint 떼어내기 : app:tint="@null"
(namespace에 android:의 경우 오래된 기능 --> app:이용)
FloatingActionButton은 ImageView를 상속받아만들었기때문에 text 쓸 수 없음, ExtendedFloatingActionButton icon/text으로 이미지/텍스트 가능
⑥ SnackBar
Toast를 대체하기 위해 만들어짐, 더 업그레이드 됨
Snackbar.LENGTH_INDEFINITE 로 무한히 떠있게 가능
Toast와 다르게 Action (버튼) 기능 .setAction()
⑦ CoordinatorLayout
FrameLayout 상속받음
SnackBar가 뜨면서 먹는 공간만큼 FloatingButton의 위치를 Behavior 객체가 알아서 조정
SnackBar가 보여질 위치에 CoordinatorLayout 배치해서 SnackBar의 위치조정 가능
.shrink(), .extend() 를 이용하여 버튼의 축소/확장 가능
extFab.setOnClickListener(new View.OnClickListener() {
            @Override
            public void onClick(View view) {
                if (extFab.isExtended()){
                    CoordinatorLayout layout = findViewById(R.id.snackber_container);
                    Snackbar.make(layout, "clicked add", Snackbar.LENGTH_INDEFINITE).setAction("okay", new View.OnClickListener() {
                        @Override
                        public void onClick(View view) {
                            Toast.makeText(MainActivity.this, "clicked add", Toast.LENGTH_SHORT).show();
                            extFab.shrink();
                        }
                    }).show();
                }else extFab.extend();
            }
});
View영역이 움직일때 AppBar영역 같이 움직리여면 Toolbar뿐만 아니라 AppbarLayout이 있어야함 (app:layout_scrollFlags 설정이 AppBarLayout 안에 있을때만 활성화됨)
app:layout_scrollFlags="scroll|enterAlways" enterAlways를 함께 주면 끝까지 스크롤을 당기지 않아도, 아래로 스크롤 하자마자 ToolBar가 바로 나옴
ScrollableView를 사용하지 않을 경우 사용자가 ToolBar에 직접 스크롤 해서 올려야함 --> 세로 스크롤이 가능한 뷰 [ NestedScrollView or RecyclerView ]
ScrollableView는 LinearLayout과 다르게 겹치게 생성됨
(app:layout_behavior="com.google.android.material.appbar.AppBarLayout$ScrollingViewBehavior"> : 쓸 경우 영역이 겹치지않고 Behavior가 알아서 영역을 구분)
ScrollableView (ScrollView/GridView... 옛것이라 호환이 안됨) --> NestedScrollView or RecyclerView 사용
<com.google.android.material.appbar.AppBarLayout
        android:layout_width="match_parent"
        android:layout_height="wrap_content">

        <androidx.appcompat.widget.Toolbar
            android:id="@+id/toolbar"
            android:layout_width="match_parent"
            android:layout_height="?attr/actionBarSize"
            app:titleTextColor="@color/white"
            app:layout_scrollFlags="scroll|enterAlways"/>

        <!-- 이 자리에 보통 TabLayout을 배치, 연습상 Button으로 대체 -->
        <Button
            android:layout_width="match_parent"
            android:layout_height="wrap_content"
            android:backgroundTint="@color/teal_200"/>

    </com.google.android.material.appbar.AppBarLayout>
스크롤뷰 구현의 주요특징
1. 자식뷰는 1개만 가능
2. 자식뷰의 height은 무조건 wrap_content
⑧ NestedScrollView
⑨ CollapsingToolbarLayout
ToolBar에서 직접 수정 불가능, 위치 이상함
theme에서 style을 만들고 이를 AppBarLayout에서 설정해야함
<!-- AppBarLayout만의 스타일테마 -->
    <style name="appbar">
        <!-- Toolbar만 있었을때 제목색상 지정 -->
        <item name="titleTextColor">@color/white</item>
        <!-- AppBarLayout 안에  ToolBar를 넣었을때 제목색상 -->
        <item name="android:textColorPrimary">@color/white</item>
</style><com.google.android.material.appbar.AppBarLayout
android:layout_width="match_parent"
android:layout_height="340dp"
android:theme="@style/appbar">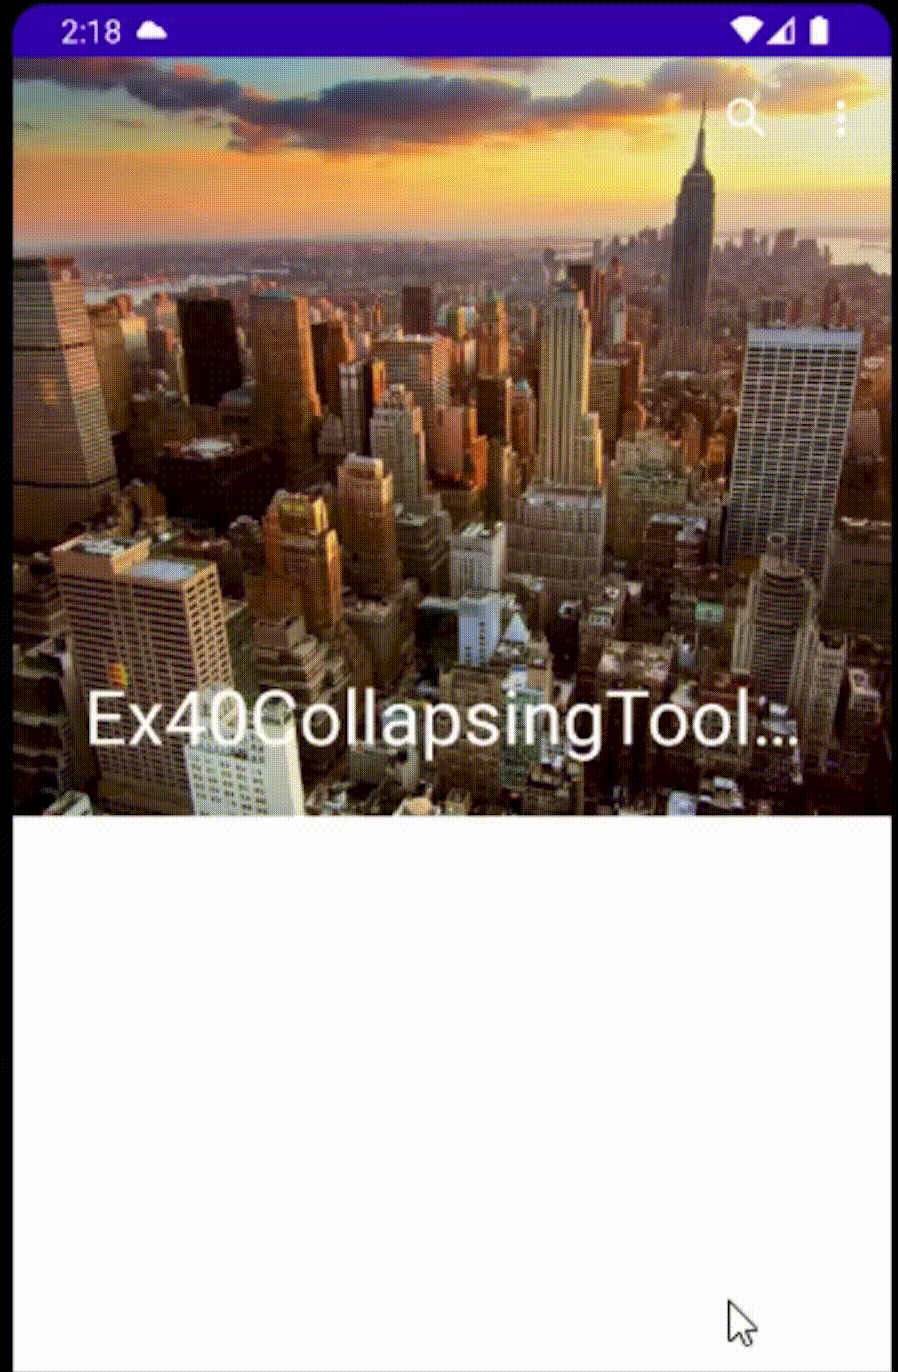
⑩ Bottom Series
BottomNavigationView : menu.xml을 이용해서 항목을 만듦 (cf. NavigationDrawer)
<FrameLayout
        android:layout_width="match_parent"
        android:layout_height="wrap_content"
        android:layout_weight="1">
일단 최소사이즈로 wrap --> weight 1