저번 포스팅에서 terraform이 무엇이고 어떠한 특장점을 가지고 있는지 설명하였다. 이번 포스팅에서는 AWS (Amazon Web Service)에 리소스를 배포하는 시나리오로 실제 terraform을 어떠한 식으로 활용하는지 사용법에 대해 소개하고자 한다.
1. Terraform 설치
(1) OS Version: Ubuntu 18.04 LTS
(2) Terraform Version: v0.12.0
wget https://releases.hashicorp.com/terraform/0.12.0/terraform_0.12.0_linux_arm.zip
unzip terraform_0.12.0_linux_arm.zip
sudo cp terraform /usr/bin/ && sudo chmod +x
terraform의 버전을 확인한다.
[root@test test] terraform -v
Terraform v0.12.0
2. HCL (Hashicorp Configuration Language) 작성
(1) provider 작성
첫번째로 AWS 프로바이더를 사용하기 필요한 설정을 작성해야한다. AWS의 <ACCESS_KEY>와 <SECRET_KEY>를 AWS 콘솔의 IAM에서 얻어와 입력한다. 리전은 미국 동부 (오하이오)를 기준으로 하였다.
[root@test test] cat aws-provider.tf

provider "aws" {
  access_key = "<ACCESS_KEY>"
  secret_key = "<SECRET_KEY>"
  region     = "us-east-2"
}
(2) VPC-Subnet 작성
두번째로 해당 EC2 인스턴스를 배포할 리전의 네트워크 리소스를 위한 코드를 작성한다. 각각 us-east-2 리전에 VPC, Subnet 리소스를 생성한다.
[root@test test] cat vpc-subnet.tf

resource "aws_vpc" "test-vpc" {
  cidr_block = "10.0.0.0/16"
  tags = {
    Name = "test-vpc"
  }
}

resource "aws_subnet" "test-subnet-a" {
  vpc_id = "${aws_vpc.test-vpc.id}"
  cidr_block = "10.0.1.0/24"
  availability_zone = "us-east-2a"
}
(3) Gateway 작성
해당 네트워크 영역과 통신을 위한 인터넷 게이트웨이 리소스를 작성한다.
[root@test test] cat gateway.tf

resource "aws_internet_gateway" "test-gateway" {
  vpc_id = "${aws_vpc.test-vpc.id}"
  tags = {
    Name = "test-gateway"
  }
}
(4) 라우팅 룰 작성
해당 인터넷 게이트웨이에 할당할 라우팅 룰을 리소스 형태로 작성한다.
[root@test test] cat routes.tf

resource "aws_route_table" "test-route-table" {
  vpc_id = "${aws_vpc.test-vpc.id}"
  route {
    cidr_block = "0.0.0.0/0"
    gateway_id = "${aws_internet_gateway.test-gateway.id}"
  }
  tags ={
    Name = "test-route-table"
  }
}

resource "aws_route_table_association" "my-subnet-association" {
  subnet_id      = "${aws_subnet.test-subnet-a.id}"
  route_table_id = "${aws_route_table.test-route-table.id}"
}
(5) 보안 그룹 및 규칙 작성
EC2 인스턴스의 Inbound, Outbound 트래픽에 대한 Security Group을 설정한다. 첫번째 코드 블록은 Security Group, 두번째 이후 코드 블록은 해당 Security Group에 할당할 Security Group Rule이다.
[root@test test] cat security-group.tf

resource "aws_security_group" "test-sg" {
  vpc_id      = "${aws_vpc.test-vpc.id}"
  name        = "test-sg"
  description = "This security group is for Terraform Test"
  tags ={ Name = "test-sg" }
}
각각의 보안 그룹 규칙 내용은 다음과 같다.
- 같은 VPC 간의 모든 트래픽 허용 (test-cluster-traffic)
- 인스턴스로의 SSH 허용 (instance-ssh)
- Outbound의 모든 트래픽 허용 (outbound-traffic)
[root@test test] cat sg-rules.tf

resource "aws_security_group_rule" "test-cluster-traffic" {
  type              = "ingress"
  from_port         = 0
  to_port           = 0
  protocol = "-1"
  cidr_blocks       = ["10.0.0.0/16"]
  security_group_id = "${aws_security_group.test-sg.id}"
}

resource "aws_security_group_rule" "instance-ssh" {
  type              = "ingress"
  from_port         = 22
  to_port           = 22
  protocol = "TCP"
  cidr_blocks       = ["0.0.0.0/0"]
  security_group_id = "${aws_security_group.test-sg.id}"
}

resource "aws_security_group_rule" "outbound-traffic" {
  type              = "egress"
  from_port         = 0
  to_port           = 0
  protocol          = "-1"
  cidr_blocks       = ["0.0.0.0/0"]
  security_group_id = "${aws_security_group.test-sg.id}"
}
(6) SSH Key 작성
EC2 인스턴스에 원격 접속을 위한 SSH Key를 생성한다.
[root@test test] cat key.tf
resource "tls_private_key" "example" {
  algorithm = "RSA"
  rsa_bits  = 4096

  provisioner "local-exec" {
    command = "echo '${self.private_key_pem}' > ./aws-key.pem"
  }
}

resource "aws_key_pair" "terraform-key" {
  key_name = "aws-key"
  public_key = "${tls_private_key.example.public_key_openssh}"
}
(7) EC2 인스턴스 작성
앞서 생성한 리소스를 기반으로 실제 EC2 인스턴스를 생성한다.
[root@test test] cat instance.tf
variable "key_pair" {
  default = "aws-key"
}

resource "aws_instance" "ubuntu-ssh-server" {
    ami = "ami-0b9064170e32bde34"
    instance_type = "t2.micro"
    subnet_id = "${module.aws-network-configs.test-subnet-a-id}"
    vpc_security_group_ids = [
        "${module.aws-network-configs.test-sg-id}"
    ]
    key_name = "${var.key_pair}"
    count = 1
    tags ={
        Name = "test-instance"
    }
    associate_public_ip_address = true
}
참고
앞선 예제 코드는 해당 Github 저장소를 통해 테스트해볼 수 있다.
3. Terraform 플러그인 설치
작성된 HCL 코드 내용을 기반으로 디렉토리 내 테라폼 환경을 초기화한다. 초기화 과정에서 클라우드 플랫폼에 맞는 플러그인 모듈을 설치한다. 작성된 HCL 코드의 디렉토리로 이동한 이후 해당 명령을 수행한다.
[root@test test] terraform init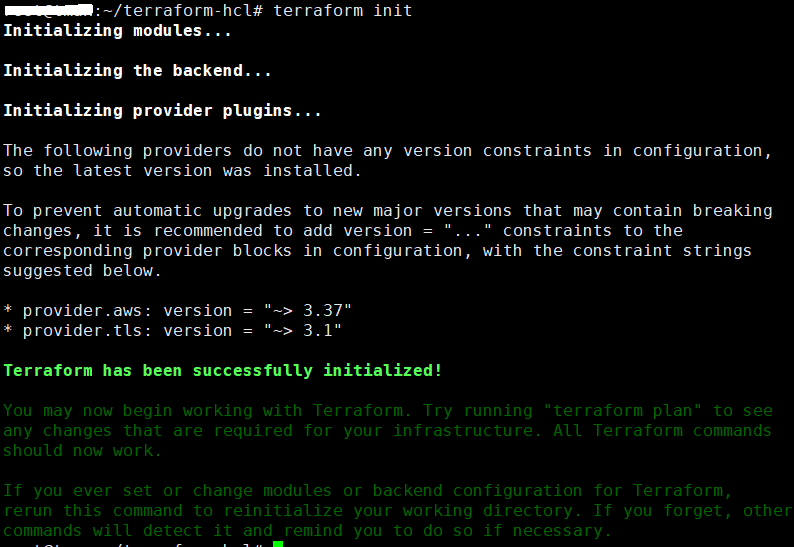
4. Terraform Dry-Run
Terraform은 작성된 HCL 코드 내용을 기반으로 리소스 프로비저닝을 수행하기 전에 해당 동작이 인프라 환경에 미칠 영향을 확인하기 위한 Dry-Run 명령을 사용할 수 있다. 작성된 HCL 코드의 디렉토리에서 해당 명령을 수행한다.
[root@test test] terraform plan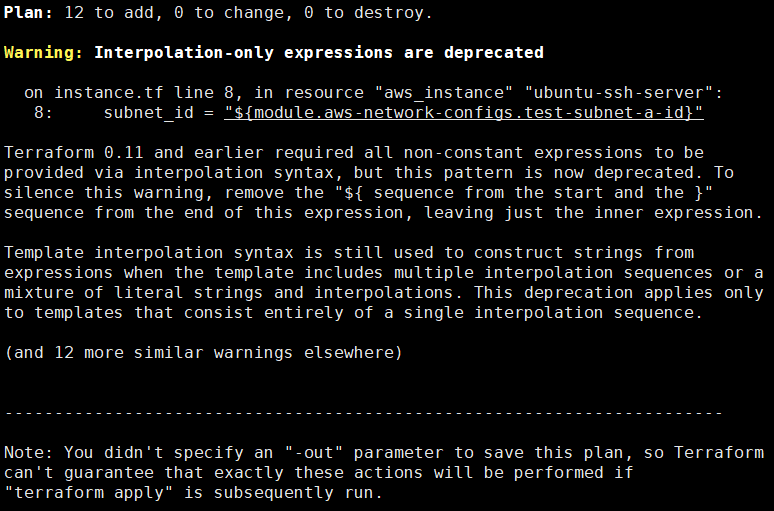
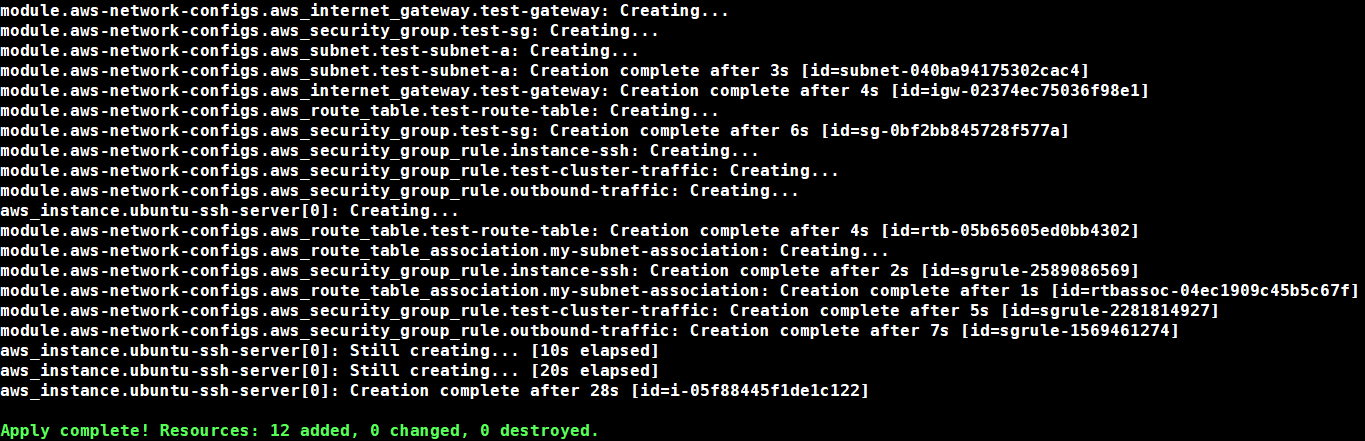
5. Terraform 실행
Plan 명령을 통해 Dry-Run 테스트를 수행한 이후 문제가 없다고 판단되면 해당 HCL 코드 내용대로 리소스 프로비저닝을 수행한다. 작성된 HCL 코드의 디렉토리에서 해당 명령을 수행한다.
[root@test test] terraform applyterraform apply 명령을 실행할 경우 해당 명령을 정말로 실행할 것인지를 확인한다. 'yes'를 입력하여 체크한다.

모든 동작이 완료된 이후 성공적으로 리소스 배포가 완료되면 'Apply complete!'라는 메세지와 함께 리소스 배포 현황을 간단하게 요약하여 출력해준다.
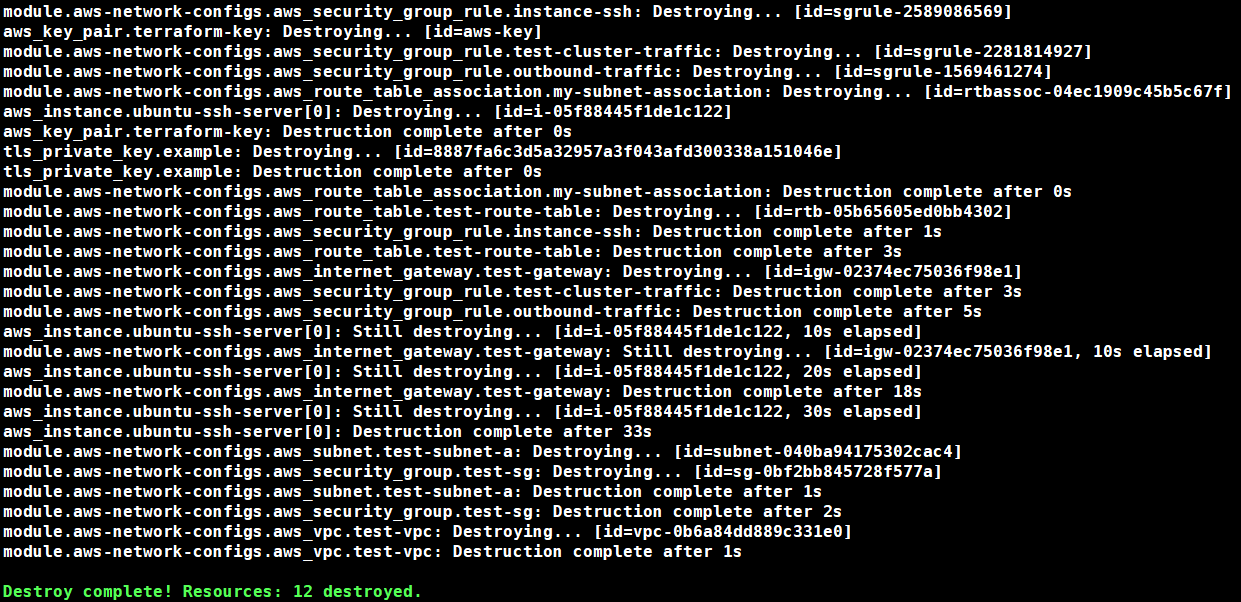
5. Terraform 실행 취소
terraform의 사용자들은 경우에 따라서 배포된 리소스를 다시 삭제하고 초기화하고 싶은 경우가 있을 수 있다. 기본적으로 해당 리소스들을 직접 콘솔에서 하나하나씩 삭제하는 방법도 있지만 terraform은 이러한 사용자들을 위해 'terraform apply'를 통해 배포한 리소스를 그대로 삭제해주는 destroy 명령을 제공해준다. 작성된 HCL 코드의 디렉토리에서 해당 명령을 수행한다.
[root@test test] terraform destroyterraform destory 명령도 동일하게 실행 여부를 확인한다. 똑같이 'yes'를 입력하여 체크한다.

모든 동작이 완료된 이후 성공적으로 리소스 삭제가 완료되면 'Destroy complete!'라는 메세지를 출력해준다.
참고