[수업 목표]
- Flask 프레임워크를 활용해서 API를 만들 수 있다.
- '모두의책리뷰' API를 만들고 클라이언트에 연결한다.
- '나홀로메모장' API를 만들고 클라이언트와 연결한다.
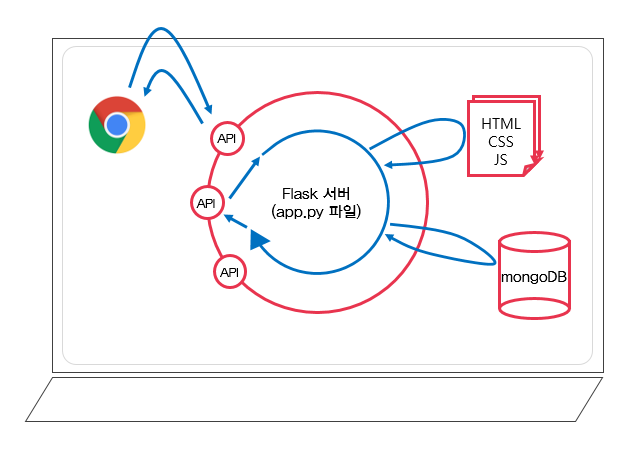
Flask
Flask 프레임워크: 서버를 구동시켜주는 편한 코드 모음. 서버를 구동하려면 필요한 복잡한 일들을 쉽게 가져다 쓸 수 있습니다.
💡Flask 서버를 만들 때, 항상,
프로젝트 폴더 안에,
ㄴstatic 폴더 (이미지, css파일을 넣어둡니다)
ㄴtemplates 폴더 : HTML 파일을 담아두고, 불러오는 역할
ㄴapp.py 파일
이렇게 세 개를 만들어두고 시작
- html 파일 불러오기
👉 flask 내장함수 render_template를 이용합니다. 바로 이게 프레임워크의 위력!
from flask import Flask, render_template
app = Flask(__name__)

## URL 별로 함수명이 같거나,
## route('/') 등의 주소가 같으면 안됩니다.

@app.route('/')
def home():
   return render_template('index.html')

if __name__ == '__main__':
   app.run('0.0.0.0', port=5000, debug=True)
Flask시작하기 - 본격 API 만들기
GET, POST 방식
여러 방식(링크)이 존재하지만 우리는 가장 많이 쓰이는 GET, POST 방식에 대해 다룸.
- GET → 통상적으로! 데이터 조회(Read)를 요청할 때
예) 영화 목록 조회
→ 데이터 전달 : URL 뒤에 물음표를 붙여 key=value로 전달
→ 예: google.com?q=북극곰- POST → 통상적으로! 데이터 생성(Create), 변경(Update), 삭제(Delete) 요청 할 때
예) 회원가입, 회원탈퇴, 비밀번호 수정
→ 데이터 전달 : 바로 보이지 않는 HTML body에 key:value 형태로 전달
<GET, POST 요청에서 클라이언트의 데이터를 받는 방법>
[코드스니펫] - GET 요청 API코드
@app.route('/test', methods=['GET'])
def test_get():
   title_receive = request.args.get('title_give')
   print(title_receive)
   return jsonify({'result':'success', 'msg': '이 요청은 GET!'})
[코드스니펫] - GET 요청 확인 Ajax코드
$.ajax({
    type: "GET",
    url: "/test?title_give=봄날은간다",
    data: {},
    success: function(response){
       console.log(response)
    }
  })
[코드스니펫] - POST 요청 API코드
@app.route('/test', methods=['POST'])
def test_post():
   title_receive = request.form['title_give']
   print(title_receive)
   return jsonify({'result':'success', 'msg': '이 요청은 POST!'})
[코드스니펫] - POST 요청 확인 Ajax코드
$.ajax({
    type: "POST",
    url: "/test",
    data: { title_give:'봄날은간다' },
    success: function(response){
       console.log(response)
    }
  })