
본 게시글은 src/component/user/경로의 AddUserComponent에 대한 소스 리뷰로써 개인적으로 진행하는 toy project의 일부입니다.
전체 소스
import React from 'react'

import TextField from '@material-ui/core/TextField';
import Typography from '@material-ui/core/Typography';
import Button from '@material-ui/core/Button';

import ApiService from '../../ApiService';


class AddUserComponent extends React.Component{
	constructor(props){
		super(props);

		this.state={
			username:'',
			password:'',
			firstName:'',
			lastName:'',
			age:'',
			salary:'',
			message:null
		}
	}

	onChange=(e)=>{
		this.setState({[e.target.name]:e.target.value})
	}

	saveUser=(e)=>{
		e.preventDefault();

		let user={
			username:this.state.username,
			password:this.state.password,
			firstName:this.state.firstName,
			lastName:this.state.lastName,
			age:this.state.age,
			salary:this.state.salary
		}

		ApiService.addUser(user)
		.then(res=>{
			this.setState({message:user.username+"님이 성공적으로 등록되었습니다."})

			console.log(this.state.message);
			this.props.history.push('/kwonnee/users/list');
		})
		.catch(err=>{
			console.log('saveUser() ERROR',err);
		})
	}

	render(){
		return(
			<div>
				<Typography variant="h4" style={style}>Add User</Typography>
				<form style={formContainer}>
					<TextField type="text" placeholder="please input your username" name="username"
							fullWidth margin="normal" value={this.state.username} onChange={this.onChange}/>

					<TextField type="text" placeholder="please input your password" name="password"
							fullWidth margin="normal" value={this.state.password} onChange={this.onChange}/>

					<TextField type="text" placeholder="please input your first name" name="firstName"
							fullWidth margin="normal" value={this.state.firstName} onChange={this.onChange}/>

					<TextField type="text" placeholder="please input your last name" name="lastName"
							fullWidth margin="normal" value={this.state.lastName} onChange={this.onChange}/>

					<TextField type="text" placeholder="please input your age" name="age"
							fullWidth margin="normal" value={this.state.age} onChange={this.onChange}/>

					<TextField type="text" placeholder="please input your salary" name="salary"
							fullWidth margin="normal" value={this.state.salary} onChange={this.onChange}/>

					<Button variant="contained" color="primary" onClick={this.saveUser}>Save</Button>
				</form>
			</div>
		);
	}
}

const formContainer={
	display:'flex',
	flexFlow:'row wrap'
}

const style={
	display:'flex',
	justifyContent:'center'
}
export default AddUserComponent;
roll
해당 소스는 사용자 목록 중, 추가로 사용자를 등록하려 할 때, 호출되는 컴포넌트
소스 분석
소스 분석은 전체 소스 line 기준, 위에서 아래로 진행하도록 하겠다.
1. constructor
첫번째로 컴포넌트 페이지가 열릴 때, 가장 먼저 호출되는 constructor 부분이다.
constructor(props){
	super(props);

	this.state={
		username:'',
        password:'',
		firstName:'',
		lastName:'',
		age:'',
		salary:'',
		message:null
	}
}| 변수명 | 설명 |
|---|---|
| username | 사용자 이름 |
| password | 패스워드 |
| firstName | 이름 |
| lastName | 성 |
| age | 나이 |
| salary | 봉급 |
| message | API통신 상태 메시지 |
2. onChange
onChange=(e){
	this.setState(
		{[e.target.name]:e.target.value}
	);
}- onChange:
요소값이 변경되는 것을 인지하고 이를 토대로 사용자 정의 함수가 실행되도록 하는 이벤트 함수이다.
내부 로직을 살펴보면 state값 변경 기능을 수행하는 것을 알 수 있다.
즉, 해당 함수는 <input>태그의 value값이 바뀔 경우, 그 값으로 state 값을 변경해주는 역할을 수행한다고 볼 수 있다.
3. saveUser
saveUser=(e)=>{
	e.preventDefault();

	let user={
		username:this.state.username,
		password:this.state.password,
		firstName:this.state.firstName,
		lastName:this.state.lastName,
		age:this.state.age,
		salary:this.state.salary
	}

	ApiService.addUser(user)
	.then(res=>{
		this.setState({message:user.username+'님이 성공적으로 등록되었습니다.'})
		this.props.history.push('/');
	})
	.catch(err=>{
		console.log('saveUser ERROR',err);
	})
}
해당 함수는 작성한 정보에 대해 저장 버튼을 누를 시, 호출되는 함수이다.
1. 앞서 언급했던 onChange를 통해 저장된 state 값을 user라는 지역변수에 저장
2. ApiService를 통해 Back단으로 해당 정보를 넘겨 실 데이터 Insert 작업 진행
3. 처리가 완료된 후, 루트 페이지('/')로 페이지 이동
4. render
render(){
	return(
		<div>
			<Typography variant="h4" style={style}>Add User</Typography>
			<form style={formContainer}>
				<TextField type="text" placeholder="please input your username" name="username"
						fullWidth margin="normal" value={this.state.username} onChange={this.onChange}/>

				<TextField type="text" placeholder="please input your password" name="password"
						fullWidth margin="normal" value={this.state.password} onChange={this.onChange}/>

				<TextField type="text" placeholder="please input your first name" name="firstName"
						fullWidth margin="normal" value={this.state.firstName} onChange={this.onChange}/>

				<TextField type="text" placeholder="please input your last name" name="lastName"
						fullWidth margin="normal" value={this.state.lastName} onChange={this.onChange}/>

				<TextField type="text" placeholder="please input your age" name="age"
						fullWidth margin="normal" value={this.state.age} onChange={this.onChange}/>

				<TextField type="text" placeholder="please input your salary" name="salary"
						fullWidth margin="normal" value={this.state.salary} onChange={this.onChange}/>

				<Button variant="contained" color="primary" onClick={this.saveUser}>Save</Button>
			</form>
		</div>
	);
}
위 JSX에서 역시 React UI 라이브러리인 Material UI를 사용했으며
이를 통해 렌더링된 화면은 아래와 같다.
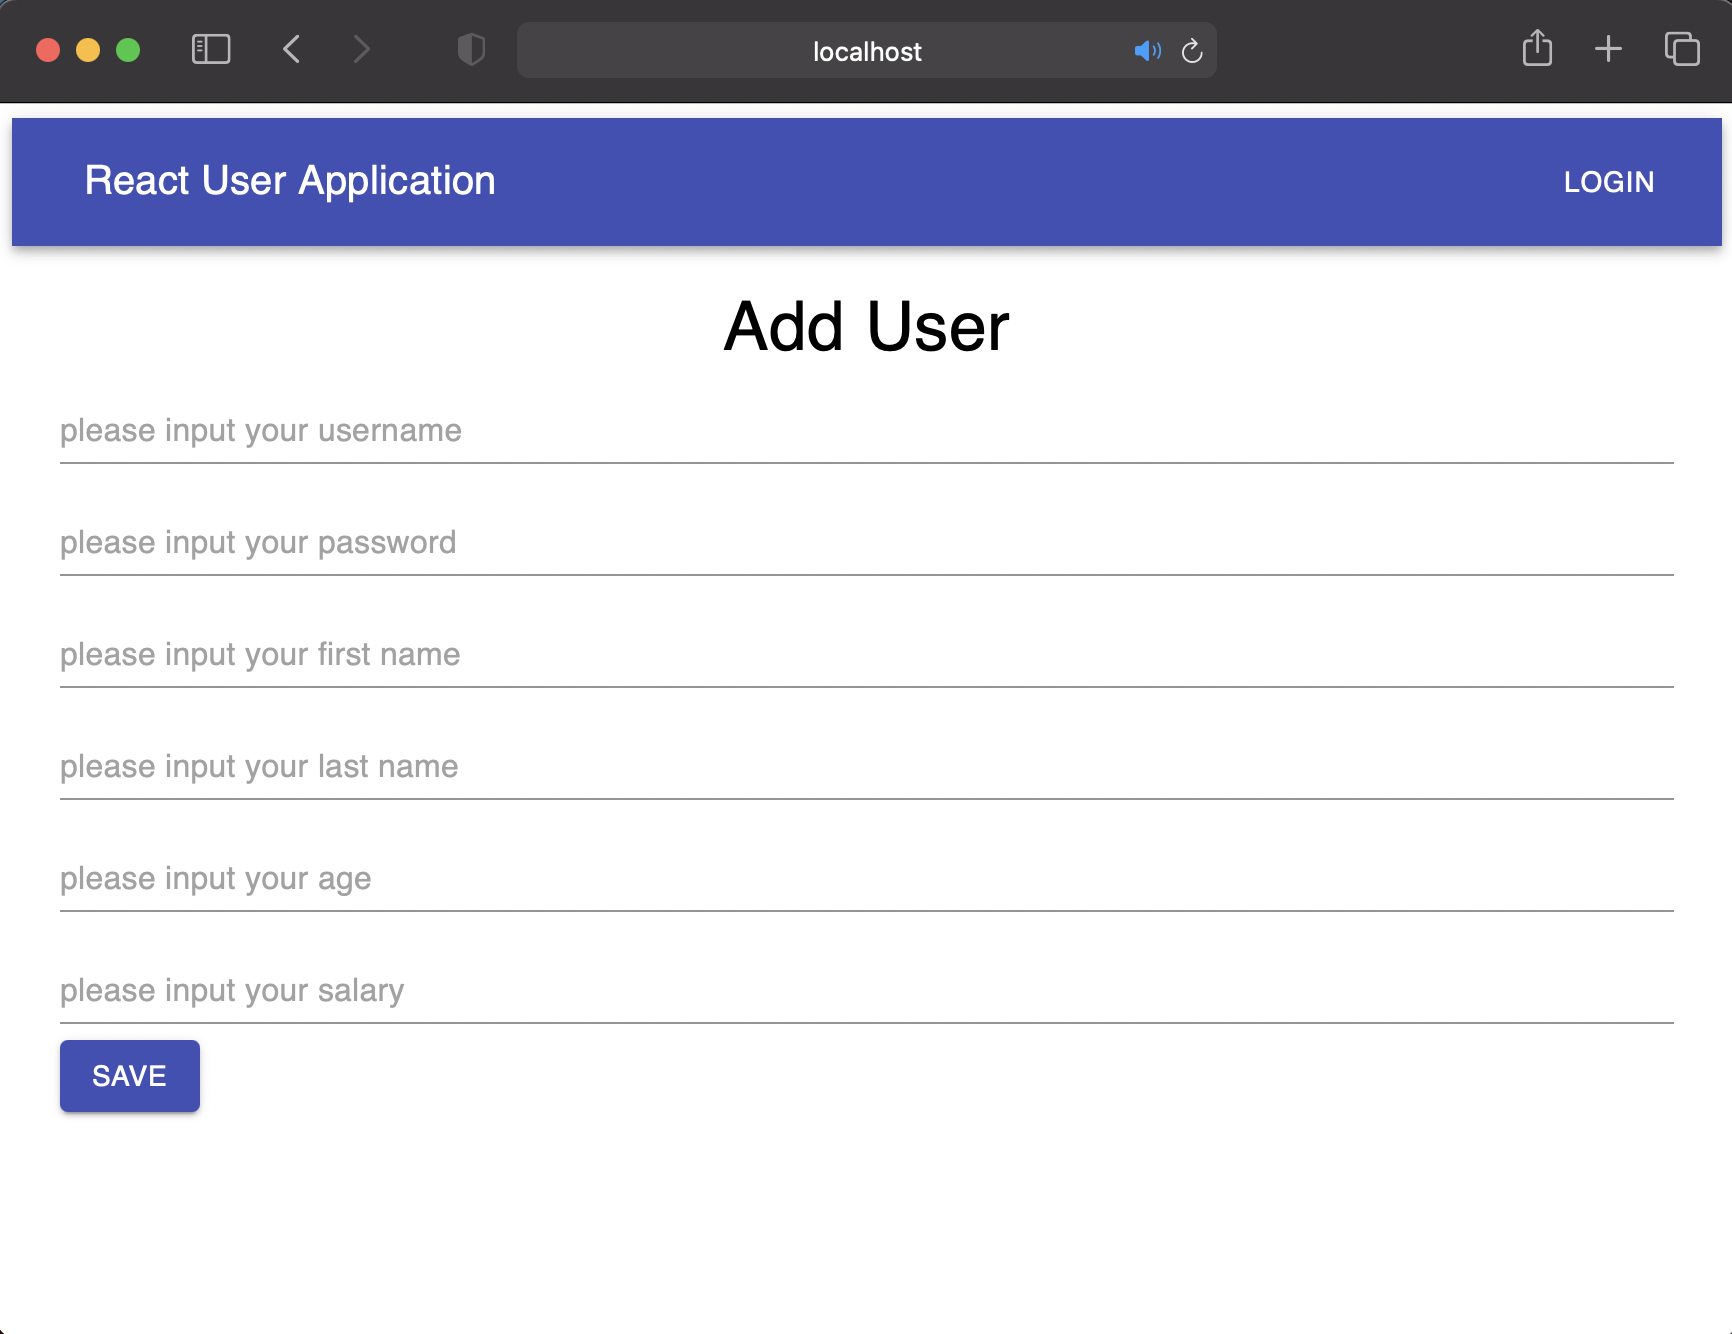

천천히, 완벽히 배워나가고자 하는 웹 서비스 엔지니어