image 를 SD카드에 매번 복사하는 것은 힘들기 때문에 uboot을 올렸다.
reference
https://velog.io/@markyang92/rpi4-64-u-boot-initramfs
https://blog.naver.com/potalgun0921/221692847766
https://www.riscosopen.org/wiki/documentation/show/Software%20information:%20Raspberry%20Pi:%20Firmware
partition작업 중, SD카드에 문제가 있는건지 READ-ONLY로 변경되고 그 이후부터 쓰기작업이 안되는 경우가 많았다. 이것저것 테스트를 하고 싶은데 'mount -o remount rw' 도 먹히지 않아, 가급적 SD카드를 리더기에 꽂는것을 지양하였다.
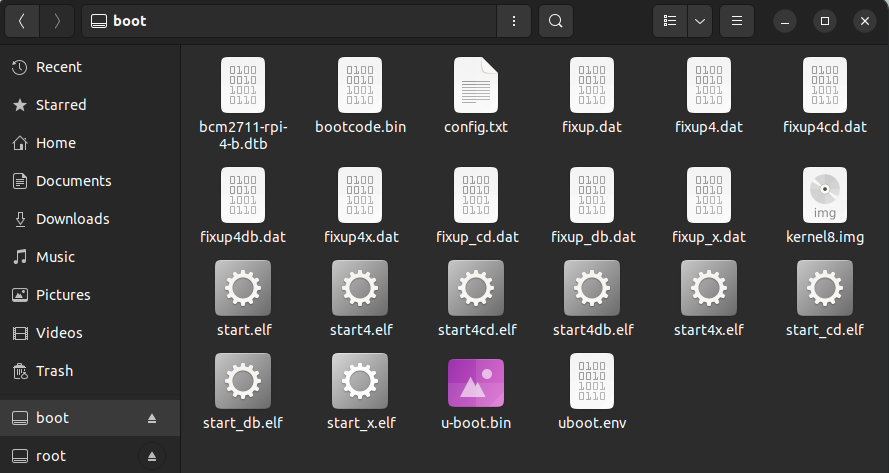
Pi bootloader files
- bootcode.bin: The boot loader for the CPU.
- fixup.dat : Additional code for the GPU. Forms a matched pair with start.elf
- start.elf : The GPU firmware. Forms a matched pair with fixup.dat
- config.txt : Configuration parameters for the boot loader. See below for suggested contents.
Boot process
boot 순서는 아래와 같다. 아래 과정은 참고만 한다.
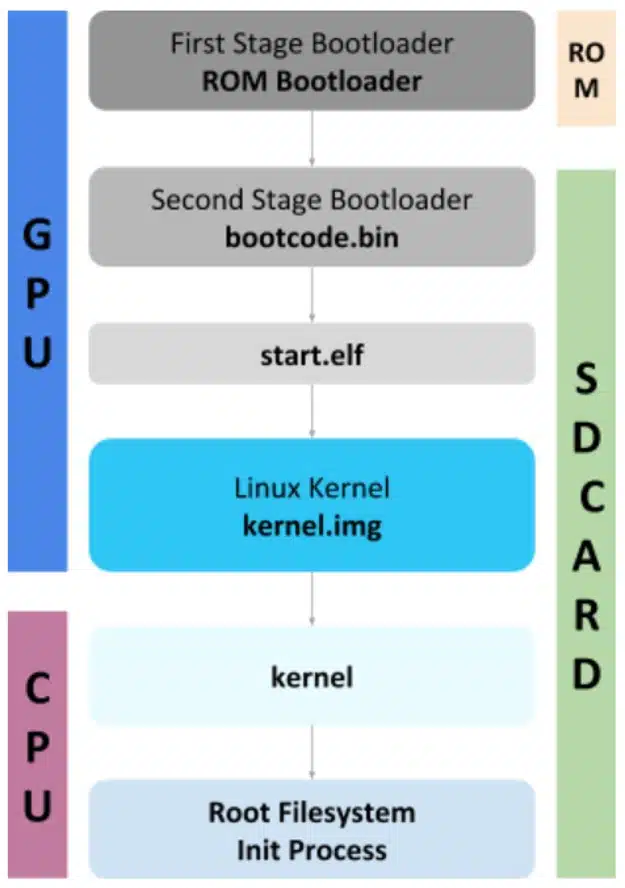
start.elf 는 config.txt / kernel.img / cmdline.txt 를 memory(default 설정이 0x8_0000)에 load 하고, GPU가 ARM CPU를 wake-up 한다. 그 이후 core의 pc를 0x8_0000로 jump한다.
booting 과정은 Linux boot loader and boot in Raspberry Pi 에 잘 설명되어 있다.
SD card에 u-boot.bin을 넣고, config.txt의 kernel을 u-boot.bin 으로 수정한다. 그러면 0x8_0000 에 u-boot.bin이 위치하게 된다.
arm_64bit=1
core_freq_min=500
enable_gic=1
enable_uart=1
kernel=u-boot.bin
image는 변환이 필요하다.
../u-boot/tools/mkimage -A arm64 -C none -O u-boot -T standalone -a 0x180000 -e 0x180000 -d kernel8.img /tftpboot/kernel8.imguboot의 boot command는 아래와 같이 설정하였다.
tftpboot 0x180000 kernel8.img
bootm 0x180000
go 0x180000