1. 자식 위젯이 부모 위젯의 state 사용하고 싶으면
3-step
1) 생성
total 변수 생성
2) 등록
자식 위젯에 등록
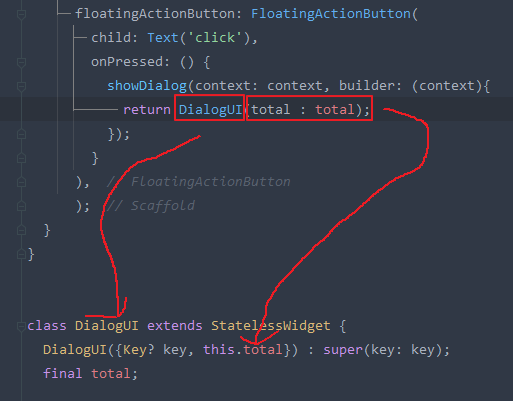
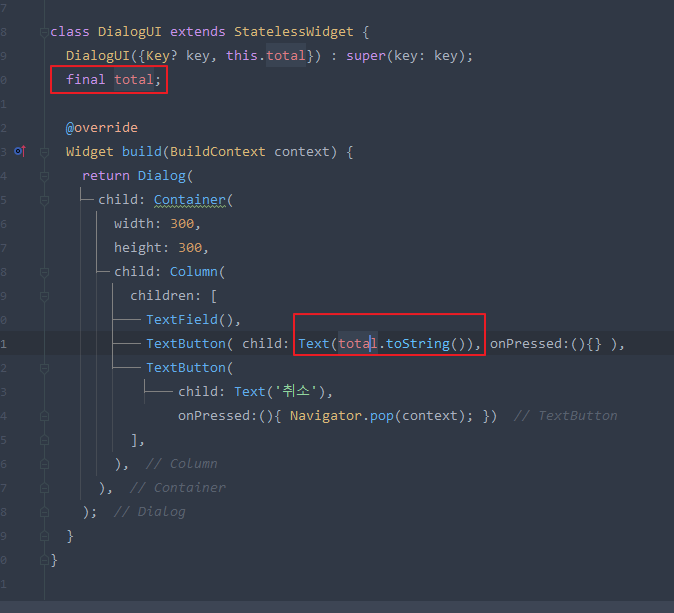
3) 사용
자식 위젯에세 보낸 state를 사용
2. 자식 위젯이 부모 위젯의 state 변경하기
1) 함수생성
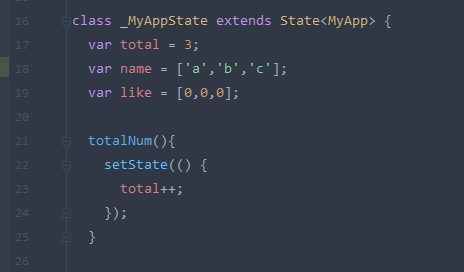
함수 안에 setState 함수를 또 작성해야함!
2) 함수 등록
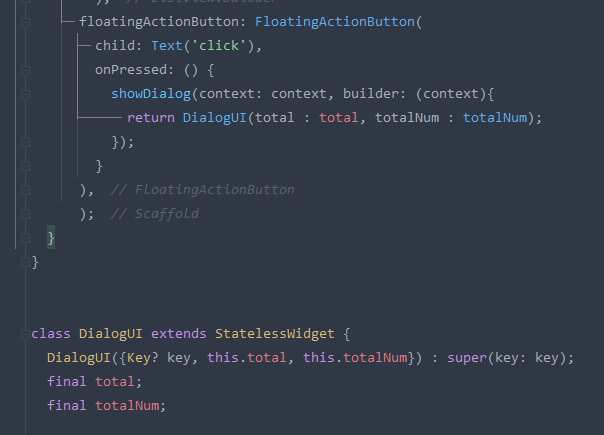 이미 작성했던 코드와 같이 함수도 변수까지 등록해준다.
3) 함수 사용
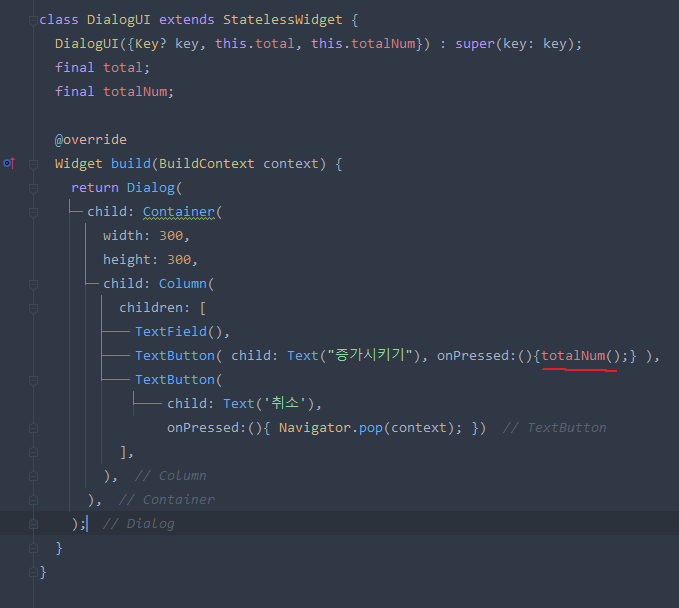
증가시키기 라는 버튼을 클릭시 부모에서 보낸 함수가 실행됨.
3. state 심화
TextField() 안의 문자 입력을 받고 리스트에 추가하기
import 'package:flutter/material.dart';
void main() {
runApp(MaterialApp(
home: MyApp(),
));
}
class MyApp extends StatefulWidget {
MyApp({Key? key}) : super(key: key);
State<MyApp> createState() => _MyAppState();
}
class _MyAppState extends State<MyApp> {
var total = 3;
var name = ['a','b','c'];
var like = [0,0,0];
totalNum(){
setState(() {
total++;
});
}
addName(a){
setState(() {
name.add(a);
});
}
build(context) {
return Scaffold(
appBar: AppBar(title: Text(total.toString()),),
bottomNavigationBar: BottomAppBar(),
body: ListView.builder(
itemCount: name.length,
itemBuilder: (c, i){
return ListTile(
leading: Icon(Icons.star),
title: Text(name[i]),
);
},
),
floatingActionButton: FloatingActionButton(
child: Text('click'),
onPressed: () {
showDialog(context: context, builder: (context){
return DialogUI(totalNum : totalNum, addName: addName);
});
}
),
);
}
}
class DialogUI extends StatelessWidget {
DialogUI({Key? key, this.totalNum, this.addName}) : super(key: key);
final totalNum;
final addName;
var test = TextEditingController(); //test.text 를 해야 값 가져옴.
var test2 =''; // 그냥 쓰면 됨
Widget build(BuildContext context) {
return Dialog(
child: Container(
width: 300,
height: 300,
child: Column(
children: [
//TextField(controller: test.text), test.text를 써야 값 가져옴!
TextField(onChanged: (a){test2 = a; print(test2);},),
TextButton( child: Text("증가시키기"), onPressed:(){
addName(test2);
Navigator.pop(context);
} ),
TextButton(
child: Text('취소'),
onPressed:(){ Navigator.pop(context); })
],
),
),
);
}
}

안녕하세요.