
PRG(Post-Redirect-Get) 패턴 이란?
PRG(Post-Redirect-Get) 패턴은 웹 개발 시에 권장 되는 디자인 패턴 중 하나로, HTTP Post 요청에 대한 응답이 또 다른 URL로의 GET 요청을 위한 리다이렉트(응답 코드가 3XX)여야 한다는 것을 의미한다.
요약 → POST로 방식으로 온 요청에 대해서 GET 방식의 웹페이지로 리다이렉트 시키는 것
PRG 패턴을 사용하지 않으면 발생하는 문제점
-
새로고침으로 인해 동일한 요청을 연속적으로 보내지는 이슈 발생
→ 이미 서버에서 한번 처리한 요청을 연속적으로 계속 보낸 경우 , 만약 해당 로직이 결제 같은 로직인 경우 중복 결제가 일어나는 문제 발생 -
POST 요청은 URL을 공유하더라도 다른 사람과 공유 할 수 없음
→ form 형식의 POST 요청을 보내게 되면 Parameter 값들이 URL에 포함되지 않기 때문에, 특정 Parameter가 필요한 POST 요청인 경우, URL을 복붙 하더라도 서버에서는 에러 페이지를 내보낼 수 밖에 없음. 즉 form이 없는데 POST 요청을 보내는 문제 발생
아이템 관리 로직 예시
아이템을 관리하는 도메인이 있다고 해보자.
사용자는 아이템을 등록 할 수 있다. 만약 Post 방식으로 아이템 객체를 입력 받아 저장을 하는 로직이 있다고 하자. 클라이언트가 /add를 호출하고, 아이템을 등록하면 성공적으로 저장이 된다.
문제는 그 다음이다. 저장 후 클라이언트에서 새로고침(/add 재호출)을 하면 이전에 입력해둔 form 데이터들이 다시 POST 방식으로 서버에 요청을 보낸다. 그럼 서버는 이전에 작동한 로직과 동일하게 item 을 저장한다.
이렇게 된 경우 itemRepository에는 동일한 요청인 item 객체가 저장이 될 수 있다.
클라이언트에서 실수로 새로 고침을 눌러도 이런 문제가 발생할 수 있기에, 서버에서 PRG 패턴을 사용해 이런 문제를 잡아줘야한다.
//컨트롤러
@PostMapping("/add")
    public String addItemV4(Item item) {
        itemRepository.save(item);
        return "/basic/item";
    }

// Item 클래스
@Data
public class Item {

    private Long id;
    private String itemName;
    private Integer price;
    private Integer quantity;

    public Item(){}

    public Item(String itemName, Integer price, Integer quantity) {
        this.itemName = itemName;
        this.price = price;
        this.quantity = quantity;
    }
}
add.html
<!DOCTYPE HTML>
<html xmlns:th="http://www.thymeleaf.org">
<head>
    <meta charset="utf-8">
    <link th:href="@{/css/bootstrap.min.css}"
          href="../css/bootstrap.min.css" rel="stylesheet">

    <style>
        .container {
            max-width: 560px;
        } </style>
</head>
<body>
<div class="container">
    <div class="py-5 text-center">
        <h2>상품 등록 폼</h2></div>
    <h4 class="mb-3">상품 입력</h4>
    <form action="item.html" th:action method="post">
        <div>
            <label for="itemName">상품명</label>
            <input type="text" id="itemName" name="itemName" class="form-control" placeholder="이름을 입력하세요"></div>
        <div>
            <label for="price">가격</label>
            <input type="text" id="price" name="price" class="form-control" placeholder="가격을 입력하세요">
        </div>
        <div>
            <label for="quantity">수량</label>
            <input type="text" id="quantity" name="quantity" class="form-control" placeholder="수량을 입력하세요"></div>
        <hr class="my-4">
        <div class="row">
            <div class="col">
                <button class="w-100 btn btn-primary btn-lg" type="submit">상품
                    등록
                </button>
            </div>
            <div class="col">
                <button class="w-100 btn btn-secondary btn-lg"
                        onclick="location.href='items.html'" type="button"
                        th:onclick="|location.href='@{/basic/items}'|">취소
                </button>
            </div>
        </div>
    </form>
</div> <!-- /container -->
</body>
</html>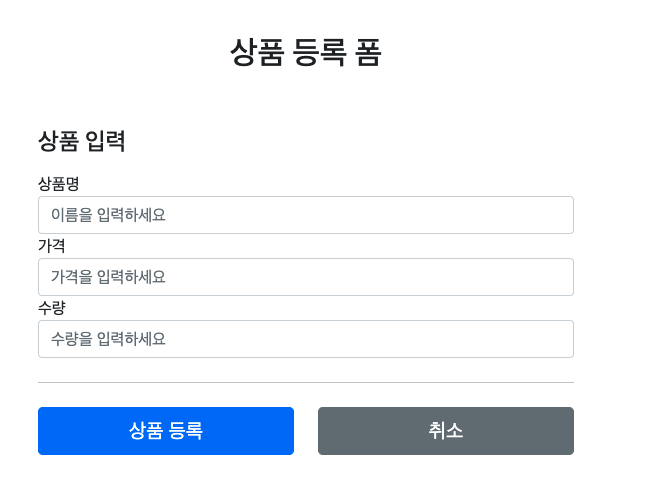
items.html
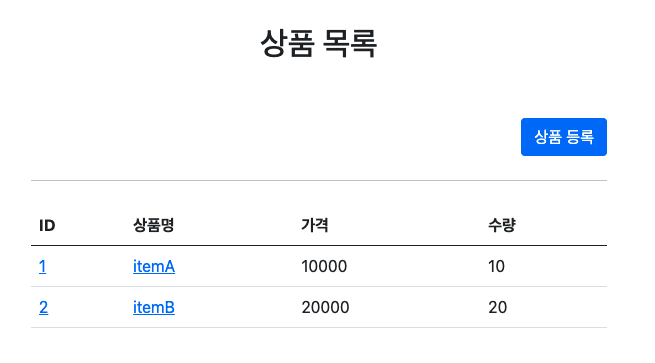
<!DOCTYPE HTML>
<html xmlns:th="http://www.thymeleaf.org">
<head>
    <meta charset="utf-8">
    <link th:href="@{/css/bootstrap.min.css}"
          href="../css/bootstrap.min.css" rel="stylesheet">
</head>
<body>

<div class="container" style="max-width: 600px">
    <div class="py-5 text-center">
        <h2>상품 목록</h2></div>
    <div class="row">
        <div class="col">
            <button class="btn btn-primary float-end"
                    onclick="location.href='addForm.html'"
                    th:onclick="|location.href='@{/basic/items/add}'|"
                    type="button">상품 등록
            </button>

        </div>
    </div>
    <hr class="my-4">
    <div>
        <table class="table">
            <thead>
            <tr>
                <th>ID</th>
                <th>상품명</th>
                <th>가격</th>
                <th>수량</th>
            </tr>
            </thead>
            <tbody>
            <tr th:each="item: ${items}">
                <td><a href="item.html" th:href="@{/basic/items/{itemId}(itemId=${item.id})}"
                       th:text="${item.id}">회원id</a></td>
                <td><a href="item.html" th:href="@{/basic/items/{itemId}(itemId=${item.id})}"
                       th:text="${item.itemName}">상품명</a></td>
                <td th:text="${item.price}">10000</td>
                <td th:text="${item.quantity}">10</td>
            </tr>
            </tbody>
        </table>
    </div>
</div> <!-- /container -->
</body>
</html>
그렇다면 이런 문제를 어떻게 해결 할 수 있을까?? 방법은 간단하다. 서버에서 아이템 저장 로직을 처리한 후, 클라이언트에게 redirect를 보내 다른 페이지로 이동을 시키면 된다. 이때 이 페이지는 GET 요청을 보내는 페이지로 보내, 새로 고침을 하더라도 문제가 되지 않도록 한다. 그렇다면 코드를 수정해보자.
💡 redirect 란?re(다시) + 지시하다(direct) 를 의미한다.
클라이언트에서 www.hello.org 라는 URL 을 웹 서버에 요청을 했다고 해보자.
그렇다면 서버는 HTTP 응답 메시지에 www.bye.org로 가라! 라고 브라우저에게 다른 URL을 지시 할 수 있다.
이렇게 리다이렉트를 이용하면 클라이언트는 서버에 www.hello.org라는 요청을 보내도 www.bye.org 에 대한 페이지를 볼 수 있다.
@Controller
@RequestMapping("/basic/items")
public class BasicItemController {

    private final ItemRepository itemRepository;

    @Autowired
    public BasicItemController(ItemRepository itemRepository) {
        this.itemRepository = itemRepository;
    }

    @GetMapping("/{itemId}")
    public String item(@PathVariable long itemId, Model model) {
        Item item = itemRepository.findById(itemId);
        model.addAttribute("item", item);
        return "basic/item";
    }

    @PostMapping("/add") // 리다이렉트 적용 PRG 패턴
    public String addItemV5(Item item) {
        itemRepository.save(item);
        return "redirect:/basic/items/" + item.getId();
    }
}
/add 가 호출된 경우 컨트롤러에서 item 객체를 저장한 후, redirect 방식으로 /basic/items/item의 id 를 호출 한다.
/basic/items/item의 id 는 컨트롤러내에 이미 GetMapping 되어 있다.
해당 url를 호출하면 클라이언트에서 새로고침을 하더라도 Get 요청인 페이지를 새로고침 하기 때문에 이전에 등록해둔 Post 요청에 대한 파라미터가 서버로 넘어오지 않는다.
RedirectAttributes
하지만 위의 방식대로 하면 클라이언트 입장에서 저장이 잘 되었는지, 안 되었는지 한번에 파악하기가 어렵다. 따라서 저장이 잘 되었으면 item 페이지에 “ 저장되었습니다.”라는 메시지가 출력되게 해보자.
여기서 사용하는 것은 RedirectAttributes를 이용하는 것이다.
RedirectAttributes 에 status 를 넣어주고, item 페이지에서 status가 true인 경우 “ 저장 완료"라는 문구가 나오도록하면된다.
여기서는 타임리프를 이용해 해당 로직을 제어해보자.
@PostMapping("/add") // 리다이렉트 적용 PRG 패턴 - redirectAttributes 버전
    public String addItemV6(Item item, RedirectAttributes redirectAttributes) {
        Item savedItem = itemRepository.save(item);
        redirectAttributes.addAttribute("itemId", savedItem.getId());
        redirectAttributes.addAttribute("status", true);
        return "redirect:/basic/items/{itemId}";
    }