리액트에서 canvas를 사용하기가 굉장히 까다로운것 같다...
자바스크립트 처럼 간편하게 script로 바로 작성하게 되면 수많은 오류를 보게된다. 그래서 열심히 구글링하여, 방법을 찾았지만, 아직 정확히 이해가 잘 가지않는다. 조금더 많은 공부가 필요할것같다.
예제를 통해 기록해보자. App.js 를 가장 메인으로 코딩으로 시작한다.
첫걸음
Canvas Props
- component 폴더에 canvas.js 를 생성해준다.
- props를 받아 canvas element에 넣어준다.
// canvas.js

<canvas {...props}/>- app.js에서 canvas.js 를 불러온다
// app.js
import Canvas from './components/canvas.js';

<Canvas/>
canvas 접근
- useRef를 이용하여 Canvas의 context에 DOM으로 접근해야한다.
// cavnas.js

const canvasRef = useRef(null);

return <canvas ref={canvasRef} {...props}/>- 이제 canvasRef를 통해서 context를 가져온다
const canvas = canvasRef.current;
const ctx = canvas.getContext('2d')
문제 발생
-
canvasRef를 통해 canvas에 접근하면 Null값에 접근하게된다. 그이유는 컴포너는가 mount 되지 않았기 때문이다.
-
useEffect 를 통해서 해결가능하다
중요한 내용이니 다시한번 언급!
useEffect를 사용하는 이유는, useEffect는 컴포넌트가 처음나타날때(마운트됬을때), 사리질때 (언마운트), 그리고 마지막으로 업데이트 될떄 (특정 변수 바뀔경우) 실행하는 Hook이기 떄문이다.
이 특징을 이용하면 리턴값에 cleanup 함수를 담아 컴포넌트가 언마운트될때 뒷정리를 해줄수있다.
그래서 아까의 코드를 useEffect안에 넣어주면
useEffect(()=>{
const canvas = canvasRef.current;
const ctx = canvas.getContext('2d')
}, [])
나중에 해당변수가 바뀔대마다 등록한 함수가 호출할수있도록 dependencies값을 넣는데, 아직은 한번만 함수를 실행하면 되기에 빈배열을 만든다.
그리기 시작
draw
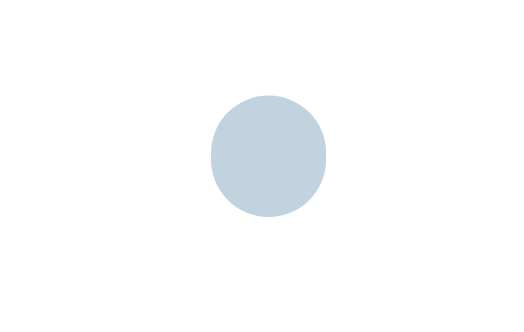
- 이제 draw라는 함수를 통해서 작은 원을 그려보자.
- canvas의 default 크기는 w : 300, h : 150 이라고 한다.
const draw = ctx =>{
	ctx.beginPath();
    ctx.arc(100, 100, 20, 0, Math.PI * 2);
    ctx.fillStyle = '#C1D3DF';
    ctx.fill();
}


useEffect(()=>{
...

draw(ctx);
}, [draw])
짜잔~ 작은 원을 만들수있다.

그리기 시작
animation
- 보통 canvas를 이용하면 animation을 많이 이용하기에 한번 적용해보자
- canvas의 애니메이션을 할때 전프렘이에 그린그림을 지우지 않으면 쭈우우욱 이어지는것 처럼 보이기에 clearRect라는 함수를 만들어 지워주도록한다
- 애니메이션을 적용하기 위해 draw함수에서 frameCount라는 변수를 받아 반지름의 계산을 사용한다.
- frameCount 변수는 useEffect에서 생성하여 0으로 초기화후 1씩 더해주어, 마치 반지름이 0 부터 1까지 커졌다 작아지는 역동적인 원을 만들어보자.
const draw = (ctx, frameCount) =>{
	ctx.clearRect(0,0, ctx.canvas.width, ctx.canvas.height);
	...
    ctx.arc(100, 100, 30 * Math.sin(frameCount * 0.05) ** 2, 0, Math.PI * 2);
	...
}- useEffect내부에 render 함수를 생성한다.
- window.requestAnimationFrame에서 render를 프레임마다 불러온다. 프레임마다 frameCount++ 되어 변경되어진 frameCount를 바탕으로 작은공을 그리게된다.
useEffect(()=>{
...

let frameCount = 0;

const redner = () =>{
	frameCount++;
    draw(ctx, frameCount);
    window.requestAnimationFrame(render);
}

render();

}, [draw]).gif)
최적화
이정도만 해도 애니메이션은 잘작동하지만, 만약 requestAnimationFrame이 호출되고 render가 호출되기전의 시점에서 컴포넌트가 unmount되면 문제가 발생하게 된다.
따라서 컴포넌트가 unmount될시에 애니메이션을 취소해야한다.
requestAnimationFrame는 request identifier라는것을 리턴하기 때문에 이러한 값을 cancelAnimationFrame에 전달하면 캔슬할수있다고한다.
// ex =>

id = window.requestAnimationFrame(callback);
window.cancelAnimationFrame(id)- 따라서, canvas가 unmount 되기 직전에 애니메이션을 캔슬하는 함수(animationFrameId)를 만들어주어 문제를 해결한다.
useEffect(()=>{
...

let animationFrameId;

const redner = () =>{
	animationFrameId = window.requestAnimationFrame(render);
}

render();

return() =>{
	window.cancelAnimationFrame(animationFrameId);
}

}, [draw])
마무리
이제 마무리로 컴포넌트를 따로 만들어주는 작업을 해보자.
app.js
1.에서는 공을 그리는 ball.js 컴포넌트를 컴포넌트폴덩나에 따로만들어주고 따라서 app.js에서는 ball 컴포넌트만 리턴해주면된다.
import React from 'react';
import Ball from './Ball.js';

function App() {
  return <Ball />
}

export default App;- ball 컴포넌트에서는 공을 그렸던 함수 draw를 정의하고 캔버스 컴포넌트를 리턴한다.
- 여기서 draw함수를 Props로 canvas에 넘겨준다.
function Ball() {

  const draw = (ctx, frameCount) => {
    ctx.clearRect(0, 0, stageWidth, stageHeight);
    ctx.beginPath();
    ctx.arc(stageWidth/2, stageHeight/2, 30*Math.sin(frameCount * 0.05)**2, 0, Math.PI * 2);
    ctx.fillStyle = 'pink';
    ctx.fill();
    ctx.closePath();
  }

  return <Canvas draw={draw}/>
}

export default Ball- 그럼 이제 ball에서 보내진, draw함수를 인자로 받아온다. useCanvas라는 이름의 useEffect Hook을 만들어 빼내고, canvas에는 아래 예제와 같이 남긴다.
- 이훅에서는 canvasRef를 리턴해주고 이를 canvas element에 연결한다.
import React from 'react';
import useCanvas from './Hooks/useCanvas.js';

const Canvas = props => {
  const { draw, ...rest } = props;
  const canvasRef = useCanvas(draw);

  return <canvas ref={canvasRef} {...rest}/>
}

export default Canvas;
useCanvas 만든 이유
- useCanvas를 만듬으로써 useEffect Hook을 만들어 재사용성을 높일슀다.
- cavnasRef를 리턴하여 canvas 컴포넌트에 넘겨준다
import React, { useRef, useEffect } from 'react';

const useCanvas = draw => {
  const canvasRef = useRef(null);

  useEffect(() => {
    const canvas = canvasRef.current;
    const ctx = canvas.getContext('2d');
    let frameCount = 0;
    let animationFrameId;

    const render = () => {
      frameCount++;
      draw(ctx, frameCount);
      animationFrameId = window.requestAnimationFrame(render);
    }
    render();

    return () => {
      window.cancelAnimationFrame(animationFrameId);
    }
  }, [draw]);

  return canvasRef
}

export default useCanvas;
진짜 마지막
마지막으로 반응형으로 캔버스의 크기가 윈도우 크기가 바뀔때마다 변하도록 설정해보자
- 또한 화질저하를 방지하기위해 설정도 추가해보자, 아래링크 참고
링크 참고 : https://joey-ful.github.io/canvas/pixel-density-canvas-animation/
- useEffect에 Reszie함수를 선언해주자.
useEffect(() => {
  ...

  const resize = () => {
  }
}, [draw]);- 애니메이션이 그려질 스테이지를 윈도우의 InnerWidth, innerHeight로 설정한다.
- 해당값을 stageWidth와 stageHeight에 저장해준다.
- stageWidth와 stageHeight는 resize외부에서도 사용할것이라 밖에서 선언해준다.
- 실시간으로 바뀌는 윈도우창 크기를 캔버스에 적용하기 위해 resize에서 매번 innerWidthhk innerHeight를 가져온다.
useEffect(() => {
  ...

  let stageWidth = window.innerWidth;
  let stageHeight = window.innerHeight;

  const resize = () => {
    stageWidth = window.innerWidth;
    stageHeight = window.innerHeight;
  }

  ...

}, [draw]);
이번에는 devicePixelRatio를 통해서 윈도우의 픽셀미도를 가져와 stageWidth와 stageHeight에 곱해 캔버스의 크기를 설정한다.
devicePixelRatio란? https://developer.mozilla.org/en-US/docs/Web/API/Window/devicePixelRatio
const resize = () => {
  stageWidth = window.innerWidth;
  stageHeight = window.innerHeight;

  const ratio = window.devicePixelRatio;

  canvas.width = stageWidth * ratio;
  canvas.height = stageHeight * ratio;

  ctx.scale(ratio, ratio);
}
이 작업을 통해서 캔버스 크기를 키워졌다. 그래서 이번에는 캔버스가 실제로 보여질 사이즈를 윈도우 창과 같게 맞춰줘여한다. 하는방법은 캔버스의 CSS width와 height를 설정하면 된다.
const reszie = () => {
  ...

  canvas.style.width = stageWidth + 'px';
  canvas.style.height = stageHeight + 'px';
}
캔버스 여러개를 겹칠 수 있도록, position:absolute로 설정후 body 마진을 없애 윈도우 창에 캔버스가 꽉 차도록 한다.
canvas.style.position = 'absolute';
document.body.style.margin = '0';
윈도우창 크기가 변할 때마다 이 resize 함수를 불러오는 이벤트를 단다
const resize = () => {
  ,,,

  window.addEventListener('resize', resize);
}
useEffect에서 resize를 한번 실행해주고 마지막으로 return의 cleanup 함수에서 이벤트를 해제해준다.
useEffect(() => {
  ...

  return () => {
    ...
    window.removeEventListener('resize', resize);
  }
}, [draw]);
우.... 리액트에서 canvas를사용하는것은 너무 복잡한것같다.. 조금더 공부가 필요하다
이자료는 https://joey-ful.github.io/canvas/react-canvas-animation-setting/
참고하여 만들었습니다.
