저번에 이은 react router를 알아보자.
hoo을 사용한다고 해서 어려워지거나 복잡하진않았다 오히려 더욱 간평하고 쉬웠다.
일단 코드를 통해서 알아보자.
import logo from "./logo.svg";
import "./App.css";
import { BrowserRouter, Route, Switch, Link } from "react-router-dom";
import Home from "./components/home";
import Profile from "./components/profile";

function App() {
  return (
    <BrowserRouter>
      <nav>
        <Link to="/">Home</Link>
        <Link to="/profile">Profile</Link>
      </nav>
      <Switch>
        <Route path={["/", "/home"]} exact>
          <Home></Home>
        </Route>
        <Route path="/profile">
          <Profile />
        </Route>
      </Switch>
    </BrowserRouter>
  );
}

export default App;
Home과 Profile을 만들고 Home의 Path는 path에서 배열을 주어 '/', "/home"둘다 이동가능하게 만들었고, profile의 path는 "/path"를 주어 작성했다.
import React from "react";
import { useHistory } from "react-router-dom";

const Home = (props) => {
  const history = useHistory();
  return (
    <>
      <h1>Home</h1>
      <button
        onClick={() => {
          history.push("/profile");
        }}
      >
        Go to Profile
      </button>
    </>
  );
};

export default Home;
그래서 App에서 props를받아 history를 읽어올수있지만 더이상 권장되지 않는 방법이라 한다. 그래서 useHistory를 이용하여 history.push('/profile') Profile의 버튼을 클릭하면 path로 이동할수있도록하였다.
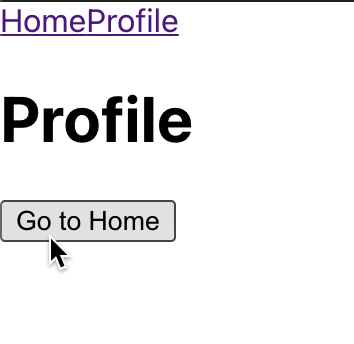
import React from "react";
import { useHistory } from "react-router-dom";

const Profile = (props) => {
  const history = useHistory();
  return (
    <>
      <h1>Profile</h1>
      <button
        onClick={() => {
          history.push("/home");
        }}
      >
        Go to Home
      </button>
    </>
  );
};

export default Profile;
Profile컴포넌트에서도 home과 같은 방법으로 만들어봤다 결과는 성공적!! 너무나 간편하고 좋은 방법인것같다.

Hello :)