WebClient
1. WebClient vs RestTemplate
- API를 호출하기 위해 사용되는 Http Client 모듈
RestTemplate
- Spring 3.0 ~ (deprecated 예정)
- 멀티스레드
- Blocking 동기방식
WebClient
- Spring 5.0 ~
- 싱글스레드
- Non-Blocking 비동기방식
Blocking
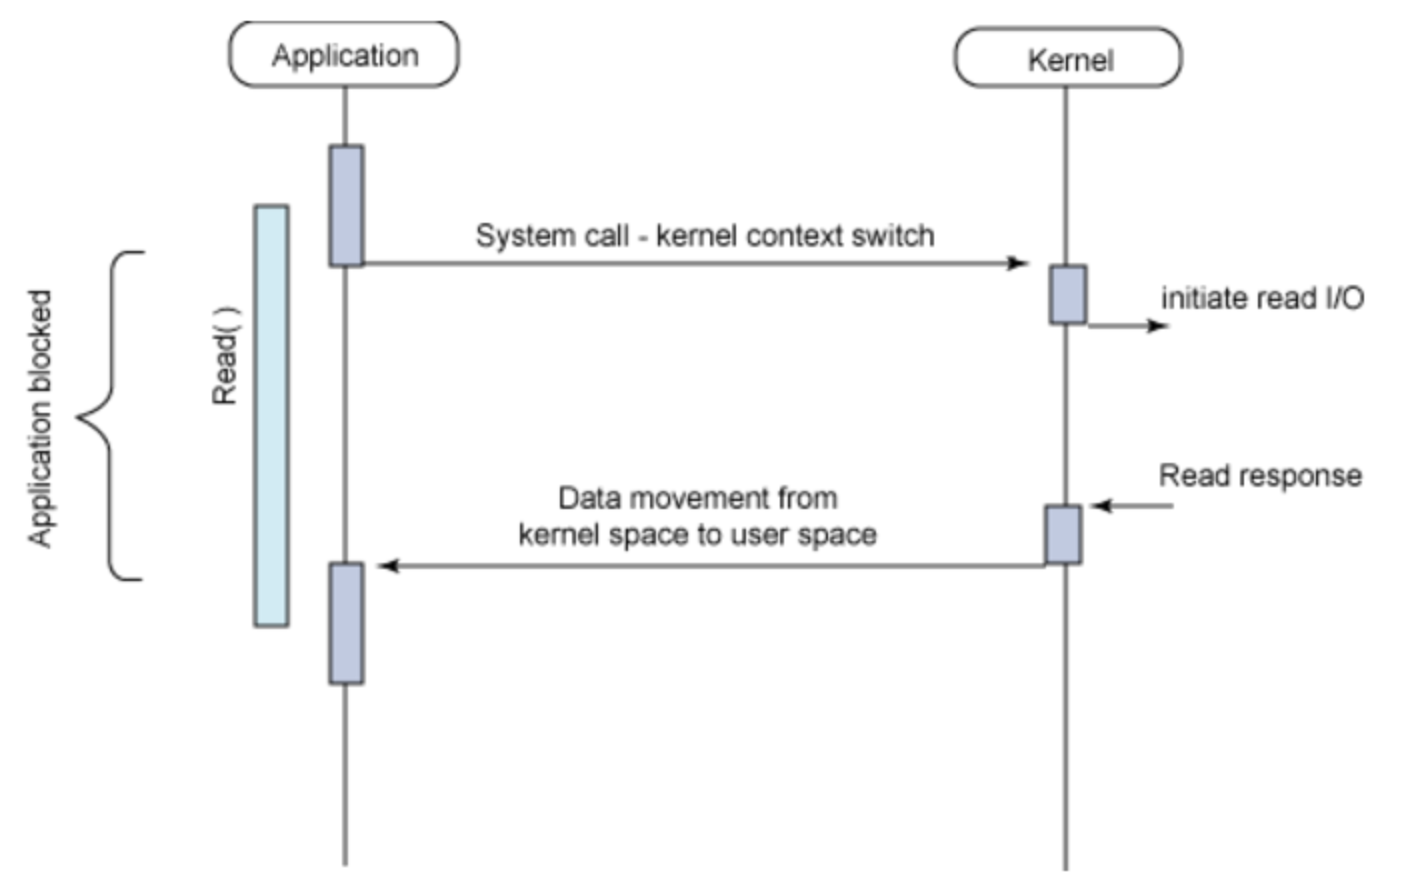
    final StopWatch stopWatch = new StopWatch();
    stopWatch.start();

    for (int i = 0; i < 3; i++) {
        final ResponseEntity<String> response =
                restTemplate.exchange(THREE_SECOND_URL, HttpMethod.GET, HttpEntity.EMPTY, String.class);
        assertThat(response.getBody()).contains("success");
    }

    stopWatch.stop();
    System.out.println(stopWatch.getTotalTimeSeconds());
3s 3번 -> 9.xxs
Asynchronous Non-Blocking
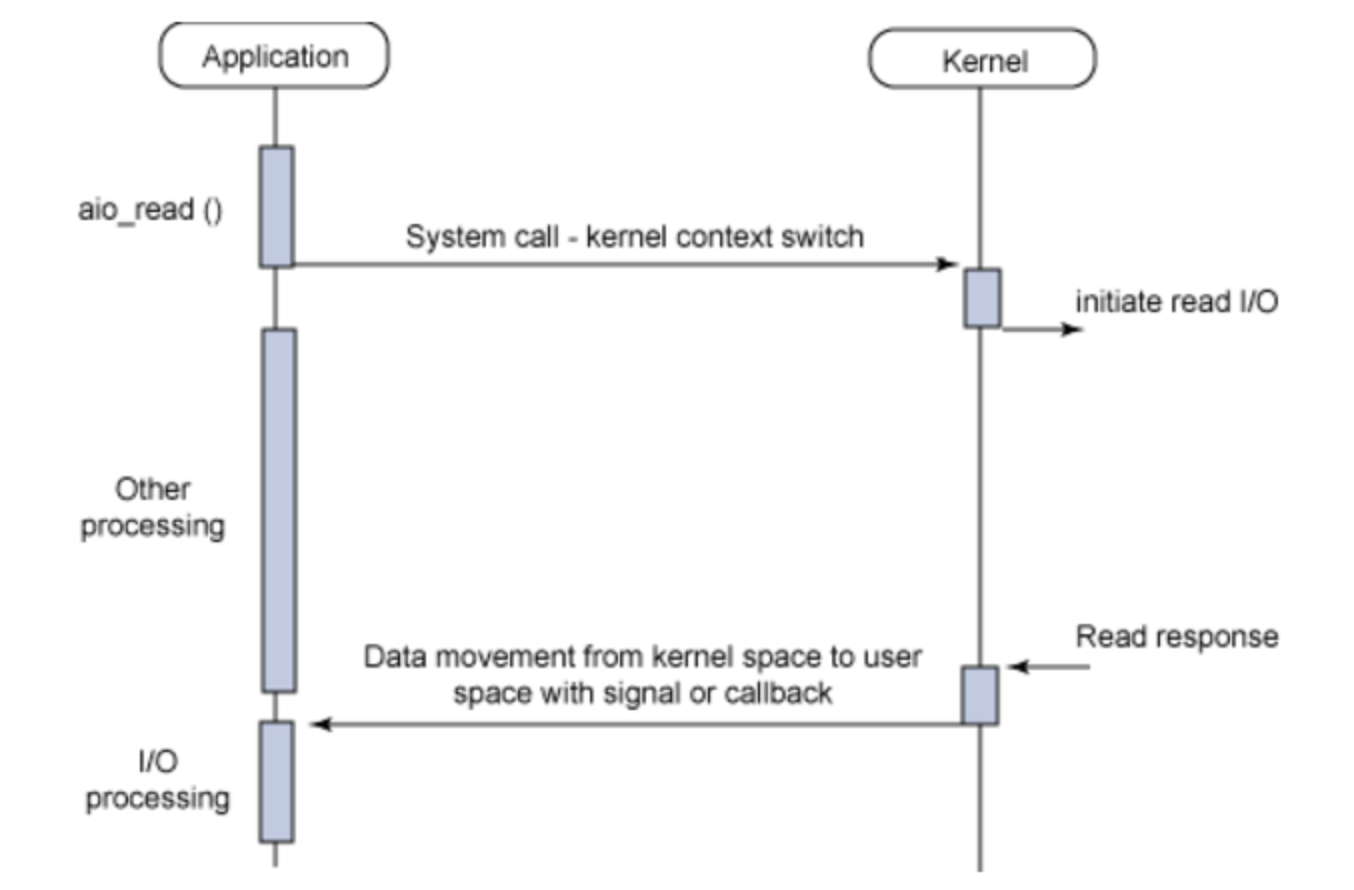
final StopWatch stopWatch = new StopWatch();
    stopWatch.start();
    for (int i = 0; i < LOOP_COUNT; i++) {
        this.webClient
                .get()
                .uri(THREE_SECOND_URL)
                .retrieve()
                .bodyToMono(String.class)
                .subscribe(it -> {
                    count.countDown();
                    System.out.println(it);
                });
    }

    count.await(10, TimeUnit.SECONDS);
    stopWatch.stop();
    System.out.println(stopWatch.getTotalTimeSeconds());
3.xxs
RestTemplate
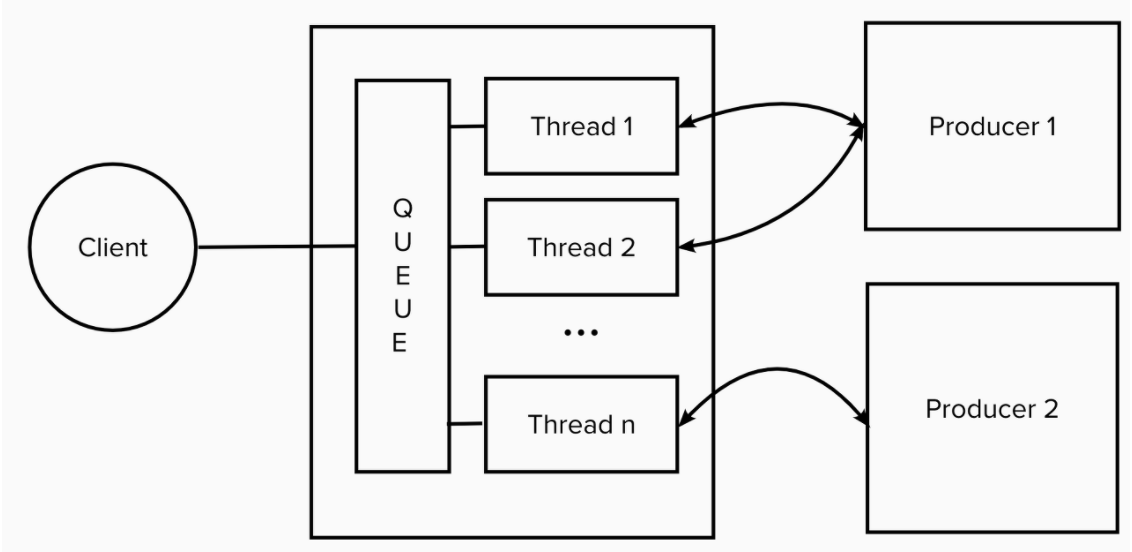
- 멀티스레드를 통해 사용자들의 요청을 동시 처리
- 사용 가능한 스레드가 없으면 queue에서 대기
WebClient
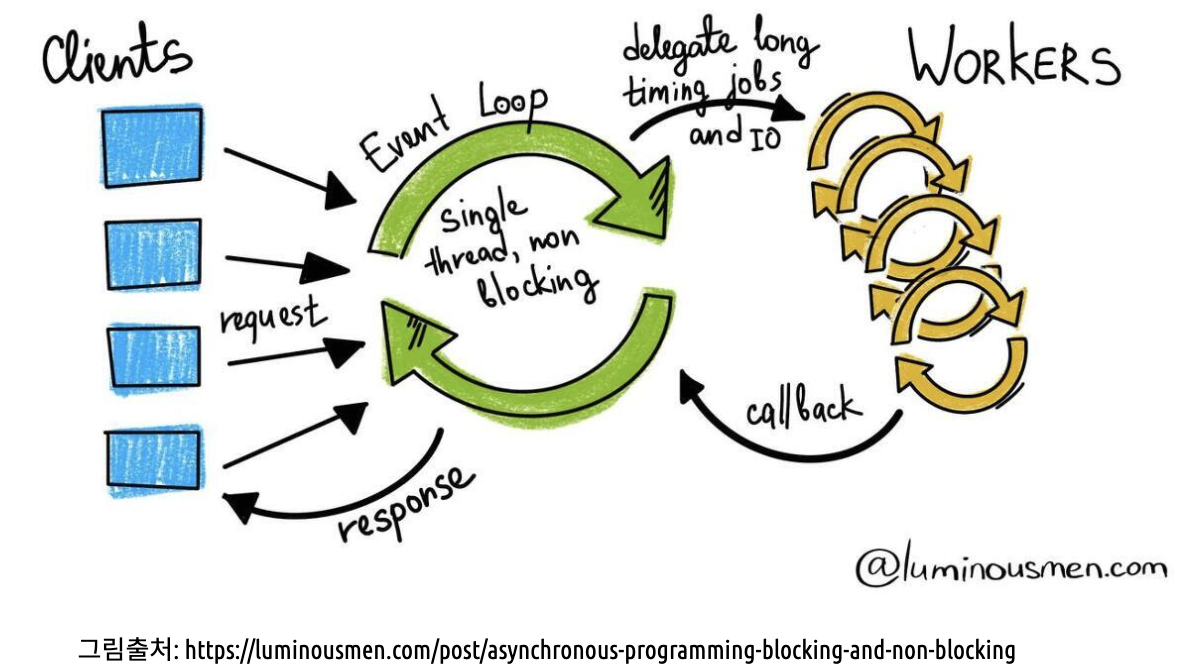
- 요청 -> Event loop에 job으로 등록
- Event loop는 제공자에게 요청 후, 결과를 기다리리 않고 다른 job 처리
- Event Loop는 제공자로부터 callback으로 응답이 오면, 그 결과를 요청자에게 제공
성능 비교
boot1 : restTemplate 사용
boot2 : webClient 사용
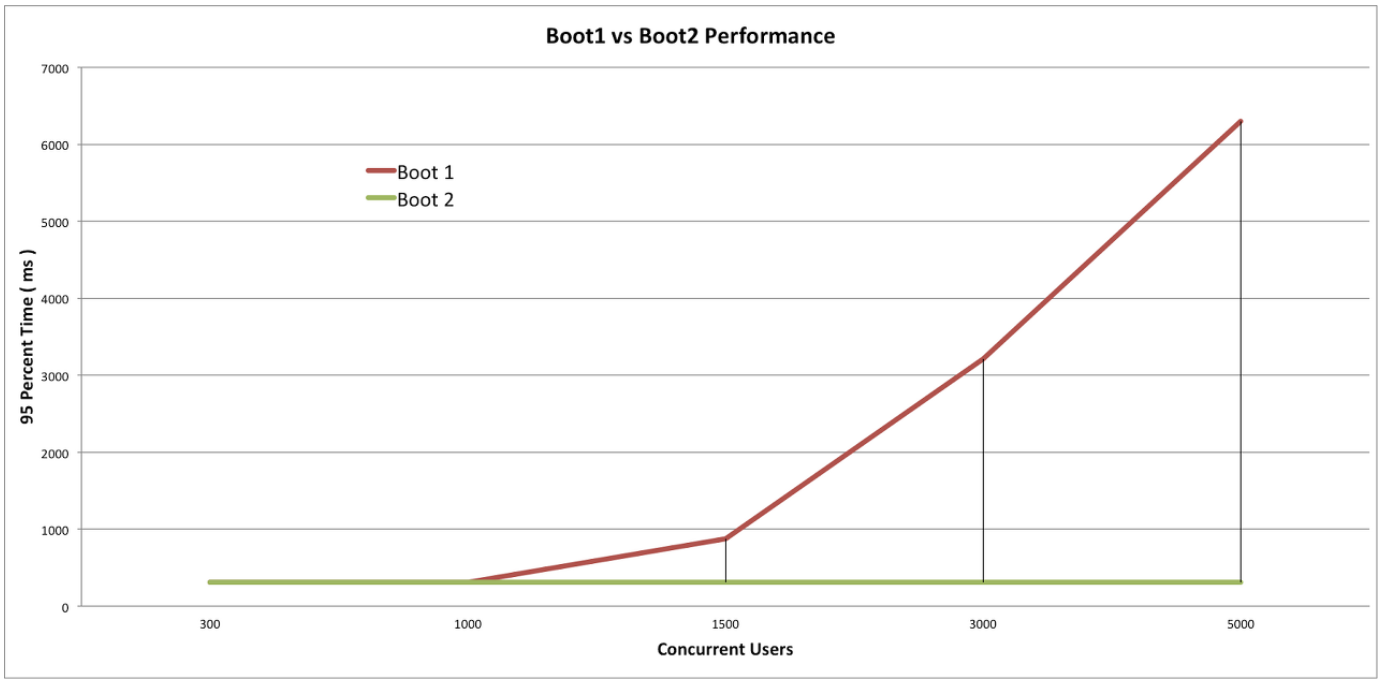
- Thread pool 범위 내에서는 유사한 성능
2. WebClient 사용법
1. webclient 생성
WebClient.create();
WebClient.create(String baseUrl);
default 값이나 filter 또는 ConnectionTimeOut 같은 값을 지정하여 생성하기 위해서는 Builder 클래스를 통해 생성
Webclient client = WebClient
                    .builder()
                    .baseUrl("http://localhost:8080")
                    .defaultCookie("쿠키키","쿠키값")
                    .defaultHeader(HttpHeaders.CONTENT_TYPE, MediaType.APPLICATION_JSON_VALUE)
                    .build();
2. 기본 사용 예시
    WebClient client = WebClient.create("https://example.org");

    Mono<Person> result = client.get()
            .uri("/persons/{id}", id).accept(MediaType.APPLICATION_JSON)
            .retrieve()
            .bodyToMono(Person.class);
    }
3. mono & flux
: reactive stream 인터페이스 중에서 데이터(시퀀스)를 제공하는 구현체
- mono : 0-1개의 데이터를 전달
- flux : 0-n개의 데이터를 전달
Flux<Integer> seq = Flux.just(1, 2, 3);Flux.just(1, 2, 3);
--1-2-3-|→ 이처럼 1, 2, 3 세개의 next신호를 발생하고 마지막에 complete 신호를 발생시켜 시퀀스를 끝낸다.
Flux<Integer> seq = Flux.just(1, 2, 3);
seq.subscribe(v -> System.out.println("첫번 째 요청: " + v));
seq.subscribe(v -> System.out.println("두번 째 요청: " + v));
첫번 째 요청: 1
첫번 째 요청: 24. .block
Person person = client.get()
    .uri("/person/{id}", i).retrieve()
    .bodyToMono(Person.class)
.block();- 동기 방식
- 객체 형태로 반환
