1. 네이버 API 키 발급받기
먼저 오픈 API 이용 신청하기 로 접속하여 사용할 API의 설정을 해준다.
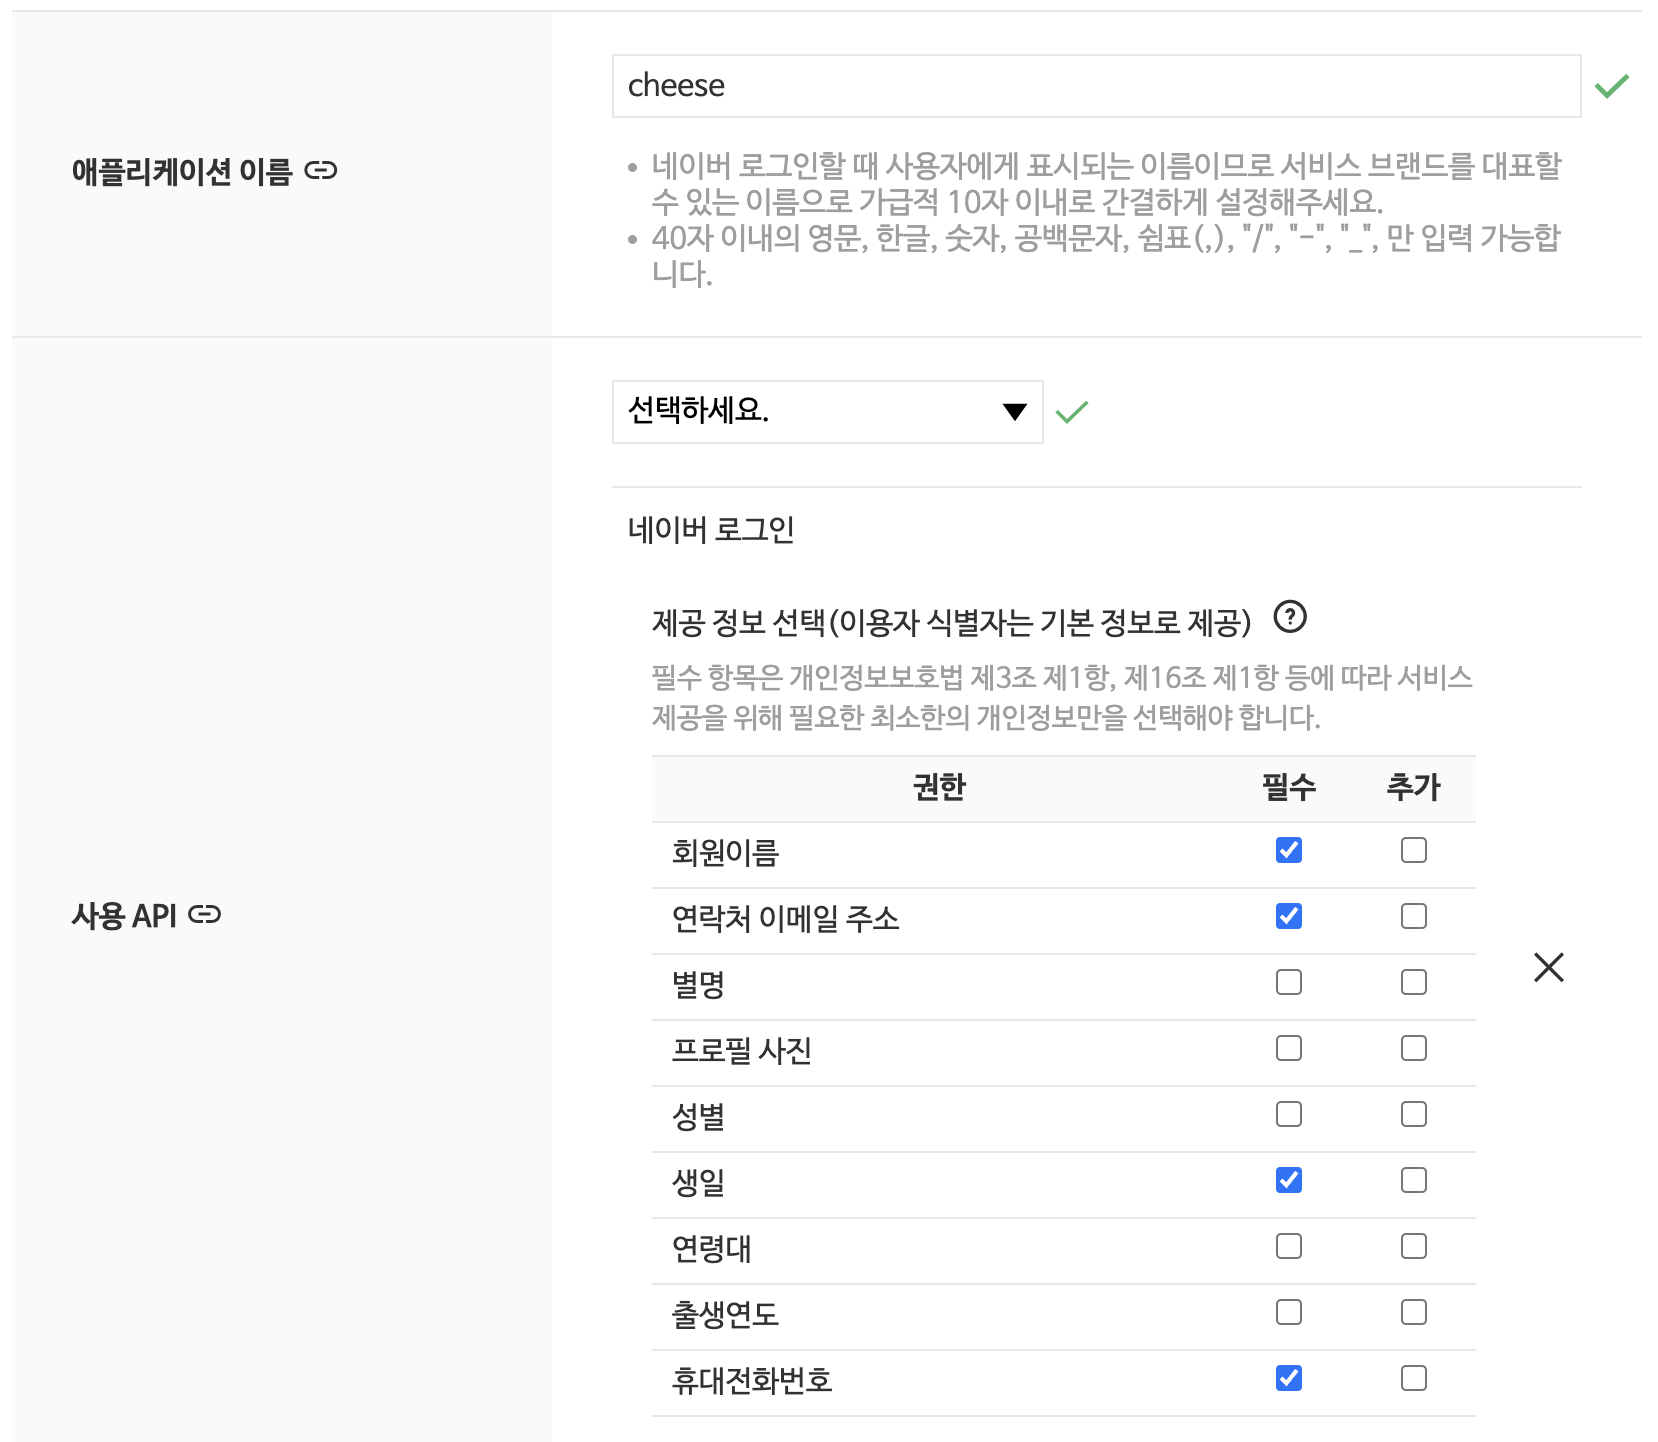 애플리케이션 이름을 원하는대로 설정해주고 회원가입시에 사용할 유저 정보들에 대해 선택해준다. 나는
 회원이름, 이메일 주소, 생일, 휴대전화번호를 선택했다.
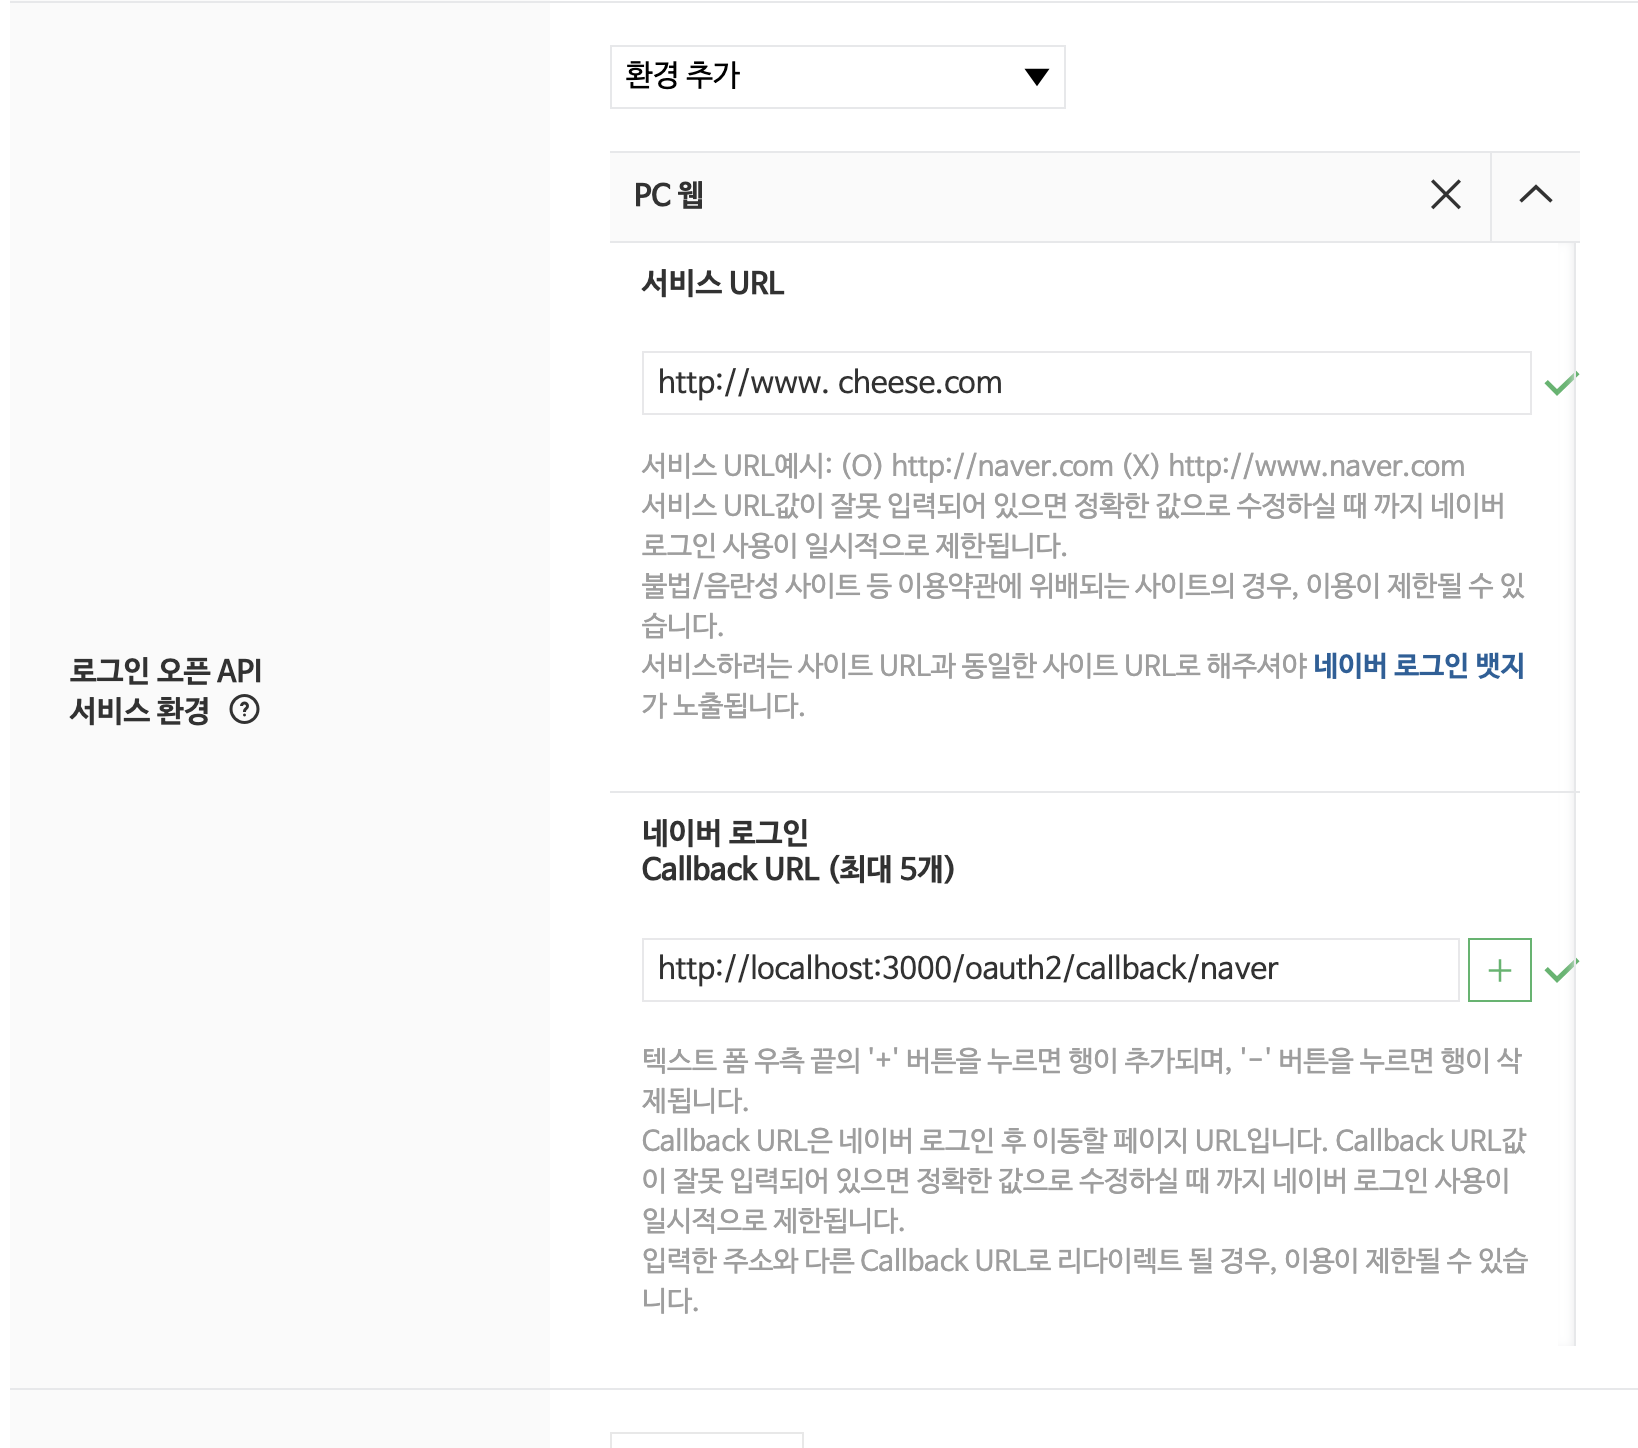 다음으로 서비스 URL을 설정해주고 Callback URL을 설정해주면된다. 간단하게 설명이 적혀있는데 이 url은 코드 부분에서 자세히 설명하겠다.
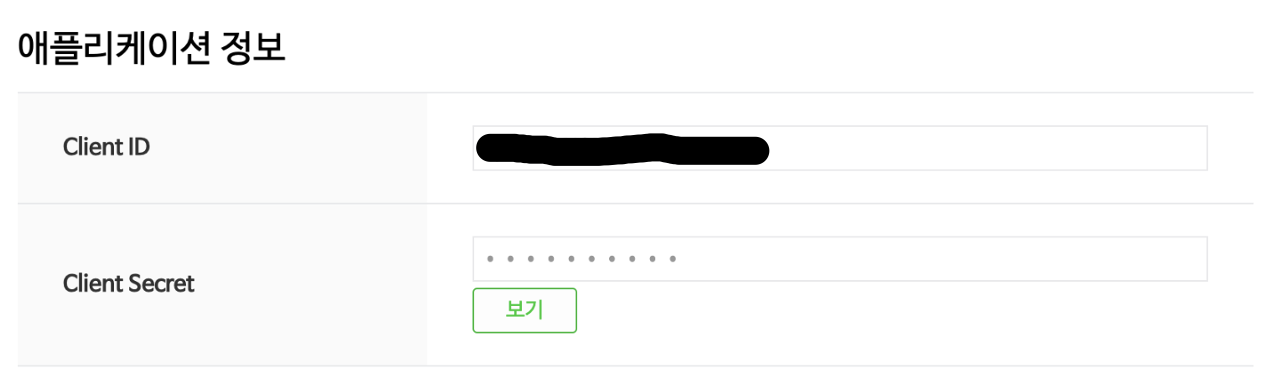 설정을 완료하면 다음과 같이
 client id와 client secret을 발급받을 수 있다.
2. 기본 세팅하기
1) 본격적으로 코드를 작성하기 전에 방금 발급받은 id와 secret을 .env파일에 설정해주자. (변수명은 원하는대로 설정해주면 된다)
//.env파일
PASSPORT_NAVER_CLIENT_ID="본인의 CLIENT ID"
PASSPORT_NAVER_CLIENT_SECRET="본인의 CLIENT SECRET"
추가적으로 아래와 같이 무작위 secret 값을 설정해주자
//.env파일
EXPRESS_SESSION_SECRET="무작위 secret 값"
2) 필요한 라이브러리들 설치하기
npm install express-session
npm install passport
npm install passport-naver-v2
npm install @quixo3/prisma-session-store
나는 Prisma를 쓰기 때문에 Prisma를 통해 Session을 저장하고 사용할 수 있도록 마지막 명령어를 넣어주었다.
(Session에 관해서는 추가 포스팅을 하겠다!)
3) prisma/schema.prisma 파일에 Session 테이블 생성하기
model Session {
  id        String   @id
  sid       String   @unique
  data      String   @db.VarChar(512)
  expiresAt DateTime @map("expires_at")

  @@map("session")
}
3. 코드 작성하기
auth.config.js파일 작성하기
//auth.config.js
import dotenv from "dotenv";
import { Strategy as NaverStrategy } from "passport-naver-v2";
import { prisma } from "./db.config.js";

// 네이버 OAuth 전략 설정 및 사용자 인증 처리
export const naverStrategy = new NaverStrategy(
  {
    clientID: process.env.PASSPORT_NAVER_CLIENT_ID, // 네이버 OAuth 클라이언트 ID
    clientSecret: process.env.PASSPORT_NAVER_CLIENT_SECRET, // 네이버 OAuth 클라이언트 Secret
    callbackURL: "http://localhost:3000/oauth2/callback/naver", // 인증 완료 후 리디렉션할 URL
    scope: ["profile"], // 요청할 사용자 정보 범위
    state: true, // CSRF 공격 방지를 위한 state 값 활성화
  },
  (accessToken, refreshToken, profile, cb) => {
    // 인증 성공 후 콜백 함수 실행
    console.log("Profile:", profile); // 사용자 프로필 정보 출력

    // 사용자 정보를 검증하거나 저장하는 함수 호출
    return naverVerify(profile)
      .then((user) => cb(null, user)) // 성공 시 사용자 정보를 반환
      .catch((err) => cb(err)); // 실패 시 에러 반환
  }
);

// 사용자 정보를 검증하거나, 데이터베이스에 새 사용자 생성
const naverVerify = async (profile) => {
  const email = profile.email; // 사용자 이메일 가져오기
  if (!email) {
    // 이메일 정보가 없을 경우 에러 발생
    throw new Error(`profile.email was not found: ${profile}`);
  }

  // 데이터베이스에서 해당 이메일을 가진 사용자 검색
  const user = await prisma.member.findFirst({ where: { email } });
  if (user !== null) {
    // 기존 사용자가 있을 경우 해당 사용자 정보 반환
    return {
      id: user.id,
      email: user.email,
      name: user.name,
      phone_num: user.phone_num,
      birth_date: user.birth_date
    };
  }

  // 새로운 사용자인 경우, 기본값과 함께 데이터베이스에 사용자 생성
  const created = await prisma.member.create({
    data: {
      email,
      name: profile.name,
      gender: "추후 수정",
      birth_date: new Date(2000, 1, 1),
      address: "추후 수정",
      phone_num: profile.mobile,
    },
  });

  // 생성된 사용자 정보 반환
  return { id: created.id, email: created.email, name: created.name, phone_num: created.phone_num, birth_date: created.birth_date };
};src/index.js파일 작성하기
import { PrismaSessionStore } from "@quixo3/prisma-session-store";
import session from "express-session";
import passport from "passport";
import { naverStrategy } from "./auth.config.js";
import { prisma } from "./db.config.js";
...

dotenv.config();

// Passport에 Naver 인증 전략을 사용 설정
passport.use(naverStrategy);

// 세션에 사용자 정보를 직렬화하는 방법 설정 (로그인 후 사용자 정보 세션에 저장)
passport.serializeUser((user, done) => done(null, user));

// 세션에 저장된 사용자 정보를 역직렬화하는 방법 설정 (세션에서 사용자 정보 복원)
passport.deserializeUser((user, done) => done(null, user));

const app = express();
const port = process.env.PORT;

...

// 세션 관리 미들웨어 설정
app.use(
  session({
    cookie: {
      maxAge: 7 * 24 * 60 * 60 * 1000, // 쿠키의 최대 유효 기간을 7일로 설정 (ms 단위)
    },
    resave: false,
    saveUninitialized: false,
    secret: process.env.EXPRESS_SESSION_SECRET, // 세션 서명에 사용할 비밀 키 (환경 변수에서 로드)
    store: new PrismaSessionStore(prisma, {
      checkPeriod: 2 * 60 * 1000, // 세션 체크 주기를 2분으로 설정 (세션 상태 확인)
      dbRecordIdIsSessionId: true,
      dbRecordIdFunction: undefined,
    }),
  })
);
// Passport 미들웨어 설정 (Passport 초기화 및 세션 관리)
app.use(passport.initialize());
app.use(passport.session());
...
app.get("/oauth2/login/naver", passport.authenticate("naver"));
// 네이버 인증 콜백 라우트: 인증 후 호출되는 콜백
app.get(
  "/oauth2/callback/naver",
  passport.authenticate("naver", {
    failureRedirect: "/oauth2/login/naver", // 인증 실패 시 리다이렉트할 URL
    failureMessage: true,
  }),
  (req, res) => res.redirect("/") // 인증 성공 시 홈 페이지로 리다이렉트
);
3. 테스트하기
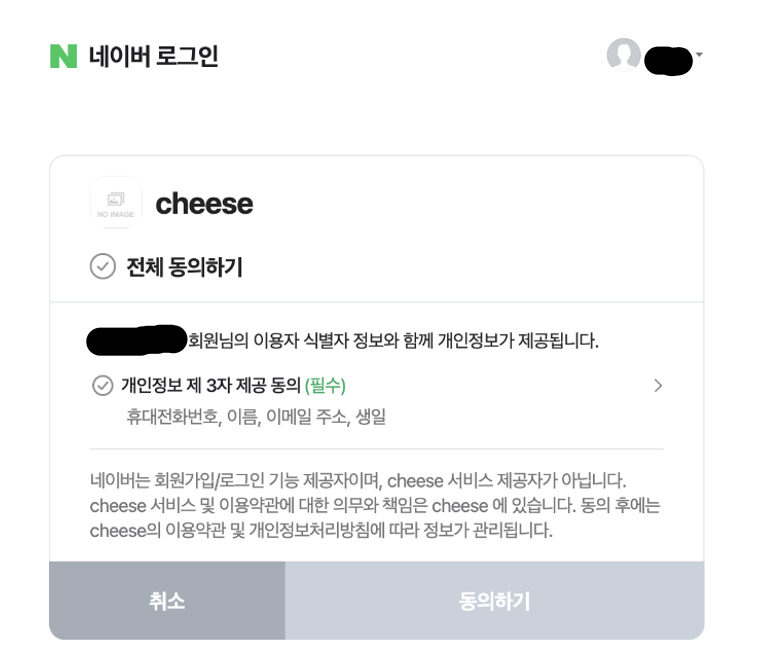
- 아까
index.js파일에서 설정해두었던 url인localhost:3000/oauth2/login/naver로 이동하면 아래 사진과 같이 로그인 창이 뜨게 된다.
- 로그인이 완료되면
auth.config.js파일에서profile출력 코드에 의해 콘솔창에 아래와 같이profile을 가져오게 된다. (개인정보는 임의로 다른 값으로 바꿨다)
Profile: {
  provider: 'naver',
  id: 'abcdefghijklmnopqrstuvwxyz',
  nickname: undefined,
  profileImage: undefined,
  age: undefined,
  gender: undefined,
  email: 'cheese@naver.com',
  mobile: '010-1234-5678',
  mobileE164: '+821012345678',
  name: '치즈',
  birthday: '01-01',
  birthYear: undefined,
  _raw: '{"resultcode":"00","message":"success","response":{"id":"abcdefghijklmnopqrstuvwxyz","email":"cheese@naver.com","mobile":"010-1234-5678","mobile_e164":"+821012345678","name":"\\ucd5c\\uc9c0\\uc6b0","birthday":"01-01"}}',
  _json: {
    resultcode: '00',
    message: 'success',
    response: {
      id: 'abcdefghijklmnopqrstuvwxyz',
      email: 'cheese@naver.com',
      mobile: '010-1234-5678',
      mobile_e164: '+821012345678',
      name: '치즈',
      birthday: '01-01'
    }
  }
}
+추가적으로 index.js에서 아래와 같이 req.user를 콘솔에 출력해보면 naverStrategy가 반환하는 user값을 알아볼 수 있다.
app.get("/", (req, res) => {
  console.log(req.user);
  res.send("Hello World!");
});
결과값
{
  id: 5,
  email: 'cheese@naver.com',
  name: '치즈',
  phone_num: '010-1234-5678',
  birth_date: '2000-01-31T00:00:00.000Z'
}